Page 1 of 1
MY Central Locking Install ...
Posted: Sun Oct 14, 2012 1:36 am
by Bantum
Looking to install central locking ... ?
Here is a short essay on the process I followed for MY Brumby ...

( I'm sure it would also apply to any late model Subaru )
Firstly gather all the nesseccary bits :
- Actuators
- Wiring
- Fuse
- Relays
Allocate yourself some time to do this, as they can be fiddly to fit ...

You'll need to strip door linings, etc. to get at the insides of door & under the dash ...
Process ...
Posted: Sun Oct 14, 2012 1:41 am
by Bantum
Door Actuator:
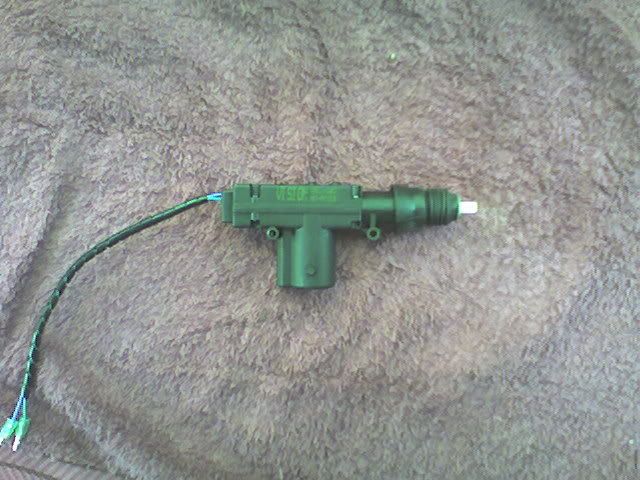 Note :
 As there are many types available, go for a higher end unit as they will last longer & have better quality ...
Locate holes :
 Notes :
 To find correct postion for actuator, place the unit inside door with push rod attached, mark & then drill holes in appropriate location ... This is typical for a front door, if you do a rear door it will require a bracket of sorts ...
Locate push rod : ( which goes to 'lock' side of latch )
 Notes :
 Actuator may require adjustment to make sure you have full throw. Also push rod may require a slight bend to run parallel to existing ...
Fit push rod :
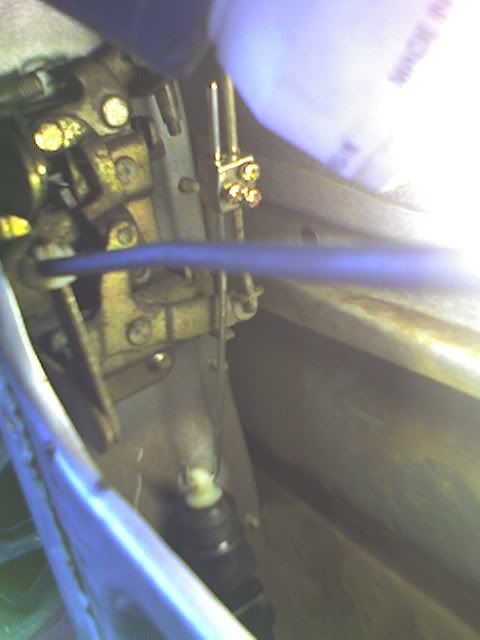 Notes :
 I find joiners with 3 or more screws will hold better.
It also helps to rough up the area under them before hand to stop 'em slipping ...
You could also disconect the existing rod from the door lock altogether if your going for that 'flush' fit ...
Wiring ...
Posted: Sun Oct 14, 2012 1:49 am
by Bantum
Locate door wiring :
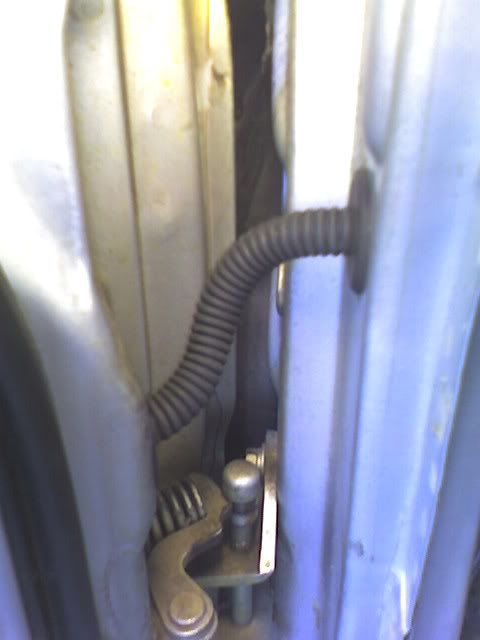 Notes :
 You may need to drill some holes if you don't have them allready. For the cover link I've also used what came in the kit, but if you have access to Genuine Subaru Gromets - use them instead, then feed the wires through to locate plugs - this can be a time consuming / frustrating process ...
Door module :
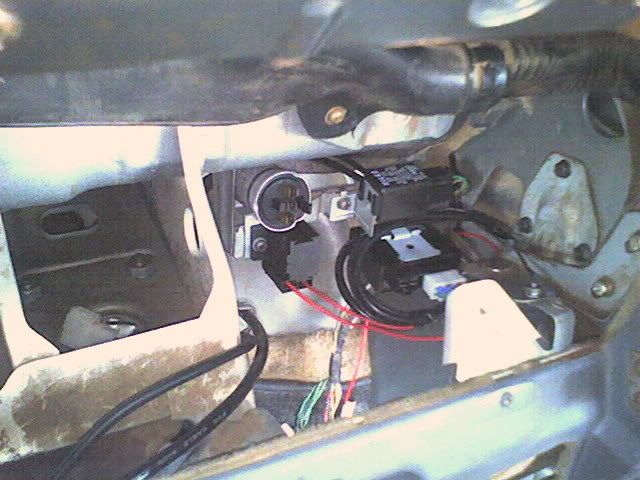 Note :
 Find a suitable location for the modules under the dash, if you are using a immobiliser it can also be linked up to it. ( Fuse is on bottom left below Intermitant wiper + Module on Right )
Depending on how you want to link it up to other compents, you'll also need to run / tap into a power souce.
Complete the install with putting all the wiring in place & testing to make sure it works, before replacing all the bits you removed ...
Done ...
Posted: Sun Oct 14, 2012 4:01 pm
by El_Freddo
Running all the wiring properly is the time consumer on this little project once you've got the actuators worked out. I did Sunnie's differently but it's all the same at the end of the day!
Next on my list is keyless entry

Cheers
Bennie
Alternate Fixing ...
Posted: Mon Oct 15, 2012 11:05 pm
by Bantum
Here is an alternate way to fix : Courtesy of ...
El_Freddo wrote: ... I did Sunnie's differently ...
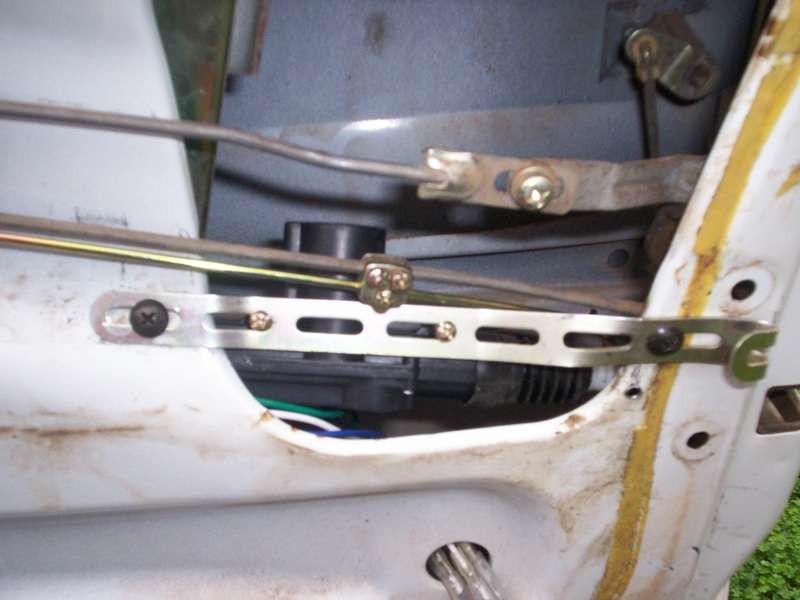 Note:
Note: This would work also for rear doors ... You just have to be mindfull of push / pull nature of the actuator + make sure it dosen't bind or hit anything ( like the window behind ) ...
Posted: Tue Oct 16, 2012 8:20 pm
by El_Freddo
Bantum wrote:Note: This would work also for rear doors ... You just have to be mindfull of push / pull nature of the actuator + make sure it dosen't bind or hit anything ( like the window behind ) ...
Yeah this is the tricky bit sometimes! The window bit was some fun too. This way was done due to lack of tools and a shed and the bent around bit at the end was taken off with an angle grinder later on.
Cheers
Bennie
Power ...
Posted: Sun Jun 12, 2016 8:11 pm
by Bantum
Was just going back over this & found there's a couple of things I've missed :

Some form of power 'upgrade' will be needed for all those door locks / relays etc. ... so I've added the board ( adjacent to the fuse links ) with resettable fuses - with room for a couple more circuits ...

Cheers, Bantum ...
Posted: Mon Jun 13, 2016 9:07 am
by Cliff R
Bantum
Just wondering where you got the power board with the re settable fuse etc.
Posted: Mon Jun 13, 2016 10:15 am
by coxy
Yes I noticed it looks aftermarket not something salvaged from a wrecking yard car from the exposed connectors, none the less a neat setup I second CliffR's question Bantum.
I have resettable circuit breaker type fuses but I have used a Jaycar unit that also has led telltales that light up to designate which fuse has blown they do a couple of sizes and are readily available.
Posted: Mon Jun 13, 2016 10:55 am
by Silverbullet
Reset ...
Posted: Mon Jun 13, 2016 4:08 pm
by Bantum
Cliff R wrote:Bantum
Just wondering where you got the power board with the re settable fuse etc.
Yeah think I got them from Repco ( It was done ages ago, so memory is fading ) Navara is the brand of reset fuses.
Add : It looks something like this :

Should be able to pick up more modern stuff now ( much easier on line too ) ...

Was going to find one with a clear cover, ( or make one ) Didn't get that far yet though ...
Will have to redo the unfinished Links / Wiring when I get round to it ... :/
Cheers, Bantum ...