fender cutting
-
twilightprotege
- Junior Member
- Posts: 480
- Joined: Sun Mar 16, 2008 7:56 pm
- Location: Brisbane

fender cutting
has anyone done up a good fender cutting how to? i need to do mine when i go to 235/75/15 tyres, but dont want it to look rubbish. so anyone with a link or pics?
06 Foz, 2" lift, 225/70/16 tyres

did mine with tin snips, but didnt actually remove anything. Best trick is to cut heaps of little slits and then fold it back, then cover it with rubber flares. This worked the best for me and came out very neat, couldnt even tell they were trimmed
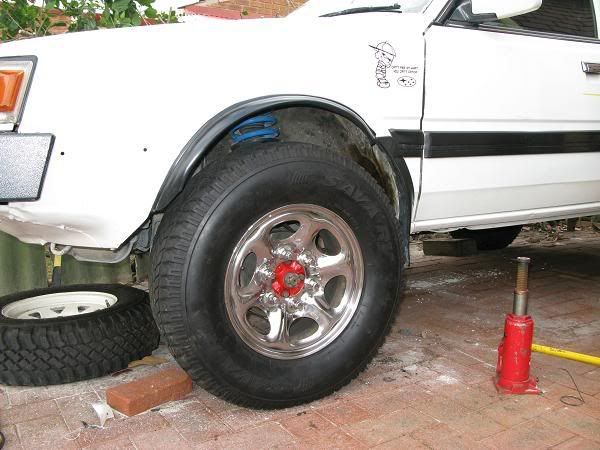
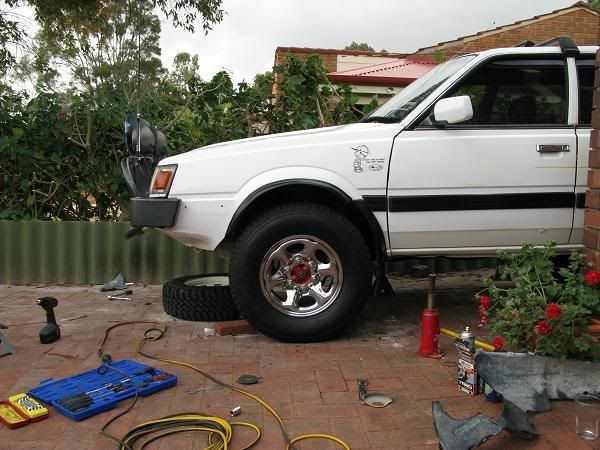
this was the rough side of my car, cant find any of the drivers side. Had to do some pretty serious trimming and bashing of the wheel arch to fit the 29s under her.
alex
this was the rough side of my car, cant find any of the drivers side. Had to do some pretty serious trimming and bashing of the wheel arch to fit the 29s under her.
alex
my07 Outback
my13 Hyundai i45(shhhh)
my02 Gen3 Liberty limited ed.
previously
L-series wagon, LSD, EJ20turbo, 29in tyres, 'wanky wagon'
2000 gen3 outback, lifted, otherwise stock.
my13 Hyundai i45(shhhh)
my02 Gen3 Liberty limited ed.
previously
L-series wagon, LSD, EJ20turbo, 29in tyres, 'wanky wagon'
2000 gen3 outback, lifted, otherwise stock.
-
twilightprotege
- Junior Member
- Posts: 480
- Joined: Sun Mar 16, 2008 7:56 pm
- Location: Brisbane

-
twilightprotege
- Junior Member
- Posts: 480
- Joined: Sun Mar 16, 2008 7:56 pm
- Location: Brisbane
-
Pommiebrat
- Junior Member
- Posts: 44
- Joined: Wed Jun 25, 2008 7:17 pm
- Location: Exeter, UK
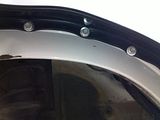
Just done mine. I used clear plastic sheet and black marker pen to make a template so both sides came out the same when I cut. Then I made one cut from the bottom to about third of the way up the wheel arch but still keeping the cut metal joined at the top and then folded it behind the remaining arch. Drilled a couple of holes and then pop riveted and glued the flap in place. Bit of filler and primer and its come out seamless.
Cheers,
John
Cheers,
John
- Attachments
-
- IMG_0024.jpg (104.9 KiB) Viewed 4333 times
-
- DSC00760.jpg (104.96 KiB) Viewed 4334 times
-
- DSC00756.jpg (106.21 KiB) Viewed 4336 times
-
- DSC00754.jpg (105.9 KiB) Viewed 4339 times
-
crundle
- Junior Member
- Posts: 44
- Joined: Tue Jul 24, 2007 9:09 am
- Location: Woodcroft, South Australia
- Contact:
Great iidea there Keffa, I am headed down to Salt Creek this weekend and am still waiting for my lift kit to be delivered, so I guess it is time to get out the cutters!
I am planning on taking out about an inch at the front and back, and maybe a tad on the top of the arch. How did you attach that style of flares to the arch?
I am thinking of going the under fitting flares in the following picture:

I am planning on taking out about an inch at the front and back, and maybe a tad on the top of the arch. How did you attach that style of flares to the arch?
I am thinking of going the under fitting flares in the following picture:
'91 carby L Series Wagon (White) - Stock standard - for now... 
-
crundle
- Junior Member
- Posts: 44
- Joined: Tue Jul 24, 2007 9:09 am
- Location: Woodcroft, South Australia
- Contact:
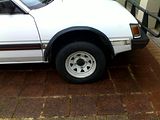
Ended up cutting a bit more than an inch out from my guards to make sure they wont scrub on me while I am waiting on my lift kit to get delivered here.
First things first, I am not very mechanically minded at the best of times, and normally hate working on cars as the thing I am working on breaks and the bit next to it breaks in sympathy.
So to help me get over my fear of breaking things, a quick pint of hand brewed beer from the Morphett Vale Creek Brewery (shameless plug!)

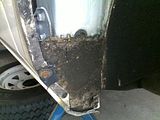
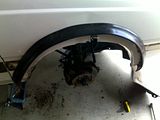
I took off the wheel first, and then took off the plastic inner shroud inside the wheel well, and this is what I found behind it, obviously years of gunk built up...
I put the flaring over the top of the existing arch and started to attach it with tekscrews
How it looked when done
I then cut out lots of metal inside the guard leaving about half an inch to be able to fold back, then I put little slits in as suggested on this thread, and folded it back slightly with pliers and then completed the job with a hammer
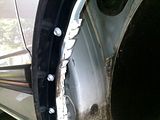
How it looked after - not pretty, but functional
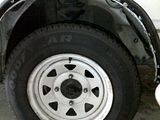
Before...
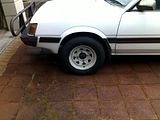
After...
Do people normally leave the inner shroud in place when they have cut the guards? I am thinking I might get it back in there somehow, but I am not in a huge rush yet as long as any sand wont get in somewhere where it shouldn't if the shroud was in place.
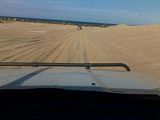
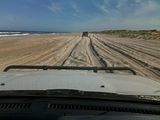
Only took about an hour for the one side, the other to follow tonight, then I think I will be ready for a fishing trip to Salt Creek! The back probably needs some cut out also, but I think I will wait for that till my lift kit gets here (hopefully soonish...), and just not load up the car too much, as it is only going to be me in my subi, with a GQ there to help me if/when I get stuck.
Will post up some photos of the trip if they aren't too embarrassing.
cheers,
Crundle
First things first, I am not very mechanically minded at the best of times, and normally hate working on cars as the thing I am working on breaks and the bit next to it breaks in sympathy.
So to help me get over my fear of breaking things, a quick pint of hand brewed beer from the Morphett Vale Creek Brewery (shameless plug!)

I took off the wheel first, and then took off the plastic inner shroud inside the wheel well, and this is what I found behind it, obviously years of gunk built up...

I put the flaring over the top of the existing arch and started to attach it with tekscrews

How it looked when done

I then cut out lots of metal inside the guard leaving about half an inch to be able to fold back, then I put little slits in as suggested on this thread, and folded it back slightly with pliers and then completed the job with a hammer

How it looked after - not pretty, but functional

Before...

After...

Do people normally leave the inner shroud in place when they have cut the guards? I am thinking I might get it back in there somehow, but I am not in a huge rush yet as long as any sand wont get in somewhere where it shouldn't if the shroud was in place.
Only took about an hour for the one side, the other to follow tonight, then I think I will be ready for a fishing trip to Salt Creek! The back probably needs some cut out also, but I think I will wait for that till my lift kit gets here (hopefully soonish...), and just not load up the car too much, as it is only going to be me in my subi, with a GQ there to help me if/when I get stuck.
Will post up some photos of the trip if they aren't too embarrassing.
cheers,
Crundle
'91 carby L Series Wagon (White) - Stock standard - for now...
-
twilightprotege
- Junior Member
- Posts: 480
- Joined: Sun Mar 16, 2008 7:56 pm
- Location: Brisbane


-
crundle
- Junior Member
- Posts: 44
- Joined: Tue Jul 24, 2007 9:09 am
- Location: Woodcroft, South Australia
- Contact:
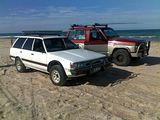
My guard cutting/removal was to allow for a 14 inch rim, 27 (OD) inch tyre to fit under and bounce around on the sand with no problems and no lift kit.
It looks ugly, but works a treat, and I was able to go about 40 kms north of Tea Tree Crossing without scrubbing whatsoever.
The way I figure is that when I get my lift kit delivered, I can always get some new guards to throw back on, but for now it works.
As an aside, I think I thrashed my right front CV on the trip, it was clanking pretty badly around right hand turns once I made it back to Tailem Bend!


'91 carby L Series Wagon (White) - Stock standard - for now...