Dashpad recolour

Get the most out of your ride & how to make enhancements ...
Post Reply
User avatar
Proton mouse
Junior Member
Posts: 378
Joined: Mon Nov 06, 2006 11:35 pm
Location: Diagonally parked in a parallel universe

Dashpad recolour

Post by Proton mouse » Fri Dec 05, 2014 2:16 pm

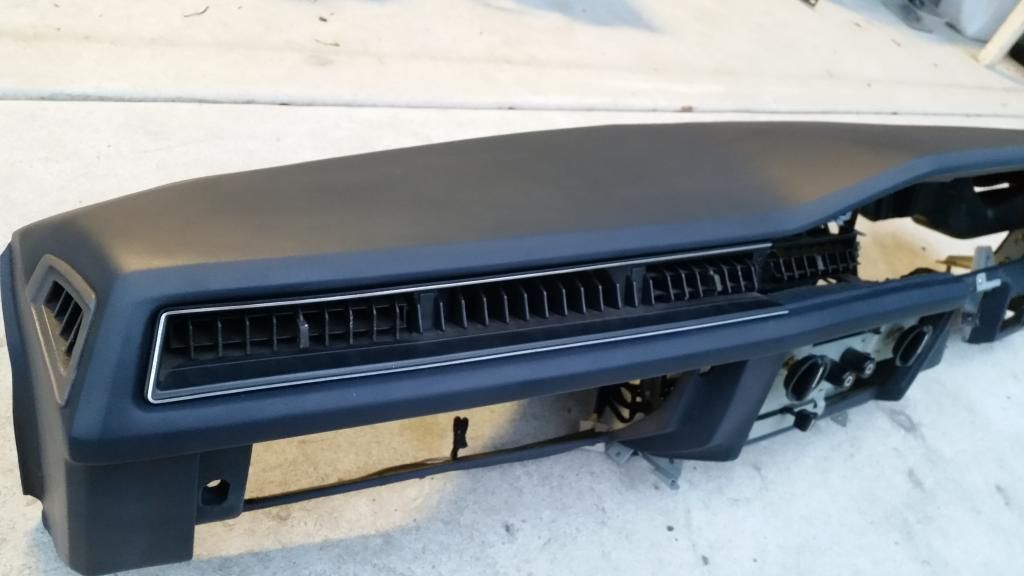
Not long ago I painted up my dash pad for the 6 gauge cluster conversion into my Brumby project.
Started with stripping it of all screws, brackets etc. Then gave it several washes with a mild washing up detergent, its amazing
the years of built up gunk that washes out.
Then time to hit it with a wax and grease remover, again several applications are necessary till it becomes clean, which is a
must if you want the vinyl paint to stick.
Then simply several coats of VHT charcoal grey vinyl dye which ended up in a very nice colour finish I think.
I had tried Dupli colour to begin with but came out a lot lighter)
Now the only problem is to match the rest of the faded interior bits to the new pristine dash colour!!
From....
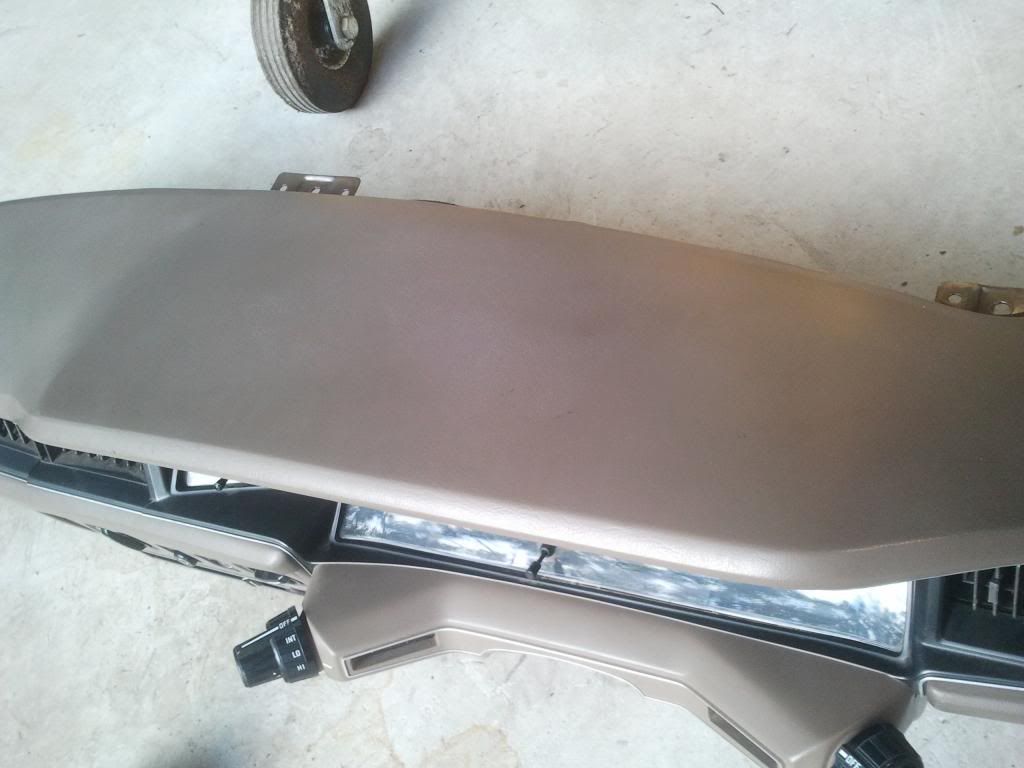
Image

To....
Image

User avatar
TOONGA
Elder Member
Posts: 5335
Joined: Sat May 30, 2009 10:15 am
Location: Australind closer to where they divided by zero
Contact:

Post by TOONGA » Fri Dec 05, 2014 9:28 pm

So many views not one ...


WOW

That looks awsome !!!

Now you have one :)

good job there

TOONGA
Image
PJ Gone but not forgotten
JETCAR AKA the sandwedge Rusted in pieces

User avatar
Silverbullet
Senior Member
Posts: 2870
Joined: Mon Aug 23, 2010 6:20 pm
Location: Adelaide

Post by Silverbullet » Fri Dec 05, 2014 10:29 pm

Wow indeed!

Always wondered how that vinyl dye stuff turns out, looks like a factory finish! I guess cleanliness is the key to making it stick.

Top work!
Will it ever end!?
-EA81 TWIN CARB!!!!
-L series 5 speed
-Custom paint job
-2" lift
-Full custom re-wire
-L series front end
Image

User avatar
steptoe
Master Member
Posts: 11582
Joined: Thu Oct 06, 2005 10:00 am
Location: 14 miles outside Gotham City

Post by steptoe » Sat Dec 06, 2014 7:46 am

CORR.... looks so yummy ...and you have shared the VHT Charcoal Grey info and side comment on dupli colour product .

I used a black vinyl spray on a centre console cushion - no idea of brand now, and was shiny black over bone . It has been incredibly durable over the last 23 years or so, and would take a keen eye to spot the bone coming through....your dash job should be long lasting.

Beats the rubber in a spray tin any day ! Best colour match too !

User avatar
subabooba
Junior Member
Posts: 105
Joined: Wed Oct 05, 2005 10:00 am
Location: Sydney

Post by subabooba » Sun Dec 07, 2014 10:31 am

That looks fantastic, nice work!

Makes me think I should have bought the GLF I saw a while ago but was put off by the brown interior! :D

User avatar
AndrewT
Senior Member
Posts: 4777
Joined: Tue Oct 04, 2005 10:00 am
Location: WA
Contact:

Post by AndrewT » Mon Dec 08, 2014 1:38 pm

Looks like it's worked out well, looks awesome! I hope it will stand the test of time in the sun, maybe put a dash mat on, although then nobody will see it.
I was thinking of giving this new-fangled Plasti-Dip stuff a go on my dashboard. Already done a few plastic interior bits and it seems to be quite good, although I haven't been driving the car yet - people have told me that it tends to smell plasticky in the hot sun so I'll find out I guess.

User avatar
Bantum
General Member
Posts: 1923
Joined: Sun Jul 29, 2012 4:30 pm
Location: Northern Territory + QLD
Contact:

:like: ...

Post by Bantum » Mon Dec 08, 2014 11:34 pm

Great work there ... :)

Got any installed photos ?

Cheers, Bantum ...

User avatar
Proton mouse
Junior Member
Posts: 378
Joined: Mon Nov 06, 2006 11:35 pm
Location: Diagonally parked in a parallel universe

Post by Proton mouse » Fri Dec 12, 2014 11:52 am

Thanks Toonga, always good to get positive feed back :-)

SB... yep got to get rid of any and all built up greases and waxes from Armoural etc if you want it to stick!

Steptoe...Thanks and WOW 23 years? Good to know it can last that long!!

Subabooba...hmmm yeah, whole interior colour change would be a bit daunting but I still would have bought it just because its a GLF!!

AndrewT...Thanks! I hope it will look as good as it does for years too. A dash matt will be a must. I just found an ebay site that does one for the different length of the sports dash pad. I'm keen to know how you go with the plasti dip!

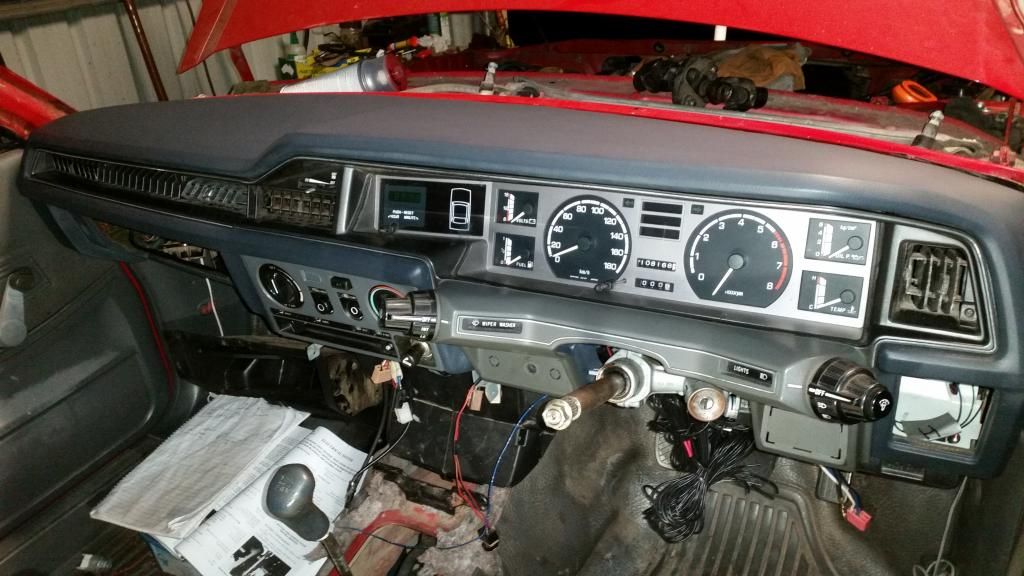
Bantum...cheers too! And here you are, pic of it installed. Have to paint the front dash cowl and fan speed dial fascia now to match!!

Image

User avatar
Bantum
General Member
Posts: 1923
Joined: Sun Jul 29, 2012 4:30 pm
Location: Northern Territory + QLD
Contact:

... :wow:

Post by Bantum » Fri Dec 12, 2014 6:15 pm

That looks great ... :cool:

Yep definitely do the rest to match ... :D

So want one for my brumby now ... :rolleyes:

Ciao, Bantum ...

User avatar
steptoe
Master Member
Posts: 11582
Joined: Thu Oct 06, 2005 10:00 am
Location: 14 miles outside Gotham City

Post by steptoe » Sat Dec 13, 2014 7:03 am

windscreen was out anyway yeah ? You didn't remove just for this job because the manual says to remove screen on step 1 ??

First dash I did, with the demister vents - made 25mm hole cuts directly over the three M6 10mm bolts that hold dash to firewall area, and plugged them up with flat rubber bung plugs - looks factory, easier for the next time to remove and refit those securing bolts.

And when Pillarless Jim sees this pic - see Jim, told you EA81's have a 5500rpm redline ;)

User avatar
El_Freddo
Master Member
Posts: 12506
Joined: Tue Oct 04, 2005 10:00 am
Location: Bridgewater Vic
Contact:

Post by El_Freddo » Sat Dec 13, 2014 11:27 pm

It looks awesome mate!

Matching all the other parts will be fun! I'm hoping it's going to go the distance in the Australian sun!

If not, the other option is a professional re-skin job. Costly for a back yarder but worth the effort in the end. Dad did this with his old RX7, got rid of the poo brown interior for a nice dark grey over blue grey, was schweet!

Cheers

Bennie
"The lounge room is not a workshop..."
Image
El Freddo's Pics - El_Freddo's youtube

User avatar
Proton mouse
Junior Member
Posts: 378
Joined: Mon Nov 06, 2006 11:35 pm
Location: Diagonally parked in a parallel universe

Post by Proton mouse » Sat Dec 20, 2014 4:22 pm

windscreen was out anyway yeah ? You didn't remove just for this job because the manual says to remove screen on step 1 ??
Steptoe, yes windscreen was out. Had a bit of brown fungus oxide on the pax side so had that fixed.
Its a complete Brumby resto/rebuild/conversion (yes I should do a build thread:rolleyes:!!)
I've even gone to the effort of rebuilding the heater box with all new foam padding on the entry/exit and air diversion flaps! Plus lubed up all the cams and gears so it runs as smooth as now!!
It looks awesome mate!

Matching all the other parts will be fun! I'm hoping it's going to go the distance in the Australian sun!

If not, the other option is a professional re-skin job. Costly for a back yarder but worth the effort in the end. Dad did this with his old RX7, got rid of the poo brown interior for a nice dark grey over blue grey, was schweet!
Thanks Bennie, I hope it lasts too!
I had a Fiat 124BC sports back in the late 80's (what a little beastie it was too!! 1600 twin cam, twin webbers, 5 speed, 4 wheel discs, not bad for a '71 model car, Italian electrics was the only downfall, lol) I had the dash professionally recovered/rebuilt in that and it looked like new but cost a mint back then!!

Image

User avatar
RSR 555
Elder Member
Posts: 6951
Joined: Sat Nov 10, 2007 10:42 am
Location: ATM... stuck in Rockingham

Post by RSR 555 » Sat May 02, 2015 12:22 am

Nice work on the recolouring of the dash pad. Looks schmick :)

I've done a few rally cars with flock and stops a lot of reflection but gives the interior a completely different look.
You know you are getting old when the candles on your birthday cake start to cost more than the cake itself.

RSR Performance
Home of the 'MURTAYA' in Oz
Subaru Impreza WRX based Sportscar
[SIGPIC][/SIGPIC]

Disclaimer: Not my website but hyperlink here to Subaru workshop manuals

User avatar
El_Freddo
Master Member
Posts: 12506
Joined: Tue Oct 04, 2005 10:00 am
Location: Bridgewater Vic
Contact:

Post by El_Freddo » Sat May 02, 2015 8:46 pm

Seeing this again makes me want to get mine sorted.

I should really look into the cost of a reskin job and start saving for it. These are such good instrument clusters compared to the small stock units!

Cheers

Bennie
"The lounge room is not a workshop..."
Image
El Freddo's Pics - El_Freddo's youtube

Post Reply

Return to “Conversions, Modifications and Performance Upgrades”