Wheel carrier build up

Get the most out of your ride & how to make enhancements ...
Post Reply
User avatar
stamp_licker
General Member
Posts: 1066
Joined: Wed Oct 05, 2005 10:00 am
Location: Kallangur.Bris North

Wheel carrier build up

Post by stamp_licker » Tue Apr 24, 2007 8:51 pm

Just testing the waters,i'm building a new wheel carrier.I'll be taking pics etc .At this stage i am modifying me existing replacement bumper. If there is enough intrest i'll pull it and take pics of that and how to, plus improvements to that design.I'll also try to include were possible measurements & part numbers. here's a sample
Bearing carrier :105mm of 42nb tube,79mm of 42mm od tube,2 sets of timken 30302CM bearings, 14mm x 160mm ht bolt,rolled shim to take 14mm bolt out to 15mm:
ImageImage
Brackets and latch,if the rear bar is built from scratch these brackets aren't required.The catch is a horse float style,spring loaded heavy duty,costing between $20 to $30 :
Image
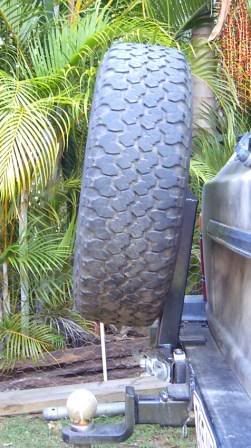
Arm bored to accept carrier
Image
IF THERE IS ENOUGH INTEREST i'll put more detailed descriptions and steps for the processes.
[SIGPIC][/SIGPIC]aka the_postie
Building a hardcore postie:D

User avatar
Fang
Junior Member
Posts: 753
Joined: Tue Oct 04, 2005 10:00 am
Location: Lawnton

Post by Fang » Wed Apr 25, 2007 4:28 pm

Will - if you decided to make more of these - I'd gladly take one off ur hands at a price ;)
Image

User avatar
maddog
Junior Member
Posts: 97
Joined: Fri Jun 30, 2006 10:00 am
Location: Jindabyne, NSW

Post by maddog » Wed Apr 25, 2007 9:59 pm

Yes Please put up as much detail as you can! I'd be really interested in the rear bumper too... I have a mate who can weld but would also be happy to buy one from you if you make more... any idea of final cost to make / sell? Thanks.
88 GL Touring Wagon - getting better all the time... or was until Skippy got in the way one night... writeoff now :(
98 Forester - wotaluvlycar! (belongs to missus) ;o)
91 Liberty Wagon in immaculate condition - can't believe how much nice it is, mine! ;)

User avatar
lukes6
Junior Member
Posts: 18
Joined: Sat May 06, 2006 10:00 am
Location: Victor Harbor SA

Post by lukes6 » Thu Apr 26, 2007 12:57 am

Im looking at making one myself so any detail would be great, or if your looking at selling them id also be interested (i just run out of time for all these projects).

User avatar
Fatz
General Member
Posts: 1003
Joined: Tue Oct 04, 2005 10:00 am
Location: Tasmania

Post by Fatz » Thu Apr 26, 2007 9:05 am

can me in as interested
Image

User avatar
stamp_licker
General Member
Posts: 1066
Joined: Wed Oct 05, 2005 10:00 am
Location: Kallangur.Bris North

Post by stamp_licker » Thu Apr 26, 2007 4:15 pm

ImageImage
This is the rear bar i've had on for a few years.
It's made of 100x50 rhs ,mounts via the rear bumper mounts & the tow points and is also braced inside the toolbox with angle and anti crush tubes.It also uses the standard bumper ends.
Image
Here you can see the rear mounts,50x25 rhs & 50x10 plate down to the tow points,flat plate could be used instead of rhs.The rhs has nuts welded on the inside spaced 60mm apart as per the standard bumper mounts.the 50x25 rhs has 10mm taken out of the top of it, where the 100x50 sits ,to lower the 100x50 to standard bumper height.

This just shows the bar i have to give you a idea.It was my first one,it has bits added . I have a much simplier way of making it now with the mounts for the tyre carrier ,some extra tow points.Looks like i'll be making another bumper so i will photo and document measurements etc.If you are handy with a welder and some form of metal cutting it isn't that hard.
[SIGPIC][/SIGPIC]aka the_postie
Building a hardcore postie:D

User avatar
stamp_licker
General Member
Posts: 1066
Joined: Wed Oct 05, 2005 10:00 am
Location: Kallangur.Bris North

Post by stamp_licker » Mon Apr 30, 2007 4:59 pm

Couple of shots of the bearing carrier welded to the arm
ImageImageImage
[SIGPIC][/SIGPIC]aka the_postie
Building a hardcore postie:D

User avatar
El_Freddo
Master Member
Posts: 12515
Joined: Tue Oct 04, 2005 10:00 am
Location: Bridgewater Vic
Contact:

Post by El_Freddo » Mon Apr 30, 2007 7:00 pm

Postie,
Count me in for interest in the carrier build and the rear bar (about to make one myself)!

Looking forward to it.

Cheers
"The lounge room is not a workshop..."
Image
El Freddo's Pics - El_Freddo's youtube

User avatar
stamp_licker
General Member
Posts: 1066
Joined: Wed Oct 05, 2005 10:00 am
Location: Kallangur.Bris North

Post by stamp_licker » Sat May 05, 2007 12:54 pm

Not much happening this week other projects taking up time.
Couple of pics of the arm mounted
ImageImage
[SIGPIC][/SIGPIC]aka the_postie
Building a hardcore postie:D

User avatar
stamp_licker
General Member
Posts: 1066
Joined: Wed Oct 05, 2005 10:00 am
Location: Kallangur.Bris North

Post by stamp_licker » Mon May 07, 2007 4:02 pm

Bit more work done on the arm.
Arm cut to angle the catch away from it.
Image
This was done as the catch i,ve got is spring loaded and want to keep the knuckles away from the tube but keep it in close the pics will probably describe it better.
Image
bent into place

Image
Welded

Image
Ground back
Image
Catch welded on,their is a gap in the weld on the catch so the latching part can be cut off once tacked onto the bar .
[SIGPIC][/SIGPIC]aka the_postie
Building a hardcore postie:D

User avatar
stamp_licker
General Member
Posts: 1066
Joined: Wed Oct 05, 2005 10:00 am
Location: Kallangur.Bris North

Post by stamp_licker » Sat May 12, 2007 12:54 pm

ImageImage
the plate for holding the rim.It was made by using 2 pices of 90x6mm plate 180mm long which i cut out to fit a piece of 50x50.The 2 plates were then welded together to make 180x180 plate.
Image
In place
Image
[SIGPIC][/SIGPIC]aka the_postie
Building a hardcore postie:D

User avatar
El_Freddo
Master Member
Posts: 12515
Joined: Tue Oct 04, 2005 10:00 am
Location: Bridgewater Vic
Contact:

Post by El_Freddo » Tue Jul 24, 2007 2:30 pm

Hey Postie,

Got a final set of pics on the car all painted up and with tyre fitted?

Cheers
"The lounge room is not a workshop..."
Image
El Freddo's Pics - El_Freddo's youtube

User avatar
stamp_licker
General Member
Posts: 1066
Joined: Wed Oct 05, 2005 10:00 am
Location: Kallangur.Bris North

Post by stamp_licker » Tue Jul 24, 2007 7:07 pm

Busy getting ready for the wollogorang trip.Probably have a few pics of it by the time i get back.
[SIGPIC][/SIGPIC]aka the_postie
Building a hardcore postie:D

User avatar
crundle
Junior Member
Posts: 44
Joined: Tue Jul 24, 2007 9:09 am
Location: Woodcroft, South Australia
Contact:

Post by crundle » Tue Aug 21, 2007 11:39 pm

Are you back from your trip yet Postie? Would love to see some pics of what it looks like mounted with tyre in place etc, looks like a great idea, beats throwing the spare up on the roof!

Crundle
'91 carby L Series Wagon (White) - Stock standard - for now... ;)

User avatar
stamp_licker
General Member
Posts: 1066
Joined: Wed Oct 05, 2005 10:00 am
Location: Kallangur.Bris North

Post by stamp_licker » Wed Oct 03, 2007 3:51 pm

I've been abit slack with pics but here they areImageImageImage
ImageImage
FULL SIZE PICS HERE//http://s218.photobucket.com/albums/cc280/WickedWill_01/
[SIGPIC][/SIGPIC]aka the_postie
Building a hardcore postie:D

Post Reply

Return to “Conversions, Modifications and Performance Upgrades”