
In the front of my Vort the coil spring conversion has been done, and as sammy says above . My fronts are marked EA82 FI 2WD and sit perfect height for specs. The rears have L Series wagon springs and they sit 60mm too high. Yet to try my GLTAX rear springs that came from something else too maybe an RX. The FWD L sedan springs were a thinner wire than the ones in my GLTA rear- so i tossed them. They may have been perfect for my Vort
My Vortex Project
-
steptoe
- Master Member
- Posts: 11582
- Joined: Thu Oct 06, 2005 10:00 am
- Location: 14 miles outside Gotham City
Johnny, there was a car on your other subaru site that had a nice wheel, maybe ask in there. No difference likely between LHD and RHD in the wheel and boss 
In the front of my Vort the coil spring conversion has been done, and as sammy says above . My fronts are marked EA82 FI 2WD and sit perfect height for specs. The rears have L Series wagon springs and they sit 60mm too high. Yet to try my GLTAX rear springs that came from something else too maybe an RX. The FWD L sedan springs were a thinner wire than the ones in my GLTA rear- so i tossed them. They may have been perfect for my Vort
In the front of my Vort the coil spring conversion has been done, and as sammy says above . My fronts are marked EA82 FI 2WD and sit perfect height for specs. The rears have L Series wagon springs and they sit 60mm too high. Yet to try my GLTAX rear springs that came from something else too maybe an RX. The FWD L sedan springs were a thinner wire than the ones in my GLTA rear- so i tossed them. They may have been perfect for my Vort

Hey everyone, its been awhile since I've posted anything on here so i guess it time for an update, "Quick note: not a lot has been done due to time, weather and lack a funds"
Also note that I have done all the work myself so it may not look as good as the perfesional people would do it but I say you get what you pay for and with no experience I think I did an okayish job :P
Firstly i had thoughts of changing the interior colour, e.g: Carpet, dash, and center console. I wanted to paint the interior white but remembered white can be painfully hard to get correct and when your mates touch the insides it gets really dirty, (seen too many white dashes with finger prints all over it, looked like a crime scene every time i went in the car) so I decided to go with a classic black interior look.
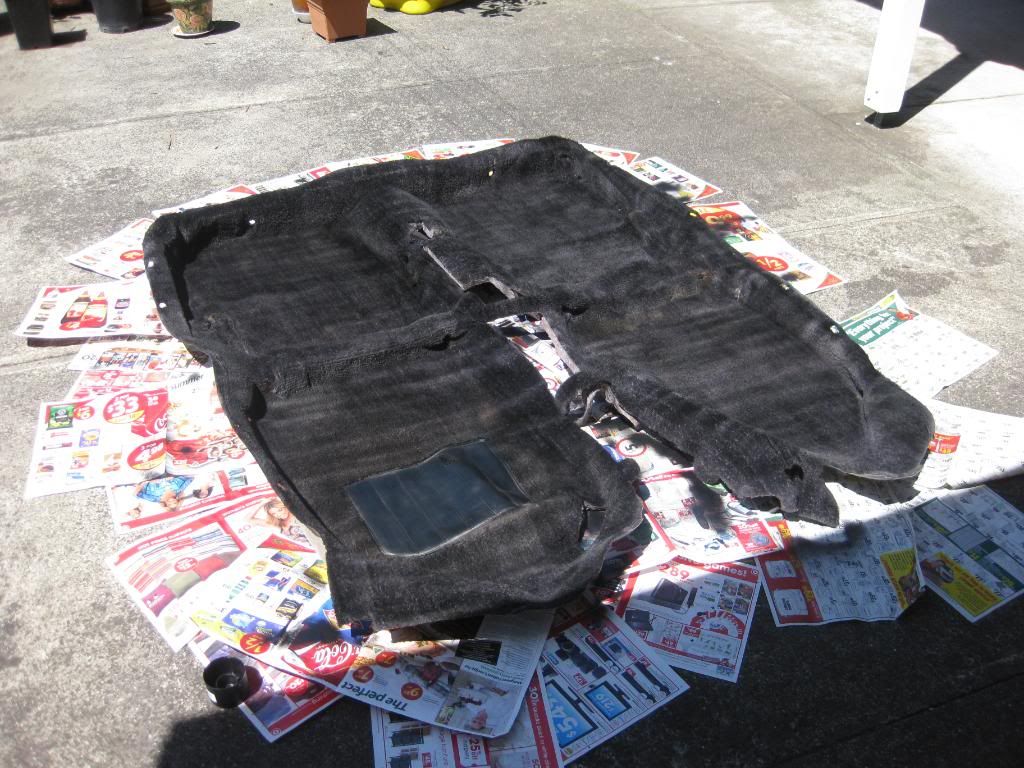
My first job was to remove the interior (and this was done early last year) and start working on the carpet, I first gave the carpet a clean like its never had before and started to paint it black, it did take 2 weeks to do because you have to wait for the first coat to dry and then do the last coat.
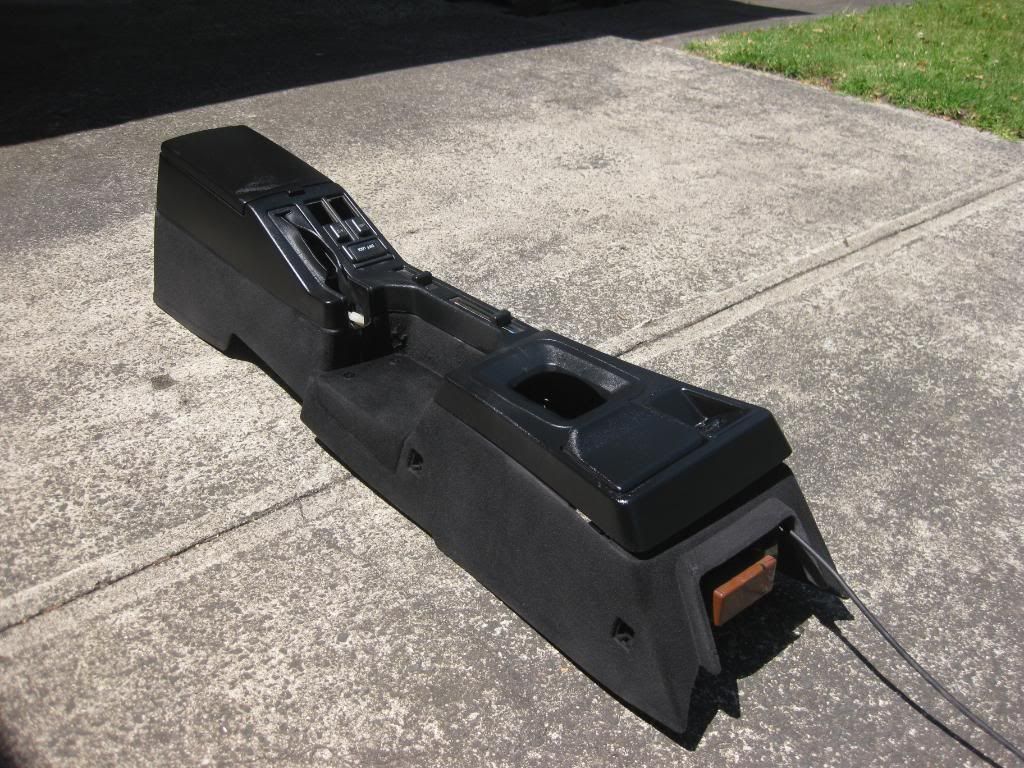
The next part was to do the center console, same style as painting the carpet, just gave it a good clean, light sand back for the paint to stick and a few coats of paint and a hot day was really helpful lol.
The most important advice I could give anyone if they want to change the colour is to make sure you over all the buttons and letters so you know whats what.
These are the before and after shots. (I still need to do the final coat so it may not look as good as it should)
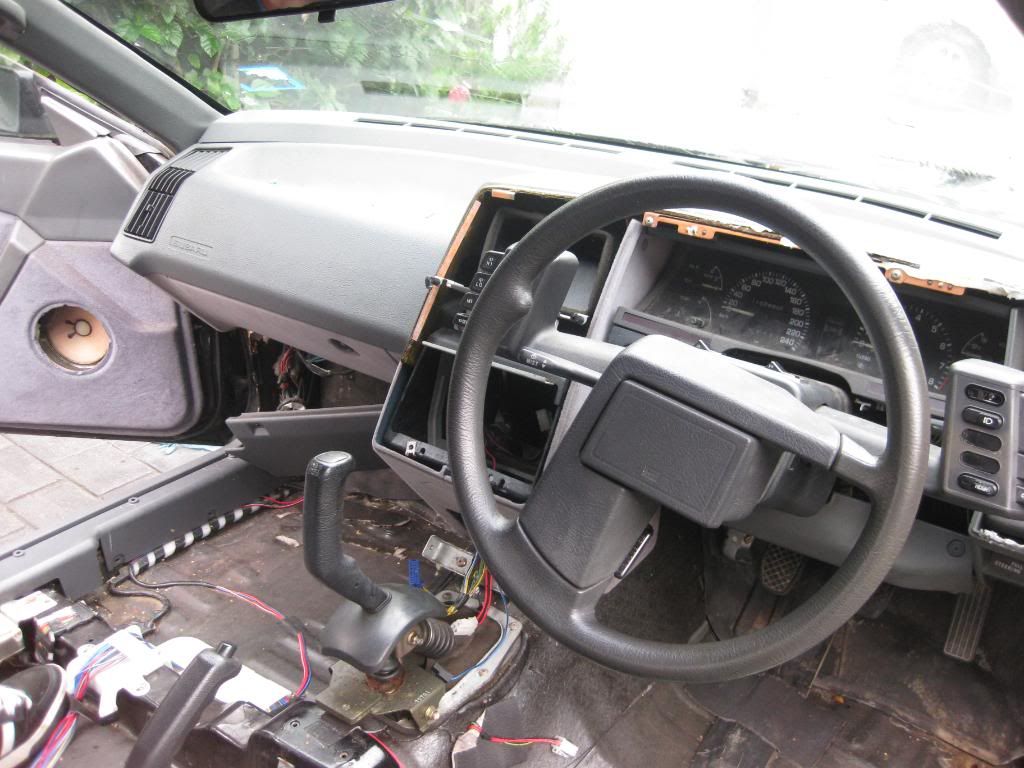
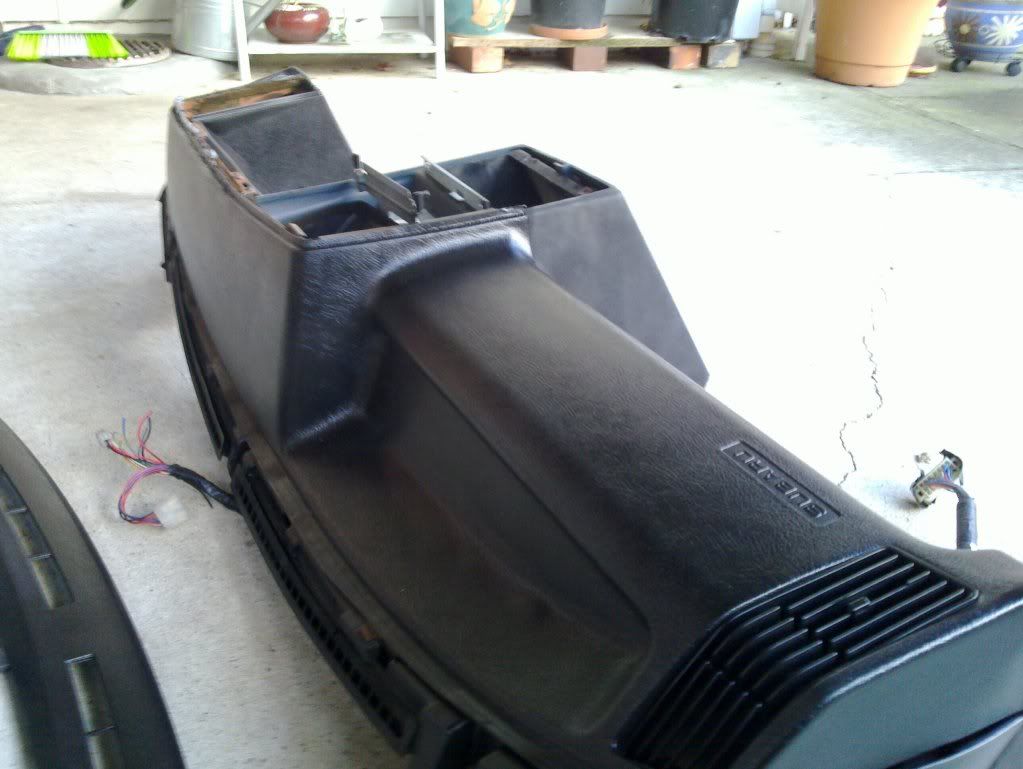
After finishing off the center console I started the dash, this still needs a lot more work and the camera didn't take the best shot, so I'll upload more photos when i find my old camera.
Next had to be the doors and internal trims. and this was the most time consuming because you need to tape up everything and make sure you don't spray the windows.
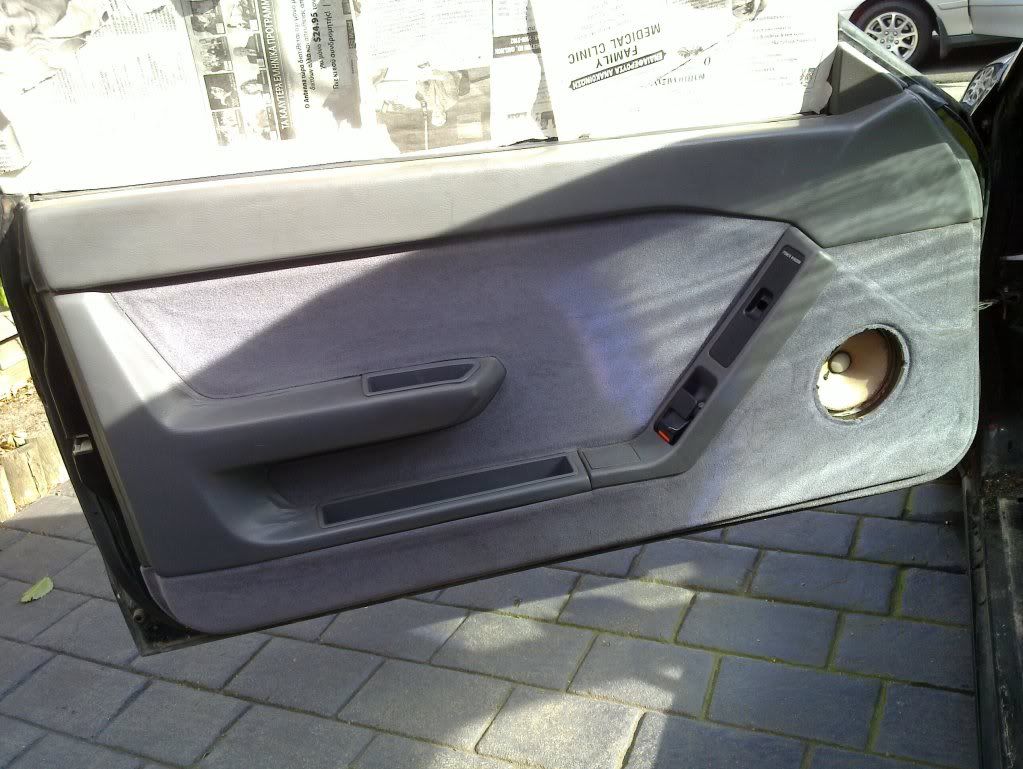
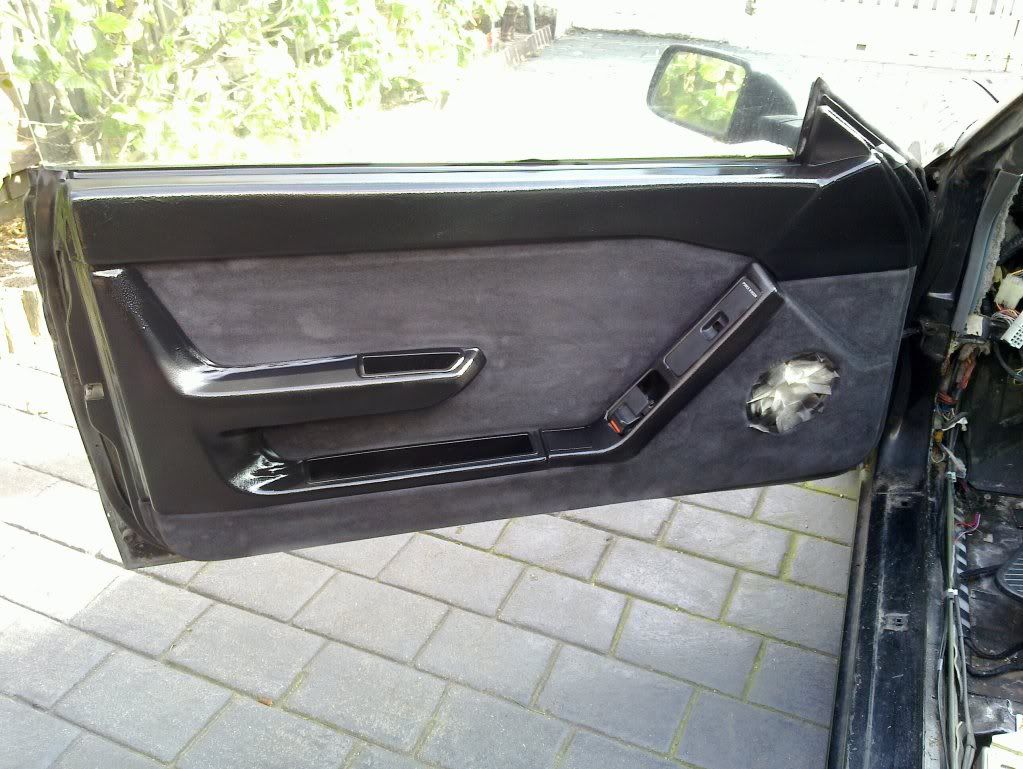
With the last one, the door came out better when the paint dried.
I have also done the gear stick, hand break and all the other parts you cant see, (with the steering wheel I'm going to get that wrapped in a black leather so it will have that final touch)
Hope you guys liked what I did there and let me know what you think
I do have another question, i found an early 90's liberty wagon that is being wrecked at the moment and I was thinking if I take the entire suspension, the hubs, breaks and shocks, so what would I have to do to make that fit onto my little pocket rocket because I do not want to to keep the 4 stud pattern.
Thanks again guys and hope to give you guys more updates
Also note that I have done all the work myself so it may not look as good as the perfesional people would do it but I say you get what you pay for and with no experience I think I did an okayish job :P
Firstly i had thoughts of changing the interior colour, e.g: Carpet, dash, and center console. I wanted to paint the interior white but remembered white can be painfully hard to get correct and when your mates touch the insides it gets really dirty, (seen too many white dashes with finger prints all over it, looked like a crime scene every time i went in the car) so I decided to go with a classic black interior look.
My first job was to remove the interior (and this was done early last year) and start working on the carpet, I first gave the carpet a clean like its never had before and started to paint it black, it did take 2 weeks to do because you have to wait for the first coat to dry and then do the last coat.
The next part was to do the center console, same style as painting the carpet, just gave it a good clean, light sand back for the paint to stick and a few coats of paint and a hot day was really helpful lol.
The most important advice I could give anyone if they want to change the colour is to make sure you over all the buttons and letters so you know whats what.
These are the before and after shots. (I still need to do the final coat so it may not look as good as it should)
After finishing off the center console I started the dash, this still needs a lot more work and the camera didn't take the best shot, so I'll upload more photos when i find my old camera.
Next had to be the doors and internal trims. and this was the most time consuming because you need to tape up everything and make sure you don't spray the windows.
With the last one, the door came out better when the paint dried.
I have also done the gear stick, hand break and all the other parts you cant see, (with the steering wheel I'm going to get that wrapped in a black leather so it will have that final touch)
Hope you guys liked what I did there and let me know what you think
I do have another question, i found an early 90's liberty wagon that is being wrecked at the moment and I was thinking if I take the entire suspension, the hubs, breaks and shocks, so what would I have to do to make that fit onto my little pocket rocket because I do not want to to keep the 4 stud pattern.
Thanks again guys and hope to give you guys more updates
________________________________________
Johnny T
88kw of fun waiting to happen
Johnny T
88kw of fun waiting to happen
-
Brumby Kid

- General Member
- Posts: 1297
- Joined: Sun Jul 17, 2011 9:19 pm
- Location: Belair S.A.
Does it look pro? Can you tell it has been painted? Or does it look like factory black? Thinking if i wanted to change colour i would just spray it, like you did.
Cheers Cam
Cheers Cam
When life gives you a corner, drop a gear, pitch, and stomp the loud pedal
Bianca: 1991 Subaru Brumby
My First / Project car
EA81 Rebuilt by Tony Knight from knight Engines
2" body lift
25" 185r14 Yokahama Delivery Star, light truck tyres
2" Sports exhaust
Rear Aguip step/bar
Liberty seats
Mums Car 08 Liberty Wagon
Bianca: 1991 Subaru Brumby
My First / Project car
EA81 Rebuilt by Tony Knight from knight Engines
2" body lift
25" 185r14 Yokahama Delivery Star, light truck tyres
2" Sports exhaust
Rear Aguip step/bar
Liberty seats
"Bianca"
[SIGPIC][/SIGPIC]
Dads Car: 02 Impreza WRX STi[SIGPIC][/SIGPIC]
Mums Car 08 Liberty Wagon

anyone tried rit dye on the plastics
"THE BRUMBY ! , Your not taking the Brumby I just dry cleaned the mud flaps."
Current
00 Outback with class, SOHC EJ25 auto 240,068ks
"B1" 90 Brumby with character 271,800K EA81 (But soon 5speed,103,000k EJ202)
"B2" wrecked and crushed
"B3" 89 Bush Bashing Brumby (BeeRumBee) Kept a Bucca
"B4" 89 Black Brumby (wam balam ) Kept at Kempsey
"B5" 92 Brumby (sold it)
"B6" 88 Beige Brumby
"W1" 83 wagon 308,000 AC and alot of rust repairs. (Wanda)
Brumby Trailer (Sulky)
LUV THAT BRUM !
RevMax Hobbies
[SIGPIC][/SIGPIC]
-
Brumby Kid
- General Member
- Posts: 1297
- Joined: Sun Jul 17, 2011 9:19 pm
- Location: Belair S.A.
Will google that, what is it?revmax wrote:anyone tried rit dye on the plastics
When life gives you a corner, drop a gear, pitch, and stomp the loud pedal
Bianca: 1991 Subaru Brumby
My First / Project car
EA81 Rebuilt by Tony Knight from knight Engines
2" body lift
25" 185r14 Yokahama Delivery Star, light truck tyres
2" Sports exhaust
Rear Aguip step/bar
Liberty seats
Mums Car 08 Liberty Wagon
Bianca: 1991 Subaru Brumby
My First / Project car
EA81 Rebuilt by Tony Knight from knight Engines
2" body lift
25" 185r14 Yokahama Delivery Star, light truck tyres
2" Sports exhaust
Rear Aguip step/bar
Liberty seats
"Bianca"
[SIGPIC][/SIGPIC]
Dads Car: 02 Impreza WRX STi[SIGPIC][/SIGPIC]
Mums Car 08 Liberty Wagon
The interior was factory blue, but I changed it to black, the photos didn't help too much, i'll try and get a closer shot to see if you can see any difference.
Changing the colour is easy, just take a bit of time and good weather.
Changing the colour is easy, just take a bit of time and good weather.
________________________________________
Johnny T
88kw of fun waiting to happen
Johnny T
88kw of fun waiting to happen
-
El_Freddo

- Master Member
- Posts: 12519
- Joined: Tue Oct 04, 2005 10:00 am
- Location: Bridgewater Vic
- Contact:
You need the crossbred conversion kit, there's details of what you need to send them and what you will need to collect to get the job done. Jeff is the one to contact about it all, just email him from the details on http://www.crossbredperformance.com or .com.au, I can't remember.Johnny T wrote:I do have another question, i found an early 90's liberty wagon that is being wrecked at the moment and I was thinking if I take the entire suspension, the hubs, breaks and shocks, so what would I have to do to make that fit onto my little pocket rocket because I do not want to to keep the 4 stud pattern.
And the interior colour change looks good from those photos, what are you going to do for the seats, pillar trim and roof lining? Time will tell with how it stands against the heat and harsh rays of the sun in summer!
Cheers
Bennie

Blue???? looks more like grey interior trim to me. Yeah as bennie said time will tell. but i does look good:)Johnny T wrote:The interior was factory blue, but I changed it to black, the photos didn't help too much, i'll try and get a closer shot to see if you can see any difference.
Changing the colour is easy, just take a bit of time and good weather.
The project, EJ22 --->>> EJ25 Quad CAM:D touring wagon

Thinking of going on holidays on a little paradise island, Check out http://www.dodolidays.com

Thinking of going on holidays on a little paradise island, Check out http://www.dodolidays.com
Thanks for the reply guys, yer during summer i plan to keep it covered, and the car still has a long way to go before its working lol
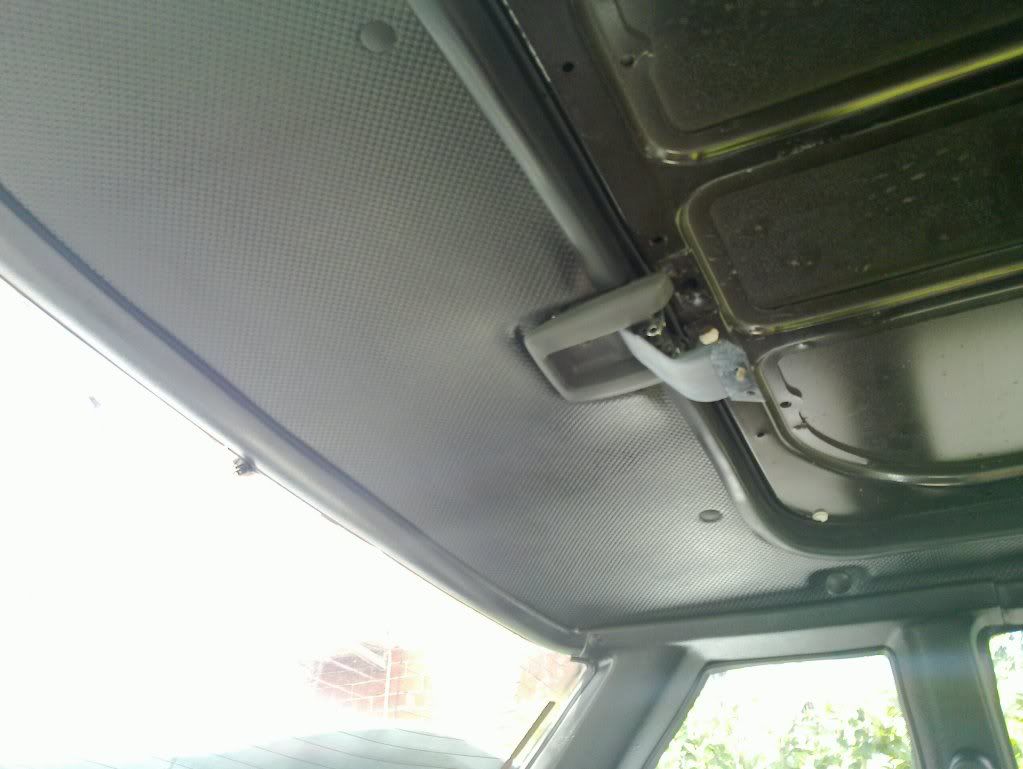
As for the seats im going to get them re done in either black velour with black or white stitching and as for the pillar trim and roof lining, that has been changes and if you decide to change it, make sure you take everything out because it will make it a lot more easier to change, more importantly make sure your paint it in an area where you can breath, i found out the hard way by spraying in the garage lol.
Here's a photo of the side pillar here; (not the best shot but it should show enough)
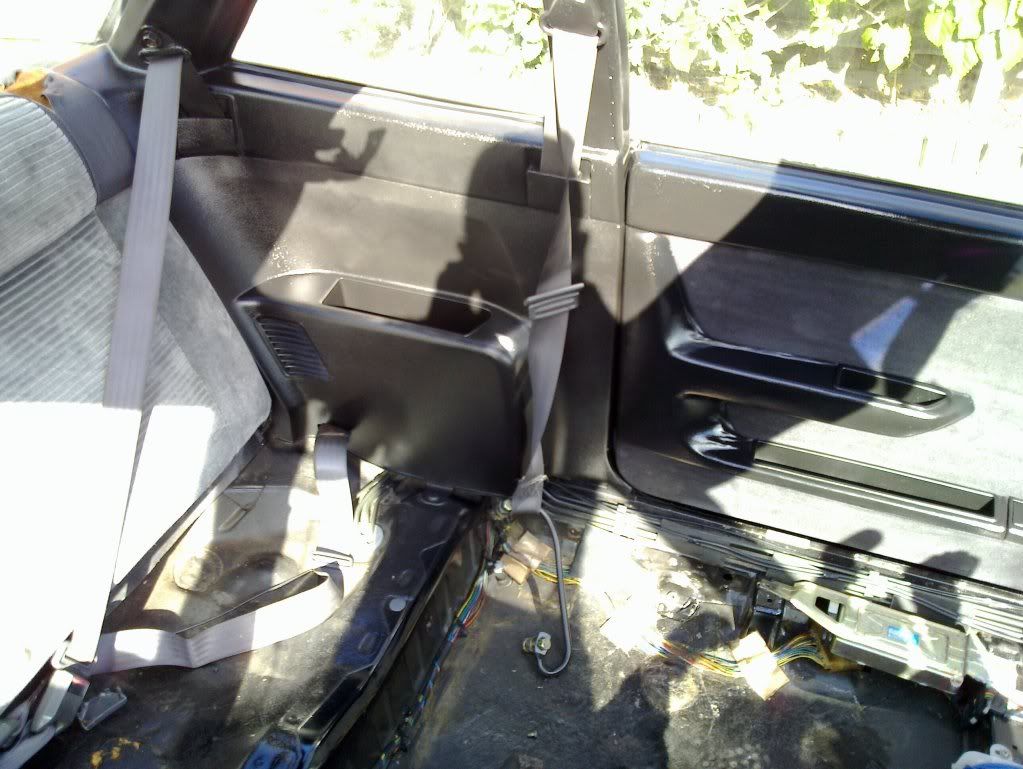
(I did realize i wrote blue instead of grey, my bad :P)
Thanks for the link El Freddo for the link, i'll send that guy an email and hopefully the kit shouldn't blow my budget lol. Just a quick one so I don't buy the wrong kit, is it the "Brake Kit (L Series) " the one im looking for?
Thanks again
Johnny T
As for the seats im going to get them re done in either black velour with black or white stitching and as for the pillar trim and roof lining, that has been changes and if you decide to change it, make sure you take everything out because it will make it a lot more easier to change, more importantly make sure your paint it in an area where you can breath, i found out the hard way by spraying in the garage lol.
Here's a photo of the side pillar here; (not the best shot but it should show enough)
(I did realize i wrote blue instead of grey, my bad :P)
Thanks for the link El Freddo for the link, i'll send that guy an email and hopefully the kit shouldn't blow my budget lol. Just a quick one so I don't buy the wrong kit, is it the "Brake Kit (L Series) " the one im looking for?
Thanks again
Johnny T
________________________________________
Johnny T
88kw of fun waiting to happen
Johnny T
88kw of fun waiting to happen
-
brumbyrunner

- General Member
- Posts: 1743
- Joined: Mon Apr 10, 2006 10:00 am
- Location: SEQ
looks great mate.
I did the same recoat to some of my mini coopers.
Yeah i found out about the ventilation thing when i did the first one lol. What a rush lol.
As for the staying power of the vinyl spray it lasted 8 years on the mini with only the seats cracking up after a few years.
Cheers Pete
I did the same recoat to some of my mini coopers.
Yeah i found out about the ventilation thing when i did the first one lol. What a rush lol.
As for the staying power of the vinyl spray it lasted 8 years on the mini with only the seats cracking up after a few years.
Cheers Pete
Use The Fork Luke
I managed to take a quick photo of the roof lining today and I have to admit its only the first spray so it never comes out the best, but I'll finish that off when the roof is getting fixed
I got a price for the kit and looks like i have to save up a bit more (its not expensive) but i need to fix the daily ride first lol.
I got another question to ask (AGAIN), when I'm putting the engine back together with the new head gaskets and what not, with the wiper motor cable as someone broke the wire, i found a new wire with the connection, can someone show me where that cable is meant to connect, if its not too much trouble would I be able to have a photo?
Thanks again guys
Johnny T
________________________________________
Johnny T
88kw of fun waiting to happen
Johnny T
88kw of fun waiting to happen
-
Tweety

- General Member
- Posts: 1253
- Joined: Mon Jul 04, 2011 9:45 am
- Location: ea81 powered trike Victoria
Johnny T, this has been a good read. I'm certain if I ever buy an older Subie it'll be a Vortex- luv em.
Stick to it. These guys on this forum have helped me with my conversion immensely.
And remember, a lot of small issues with older cars often are easy repair. loose wires, fuses etc. they just need some TLC.
Stick to it. These guys on this forum have helped me with my conversion immensely.
And remember, a lot of small issues with older cars often are easy repair. loose wires, fuses etc. they just need some TLC.
[SIGPIC][/SIGPIC]Tweety trike- EA81 (full reco 2014) 32/36 weber, SPFI manifold, 9.5:1 CR, VW auto.
-
Chris_Rogers
- General Member
- Posts: 1155
- Joined: Sat Dec 31, 2005 10:00 am
- Location: Brisbane
- Contact:
crossbred performance do the kit.
I do have another question, i found an early 90's liberty wagon that is being wrecked at the moment and I was thinking if I take the entire suspension, the hubs, breaks and shocks, so what would I have to do to make that fit onto my little pocket rocket because I do not want to to keep the 4 stud pattern.
Thanks again guys and hope to give you guys more updates
you will need:
the full front strut setup with ball joint.
a new set of driveshafts up front are needed as the spline count changes on the outside.
modified control arms (crossbred do these.)
MY rack ends on the L series rack
rear will need ALL the brake hardware and the cable setup. use a 80s honda accord handbrake. it may be a bit low but the mounting points are the right way up.
if you wnat to get trick and the donor car has it - grab the ABS system as well.
questions - ask.
Hey everyone, long time since I posted an update here, so here it is;
I am currently putting the engine back together with my uncle who is a panel beater and we are not 100% sure where all the piping is going, I have replaced the cut pipes and now can't seem to work out where the pipe that connects to the spider manifold goes, (Picture below)
Once this is all put back on my uncle and I we should be able to start it and weld up the roof and continue working on the body, but most importantly is working out how to put all the engine pipes and cables back together.
Any advice would be great and I will post some more photo's shortly of other things that I have done.
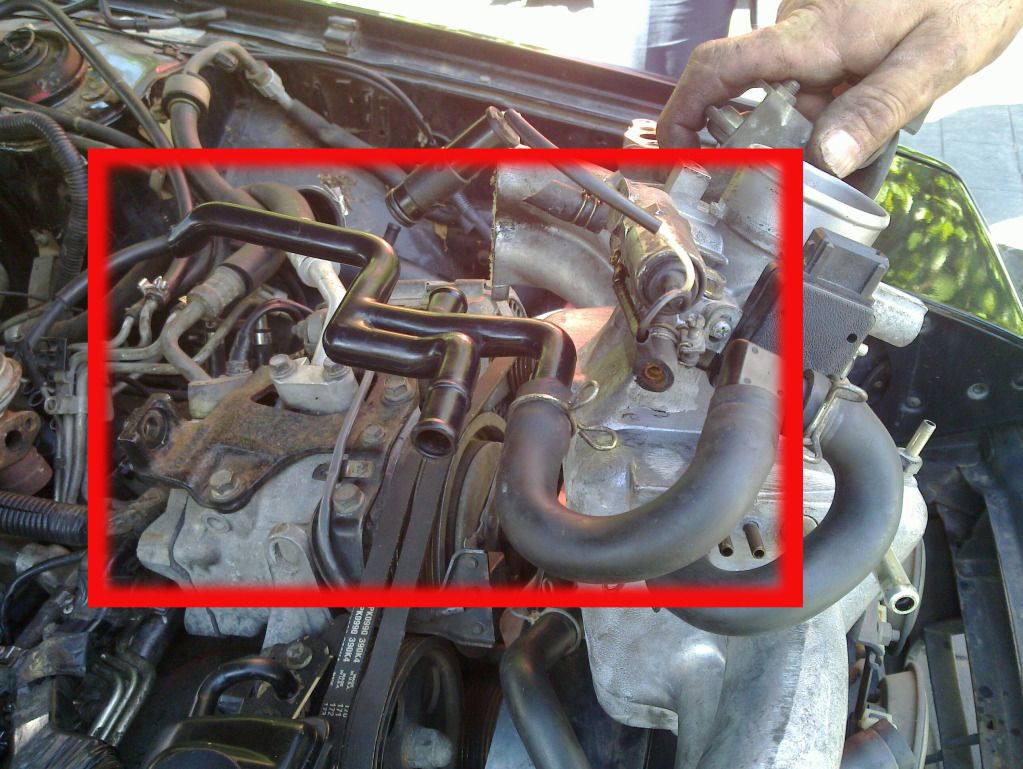
I do know that this pipe is broken but I am getting this part fixed
I am currently putting the engine back together with my uncle who is a panel beater and we are not 100% sure where all the piping is going, I have replaced the cut pipes and now can't seem to work out where the pipe that connects to the spider manifold goes, (Picture below)
Once this is all put back on my uncle and I we should be able to start it and weld up the roof and continue working on the body, but most importantly is working out how to put all the engine pipes and cables back together.
Any advice would be great and I will post some more photo's shortly of other things that I have done.
I do know that this pipe is broken but I am getting this part fixed
________________________________________
Johnny T
88kw of fun waiting to happen
Johnny T
88kw of fun waiting to happen
Hey everybody, its been awhile since I have posted something up here,
I'm almost done putting the engine back together and should have the engine started within a few months (depending on timing)
When the engine starts I'm going to run a Compression Test to see how well the engine is running, hopefully every cylinder is running correctly considering the engine hasn't moved in over 3 years its a possibility of something going wrong.
I have another question I am not to sure off with the rear suspension, I found this problem awhile ago when I took the tyres off and put the car on stands (I know in the photo 1 of the stands are in the wrong place but I do have more than 4 stands available at that time).
In the photo below shows that the hub has fallen to the ground but on the other side it is fine, does anyone know what I have to do to fix it?
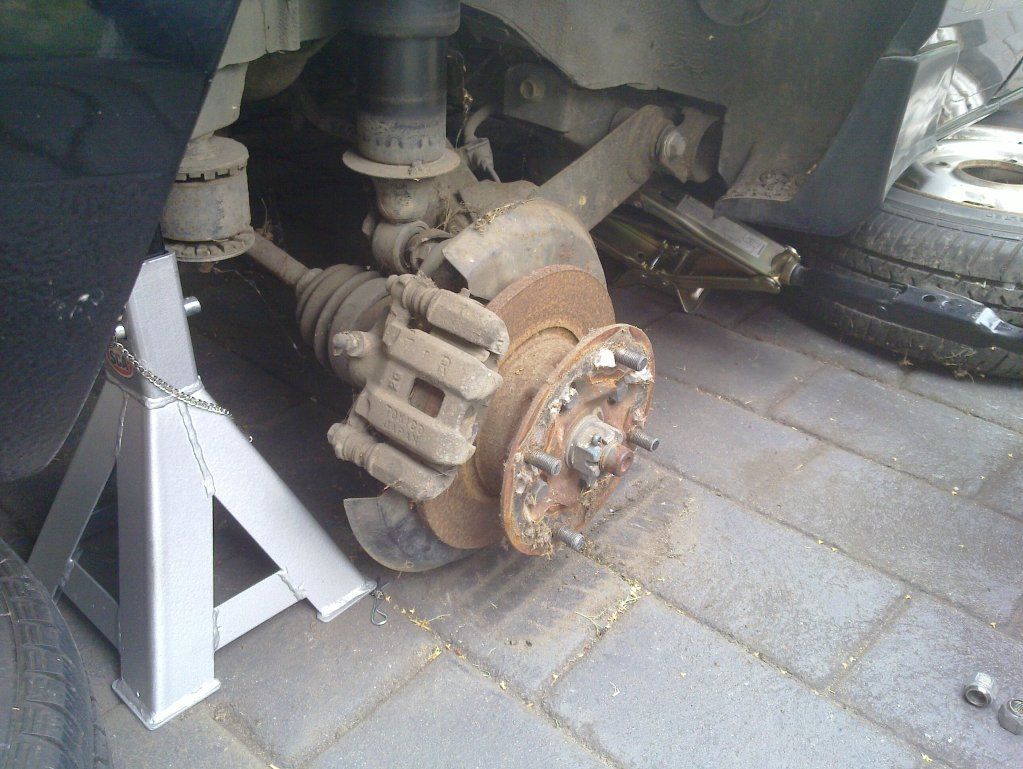
Also does anyone know where I can get some new break disks from?
Thanks again everyone and when I get some new updates I will keep everyone posted.
Kind regards
Johnny T
________________________________________
Johnny T
88kw of fun waiting to happen
Johnny T
88kw of fun waiting to happen
Thanks for the reply Steptoe, if you can find the number when you got some free time it would be great
As for the suspension it is an air bag system, would this issues be caused by a leak, because when the car was working only the passenger side fell and the drivers side was fine, also how would I find the lines so I can trace if the hose or rings are broken?
Thanks again
Johnny T
As for the suspension it is an air bag system, would this issues be caused by a leak, because when the car was working only the passenger side fell and the drivers side was fine, also how would I find the lines so I can trace if the hose or rings are broken?
Thanks again
Johnny T
________________________________________
Johnny T
88kw of fun waiting to happen
Johnny T
88kw of fun waiting to happen