Venom: H6 Gen2 Liberty GX
Andrew I'd also recommend checking the valve clearances, a fresh valve cover gasket kit and half moon plugs. The valves seem to be a very neglected aspect of these motors, probably because of the lack of major service intervals from the chain over belt. This motor is 80,000 km (supposedly) but pretty much all valves are out of spec. Really interested to inspect the motor coming out, it's possible they've never been checked at all.
[SIGPIC][/SIGPIC]
- vincentvega
- Senior Member
- Posts: 2446
- Joined: Tue Oct 04, 2005 10:00 am
- Location: Brisvegas
- Contact:
Sorry mate didn't grab a printout, don't bother at this place like I would a tyre shop.
Investigating a heavier flywheel. My stalling issues are almost identical to what people experience sometimes with the lightened flywheel. Stock is 7 - 10 kg, bigger WRX upto 11 ish I think. Thinking something around 12 to 14 kgs? Not cheap. Cheaper than aftermarket ECU.
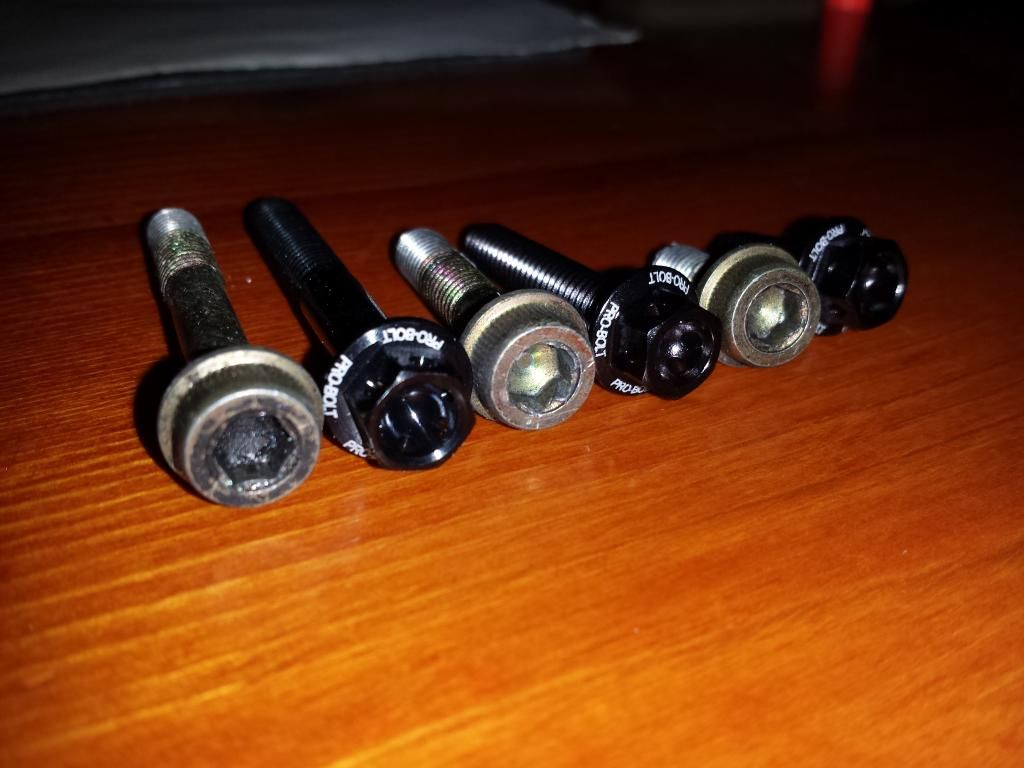
Those ****ing timing chain cover bolts... Try $300+ from Subaru for the set. Really relunctant to put what I have back in, corosion is pretty rife and a lot of the heads are on the way out. M6 1.00mm thread with a flange head are tricky to find. Motorbike spec stainless stuff up to $5 per bolt.
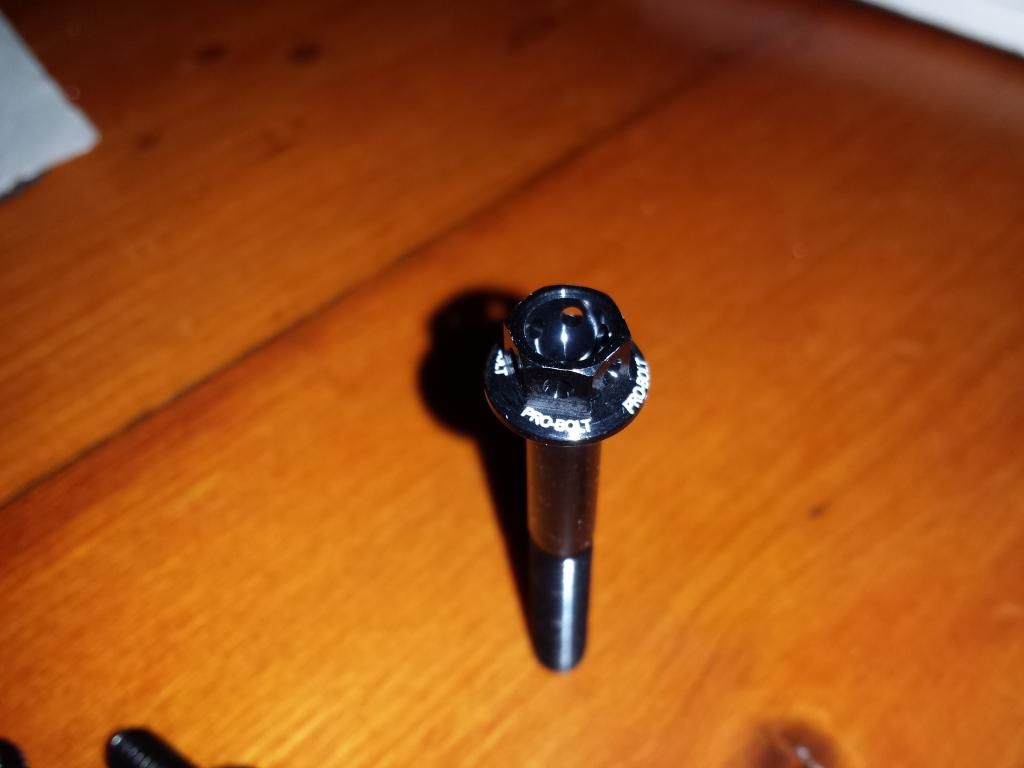
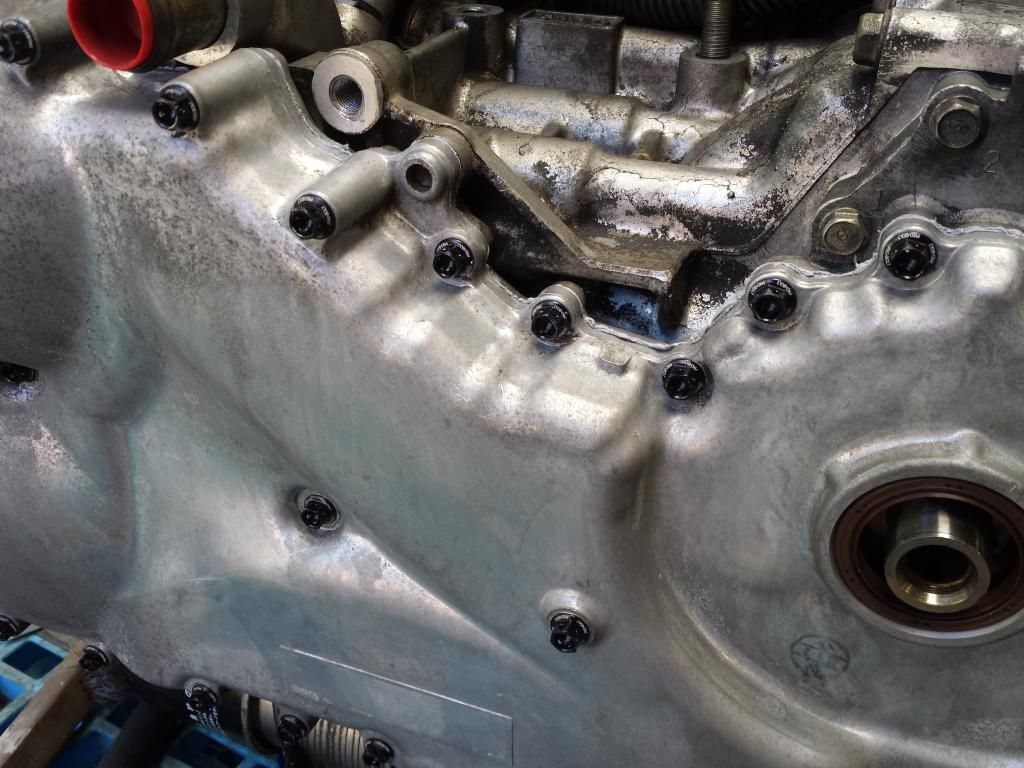
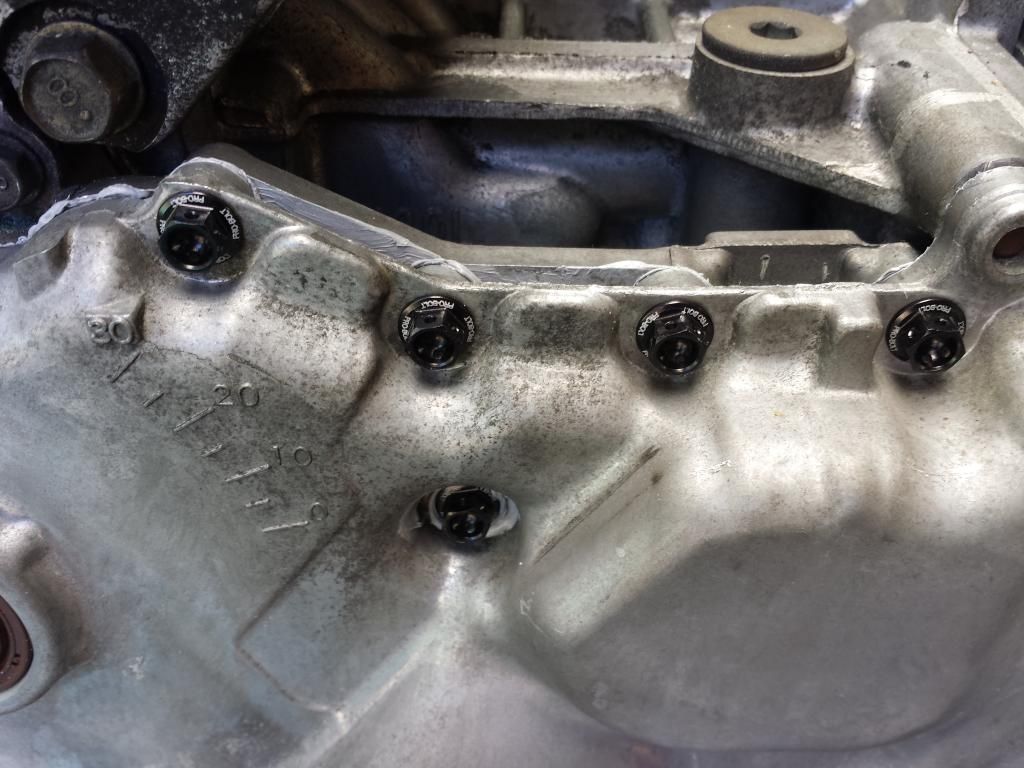
Ended up buying a set of flanged hex head ones so 8mm socket to replace the allen key shite, anodized black aluminium. Look pretty trick. Allu should be fine for this low toque spec application, 4-5nm from memory.
[SIGPIC][/SIGPIC]
- El_Freddo
- Master Member
- Posts: 12568
- Joined: Tue Oct 04, 2005 10:00 am
- Location: Bridgewater Vic
- Contact:
Got a welderVenom wrote:Thinking something around 12 to 14 kgs? Not cheap. Cheaper than aftermarket ECU.
Or is there a model out there that uses the same clutch setup so the flywheel might possibly be the same dimensions but heavier? Long shot and not sure how to work this one out...
The hex bolts was my thought too. The black would look good!Venom wrote:Ended up buying a set of flanged hex head ones so 8mm socket to replace the allen key shite, anodized black aluminium. Look pretty trick. Allu should be fine for this low toque spec application, 4-5nm from memory.
Are you going to spray any of the motor's surfaces to make it easier to clean?
How much more do you have to go before you do the engine swap?
Cheers
Bennie
I'm not sure about a heavier flywheel. You'll notice a big reduction in horsepower & acceleration & fuel economy will suffer too. I think you would regret it even though it would make it less prone to stalling
[SIGPIC][/SIGPIC]
Owner SubieLiftOz, lift kits for Subarus
'97 Forester: EJ22E; 4" Custom Body Lift; JDM STi plated LSD; 20mm WRX RSB; Snorkel; Kings
Owner SubieLiftOz, lift kits for Subarus
'97 Forester: EJ22E; 4" Custom Body Lift; JDM STi plated LSD; 20mm WRX RSB; Snorkel; Kings
It will only be equal to or a little more than the heaviest stock flywheel. There's no way it could be worse than an auto. Doubt its going to matter all that much to the H6. Perhaps with a happier ecu it will actually be more efficient. Lightweight flywheels dont make that big of a difference so I really dont see an incrementally heavier one doing much to how it drives.
If anything the extra inertia will be better off road. Worse come to worse I pull it out and lighten it to standard.
If anything the extra inertia will be better off road. Worse come to worse I pull it out and lighten it to standard.
[SIGPIC][/SIGPIC]
When I put a lightened flywheel in my RX3 I was stunned by how much easier it would rev. Taza found the same when he did his.
Depending on the type of flywheel, you shouldnt lighten it. Most are hardened steel which means the outer layer is very hard but the inner bit os weaker, so when you remove that outer hardened layer you drastically reduce the strength. thats why you hear of flywheels disintegrating! lol.
You can get billet flywheels which don't have that issue
[SIGPIC][/SIGPIC]
Owner SubieLiftOz, lift kits for Subarus
'97 Forester: EJ22E; 4" Custom Body Lift; JDM STi plated LSD; 20mm WRX RSB; Snorkel; Kings
Owner SubieLiftOz, lift kits for Subarus
'97 Forester: EJ22E; 4" Custom Body Lift; JDM STi plated LSD; 20mm WRX RSB; Snorkel; Kings
little tiny motor with the rotary though, yeah I remember having a light flywheel on my 12A was very noticeable too.
I've been driving one of these H6's (wife's car) for ages now and I don't rekon it will blink twice at a heavier flywheel, specially if it's not that much heavier than a stock one anyway. These motors have balls. As Venom says, the extra inertia will help with offroading. It's not a track car anyway.
I've been driving one of these H6's (wife's car) for ages now and I don't rekon it will blink twice at a heavier flywheel, specially if it's not that much heavier than a stock one anyway. These motors have balls. As Venom says, the extra inertia will help with offroading. It's not a track car anyway.
EZ30 L series - Monsterwagon
https://www.ausubaru.com.au/viewtopic.php?f=71&t=26163
https://www.ausubaru.com.au/viewtopic.php?f=71&t=26163
Refitted the projectors.
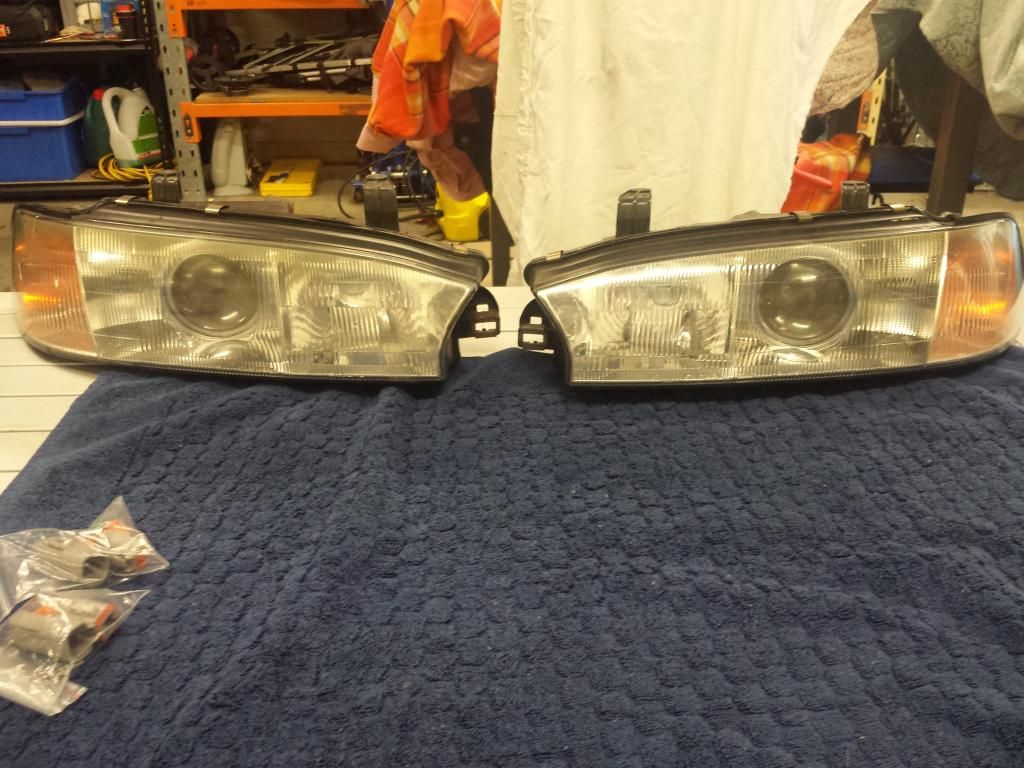
I've been really disappointed with the quality of water-proof plugs I've purchased in the past. Mainly the pins not aligning properly when you plug them together, I had this proplem with my thermo fan plug and the wires just kept pushing back out...
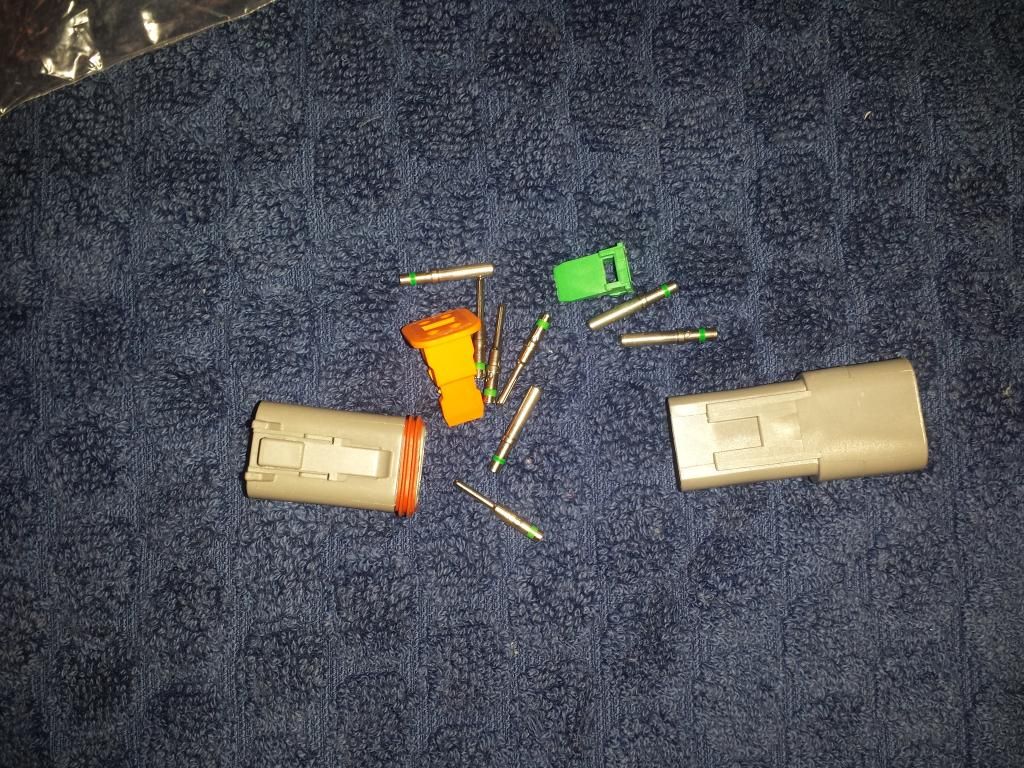
So I purchased some Deutsch connectors. So easy to use and the quality is fantastic.
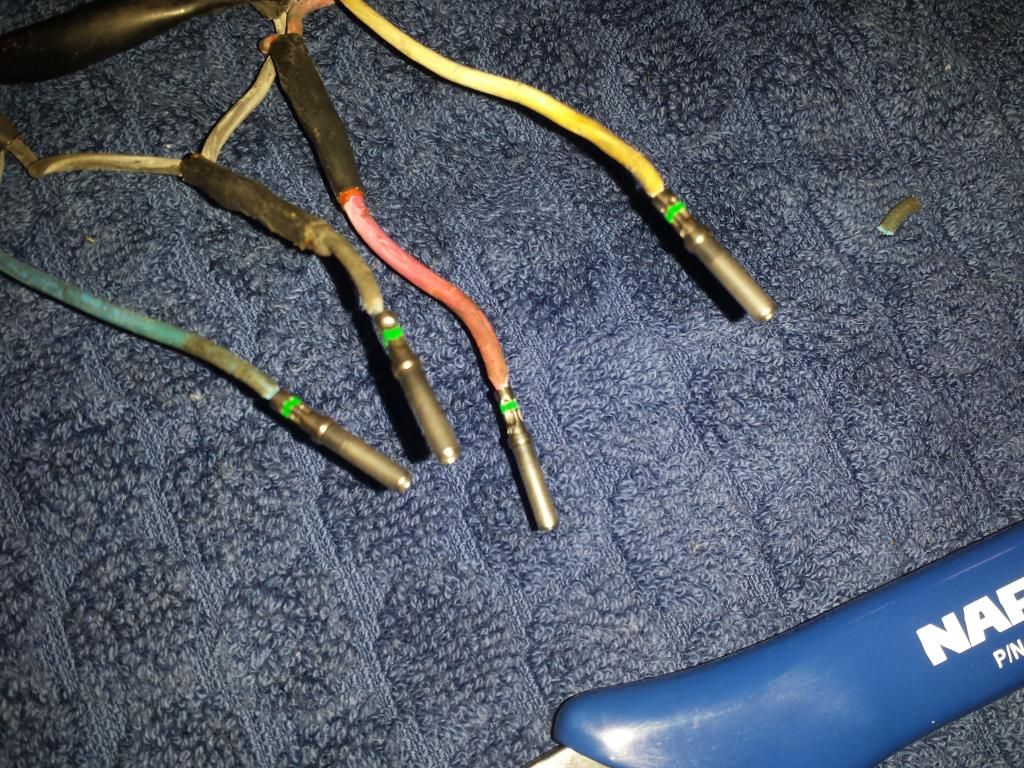
You can probably get away without it but this is the specific crimper for the Deutsch terminals. Worked so well, no problems with the grip on the wire.
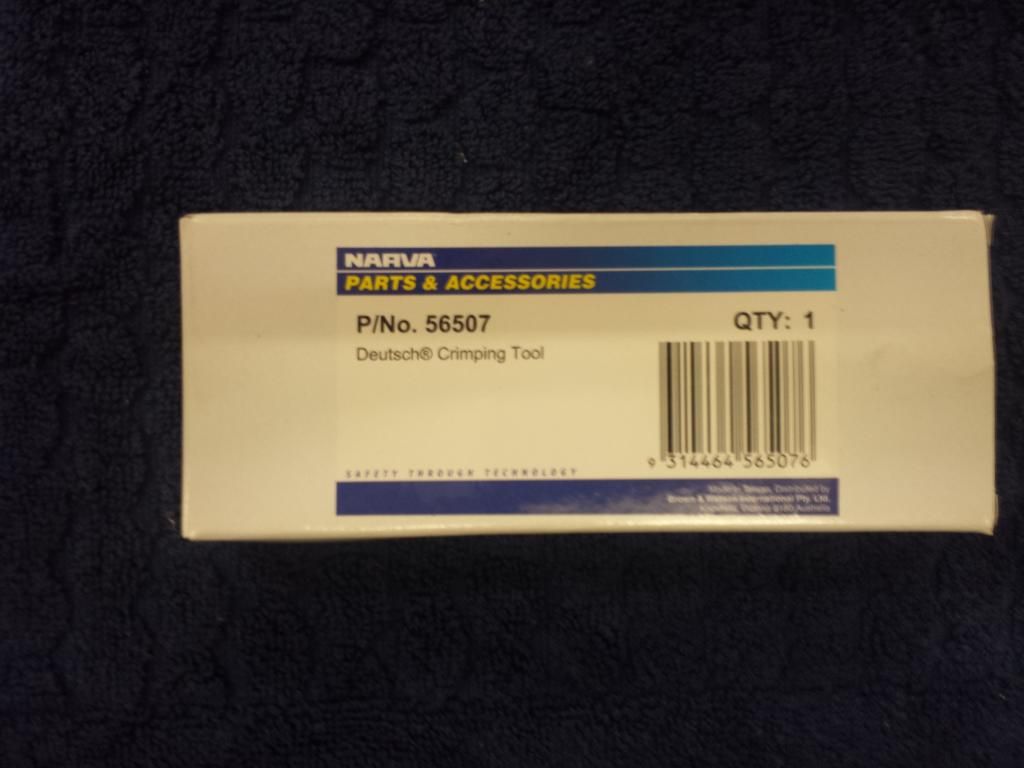
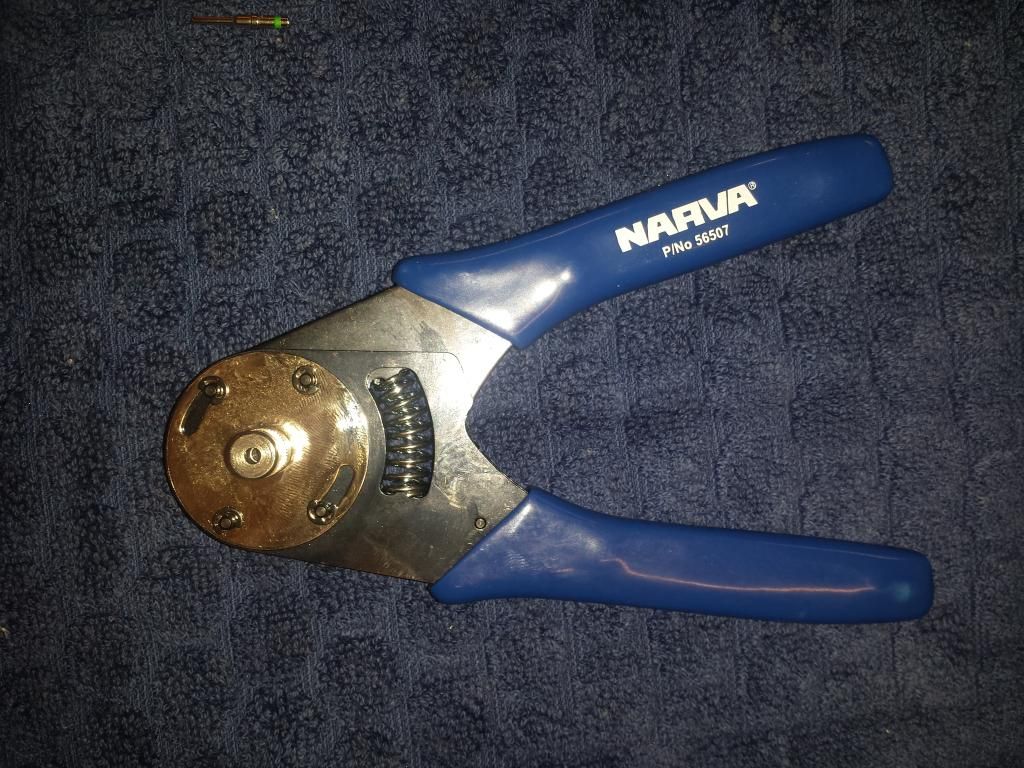
It crimps them in 4 directions.
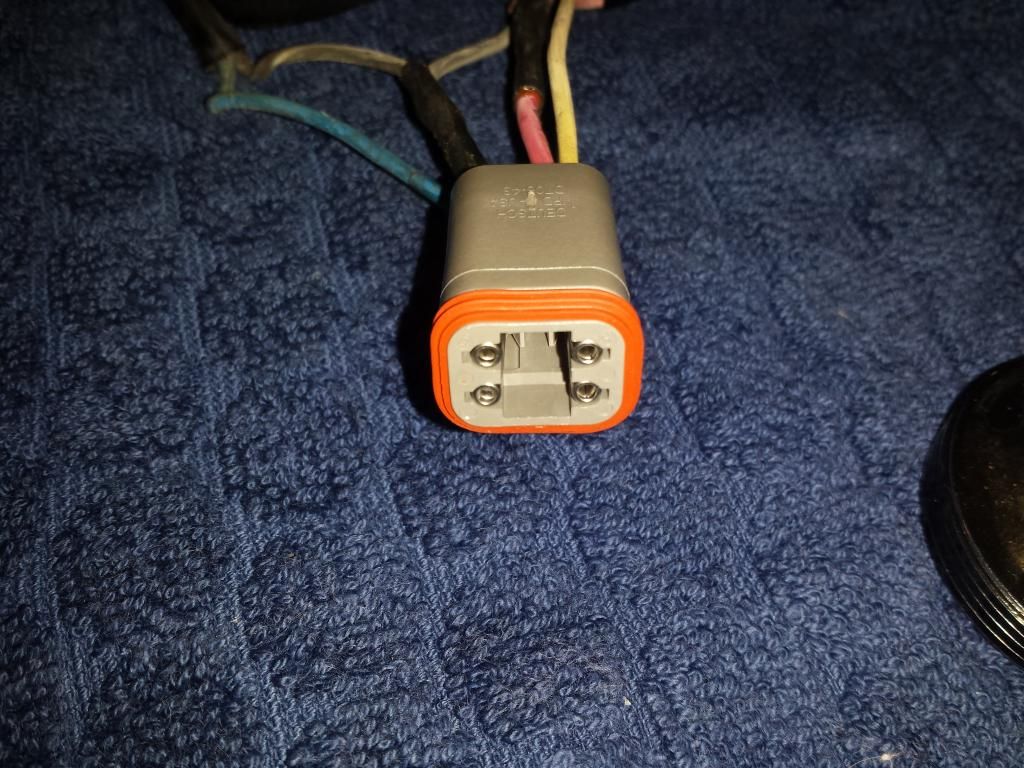
Male side of the plug. A wedge goes in there to fix the pins in place, and it has a stopper so that rubber grommet doesn't come off when you undo the plug.
Female side of the plug with the wedge fitted.
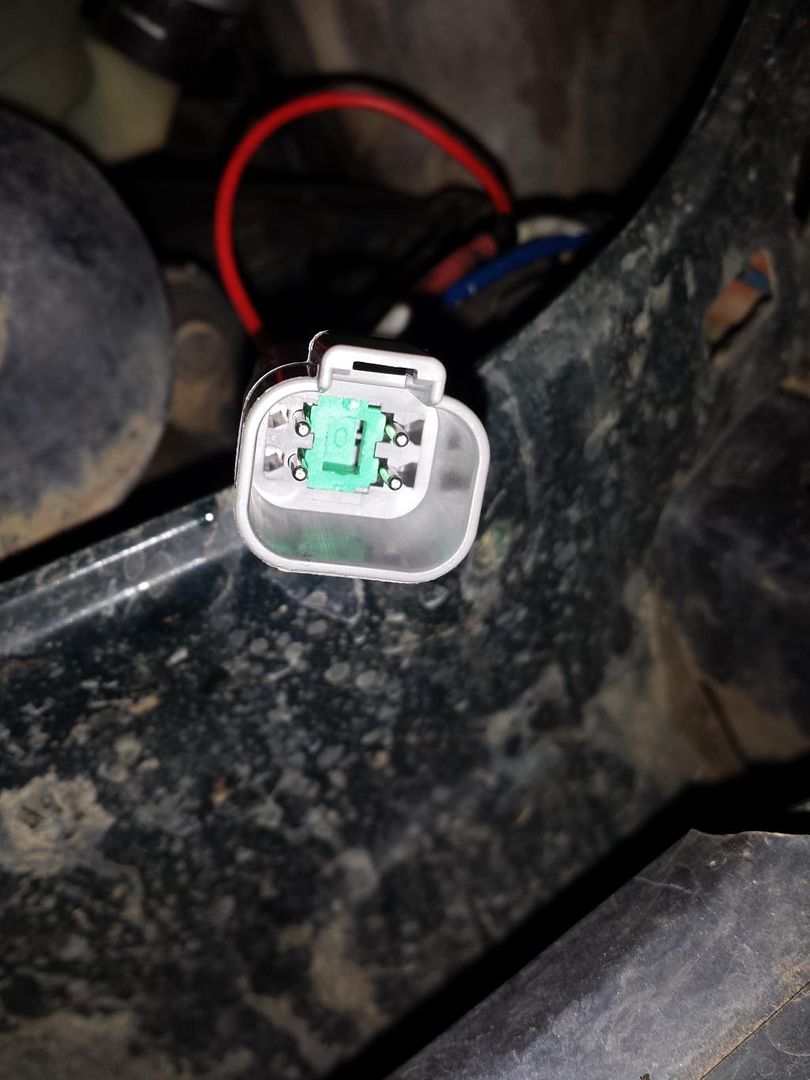
The pins themselves are really solid, machined i guess? Not flimsy like a standard terminal or connector. The locking mechanism is really easy to get to so it's simple and non-destructive to repin. I found that out because I forgot the H4 headlight relay I had fitted up was different to the stock earth switch style. Like all this electrical it just gave me a headache trying to work out how to make it work, so I stripped out the headlight relay and went back to stock.

I've been really disappointed with the quality of water-proof plugs I've purchased in the past. Mainly the pins not aligning properly when you plug them together, I had this proplem with my thermo fan plug and the wires just kept pushing back out...
So I purchased some Deutsch connectors. So easy to use and the quality is fantastic.

You can probably get away without it but this is the specific crimper for the Deutsch terminals. Worked so well, no problems with the grip on the wire.


It crimps them in 4 directions.

Male side of the plug. A wedge goes in there to fix the pins in place, and it has a stopper so that rubber grommet doesn't come off when you undo the plug.

Female side of the plug with the wedge fitted.

The pins themselves are really solid, machined i guess? Not flimsy like a standard terminal or connector. The locking mechanism is really easy to get to so it's simple and non-destructive to repin. I found that out because I forgot the H4 headlight relay I had fitted up was different to the stock earth switch style. Like all this electrical it just gave me a headache trying to work out how to make it work, so I stripped out the headlight relay and went back to stock.
[SIGPIC][/SIGPIC]
I was in a bit of a rush so this was the only decent photo I took. Spent a bit of coin getting Phillips +100 bulbs for low and high beams. Better looking headlight, but for me the biggest improvement is having a single assembly rather than the separate indicator. Much neater.
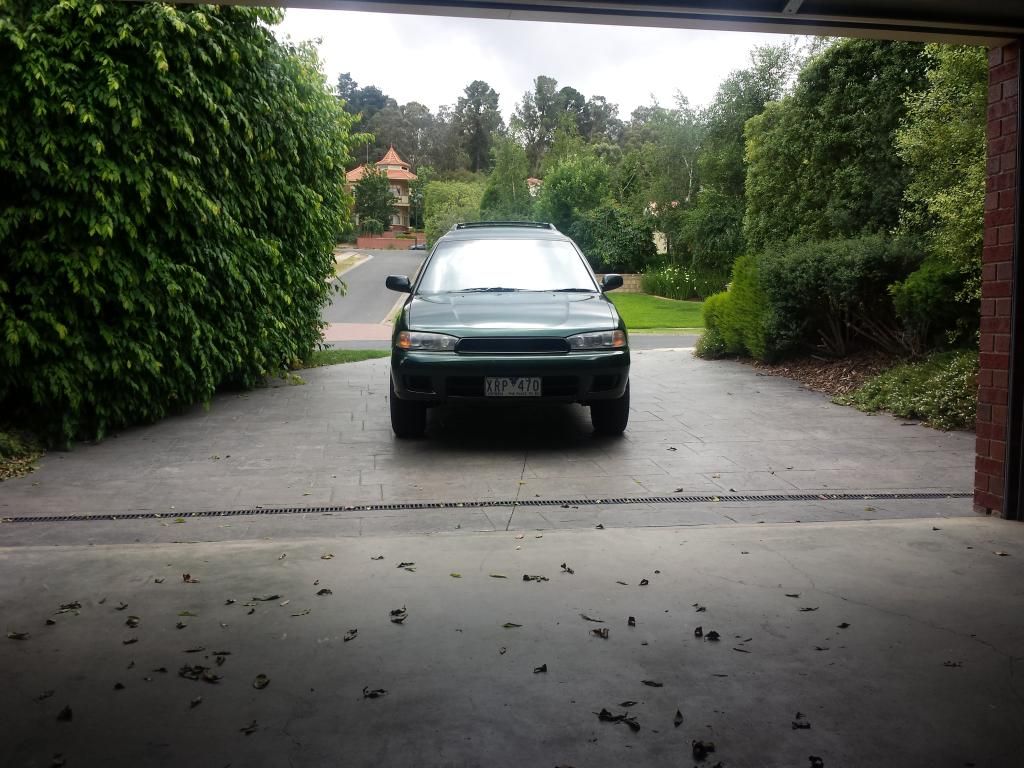
Low beam from the headlight has been grounded to the chassis, so the low beam stays on with the high. The high on these is apparently pretty average so it helps.
At some point I will fit up some mesh to that grill and throw some plasti-dip on it and the rear mid-wing/drinks bar. It's started to chip on the grill and the paint on the rear wing is cracking.
[SIGPIC][/SIGPIC]
- Bantum
- General Member
- Posts: 1957
- Joined: Sun Jul 29, 2012 4:30 pm
- Location: Northern Territory + QLD
- Contact:
... :like:
Well done, I like the wiring plug - will have to try them ... 
Cheers, Bantum ...
Cheers, Bantum ...
- vincentvega
- Senior Member
- Posts: 2446
- Joined: Tue Oct 04, 2005 10:00 am
- Location: Brisvegas
- Contact:
Valve shims. It only took me a few months to get these out of the spare motor. Ended up just prying the buckets down with a screwdriver, exactly what I didn't want to do.. but it worked.
And since I'm a visual kinda guy I set it all out so I know what is going on. I'll buy a micrometer tomorrow, measure these bad boys up and 1 - order some new shims or 2 - see if a machine shop will sort it out.
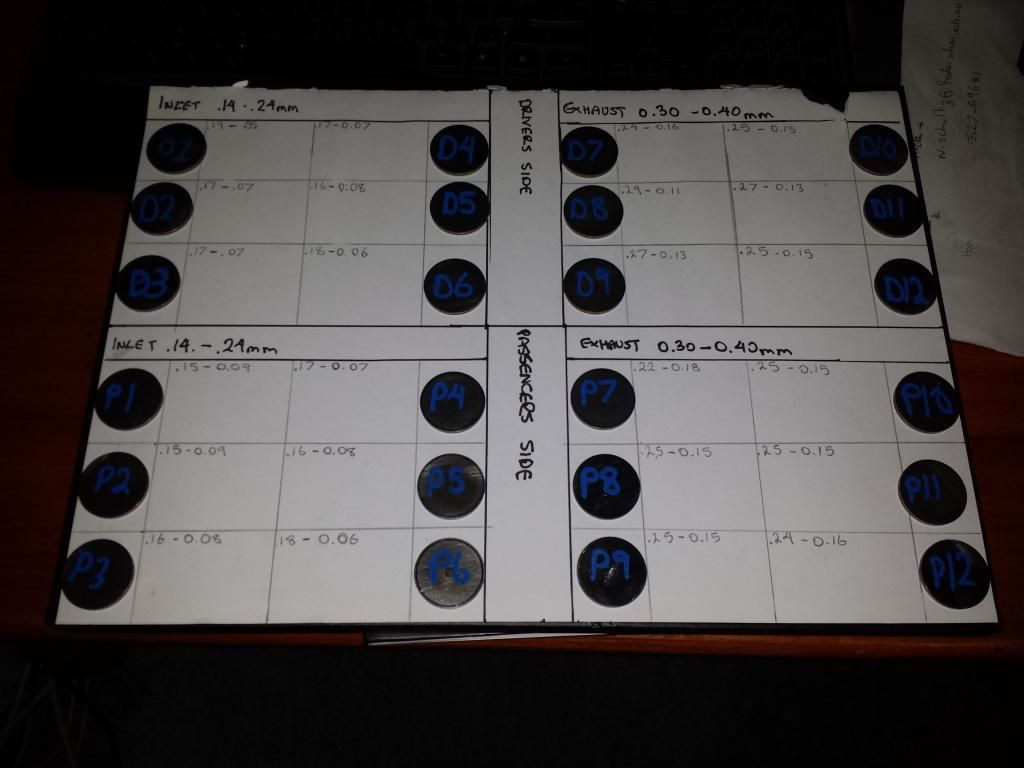
I've written down the valve clearance measured minus the thickness needed to achieve the desired clearance. As you can see intake valve clearances are all within spec, but only just. Exhaust valve clearances are all out of spec.
The clearances on this style shim over bucket design will get tighter as they wear, hence I am aiming for the upper end.
And since I'm a visual kinda guy I set it all out so I know what is going on. I'll buy a micrometer tomorrow, measure these bad boys up and 1 - order some new shims or 2 - see if a machine shop will sort it out.

I've written down the valve clearance measured minus the thickness needed to achieve the desired clearance. As you can see intake valve clearances are all within spec, but only just. Exhaust valve clearances are all out of spec.
The clearances on this style shim over bucket design will get tighter as they wear, hence I am aiming for the upper end.
[SIGPIC][/SIGPIC]
- Bantum
- General Member
- Posts: 1957
- Joined: Sun Jul 29, 2012 4:30 pm
- Location: Northern Territory + QLD
- Contact:
Noice One ...
Looks good, even got the aircraft theme going with holes in the bolt head - good enough to 'chain wire' them together & help stop losing them if they come loose ... 
Ya gotta give the rest of the motor a bit of a spruce up & make it look as good now ...
Cheers, Bantum ...
Ya gotta give the rest of the motor a bit of a spruce up & make it look as good now ...
Cheers, Bantum ...
I thought the new shiny bolts matched well to the aluminium oxide 
The exhaust valve clearance tolerance I had wasn't right, it must be for a later EZ motor. Found another source with pictures (Technical Ref) and confirmed with some diagrams on a Subaru parts website. Exhaust is 0.25 +/- .05 mm. So in fact exhaust side is all in spec. Which is good, I was a little concerned a motor with 80,000km would be so far out of spec. What I will do is make the new target for the exhaust side .25, since that is what most of them are and leave the ones which are slightly over.
A lot of those inlet shims I could probably leave... but hopefully I can shuffle a few around and I don't have to buy too many.
Another tool on the shopping list I reckon is a smaller torque wrench. A lot of this motor stuff is around 5nm which my bigger one doesn't get close to. Maybe been a bit picky but I'd rather have the confidence I'm doing the job properly, getting even tension, etc.
[SIGPIC][/SIGPIC]
- vincentvega
- Senior Member
- Posts: 2446
- Joined: Tue Oct 04, 2005 10:00 am
- Location: Brisvegas
- Contact:


