Page 6 of 10
Posted: Sat Oct 29, 2011 10:31 am
by Dann
I've only done my headlights only because I'm planning to get new spotties in the near Future then i'll Convert them too, usless they already HID. But yeah casue my spotties do nothing now LOL, they do haelp alittle but not much,
Guy, haha thats funny, yeah I've had some one do that too, paople hate HID's... unless you the one with them :P
Posted: Sat Oct 29, 2011 1:36 pm
by Brumby Kid
Are HID's globes? So if i wanted new globes, HID's? Or do you buy the globes and add a kit?
Posted: Sat Oct 29, 2011 2:51 pm
by guyph_01
they are part of a kit. The globe needs a ballast to work
Posted: Sat Oct 29, 2011 3:09 pm
by RSR 555
Dann wrote:Ok guys after swapping back to the old globes for abit of a photo shoot, heres the before and after shoots as promised,
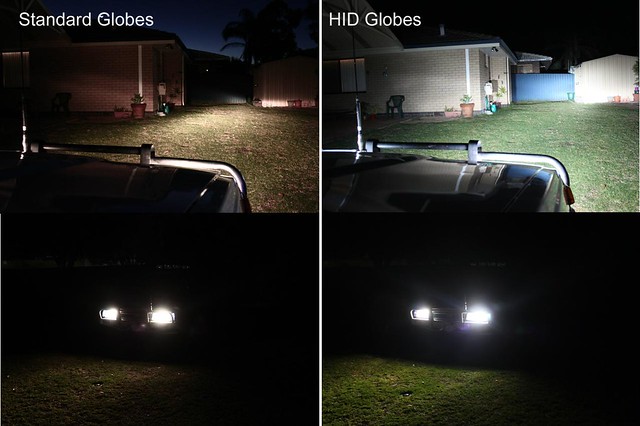 HID lights
 by
Dann_Evans, on Flickr
Dann.. this shot looks like low beam on your original lights? or am I seeing it wrong? because I can see the LH side kickup which you don't really see on high beam.
guyph_01 wrote:they are part of a kit. The globe needs a ballast to work
Yeah.. some people are trying to sell HID lights that are just higher output but the kits must come with a ballast or your getting jibbed.
Posted: Sat Oct 29, 2011 6:12 pm
by Brumby Kid
guyph_01 wrote:they are part of a kit. The globe needs a ballast to work
So I may as well get HID's rather than just better globes, I will probebly need new lights completely actually.
Posted: Sat Oct 29, 2011 9:59 pm
by Dann
Paul the two photos are both on low beam,
and brumby kid as guy said the kit comes complete with the globes, ballast and the wiring.
Posted: Sun Oct 30, 2011 11:57 am
by RSR 555
Dann wrote:Paul the two photos are both on low beam
Wow.. that is cool.. and I can see why people will be flashing their high beams at you. I would definately adjust them.
I've found the best way to adjust is at night time, pull up to a wall (about a metre away) make sure both are set at the same height, then mark a spot on the wall and reverse the car back (about 5 metres from the wall) and see if the line has dropped.. if not turn it so it's about 4 inches below. It's not perfect but it works everytime.
Posted: Sun Oct 30, 2011 1:52 pm
by guyph_01
RSR 555 wrote:Wow.. that is cool.. and I can see why people will be flashing their high beams at you. I would definately adjust them.
I've found the best way to adjust is at night time, pull up to a wall (about a metre away) make sure both are set at the same height, then mark a spot on the wall and reverse the car back (about 5 metres from the wall) and see if the line has dropped.. if not turn it so it's about 4 inches below. It's not perfect but it works everytime.
Thats about what we did with my bro's RS and he never annoyed other drivers since:)
Posted: Sun Oct 30, 2011 11:57 pm
by El_Freddo
RSR 555 wrote:That's usually where you can find the cheapest ATF

BTW Bennie.. do you have the Liberty or L rack in Ruby?
( sorry Dann for the highjack

)
L series rack with the liberty lines and PS pump. But my PS pump shagged out last thursday night, so Dann I suggest you go out and order a 5PK685 or a 4PK685 - the 5PK is the same width as a stock belt, 5 ribs where as the 4PK is only a 4 rib belt

RSR 555 wrote:I've found the best way to adjust is at night time, pull up to a wall (about a metre away) make sure both are set at the same height, then mark a spot on the wall and reverse the car back (about 5 metres from the wall) and see if the line has dropped.. if not turn it so it's about 4 inches below. It's not perfect but it works everytime.
That's a great way to adjust your headlights Paul!
I've decided that I hate HIDs and those xenon blue lights - they're soooo glaring it's not funny, plus those projectors lights are more distracting than the traditional lights when the passing vehicle is going over bumps. I'd much rather the series one AU low beams over HIDs and blue xenon lights!
Cheers
Bennie
Posted: Mon Oct 31, 2011 4:24 pm
by RSR 555
El_Freddo wrote:L series rack with the liberty lines and PS pump. But my PS pump shagged out last thursday night, so Dann I suggest you go out and order a 5PK685 or a 4PK685 - the 5PK is the same width as a stock belt, 5 ribs where as the 4PK is only a 4 rib belt
That's a great way to adjust your headlights Paul!
I've decided that I hate HIDs and those xenon blue lights - they're soooo glaring it's not funny, plus those projectors lights are more distracting than the traditional lights when the passing vehicle is going over bumps. I'd much rather the series one AU low beams over HIDs and blue xenon lights!
Cheers
Bennie
Yeah.. the smaller belt does sound like a good idea.. even my best mate Joe has a 2006 Outback that busted the p/s pulley on his trip over east at easter this year.
I wasn't a big fan on HIDs at first but I think it's if people buy the cheaper kits that don't have the proper cover to stop the low beam shine correctly and make it very hard to pass (oncoming) them on narrow roads.
I think the correct type HID globes and adjusted correctly you'd be happy.
Posted: Tue Nov 01, 2011 6:46 pm
by NachaLuva
RSR 555 wrote:I wasn't a big fan on HIDs at first but I think it's if people buy the cheaper kits that don't have the proper cover to stop the low beam shine correctly and make it very hard to pass (oncoming) them on narrow roads.
I think the correct type HID globes and adjusted correctly you'd be happy.
Thats exactly right...people who dont adjust their high power lights whether HID or halogen need a good kick up the ****! Its so selfish & dangerous as well as stupid. Not only do they cause fatigue in oncoming drivers they can even blind the driver enough to cause them to crash. As they have an unroadworthy car they are now liable to criminal charges. & i say good!
If you get high power lights, adjust em! its so easy. Apart from doing the right thing it will save you from a lot of pain if anything does go wrong plus it keeps the cops off your back.
my 2c worth
")
Update- ej22
Posted: Fri Nov 04, 2011 12:08 am
by Dann
Ok guys well enough bit$@ing on my thread lol.
So IT HAS BEGUN!!!!
I Started the engine conversion yesterday, pulled the fenders, bullbar, and got the Ea82 all ready to be pulled, basically lots of prepping.
Today I pulled the ea82 out, I placed the power steering rack with l series end on, did abit more prepping like cleaning the engine bay, making thing pretty lol, (not as far as getting sponsored by maccas but just cleaning all the mud off).
Getting pretty tired, been working on it til late then starting work at 6.
This weekend will be full on, playing with the adapter plate alittle, swapping fuel tanks and lines running loom and putting ej22's in
.
Hopefully all goes well and everything just fits together,
Anyway thats my little update, heres a couple of pics to go with it.
Just a quick Before shot,
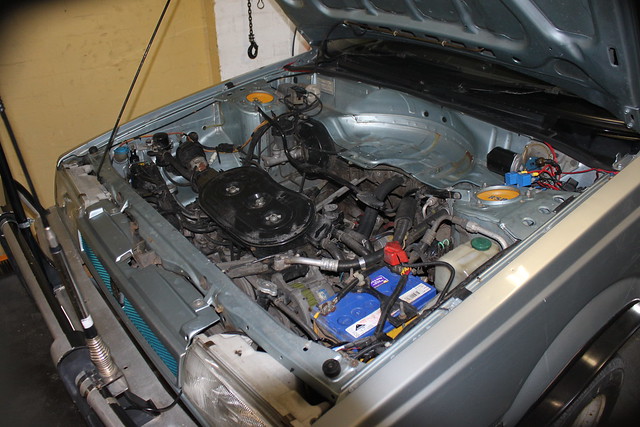 EA82 waiting (before)
 by
Dann_Evans, on Flickr
Thats the last time the EA82's going to be in there,
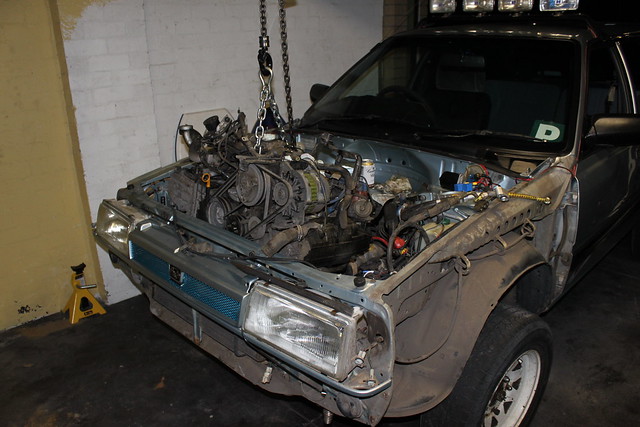 The last time that engine going to be in there
 by
Dann_Evans, on Flickr
All clean and Ready,
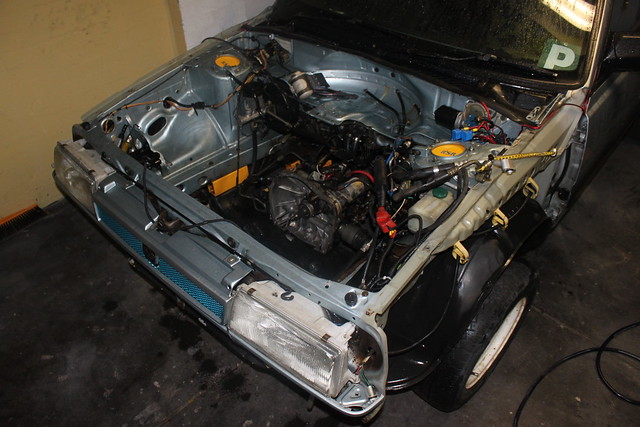 MMMMMmmm somethings missing
 by
Dann_Evans, on Flickr
Posted: Fri Nov 04, 2011 2:08 am
by guyph_01
Sorry but You are already half sponsored by Maccus with those yellow Lift blocks Paul did for you, lol. Anyway, don't worry and specially don;t be ashamed of what you do to your car. I know plenty of people gave me shit about mine but i can tell you that many of them envie the car:p
Can't wait till we can all go on a trip with your blue, john's white and the twins:)
Posted: Fri Nov 04, 2011 1:58 pm
by NachaLuva
guyph_01 wrote:Sorry but You are already half sponsored by Maccus with those yellow Lift blocks Paul did for you, lol. Anyway, don't worry and specially don;t be ashamed of what you do to your car. I know plenty of people gave me shit about mine but i can tell you that many of them envie the car:p
Can't wait till we can all go on a trip with your blue, john's white and the twins:)
Hahaha yeah i like the yellow blocks too hehe.
my only worry would be if they are visible to Mr.Plod driving by...he doesnt like anything non-standard
Good luck with the conversion, hope it all goes smoothly

Posted: Fri Nov 04, 2011 7:47 pm
by RSR 555
nachaluva wrote:Hahaha yeah i like the yellow blocks too hehe.
my only worry would be if they are visible to Mr.Plod driving by...he doesnt like anything non-standard
Good luck with the conversion, hope it all goes smoothly
Very hard to see them but the ones you can see are only 2" so all is good
Dann.. why for you remove the guards?
Posted: Sun Nov 06, 2011 1:32 am
by Dann
guyph_01 wrote:Sorry but You are already half sponsored by Maccus with those yellow Lift blocks Paul did for you, lol. Anyway, don't worry and specially don;t be ashamed of what you do to your car. I know plenty of people gave me shit about mine but i can tell you that many of them envie the car
Can't wait till we can all go on a trip with your blue, john's white and the twins
Yeah Guy The yellow blocks where abit of a shock when paul first showed them to me, but they've grown on me now
Can't wait for everyone to get ready and go on a trip.
nachaluva wrote:Hahaha yeah i like the yellow blocks too hehe.
my only worry would be if they are visible to Mr.Plod driving by...he doesnt like anything non-standard
Good luck with the conversion, hope it all goes smoothly
Yeah i dont like be the one that stands out to the policia, perfer to be looking normal and discreet, but it's kinda hard when you pull up next to a stock L series, lol. and yes the conversions going great... so far
RSR 555 wrote:Very hard to see them but the ones you can see are only 2" so all is good
Dann.. why for you remove the guards?
The reason I took the guards off was because some guy decided to halp me put 3 inch body lift in and now I gotta lean over the side and it seems to get scratched and dirty, and I need to run the wiring loom,
So the Update for today,
I started the day pretty late, partly because I got distracted by the family of kookaburras, the male was flying into the car and house windows every minute or too, it was trying to protect it's baby...from it's self?? hahah
but yeah thought it was a good photo opportunity.
Anyway back to the car, I ran the fuel lines today put the EFI tank in, dad helped me adapt the adapter plate, dad wasn't convinced that the normal way the bolts where attached was up to his engineering standards, so he helped me do that, i'll put up pictures of it after,
put all the trim back together only to find i'd left a screw driver under the vinyl, and... Got the engine in!!!! woooohh so happy now, finally after so long it's all starting to come together.
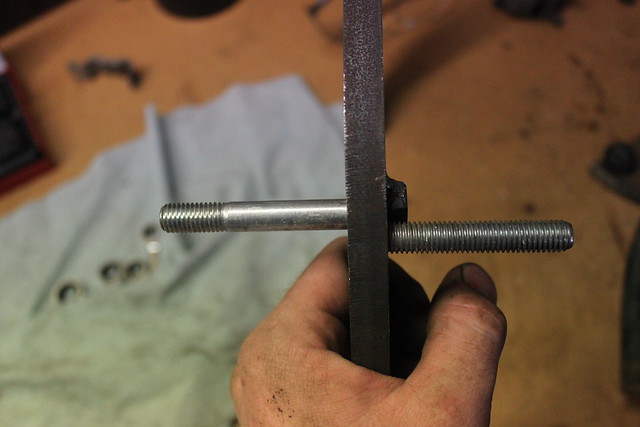
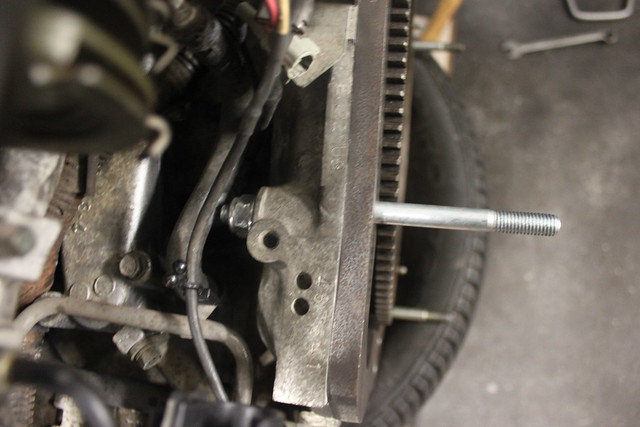
heres some pics of the adapter plate adapted,
basically we drilled out the engine side of the top two holes then tapped and welded a tread in the adapter plate then going the other way we, shaved the bolt head down on one side and welded it to the adapter plate and cut the engine alittle to mount flush with the bolt head sticking out.
 Adapter plate
 by
Dann_Evans, on Flickr
 Adapter plate
 by
Dann_Evans, on Flickr
 Adapter plate
 by
Dann_Evans, on Flickr
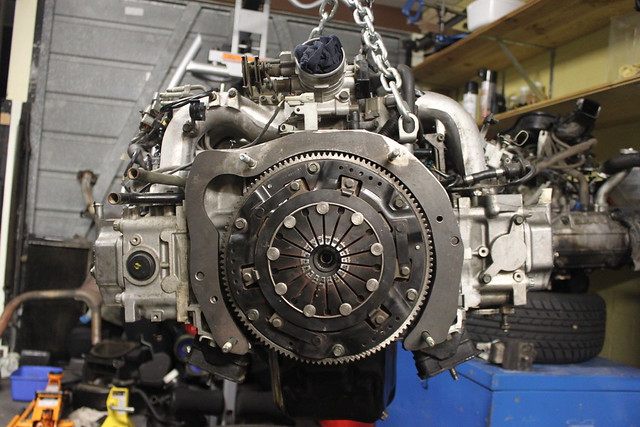 Ej22 with Adapter plate
 by
Dann_Evans, on Flickr
The lowering of my sexy new EJ22
 The lowering
 by
Dann_Evans, on Flickr
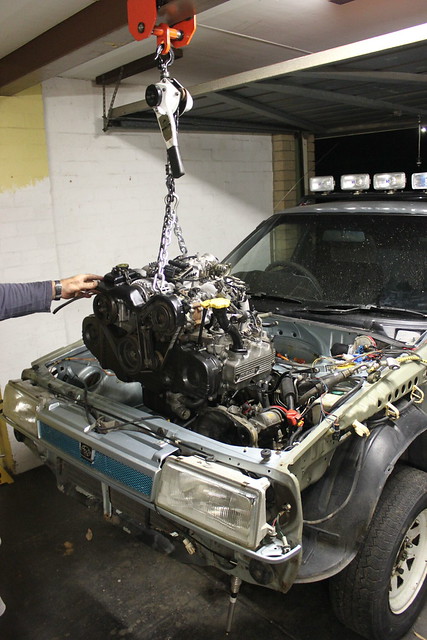
And it's finally in wooooh
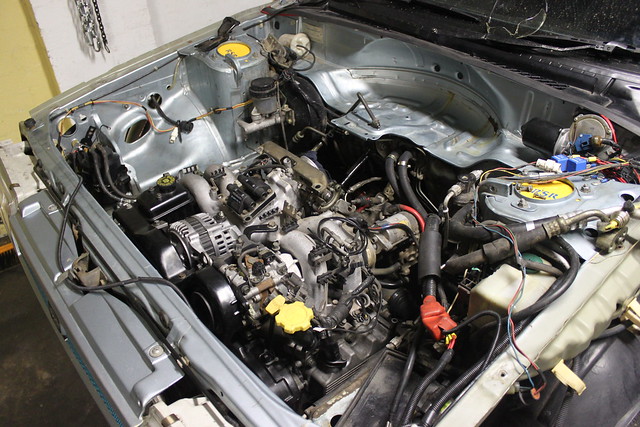 EJ22 is in
 by
Dann_Evans, on Flickr
And just wondering what is this and what is it for, do I need it??
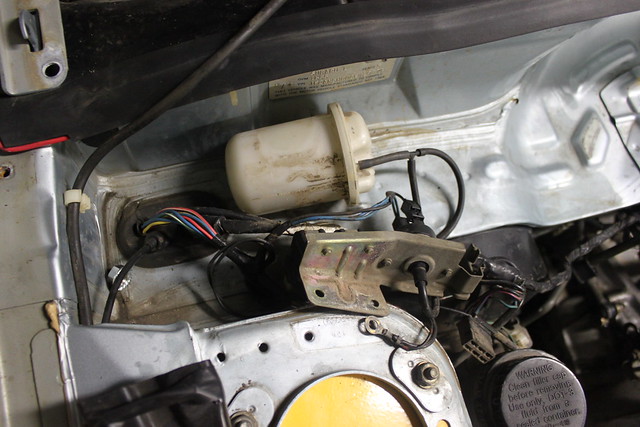 WTF
WTF by
Dann_Evans, on Flickr
Posted: Sun Nov 06, 2011 1:36 am
by Dann
Theses are some pictures of the kookaburras that got me distracted
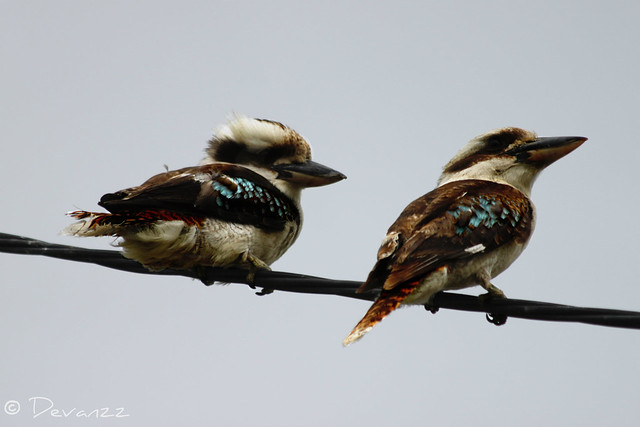 mum and dad
 by
Dann_Evans, on Flickr
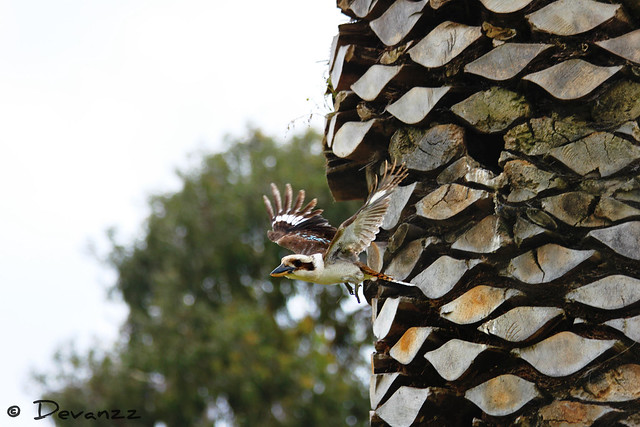 Kookarburra
 by
Dann_Evans, on Flickr
 Baby birdy
 by
Dann_Evans, on Flickr
Posted: Sun Nov 06, 2011 2:07 am
by guyph_01
Dann wrote:
And just wondering what is this and what is it for, do I need it??
WTF by
Dann_Evans, on Flickr
Every one doing ej conversions seem to ask the same question:p
Its a vacuum tank for you vacuum activated air control vent. You don't really need it. All you have to do is get the vacuum line that goes in the car extended and hook it up to the engine. The series one EJ had this little tab that you can use to hook it up too straight to the manifold.
Check post 533 on this build
showthread.php?p=182977#post182977
Pretty sure Bennie or maybe John would have something about that vacuum tank on there build thread..
Apart from that great work on the conversion and it looks very very clean. just need an engine cover over the top of that engine now:)
Posted: Sun Nov 06, 2011 11:32 am
by Dann
Thanks guy will do alittle research on it, I'm pretty sure I know the line you talking bout, and yeah I've got the cover but thats like the icing it goes on last
Posted: Sun Nov 06, 2011 2:00 pm
by Dann
hey guys is this the vacuum hose I use to replace the canister in the previous photo, do I just use the hose to hose or do I need all the wires still??
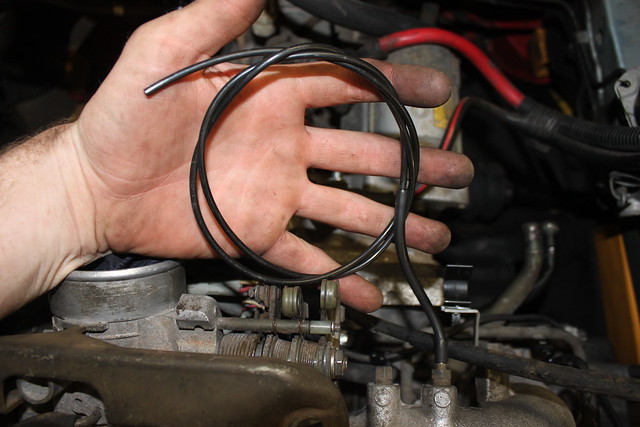 IMG_3462
 by
Dann_Evans, on Flickr