Also posted on VW trike subaru conversion
Bennie (EL Freddo) spent the best part of the day at my place in Strathbogie. A great time we had.
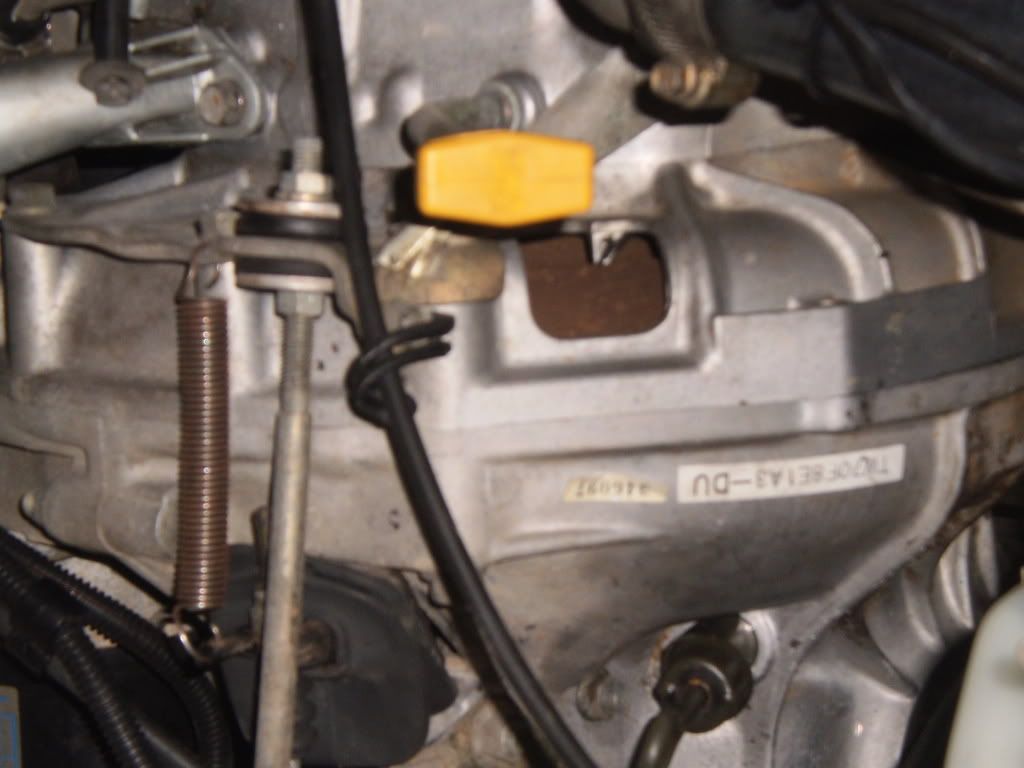
Among the things we did was check his ea81 Brumby timing. It was at the 8 degrees required. And where was the notch on the crankcase pully? it was dead centre of the block halves!!
Regular readers will recall that when I carried out my ea81 conversion mating it to my type 3 VW auto transmission, that the timing marks on the flywheel disappeared when the flywheel was discarded. This left me wondering how to time the engine.
There is a notch on the front pully. I had incorrectly assumed this notch was TDC. I tuned my engine to 8mm advanced from this point. Because the pully is 360mm in circumference that meant 8 degrees (which was wrong...it was actually 16 degrees. Well it pinged so much on 95RON that I kept backing the advance off. 4 adjustments later it stopped pinging and that mark lined up on the block halves with the timing light.
When we checked Bennie's timing 8 degrees on the flywheel meant that the notch lines up on the block halves. This meant that the timing of my ea81 engine ended up correct at 8 degrees. Amazing I feel because the method I used was the old one whereby I would ride up a hill in a taller gear and back off the timing until it stopped pinging.
So anyone that wants to time their ea81 engine by the front pulley notch can safely assume that the notch lines up with the centre line of the block halves is 8 degrees not TDC.
Thanks Bennie.
ea81 timing without flywheel
-
Tweety

- General Member
- Posts: 1253
- Joined: Mon Jul 04, 2011 9:45 am
- Location: ea81 powered trike Victoria
ea81 timing without flywheel
[SIGPIC][/SIGPIC]Tweety trike- EA81 (full reco 2014) 32/36 weber, SPFI manifold, 9.5:1 CR, VW auto.
-
Brumby Kid

- General Member
- Posts: 1297
- Joined: Sun Jul 17, 2011 9:19 pm
- Location: Belair S.A.
Where is the timing mark ment to be? There is a rectangular hole in my flywheel housing. (ment to be there), I'm wondering if that is where i'm ment to be looking?
When life gives you a corner, drop a gear, pitch, and stomp the loud pedal
Bianca: 1991 Subaru Brumby
My First / Project car
EA81 Rebuilt by Tony Knight from knight Engines
2" body lift
25" 185r14 Yokahama Delivery Star, light truck tyres
2" Sports exhaust
Rear Aguip step/bar
Liberty seats
Mums Car 08 Liberty Wagon
Bianca: 1991 Subaru Brumby
My First / Project car
EA81 Rebuilt by Tony Knight from knight Engines
2" body lift
25" 185r14 Yokahama Delivery Star, light truck tyres
2" Sports exhaust
Rear Aguip step/bar
Liberty seats
"Bianca"
[SIGPIC][/SIGPIC]
Dads Car: 02 Impreza WRX STi[SIGPIC][/SIGPIC]
Mums Car 08 Liberty Wagon
-
Silverbullet

- Senior Member
- Posts: 2953
- Joined: Mon Aug 23, 2010 6:20 pm
- Location: Adelaide
You learn something new every day hey! That's a handy bit of info, I'll commit that to long term memory 
That's right Cam, there should be a rubber plug for that hole as well. If you turn over the engine by hand you will eventually see some numbers, either side of a 0. find the eighth mark on the minus side of the zero and put a paint line on it. Then when you hook up a timing light and point it at the hole at idle at operating temp that pointer should line up with the stationary paint line.
That's right Cam, there should be a rubber plug for that hole as well. If you turn over the engine by hand you will eventually see some numbers, either side of a 0. find the eighth mark on the minus side of the zero and put a paint line on it. Then when you hook up a timing light and point it at the hole at idle at operating temp that pointer should line up with the stationary paint line.
Will it ever end!?
-EA81 TWIN CARB!!!!
-L series 5 speed
-Custom paint job
-2" lift
-Full custom re-wire
-L series front end

-EA81 TWIN CARB!!!!
-L series 5 speed
-Custom paint job
-2" lift
-Full custom re-wire
-L series front end
-
Brumby Kid
- General Member
- Posts: 1297
- Joined: Sun Jul 17, 2011 9:19 pm
- Location: Belair S.A.
Ok, Could we perhaps right down how to do this propelly step by step?
This would really help, shouldn't the flywheel spin with the engine?
Im still slightly confused about how to do the timing of a car.
Thanks Cam
This would really help, shouldn't the flywheel spin with the engine?
Im still slightly confused about how to do the timing of a car.
Thanks Cam
When life gives you a corner, drop a gear, pitch, and stomp the loud pedal
Bianca: 1991 Subaru Brumby
My First / Project car
EA81 Rebuilt by Tony Knight from knight Engines
2" body lift
25" 185r14 Yokahama Delivery Star, light truck tyres
2" Sports exhaust
Rear Aguip step/bar
Liberty seats
Mums Car 08 Liberty Wagon
Bianca: 1991 Subaru Brumby
My First / Project car
EA81 Rebuilt by Tony Knight from knight Engines
2" body lift
25" 185r14 Yokahama Delivery Star, light truck tyres
2" Sports exhaust
Rear Aguip step/bar
Liberty seats
"Bianca"
[SIGPIC][/SIGPIC]
Dads Car: 02 Impreza WRX STi[SIGPIC][/SIGPIC]
Mums Car 08 Liberty Wagon
-
Tweety
- General Member
- Posts: 1253
- Joined: Mon Jul 04, 2011 9:45 am
- Location: ea81 powered trike Victoria
I'll try and others can improve on it Brumby Kid.
Yes the flywheel spins with the engine running.
Buy a timing light, one with 12 volt leads. connect the leads to the battery terminals and the third odd shaped connector to the number one spark plug lead front left hand plug as you look at the engine form the grill area.
Get a socket to fit the front centre bolt inside the crank pully. turn the motor over by hand until the timing marks show up in that small square window at the rear of the engine. Now as silverbullet said there will be a zero....that is top dead centre. This also means the piston in number one cylinder is at the very top of its position. Dont forget to take off that socket.
You will also see marks on the flywheel. Where there is a -8 mark the small groove with some white out or white paint. if it smudges wipe off the excess so the paint only shows in the small narrow slot. Disconnect the vacuum tube running from the distributer and plug it with a small screw so it doesnt leak (this garantees no vacuum advance while tuning). Start engine.
Squeeze the timing light and it will flash. Aim it at the square hole. If the white mark doesnt meet up with the pointer then you need adjustment. eg -8 should line up with the pointer. Unscrew the small 10mm bolt on the distributer adjustment and turn it either way until the 8 degree mark meets with the pointer.
Tighten up the adjuster, reconnect the vacuum.
The alternative is to use the timing light on the front pully. Find the notch in the pulley and mark it. Adjust the dizzy till the mark is exactly lined up on the two block halves when the timing light is flashing. That's 8 degrees- is what we found out today.
Tuning an engine is done almost blindfolded by some after many years. I suggest you buy a tuning book and engine manual. There is a priority when doing it. Spark plug adjust gap or replace and adjust gap, tappets, points, timing, air mixture, idle speed, secondary throat adjustment etc...doing it out of sink will cause problems. eg adjusting air/fuel mixture first is a no no. wasting your time because all the other adjustments will upset that adjustment. If you are servicing the engine as well then you do that first. Reason is that when the oil is new and nice and slippery the engine idle will increase, a clean air filter can cause the same.
After 20 years or so you will listen to your engine. You will know how to adjust it to get it running the best.
Some improvements like iridium spark plugs (change every 60-100,000kms) not needing adjustment and electronic ignition (never needing point adjustment) can cut tuning time and labour a lot. If you can afford these things then I recommend it.
I've learned all this the hard way. An easy method of avoiding heartache and time wasting as well as expence is asking others for advice. Just like you are doing here. It will pay off and others here like to help out.
Good luck
[SIGPIC][/SIGPIC]Tweety trike- EA81 (full reco 2014) 32/36 weber, SPFI manifold, 9.5:1 CR, VW auto.
-
El_Freddo

- Master Member
- Posts: 12707
- Joined: Tue Oct 04, 2005 10:00 am
- Location: Bridgewater Vic
- Contact:
You'll probably find that the flywheel numbers will look like this:
...........................A.............................................B
20 | | | | 15 | | | | 10 | | | | 5 | | | | 0 | | | | 5 | | | | 10 | | | | 15 | | | | 20
The "15" may not be there, I can't remember and the .... aren't there, I've done that for spacing.
The bottom of the numbers is at the front of the subi. You'll want to clean off the numbers to make them easier to see when you're using the timing light.
Mark the 8 degrees before TDC with a little coloured texta, nail polish etc to make it easier to line up when you're tuning
And Tony, the thanks goes to you!
Cheers
Bennie

-
Silverbullet
- Senior Member
- Posts: 2953
- Joined: Mon Aug 23, 2010 6:20 pm
- Location: Adelaide
Ah yes thanks tweety I forgot to mention the vac advance line to the dizzy. I could have also explained better: the flywheel does turn with the engine. When you press the trigger on the timing light it flashes repeatedly at exactly the same time as number 1 cylinder sparks which should be 8 degrees before top dead center (TDC) and lights up a position on the flywheel for a split second so the flywheel will appear almost stationary. A long sentence I know 
Adjustments can be made to the dizzy while the engine is running to bring your paint mark at -8 exactly in line with the pointer. Then try tightening the bolt on the dizzy without knocking the timing out of adjustment...it's not fun
Also, you will find it very difficult to turn the engine over by hand with all the spark plugs in
This really needs a good step by step...maybe with pics, but I'm too tired right now
Will it ever end!?
-EA81 TWIN CARB!!!!
-L series 5 speed
-Custom paint job
-2" lift
-Full custom re-wire
-L series front end
-EA81 TWIN CARB!!!!
-L series 5 speed
-Custom paint job
-2" lift
-Full custom re-wire
-L series front end
-
Brumby Kid
- General Member
- Posts: 1297
- Joined: Sun Jul 17, 2011 9:19 pm
- Location: Belair S.A.
Yes Please, then maybe a sticky for it, with both ways?Silverbullet wrote: This really needs a good step by step...maybe with pics, but I'm too tired right now
When life gives you a corner, drop a gear, pitch, and stomp the loud pedal
Bianca: 1991 Subaru Brumby
My First / Project car
EA81 Rebuilt by Tony Knight from knight Engines
2" body lift
25" 185r14 Yokahama Delivery Star, light truck tyres
2" Sports exhaust
Rear Aguip step/bar
Liberty seats
Mums Car 08 Liberty Wagon
Bianca: 1991 Subaru Brumby
My First / Project car
EA81 Rebuilt by Tony Knight from knight Engines
2" body lift
25" 185r14 Yokahama Delivery Star, light truck tyres
2" Sports exhaust
Rear Aguip step/bar
Liberty seats
"Bianca"
[SIGPIC][/SIGPIC]
Dads Car: 02 Impreza WRX STi[SIGPIC][/SIGPIC]
Mums Car 08 Liberty Wagon

-
El_Freddo
- Master Member
- Posts: 12707
- Joined: Tue Oct 04, 2005 10:00 am
- Location: Bridgewater Vic
- Contact:
No. The dizzy would also turn clockwise - the cam shaft turns anticlockwise which then turns the dizzy clockwisesteptoe wrote:someone tell which way the flywheel turns when viewed from the radiator - it goes clockwise so passes from left to right when viewed from the radiator. Ea81 dizzies spin anti clock ???
Cheers
Bennie
-
Silverbullet
- Senior Member
- Posts: 2953
- Joined: Mon Aug 23, 2010 6:20 pm
- Location: Adelaide
Are you sure? it's been a while since I was fiddling with the dizzy on mine but I thought it went anti clockwise...this is going to bother me until I go and see for myselfEl_Freddo wrote:No. The dizzy would also turn clockwise - the cam shaft turns anticlockwise which then turns the dizzy clockwise
Cheers
Bennie
Will it ever end!?
-EA81 TWIN CARB!!!!
-L series 5 speed
-Custom paint job
-2" lift
-Full custom re-wire
-L series front end
-EA81 TWIN CARB!!!!
-L series 5 speed
-Custom paint job
-2" lift
-Full custom re-wire
-L series front end


-
Silverbullet
- Senior Member
- Posts: 2953
- Joined: Mon Aug 23, 2010 6:20 pm
- Location: Adelaide
-
steptoe
- Master Member
- Posts: 11582
- Joined: Thu Oct 06, 2005 10:00 am
- Location: 14 miles outside Gotham City
maybe this will help

Uploaded with ImageShack.us
it is from a manual that is split in two sections - EA81 or EA82, this section does not differentiate between the two - so until further notice, they spin same way in both hemi's!
Post #10 remains unedited at the moment
Hey, shall we confuse the Kid with static timing and Ketterings ignition contact points, and timing with a light bulb, coupla wires ?
sneaks outside to physically check the EA81 Brumby
-
Tweety
- General Member
- Posts: 1253
- Joined: Mon Jul 04, 2011 9:45 am
- Location: ea81 powered trike Victoria
Brumby kid reminds me of myself back in 1981.
Put Lotus engine into car after head rebuild. had dizzy out etc. placed dizzy in and checked leads 1342 1342,,,,yep she's cool.
Spent next 3 days starting engine up and had a bad backfire. Cops called, neighbours yelling.
Rang a mechanic mate of mine. Described symptoms. His reply- "swap number 4 lead with number 1.
Ten seconds later- vrooooom!!!!
Moral of the story- good mechanical knowledge comes from - experience- listening- asking questions and being on Ausubaru forum.....but we didnt even have a computer then.
[SIGPIC][/SIGPIC]Tweety trike- EA81 (full reco 2014) 32/36 weber, SPFI manifold, 9.5:1 CR, VW auto.
-
El_Freddo
- Master Member
- Posts: 12707
- Joined: Tue Oct 04, 2005 10:00 am
- Location: Bridgewater Vic
- Contact:
We're not comparing dunnies are we???steptoe wrote:we are all correct - anti clockwise in southern hemisphere, clock in northern
I'm sure it runs clockwise, and since my post in #10 about the cam etc, I realised that it's run off the crank - but this can still make it run either way depending on the direction of the cam gearing on the crank. But I'm still sure it runs clockwise without having checked it. Same goes for the EA82.steptoe wrote:maybe this will help
Uploaded with ImageShack.us
it is from a manual that is split in two sections - EA81 or EA82, this section does not differentiate between the two - so until further notice, they spin same way in both hemi's!
Post #10 remains unedited at the moment
Hey, shall we confuse the Kid with static timing and Ketterings ignition contact points, and timing with a light bulb, coupla wires ?
sneaks outside to physically check the EA81 Brumby
I think I too will have to have a look tomorrow if a) the brumby hasn't been swept away with all this rain or b) it's no longer raining as heavily as it is now
Cheers
Bennie