Finally installing my lift kit!

User avatar
ratters
Junior Member
Posts: 33
Joined: Thu May 31, 2012 1:41 pm
Location: Sandy Bay / TAS

Finally installing my lift kit!

Post by ratters » Sat Nov 03, 2012 8:09 pm

So I found some motivation today to begin installing my lift kit which had sat in the garage for a good 6 months now. Didnt get off to a good start, rusted on lug nut + rattle gun:

Image

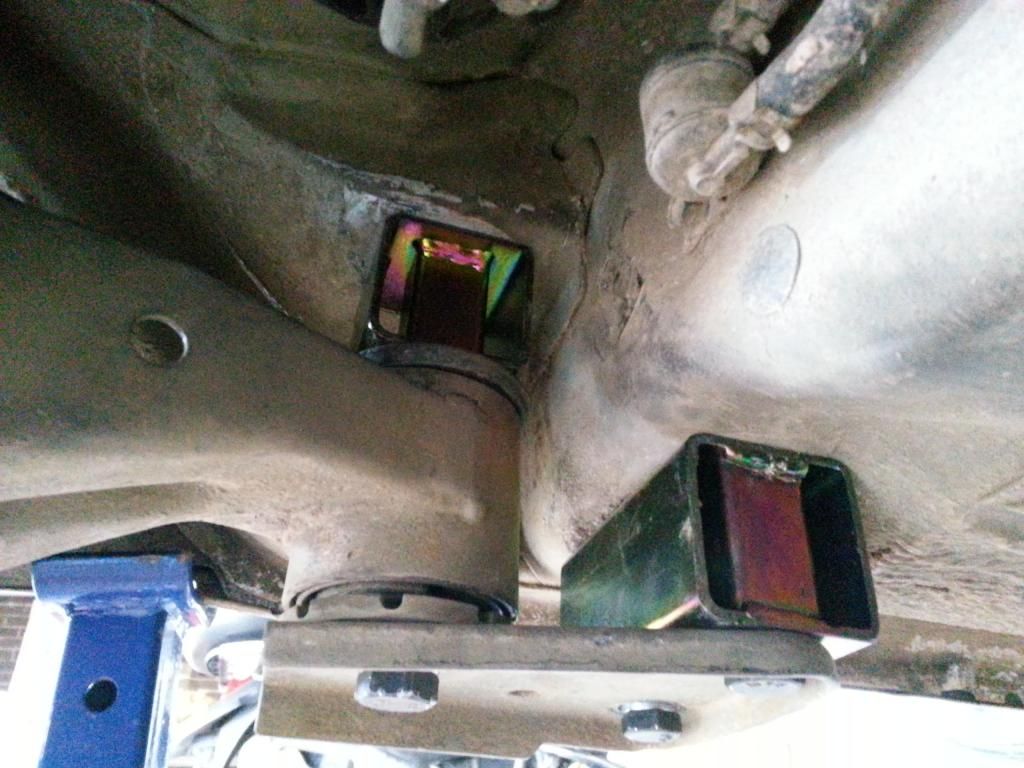
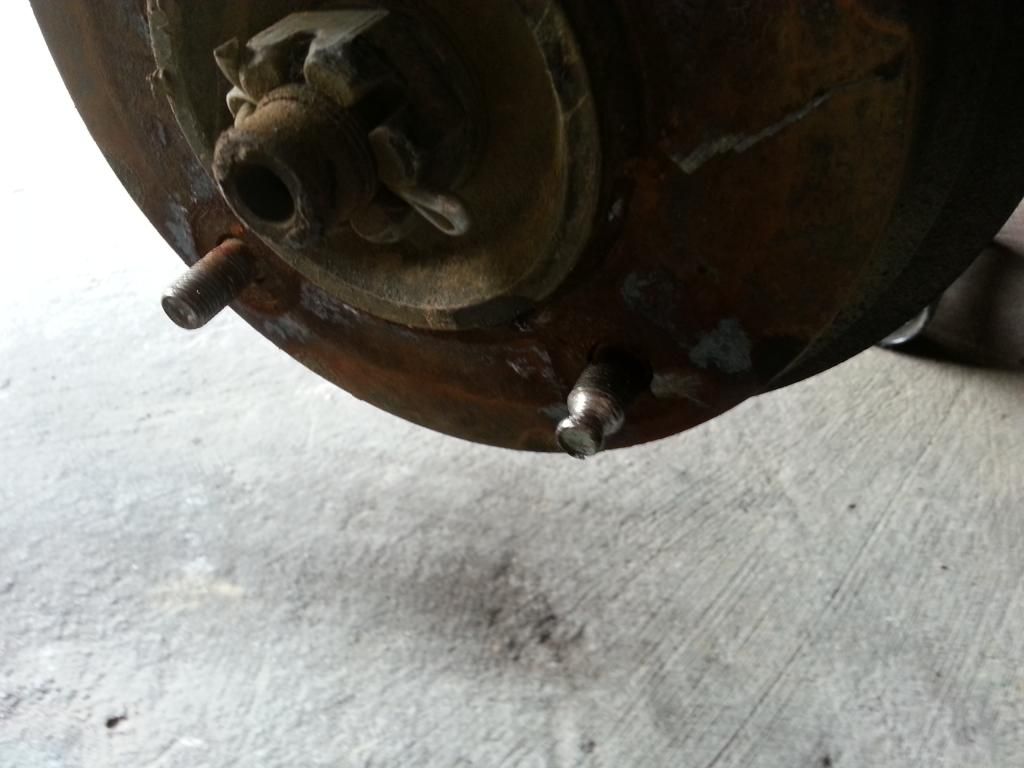
After that little mishap, it was all pretty much smooth sailing. Had no idea what I was doing due to the instructions being basically a single page diagram of roughly where each block goes. Started with the rear end, and thankfully it started to make sense pretty quick what I needed to do.

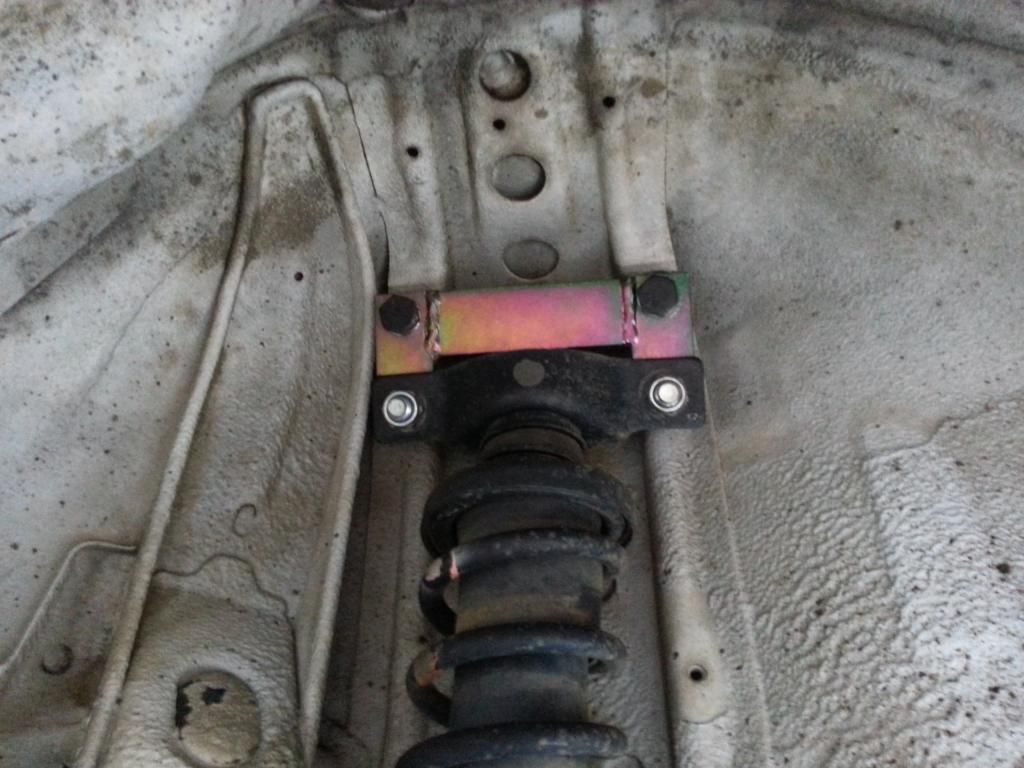
The blocks in place:

Image

Image

Image

Image

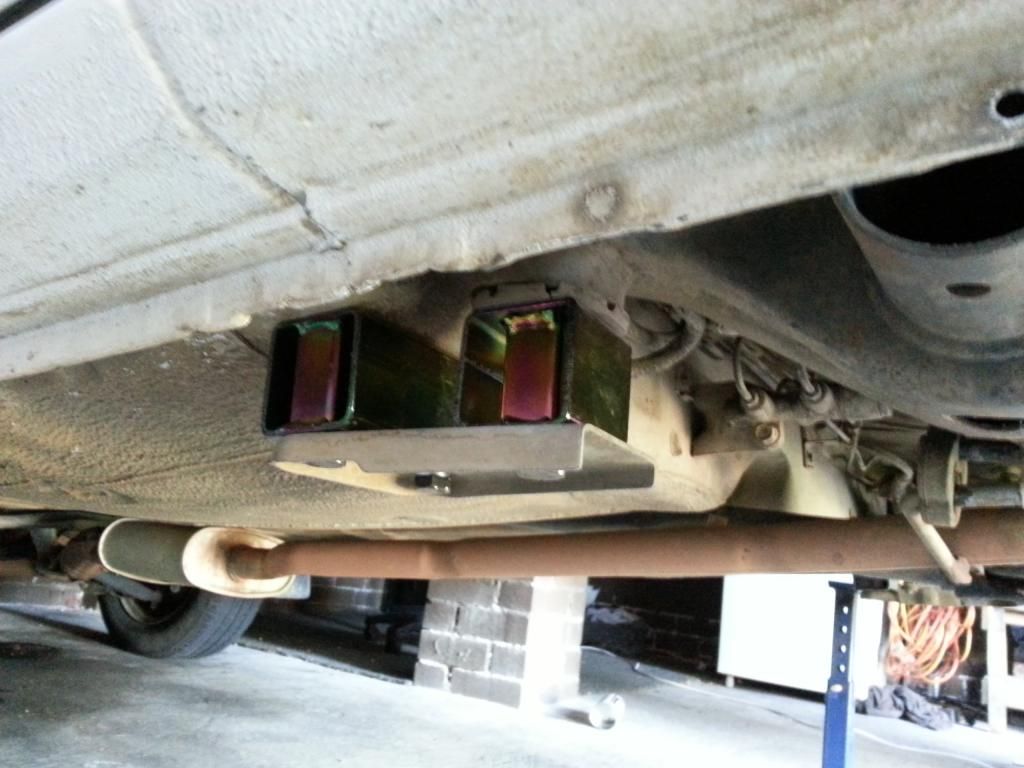
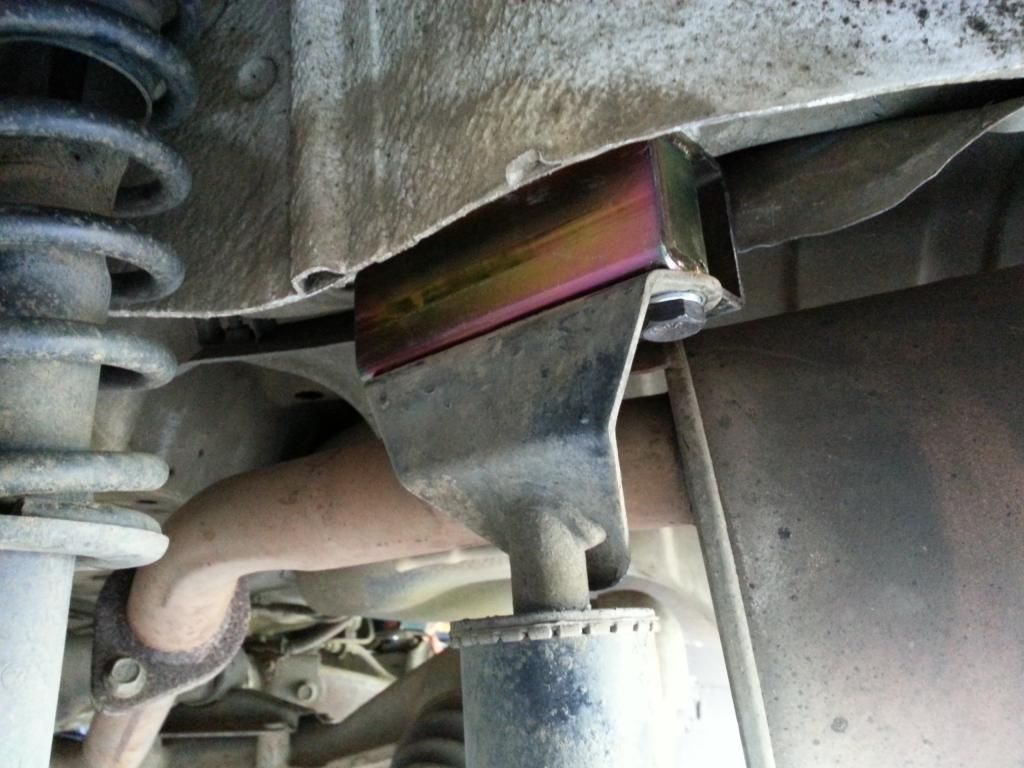
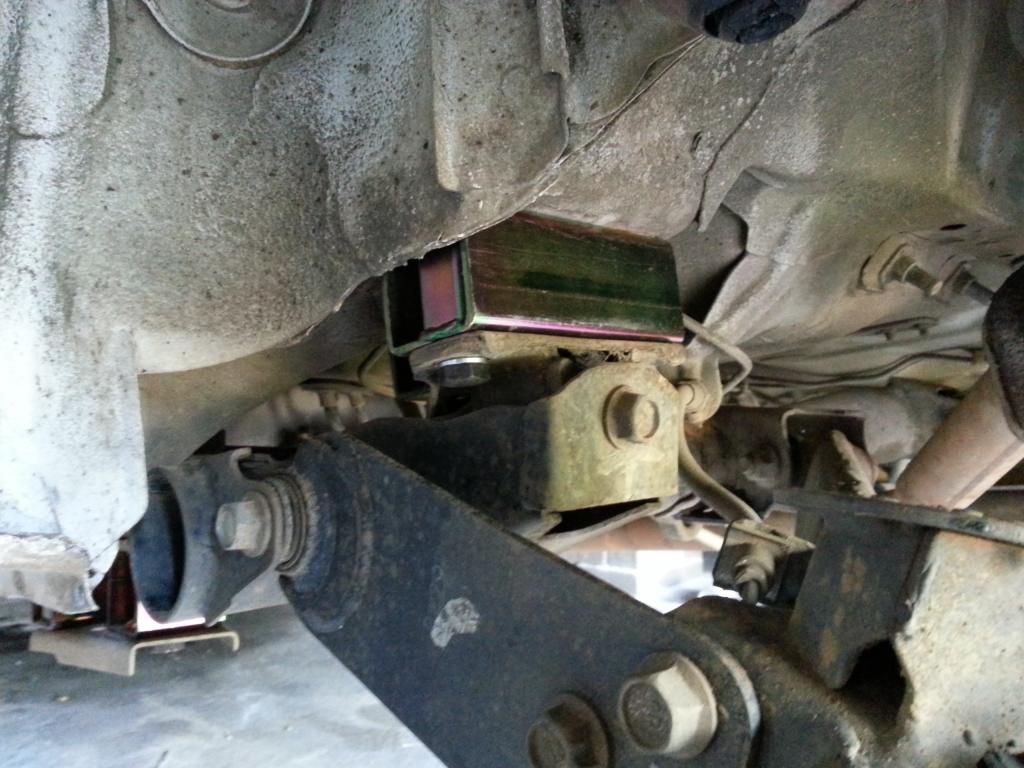
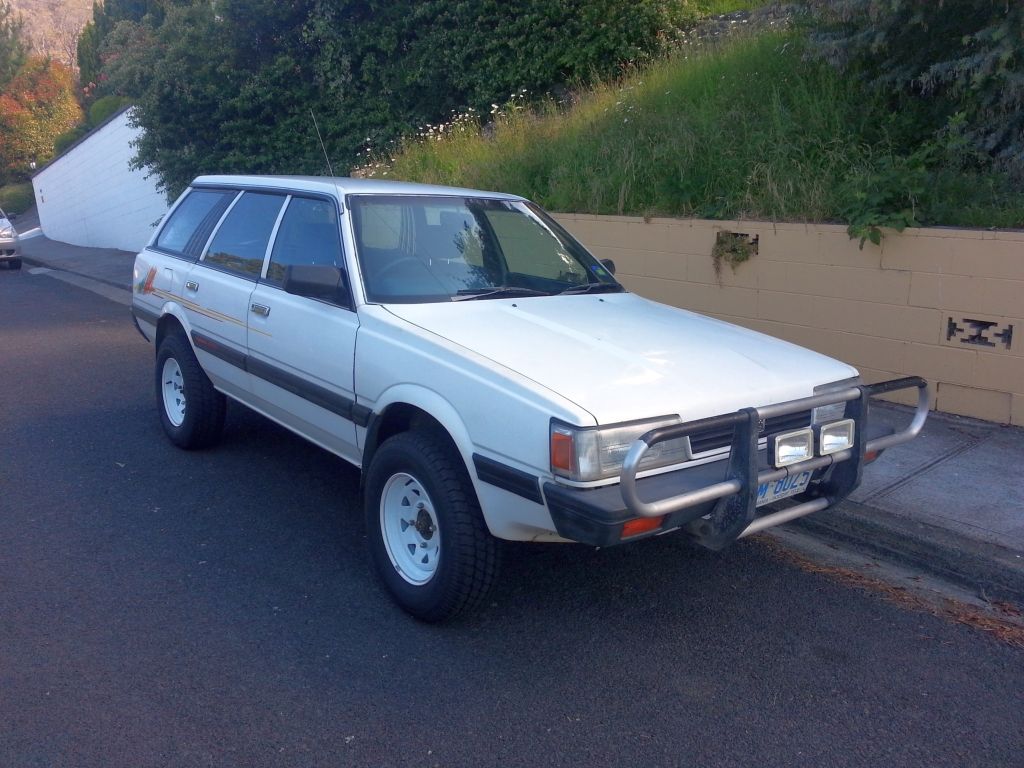
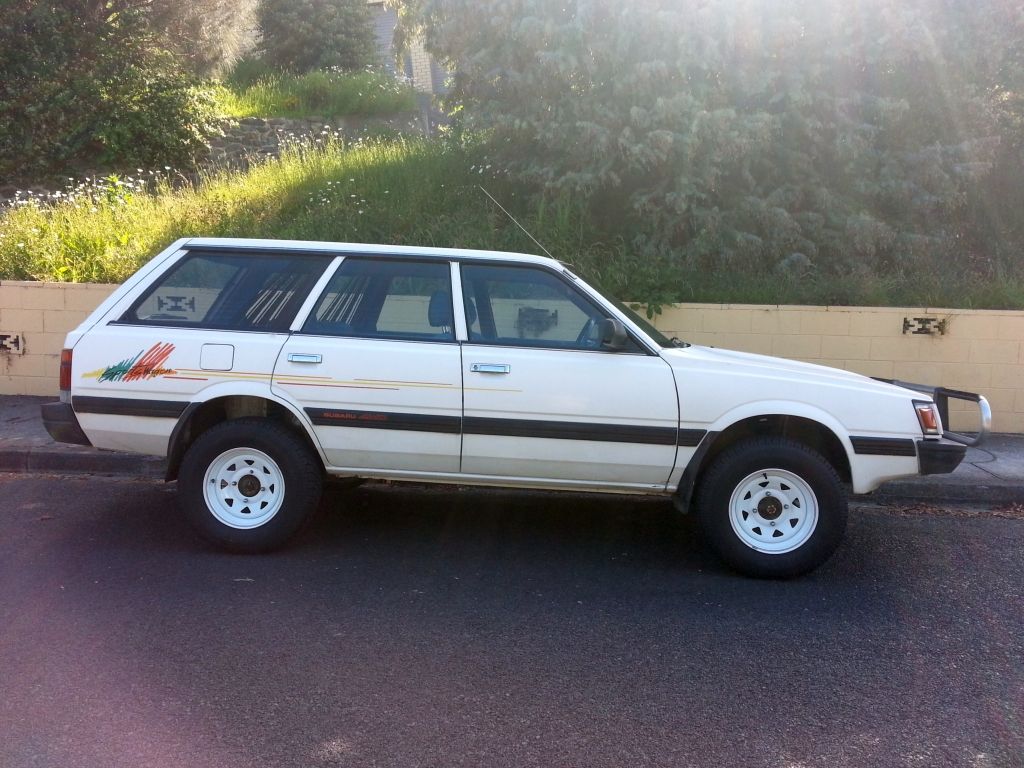
And the final product:

Image

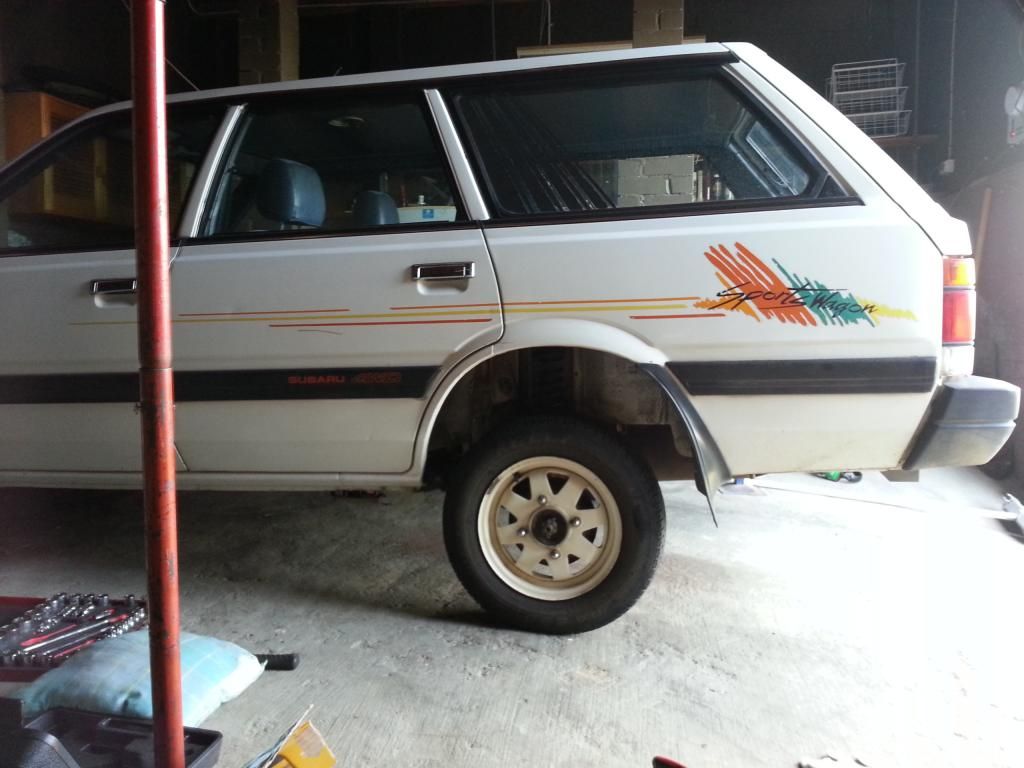
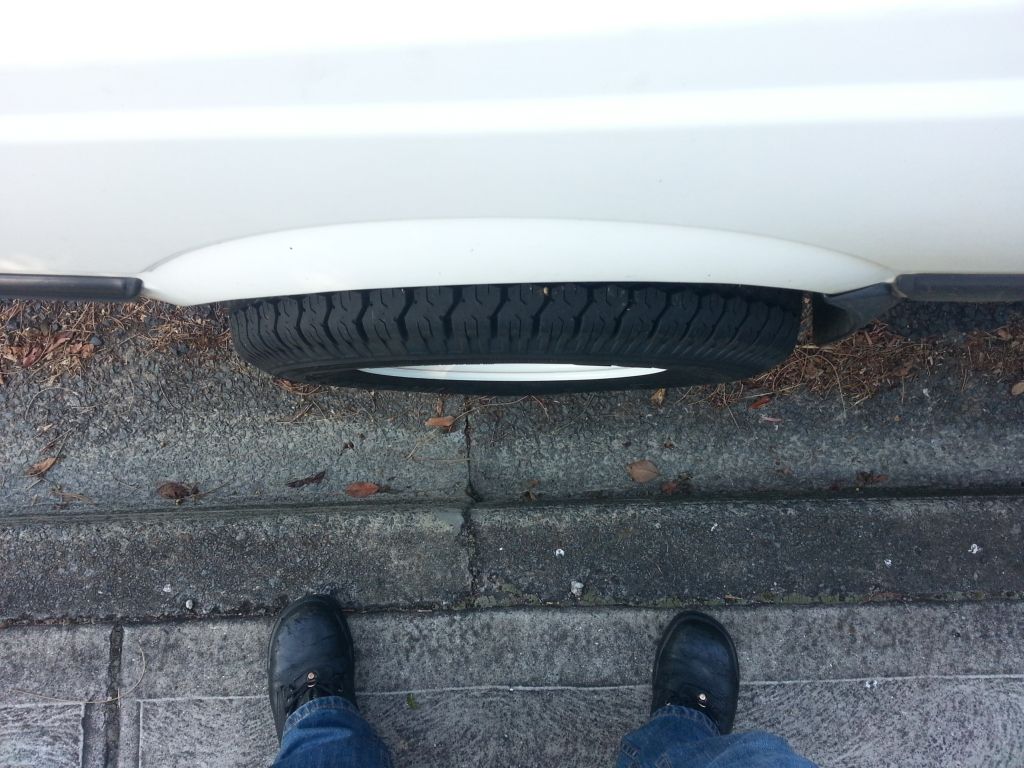
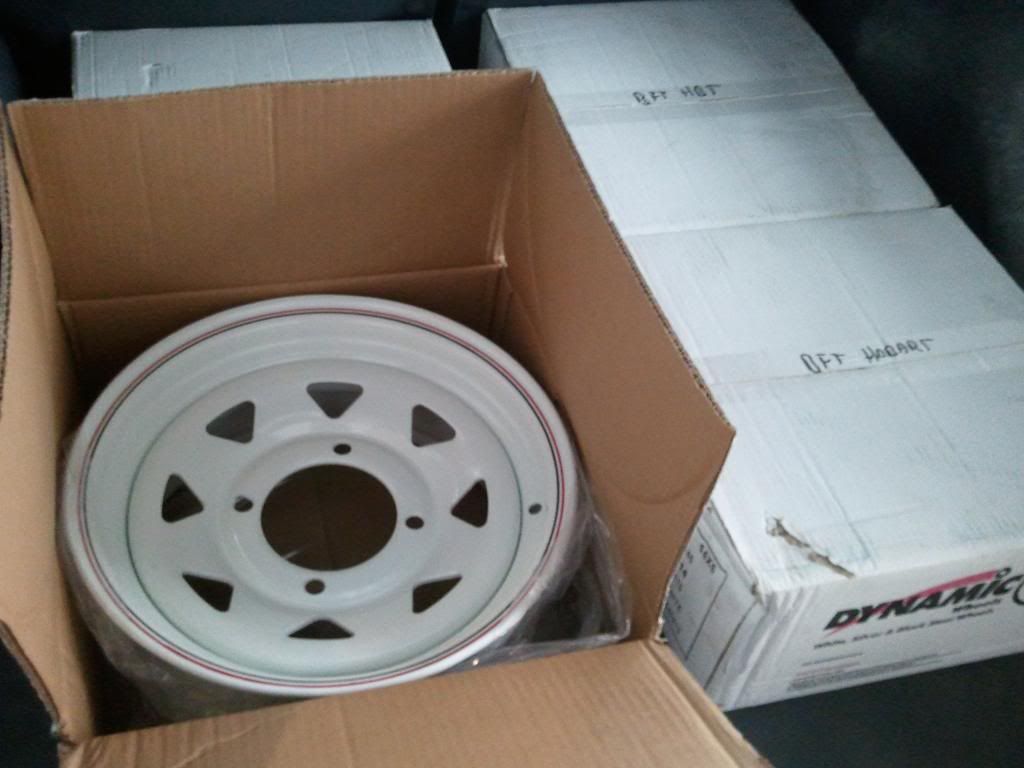
So thats the rear done, will probably get stuck into the front tomorrow although I have to admit im very daunted by it, seems a lot more difficult than the rear end, so if theres any advice or things to watch for please do tell me! Once I have it all finished I will be putting these shiny fellas on, 14" sunraysias:

Image

Will post back when I have completed the job!

User avatar
Cliff R
General Member
Posts: 1061
Joined: Sat Feb 07, 2009 11:07 am
Location: Muswellbrook/NSW

Post by Cliff R » Sun Nov 04, 2012 6:38 am

This is right up my ally having done this to an L series a couple of months ago.
With the rear what did you do with the fuel pump ?
I spaced it down about 50mm too.
Also with the rear I had to massage the rear muffler as it was hitting on the LH rear block.
With the front/gearbox .(it was harder and more complicated than the rear and takes quite some time to finish)
-take the 4 bolts off the engine fan shroud othewise you will bend/break it or the fan itself when the engine is lowered. I had to space the shroud down too which as a pain
-I had to modify the lower (on the LH side of the car) radiator hose and modified one off an MY. With the engine lowered into place with the kit this hose is very kinked and the original bend of the hose is now much tighter.
-slot out the sump guard holes to fit
-I had to bend the 4WD stick as it was hitting on the centre console when the kit was installed
-Speedo cable. Get one from an MY they are longer. The original L series cable will break eventually as it is too short with the kit installed
-remember to take off at least one of the engine torsion rod bolts (goes from the firewall to the engine)
-Take off the earthing wire that is in the area under the spare wheel. It will need to be replaced with a longer one or repositioned as it will now be too short.
-dont know what brand of kit you are installing but different brands line up the strut top spacers in different ways.
-have plenty of jacks and car stands on hand. If you have someone to help you things will be much easier. I did it by myself so it was had going.
-when removing the front struts be carful not to pop the CV's (that really sucked)
-a long pinch bar or pipe to lever the front suspension down helps
-see if you can get a hold of a cordless rattler gun. Makes things easier.
-It is a big job, take it easy

User avatar
El_Freddo
Master Member
Posts: 12511
Joined: Tue Oct 04, 2005 10:00 am
Location: Bridgewater Vic
Contact:

Post by El_Freddo » Sun Nov 04, 2012 2:17 pm

ratters wrote:Image
The rear block in the above pic has to be above the suspension K frame part.

Cheers

Bennie
"The lounge room is not a workshop..."
Image
El Freddo's Pics - El_Freddo's youtube

User avatar
Cliff R
General Member
Posts: 1061
Joined: Sat Feb 07, 2009 11:07 am
Location: Muswellbrook/NSW

Post by Cliff R » Sun Nov 04, 2012 3:26 pm

Times 2 for what Bennie said, ie, the spacer on the left is OK but the one on the right is on the wrong side of the suspention. Where it is currently located is isnt doing anything to lift the car.
P.S. if you are located in NSW and intend to go for an engineering certificate let me know. I have some more pointers.
NSW Engineers have major concerns on how the steering extensions are constructed, Welded components (such as your rear strut extensions), extenting mud flaps and rear suspension stops extensions are needed.
If you arent going for an engineers certificate - dont worry about it.

User avatar
ratters
Junior Member
Posts: 33
Joined: Thu May 31, 2012 1:41 pm
Location: Sandy Bay / TAS

Post by ratters » Sun Nov 04, 2012 5:22 pm

Wow OK, thanks for pointing that out! As I mentioned, instructions were not instructions at all, just a bit of paper with some squares drawn in microsoft paint..

Would somebody be so kind as to post a pic of the correct way so that I can fix it properly?

@ Cliff R, thanks for those tips mate, wouldnt have known any of that. Im not fully across what exactly MY cars are, would that be liberties and foresters? So I grab a speedo cable and radiator hose from a manual liberty at a wrecker and im all set? Also Im in TAS, none of those engineering requirements that im aware of, happy to be corrected though.

Cheers for all this help guys!

User avatar
RSR 555
Elder Member
Posts: 6951
Joined: Sat Nov 10, 2007 10:42 am
Location: ATM... stuck in Rockingham

Post by RSR 555 » Sun Nov 04, 2012 5:38 pm

Fitted this way will cuse the K frame to flex too much. You shouldn't need pics, just take the small block and put it between the body and K frame (not between the K frame and retainer plate, like it is in your pic) and it will be sweet.
You know you are getting old when the candles on your birthday cake start to cost more than the cake itself.

RSR Performance
Home of the 'MURTAYA' in Oz
Subaru Impreza WRX based Sportscar
[SIGPIC][/SIGPIC]

Disclaimer: Not my website but hyperlink here to Subaru workshop manuals

User avatar
Cliff R
General Member
Posts: 1061
Joined: Sat Feb 07, 2009 11:07 am
Location: Muswellbrook/NSW

Post by Cliff R » Sun Nov 04, 2012 7:58 pm

OK, the MY's are Subaru's pre 1985 like the Leone's that confuse the crap out of spares places when you go in and say you have one.
I dont know how many times I have been asked if my car is a Brumby, Liberty, Forester.
The L series are those cars that are 1985 to 1994 and look completely different to cars like Brumbies etc.
L series are those cars like that which is shown in Bennies signature which is what you have.
Basically, you have an L series so all good.
It is up to you and it is only my opinion but feel free to check with your local transort department for local requirements and regulations.
P.S. Nice new wheels

User avatar
ratters
Junior Member
Posts: 33
Joined: Thu May 31, 2012 1:41 pm
Location: Sandy Bay / TAS

Post by ratters » Tue Nov 06, 2012 9:54 pm

OK, so howabout now? I think where i went wrong was when lowering the jack and the gaps opening up for the blocks to fit in that this part stayed up so i didnt realise the block went up there. Thanks so much for pointing it out as being wrong, it would have been left incorrect!

Image

User avatar
El_Freddo
Master Member
Posts: 12511
Joined: Tue Oct 04, 2005 10:00 am
Location: Bridgewater Vic
Contact:

Post by El_Freddo » Sun Nov 11, 2012 12:10 pm

That's much better!

Cheers

Bennie
"The lounge room is not a workshop..."
Image
El Freddo's Pics - El_Freddo's youtube

User avatar
ratters
Junior Member
Posts: 33
Joined: Thu May 31, 2012 1:41 pm
Location: Sandy Bay / TAS

Post by ratters » Mon Nov 19, 2012 8:41 am

So I got started on the front on Sunday, bloody hell some serious drama there!

The engine cross member bolts which have the plate attached on top had their nuts rusted on good on the drivers side. And to make matters worse Subaru decided to make those nuts from actual cheese. I ended up stripping both of them. Even with high quality sockets, penetrating oil and a good solid hold the sockets just ate them up. So a long story short is that 3hrs later, and after 15 odd dremel cut off discs I got that bloody thing out! And of course its made of high tensile steel so my attempts at drilling it just resulted in a ruined drillbit.

The passenger side went like a charm, still very tight but a couple of loud 'cracks' and both nuts gave way, and were not rusted like the drivers side.

Will get stuck into it again tonight and hopefully get the blocks in.

User avatar
ratters
Junior Member
Posts: 33
Joined: Thu May 31, 2012 1:41 pm
Location: Sandy Bay / TAS

Post by ratters » Wed Nov 21, 2012 9:45 pm

Update:

Have now almost 100% completed the lift kit. All blocks are in, wheels back on, new lower radiator hose fitted, 4WD gear lever bent to accomodate the new angle, and had a successful test drive. Feels high! Cant wait to see what extra height the bigger wheels and tyres give it.

Last couple of things are to change speedo cable to MY cable, and also discovered that the tailshaft just hits on that bracing plate under the gearbox so it had to come out, i will have to space it down with some washers i think.

Will post a pic with the new wheels on when shes all done.

User avatar
El_Freddo
Master Member
Posts: 12511
Joined: Tue Oct 04, 2005 10:00 am
Location: Bridgewater Vic
Contact:

Post by El_Freddo » Thu Nov 22, 2012 2:03 pm

Got any pics of your work? Keen to see your ride with the lift!

You'll love it once you get the tyres on - it makes a phenominal difference offroad!

Cheers

Bennie
"The lounge room is not a workshop..."
Image
El Freddo's Pics - El_Freddo's youtube

User avatar
B00sting
Junior Member
Posts: 409
Joined: Wed Dec 28, 2011 8:12 pm
Location: Vic

Post by B00sting » Thu Nov 22, 2012 4:14 pm

Can you elaborate on the tailshaft fouling? what are you going to space down? do you mean the gearbox crossmember?
Brumby 1992: EA81, 15" peugot steelies, 2" ********* body lift, tonneau cover, bullbar, GME UHF, ARB compressor, ********* rear diff protector, SOLD

-97 Landcruiser :D

User avatar
El_Freddo
Master Member
Posts: 12511
Joined: Tue Oct 04, 2005 10:00 am
Location: Bridgewater Vic
Contact:

Post by El_Freddo » Thu Nov 22, 2012 5:16 pm

B00sting wrote:Can you elaborate on the tailshaft fouling? what are you going to space down? do you mean the gearbox crossmember?
Boosting, there's a plate behind the gearbox crossmember that doesn't support anything, doesn't hold anything so most ditch it with the lift kit. It's only there in the event of the front uni joint letting go - a rare event! This is what ratters is talking about.

Cheers

Bennie
"The lounge room is not a workshop..."
Image
El Freddo's Pics - El_Freddo's youtube

User avatar
B00sting
Junior Member
Posts: 409
Joined: Wed Dec 28, 2011 8:12 pm
Location: Vic

Post by B00sting » Thu Nov 22, 2012 8:05 pm

Ah your referring to a tailshaft loop? (like what is mandatory at all race events).
I'd say it's important however slim the chance of failure is, but you could modify and fit the original I suppose.

If it's not a tailshaft loop then my bad :D
Brumby 1992: EA81, 15" peugot steelies, 2" ********* body lift, tonneau cover, bullbar, GME UHF, ARB compressor, ********* rear diff protector, SOLD

-97 Landcruiser :D

User avatar
ratters
Junior Member
Posts: 33
Joined: Thu May 31, 2012 1:41 pm
Location: Sandy Bay / TAS

Post by ratters » Fri Nov 23, 2012 9:46 am

Yep it would be the tailshaft loop, boy I felt sick when I started to take off for the test drive and hear this clunk clunk clunk coming from under the car! I will space it down with some washers and put it back, cant hurt I guess.

Tyres are booked in for Tuesday and I have chosen to go with a 27" Maxxis MA-751 A/T. They look like a pretty decent tyre and have some good reviews. I will chuck up a few pics once shes all done.

User avatar
B00sting
Junior Member
Posts: 409
Joined: Wed Dec 28, 2011 8:12 pm
Location: Vic

Post by B00sting » Fri Nov 23, 2012 1:36 pm

Tyres sound good mate. I had some mt 753 bravos in 14" previously on my brumby (mud version though, not all terrain). that was pre-lift though and now i'm wishing I kept them.
Brumby 1992: EA81, 15" peugot steelies, 2" ********* body lift, tonneau cover, bullbar, GME UHF, ARB compressor, ********* rear diff protector, SOLD

-97 Landcruiser :D

User avatar
Cliff R
General Member
Posts: 1061
Joined: Sat Feb 07, 2009 11:07 am
Location: Muswellbrook/NSW

Post by Cliff R » Sat Nov 24, 2012 9:13 pm

Catching up on your progress only now re fitting the kit.
* Front enging bolts stripping - yes sucks heaps. I stuffed 2 and spent hours getting them off.
* tail shaft cross member - my engineer "hinted" I should put it back on in case of a broken tail shaft so some adjustment with a hammer and vice and back on it is.
Glad it is working for you and yes I thought it lifted the car quite a bit.
Mine is 2" on the front and 2.5 on the rear

User avatar
ratters
Junior Member
Posts: 33
Joined: Thu May 31, 2012 1:41 pm
Location: Sandy Bay / TAS

Post by ratters » Tue Nov 27, 2012 5:43 pm

OK well here she is! Got the new tyres fitted today. They actually rub on the front plastic mud guards while turning and the suspension being compressed, but on the flat it seems OK. the guards may have to come off though? what have other people experienced? Also Im going to need to get a set of flexi flares as you can see they do sit pretty wide! All up though im quite happy with it and it really does feel a lot higher!

Image

Image

Image

User avatar
Rodeo4jake
Junior Member
Posts: 297
Joined: Fri Oct 19, 2012 5:42 am
Location: Tylden Victoria

Post by Rodeo4jake » Tue Nov 27, 2012 6:41 pm

Hey mate
Looks really good with the tyres, you should be pleased with yourself. A neat job with some flexi flares can look good if done nicely.
Well done

Post Reply

Return to “Suspension - shocks, springs and upgrades”