
man, thats awesome what you have done to the old brumby, with the floor out it must be tempting to channel it a couple of inches.
i will be in geraldton over xmas, maybe i can have a look in the flesh and share a beer or 2.
i cant believe the effort you have thrown at this car. truly inspiring. awesome work
Brumby build with a difference

mmmmm channelling hey ????? Nah that would be too much work......wrxer wrote:man, thats awesome what you have done to the old brumby, with the floor out it must be tempting to channel it a couple of inches.
i will be in geraldton over xmas, maybe i can have a look in the flesh and share a beer or 2.
i cant believe the effort you have thrown at this car. truly inspiring. awesome work
although it would be nice - even with this way of doing the conversion its not going to sit as low as I wanted it
hmmmmm beeeeeeer
Oh hang on I don't drink beer
[SIGPIC][/SIGPIC]
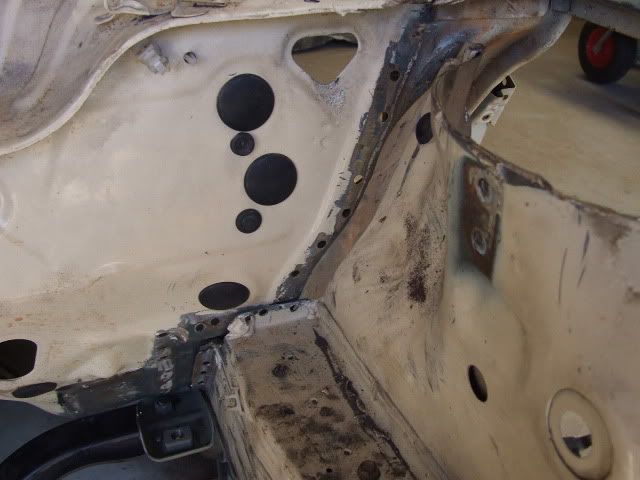
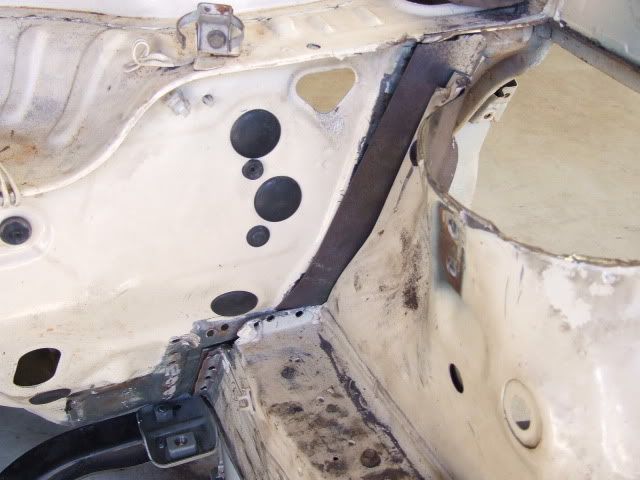
Came across my first problem 
The chassis rails were pushed out wider than I thought and this has left a little bit of a gaping hole :
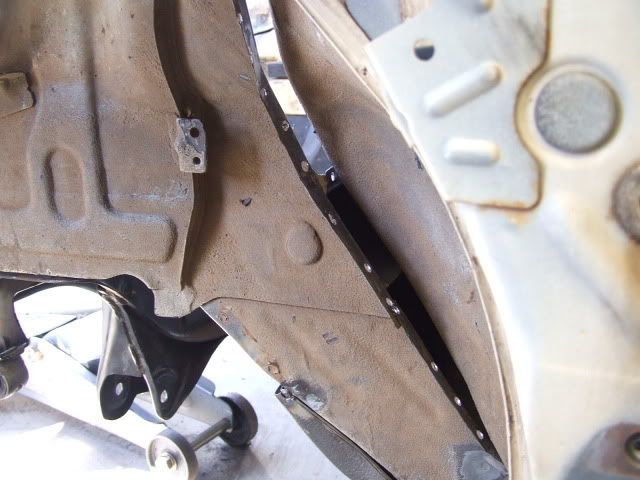
But not to worry - 3 hours playing with cardboard and then some decent 1.6mm steel resulted in this :
Should be plenty storng enough and still looks like a factory stamping (or at least it will once its welded in and all the gaps filled and smoothed.
Pretty stoked with that as it is my first attempt at something like this
The chassis rails were pushed out wider than I thought and this has left a little bit of a gaping hole :
But not to worry - 3 hours playing with cardboard and then some decent 1.6mm steel resulted in this :
Should be plenty storng enough and still looks like a factory stamping (or at least it will once its welded in and all the gaps filled and smoothed.
Pretty stoked with that as it is my first attempt at something like this
[SIGPIC][/SIGPIC]
-
RSR 555

- Elder Member
- Posts: 6951
- Joined: Sat Nov 10, 2007 10:42 am
- Location: ATM... stuck in Rockingham
Awesome work there Ken.. can't wait to see it in the flesh 
You know you are getting old when the candles on your birthday cake start to cost more than the cake itself.
RSR Performance
Home of the 'MURTAYA' in Oz
Subaru Impreza WRX based Sportscar
[SIGPIC][/SIGPIC]
Disclaimer: Not my website but hyperlink here to Subaru workshop manuals
RSR Performance
Home of the 'MURTAYA' in Oz
Subaru Impreza WRX based Sportscar
[SIGPIC][/SIGPIC]
Disclaimer: Not my website but hyperlink here to Subaru workshop manuals
im not sure how you are drilling spot welds, but i use one of these:
http://www.ebay.com.au/itm/HSS-3-8-10mm ... 519bc52c91
well worth the money. i use it with the cordless drill so you can slow it right and use plenty of pressure. it easy to just cut the top layer of steel, leaving a button of spot weld on the rear sheet.
i have a snapon drill as well like this:
http://www.ebay.com.au/itm/3Pce-6mm-8mm ... 3f0ffd5557
but because it drills the weld hardened area, it goes blunt quick. the top one is pretty good and is still sharp after the 70 odd spots i have removed.
btw, how are you keeping everything aligned and positioned? plumb bob and tape measure? the alignment thing boggles me
"UNDERSTEER" is when you hit the fence with the front of the car.
"OVERSTEER" is when you hit the fence with the rear of the car.
"HORSEPOWER" is how fast you hit the fence.
"TORQUE" is how far you take the fence with you.
"OVERSTEER" is when you hit the fence with the rear of the car.
"HORSEPOWER" is how fast you hit the fence.
"TORQUE" is how far you take the fence with you.
[SIGPIC][/SIGPIC]
If it works, pull it apart to see why.Yeah got both of those types of cutter - prefer the drill bit type,wrxer wrote:im not sure how you are drilling spot welds, but i use one of these:
http://www.ebay.com.au/itm/HSS-3-8-10mm ... 519bc52c91
well worth the money. i use it with the cordless drill so you can slow it right and use plenty of pressure. it easy to just cut the top layer of steel, leaving a button of spot weld on the rear sheet.
i have a snapon drill as well like this:
http://www.ebay.com.au/itm/3Pce-6mm-8mm ... 3f0ffd5557
but because it drills the weld hardened area, it goes blunt quick. the top one is pretty good and is still sharp after the 70 odd spots i have removed.
btw, how are you keeping everything aligned and positioned? plumb bob and tape measure? the alignment thing boggles me
Aligned and positioned ? Hadn't even thought about - just putting it back where it looks right - hahahahaha
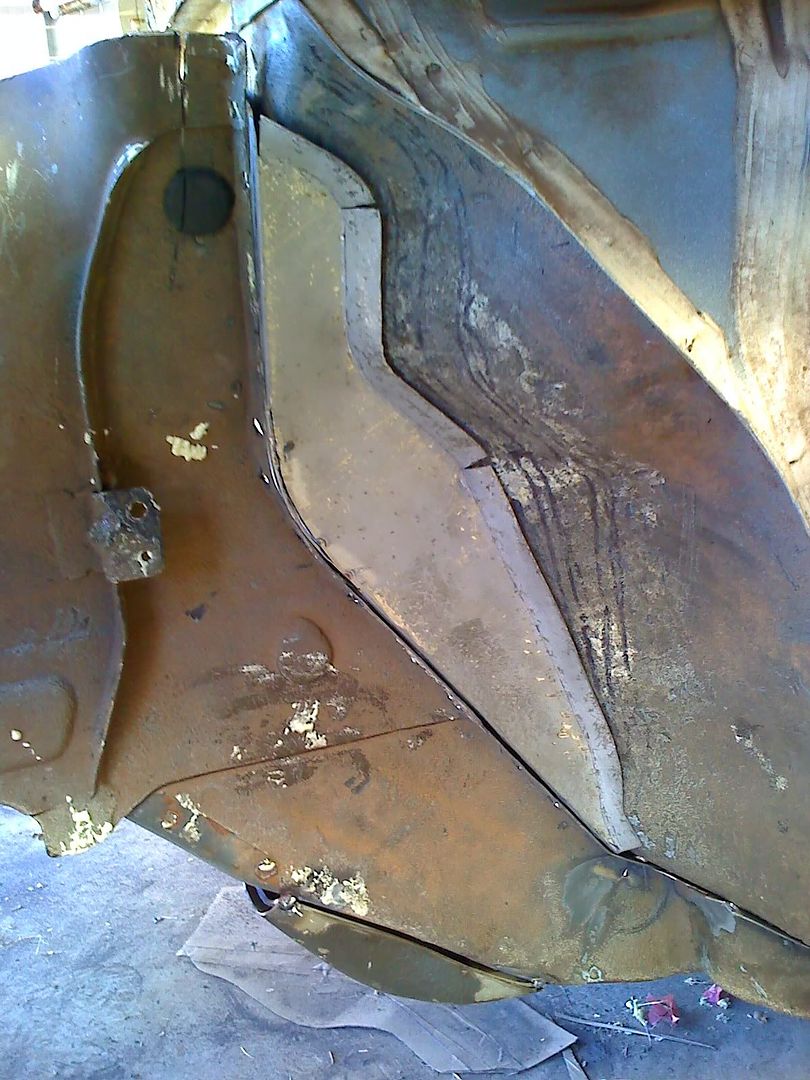
But seriously the frame rails are positioned by the Crossmember, LCA and gearbox mount - just made sure it was square once it was all bolted in tight. Then just need to make sure it the whole assembly is then square once its on the body. Probably won't be perfect but should be within a few mm.
[SIGPIC][/SIGPIC]
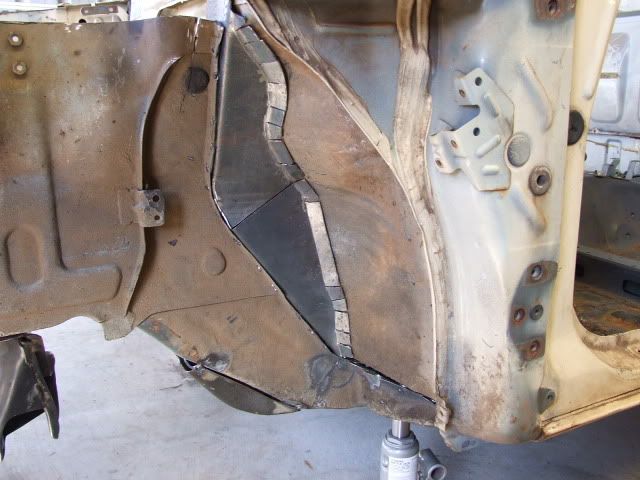
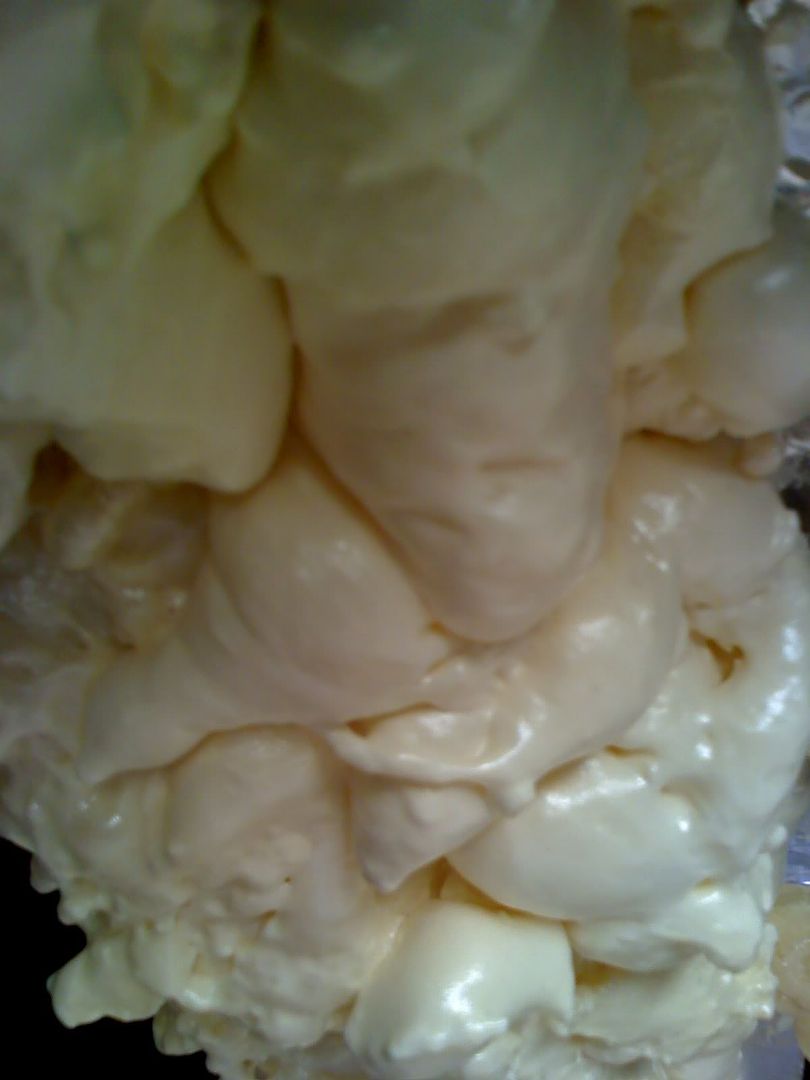
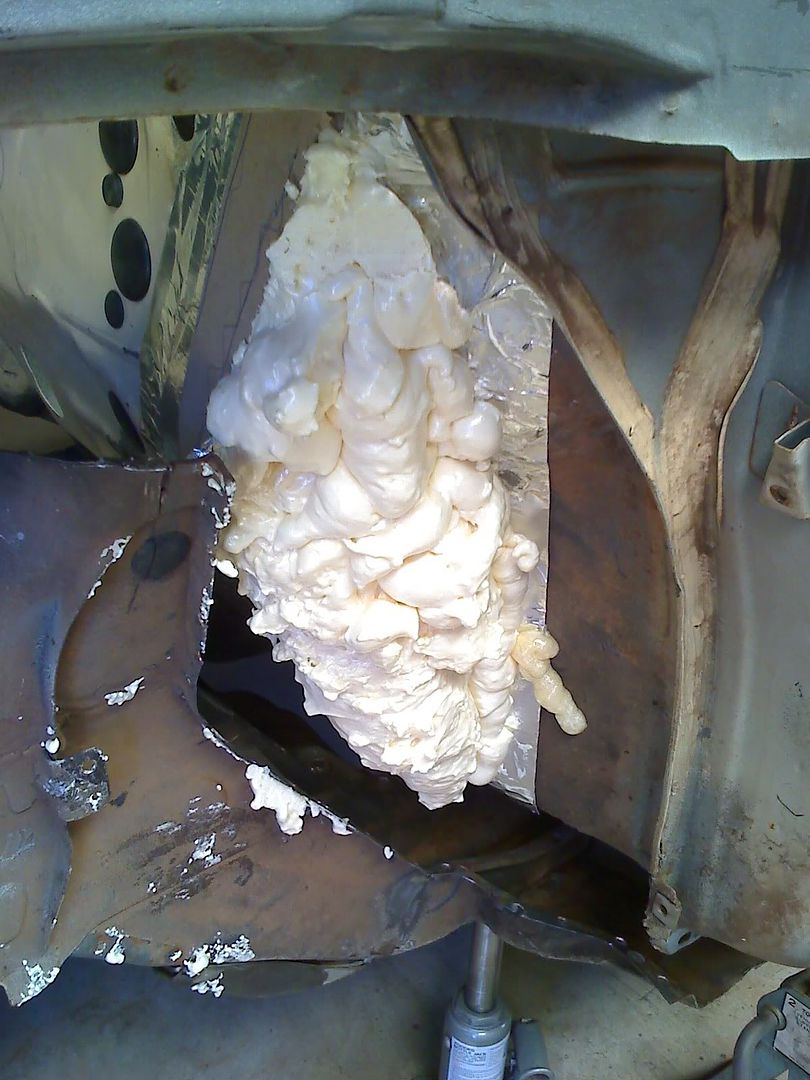
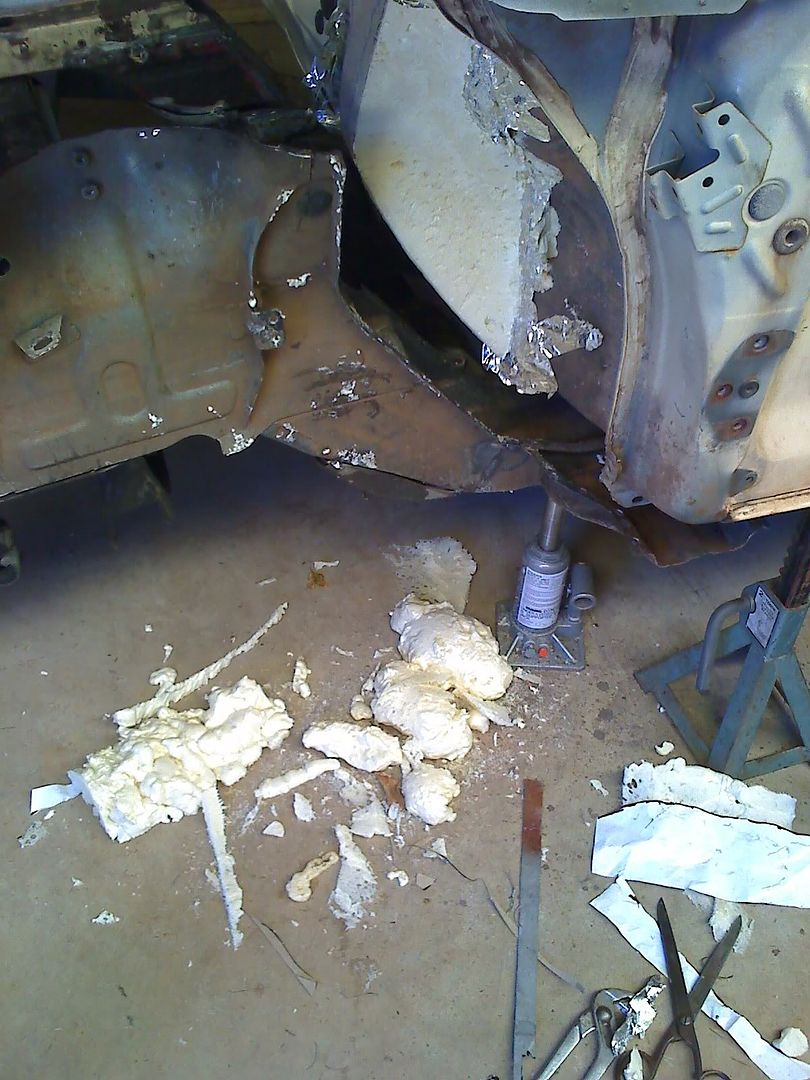
Small update :
Been trying to get that bracket from the chassis to the firewall perfect. Done about a dozen attempts in cardboard and half a dozen in steel and just can't quite get the shape and fit right. Even went to the trouble of filling the space with expanding foam and trimming that to exactly the right shape and I still can't replicate it in steel
1. Fill hole with foam :
2. Move chassis rail out of the way :
3. Cut away excess foam :
4. Final shape - guaranteed to be correct :
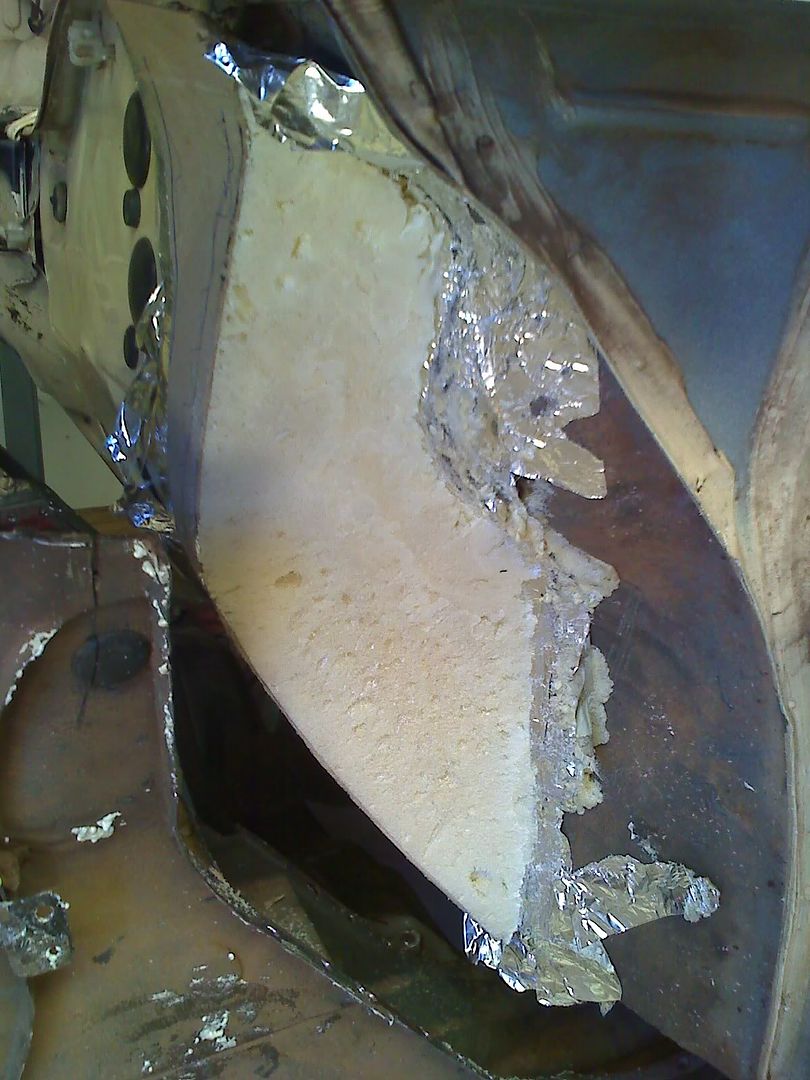
And on a positive note my engineer came over and gave me the big thumbs up for the work so far
Been trying to get that bracket from the chassis to the firewall perfect. Done about a dozen attempts in cardboard and half a dozen in steel and just can't quite get the shape and fit right. Even went to the trouble of filling the space with expanding foam and trimming that to exactly the right shape and I still can't replicate it in steel
1. Fill hole with foam :
2. Move chassis rail out of the way :
3. Cut away excess foam :
4. Final shape - guaranteed to be correct :
And on a positive note my engineer came over and gave me the big thumbs up for the work so far
[SIGPIC][/SIGPIC]
-
RSR 555
- Elder Member
- Posts: 6951
- Joined: Sat Nov 10, 2007 10:42 am
- Location: ATM... stuck in Rockingham
Yeah.. looks like you're on a winner there Ken 
You know you are getting old when the candles on your birthday cake start to cost more than the cake itself.
RSR Performance
Home of the 'MURTAYA' in Oz
Subaru Impreza WRX based Sportscar
[SIGPIC][/SIGPIC]
Disclaimer: Not my website but hyperlink here to Subaru workshop manuals
RSR Performance
Home of the 'MURTAYA' in Oz
Subaru Impreza WRX based Sportscar
[SIGPIC][/SIGPIC]
Disclaimer: Not my website but hyperlink here to Subaru workshop manuals
-
RSR 555
- Elder Member
- Posts: 6951
- Joined: Sat Nov 10, 2007 10:42 am
- Location: ATM... stuck in Rockingham
What?? sarcasm.. me?? come on Ken, you know that's not Initerida wrote:OI thats enough sarcasm in my thread thank you very much..............
But seriously.. I think that could work
You know you are getting old when the candles on your birthday cake start to cost more than the cake itself.
RSR Performance
Home of the 'MURTAYA' in Oz
Subaru Impreza WRX based Sportscar
[SIGPIC][/SIGPIC]
Disclaimer: Not my website but hyperlink here to Subaru workshop manuals
RSR Performance
Home of the 'MURTAYA' in Oz
Subaru Impreza WRX based Sportscar
[SIGPIC][/SIGPIC]
Disclaimer: Not my website but hyperlink here to Subaru workshop manuals

Could you do it in fibreglass so it holds its shape better? A couple of layers of chop over the foam should work...maybe?niterida wrote:BOOOOOO !!!!
No pics yet cos I still didn't get it right - bloody compound curves grrrrrrr.
I think I've got it nailed now but back at work for the next week so won't be able to do any more till then. This has taken me about 60hours so far - ouch !!
[SIGPIC][/SIGPIC]
Owner SubieLiftOz, lift kits for Subarus
'97 Forester: EJ22E; 4" Custom Body Lift; JDM STi plated LSD; 20mm WRX RSB; Snorkel; Kings
Owner SubieLiftOz, lift kits for Subarus
'97 Forester: EJ22E; 4" Custom Body Lift; JDM STi plated LSD; 20mm WRX RSB; Snorkel; Kings
Its not the foam thats the problem. Because it bends in 3 or 4 different ways if you are a mm out with the angle or the size it completely throws it out of shape when done in steel. But I'm pretty sure I've got the template right now so tomorrow I may get time to have another crack at it.nachaluva wrote:Could you do it in fibreglass so it holds its shape better? A couple of layers of chop over the foam should work...maybe?
Of course I could have made it easy on myself by doing it outof 2 or 3 different pices and just doing flat bends and welding it together with straight lines, but then it wouldn't look factory and wouldn't be half as much fun
[SIGPIC][/SIGPIC]
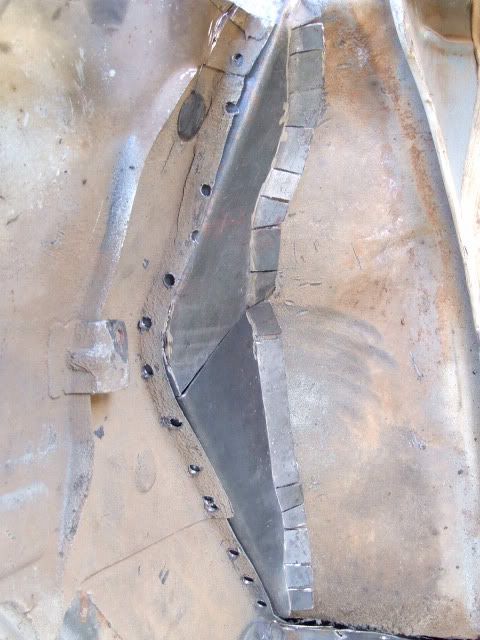
SUCCESS !!!!!!
What a bloody nightmare this has been getting one piddly little bracket made.
Now I have to make a template from this one and then make 2 proper ones - the one in the photo looks good but it is missing a couple of bits where you can't see it - the joys of trying to amke things fit.
So tomorrows job is to make 2 good ones and then hopefully Wednesday I will be able to tack weld them in place, tack the chassis rails on and then tack the Liberty floor in as well.
Then I have to find someone with real welding skills to weld everything in properly. But it will be all smooth fast sailing once this bit of the project is done. Downhill from here...........
[SIGPIC][/SIGPIC]
-
El_Freddo

- Master Member
- Posts: 12502
- Joined: Tue Oct 04, 2005 10:00 am
- Location: Bridgewater Vic
- Contact:
That's great news mate! You must be stoked!!niterida wrote:And on a positive note my engineer came over and gave me the big thumbs up for the work so far
Don't be going too fast now niterida - you want to make sure you've done it all properly so it is sweet as possible! It's all ready a sweet project, but I think the aim as been to go for "sweet az bro" statusniterida wrote:Then I have to find someone with real welding skills to weld everything in properly. But it will be all smooth fast sailing once this bit of the project is done. Downhill from here...........
Cheers
Bennie

-
RSR 555
- Elder Member
- Posts: 6951
- Joined: Sat Nov 10, 2007 10:42 am
- Location: ATM... stuck in Rockingham
I could weld for you Ken but bit hard when you're in Gero unless you know of a good welding machine up your way and put me up for a couple of days
You know you are getting old when the candles on your birthday cake start to cost more than the cake itself.
RSR Performance
Home of the 'MURTAYA' in Oz
Subaru Impreza WRX based Sportscar
[SIGPIC][/SIGPIC]
Disclaimer: Not my website but hyperlink here to Subaru workshop manuals
RSR Performance
Home of the 'MURTAYA' in Oz
Subaru Impreza WRX based Sportscar
[SIGPIC][/SIGPIC]
Disclaimer: Not my website but hyperlink here to Subaru workshop manuals
Thanks for the offer Paul but it needs to be done properlyRSR 555 wrote:I could weld for you Ken but bit hard when you're in Gero
But seriously it does have to be done by a coded welder as they have to sign off on it for the engineering to be approved
Wouldn't want it falling apart in the middle of a 10sec 1/4
[SIGPIC][/SIGPIC]