Brumby build with a difference

Detailed reference pages on Members special projects ...
User avatar
niterida
General Member
Posts: 1158
Joined: Sun Apr 13, 2008 5:45 pm
Location: Geraldton WA

Post by niterida » Sun May 29, 2011 6:42 am

d_generate wrote:Looks like a cheap sand blasting gun & a couple of bags of grit may be in order, I used one when I restored my Landcruiser and it was invaluable.
Got a gun and compressor - might need to look into getting some media and a tank. Anybody know what/where I should be buying ??

Although I was considering the old wire wheel on the drill trick as well :-(

Just had a quick look on eBay - choices are suction feed, gravity feed or pressure tank. Obviously the pressurised tanks are going to be the best but has anybody used either of the other 2 cheaper options ??

Or I could just get the local mobile soda blaster to come and do it for me :-)
[SIGPIC][/SIGPIC]

User avatar
last celtic warrior
Junior Member
Posts: 271
Joined: Mon Aug 06, 2007 9:39 pm
Location: Gympie, Queensland

Post by last celtic warrior » Sun May 29, 2011 9:55 am

Grab yourself a stack of 1mm cutting disks and cut the crap out of it. And a spot weld drill bit too, so you can unpick panel sections from the frame. The first time you use your new welding skills on the car though, should be when you weld in some bracing, so when you cut half the car away it doesn't get all out of shape.

Loads of fun to be had in finding all the rust in an older car...
Steve.

- BARNES AUTOMOTIVE TECHNOLOGIES -

User avatar
d_generate
General Member
Posts: 1529
Joined: Sat Feb 16, 2008 1:51 am
Location: Back in Perth and SORing it atm.

Post by d_generate » Sun May 29, 2011 5:44 pm

I just used the bottom tank type suction gun, they cost bugger all and with the amount of rust on that thing you'll probably go through a couple of wire brushes & possibly a drill, I used to do it over a tarp & sieve the grit & re use it + it's easier & more fun and you can get into the tightest corners.
98 Libbo with V3 STI running gear. 13.0 @ 105mph with CAI & 3" Zorst:mrgreen:
http://www.youtube.com/watch?v=TKrsF-2JS3M :twisted:
Image

User avatar
niterida
General Member
Posts: 1158
Joined: Sun Apr 13, 2008 5:45 pm
Location: Geraldton WA

Post by niterida » Thu Jun 23, 2011 7:03 pm

Quick update - I haven't done any actual work on the car since the last update but I have been busy.

Redid some of my rotisserie to make it a lot stronger.

Spent several days organising a million nuts, bolts, screws and washers into some sort of order. This has freed up lots of shelf space and several plastic boxes to put more important Subaru bits into.

Mounted my new vice and bench grinder.

Sold the doors and a guard from the donor liberty for half of what I paid for it.

And most exciting of the lot I have splashed out and bought a fancy alloy radiator, a set of WRX 4 pots, a mechanical 1.5 way LSD and best of all a short ratio DCCD box from a V5 STi RA :-) That has sent me broke though, so I can't even afford to pay for the freight for another 2 weeks.

Not that I can do any work on the car for the next few weeks anyway - I buggered my Median Cruciate Ligament in my knee playing soccer on the weekend. But at least I got my photo in the paper for my troubles - pity it showed me lying on the ground in a quivering mess :-( Off to the doctor again tomorrow to see if I need a scan and a reconstruction.
[SIGPIC][/SIGPIC]

User avatar
El_Freddo
Master Member
Posts: 12504
Joined: Tue Oct 04, 2005 10:00 am
Location: Bridgewater Vic
Contact:

Post by El_Freddo » Fri Jun 24, 2011 12:38 pm

Looking good mate! Very exciting!

Cheers

Bennie
"The lounge room is not a workshop..."
Image
El Freddo's Pics - El_Freddo's youtube

User avatar
niterida
General Member
Posts: 1158
Joined: Sun Apr 13, 2008 5:45 pm
Location: Geraldton WA

Post by niterida » Thu Jul 07, 2011 10:28 pm

Small but exciting update :

Dept Of Transport have APPROVED my modifications so I will be able to get this registered !

WOOOOOO HOOOOOOO :-)
[SIGPIC][/SIGPIC]

User avatar
niterida
General Member
Posts: 1158
Joined: Sun Apr 13, 2008 5:45 pm
Location: Geraldton WA

Post by niterida » Mon Aug 01, 2011 10:10 pm

Well due to my knee injury which is still giving me grief I have been unable to do anything except play on ebay and forums and BUY STUFF

picked up my DCCD 4.44 gearbox and diff, radiator and 4 pots. Bought a set of 2 piece DBA 5000 rotors, and another motor - its a bare motor in pieces but has already been ported and everything is in excellent condition, an SX fuel pump with a holley lift and surge tank and a set of coilovers.

Image

Image

Image

Image

And actually did some work - car is almost completely stripped just needs the dash board removed. Haven't decided if I am going to put the good dash out of my other Brumby in or use the Liberty one ??

Stripped and cleaned the engine bay

Image

Stripped the noise insulation stuff from the cab floor - probably close to 20kgs of the shit. Red line shows the damaged sectionthat needs to be replaced - it is badly dented and irrepairable.

Image

found some rust in the cab where the tray meets the rear firewall - easily fixed by removing the entire joining strips and welding them smooth

Image

Found bad rust in the passenger footwell

Image
[SIGPIC][/SIGPIC]

User avatar
El_Freddo
Master Member
Posts: 12504
Joined: Tue Oct 04, 2005 10:00 am
Location: Bridgewater Vic
Contact:

Post by El_Freddo » Mon Aug 01, 2011 10:36 pm

Yep, there's nothing better than spending when you're crook!

Glad to see you're into it and still motivated to get stuff/get stuff done even with your knee playing up!

Love the pics too ;) Keep them coming!

Cheers

Bennie
"The lounge room is not a workshop..."
Image
El Freddo's Pics - El_Freddo's youtube

User avatar
niterida
General Member
Posts: 1158
Joined: Sun Apr 13, 2008 5:45 pm
Location: Geraldton WA

Post by niterida » Mon Aug 01, 2011 10:50 pm

Well the pics shoudl start getting better from here on - there is nothing left to pull apart so I guess I have to actually start building it :-)

Actually the next job is more pulling apart - gonna attack the donor Liberty and pull the engine and box out so I can get the suspension out and mounted under the Brumby.
[SIGPIC][/SIGPIC]

User avatar
87rxturbo
Junior Member
Posts: 84
Joined: Sat Jan 01, 2011 8:14 pm
Location: SA

Post by 87rxturbo » Wed Aug 03, 2011 10:01 pm

Pretty sure there was a rotary powered subaru cross back in the early 80's in SA that used to rally that was known as "Masuba",anyone on here that is connected to rallying from that time period my remember it.I was only a kid at the time and it used to get me into arguements over which was quicker,my dads old xb 351 or this little suba-what? In hindsight i dare say power to weight ratio may have been in the subies favour...

User avatar
niterida
General Member
Posts: 1158
Joined: Sun Apr 13, 2008 5:45 pm
Location: Geraldton WA

Post by niterida » Fri Aug 19, 2011 1:12 am

Work has finally started in earnest. I have 2 weeks off and am hoping to get a lot done. Started off by sussing out how to mount the WRX suspension front and rear. Turns out the front crossmember puts the mounting bolts right on the edge of the chassis rail and the lower control arm rear mounts right in the middle of the chassis rail where it starts to come up from the cabin floor. To make it fit would have required major cutting of the chassis which is a total no-no if I want to get it legally registered. So hit a major hurdle on my first thing I started :-(

Did lots of head scratching and looking and thinking and finally came up with a solution. Turns out the kind people at Subaru made the Brumby crossmember with mounting points to fit the lower control arm exactly in the right spot in relation to all the other important bits like the position of the crossmember itself, the steering and the struts. So I am going to use the Brumby crossmember and everything else will be WRX stuff. This only needs a mount made up for the rear of the lower control arm - will cut this out of the donor car and weld it on and will hopefully look like it is there from the factory. The other major challenge with this set up is the CV shafts - they need to be about 60mm shorter so I will have to get custom ones made up.
But on a plus side it means my track will be about the same and means I don't need to flare my guards.

The rear is a lot easier to do. The diff crossmember just needs about 5mm cut off the ends and will bolt up to the chassis rail. Well it will after I put some new captive nuts inside the chassis itself. The front T piece that holds the front of the diff up will need to be narrowed and the mounts brought in about 100mmm either side and mounting brackets nmade up to run on the inside of the chassis rails and the mounts for the rear trailing arms will line up on the chassis so again just need to weld some captive nuts (might need a bit of massaging of the chassis rail).

This would all fit as described but would then leave me with much wider track at the rear so I will need to get shorter rear control arms. Can do this by cutting and welding or hopefully getting some adjustable ones (if they can adjust far enough). And of course will need shorter CV shafts as well.

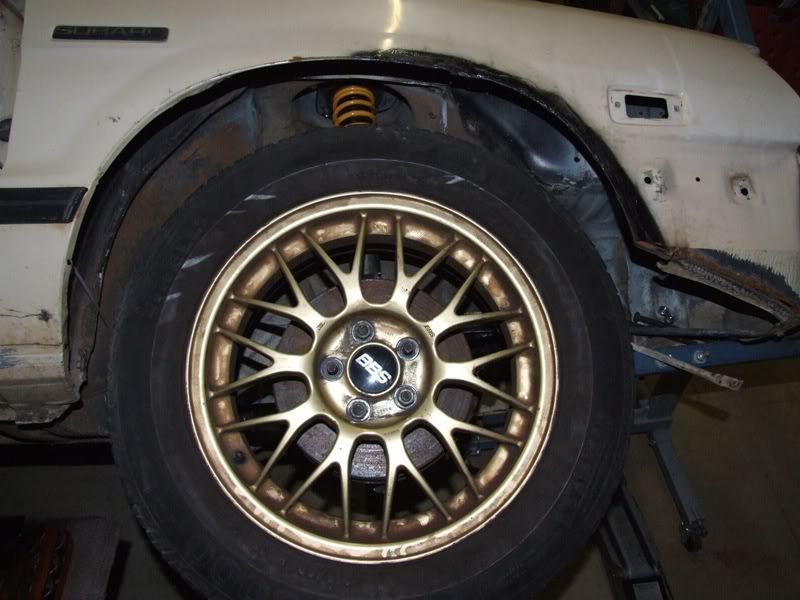
Nice lightweight BBS wheel mounted and looking good :
Image

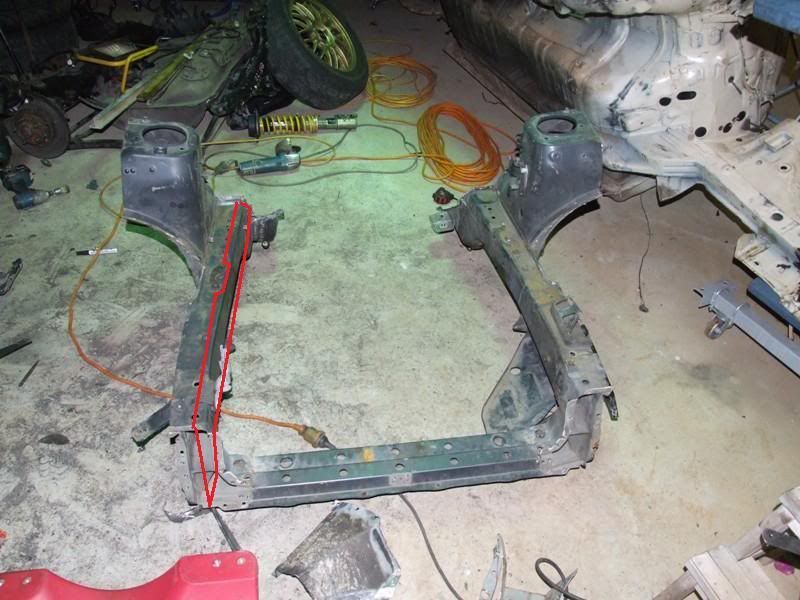
WRX lower control arm and coilover mounted on Brumby crossmember :
Image

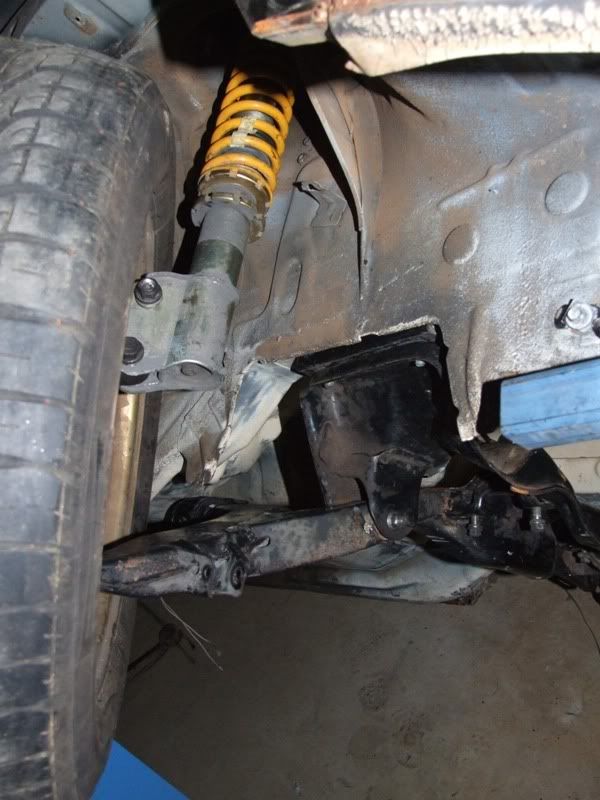
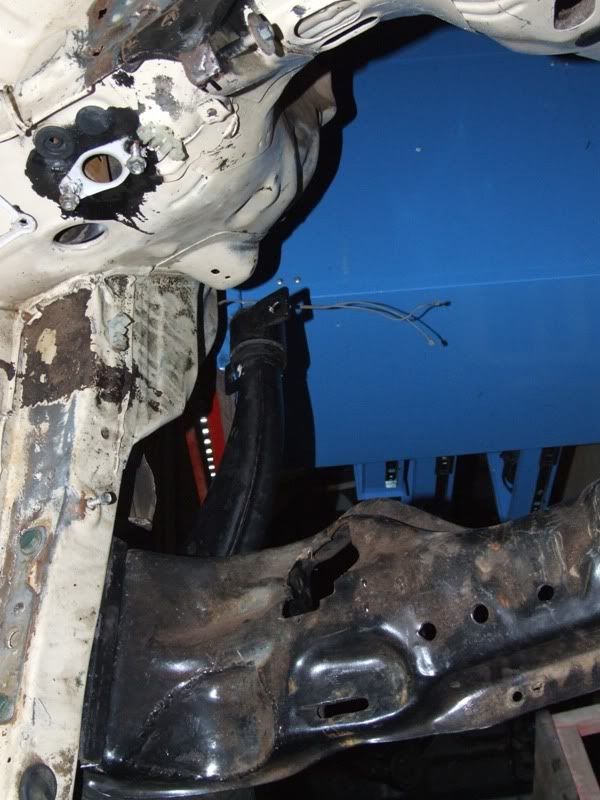
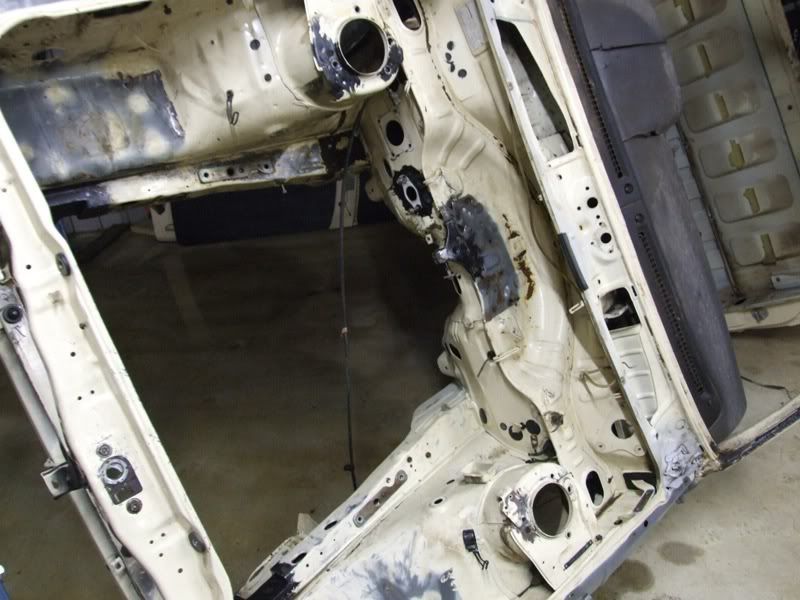
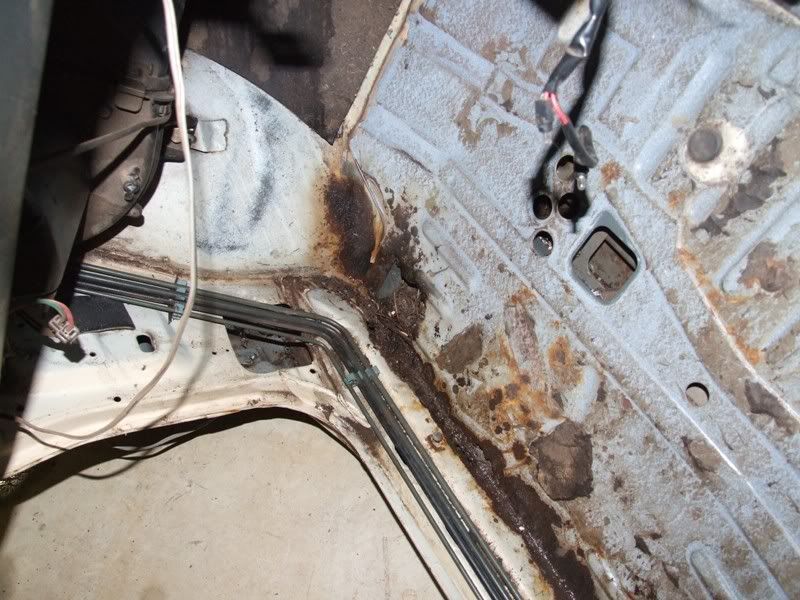
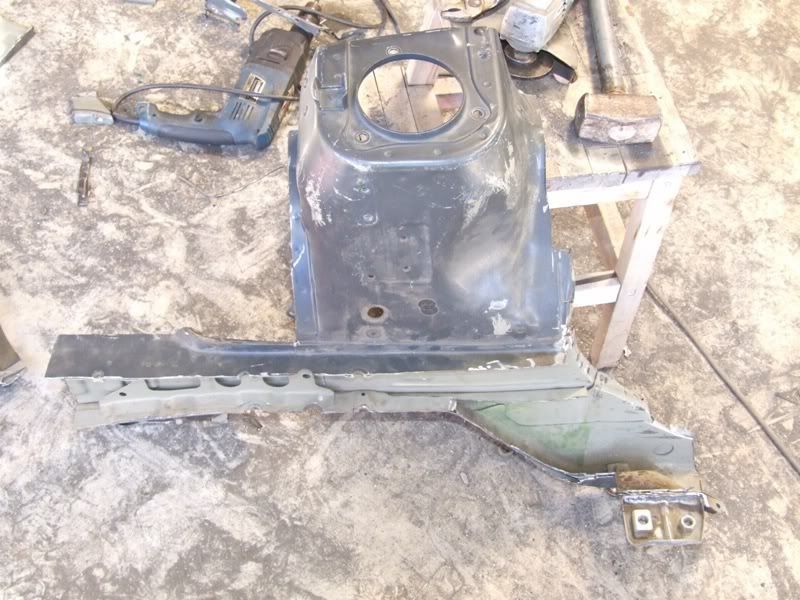
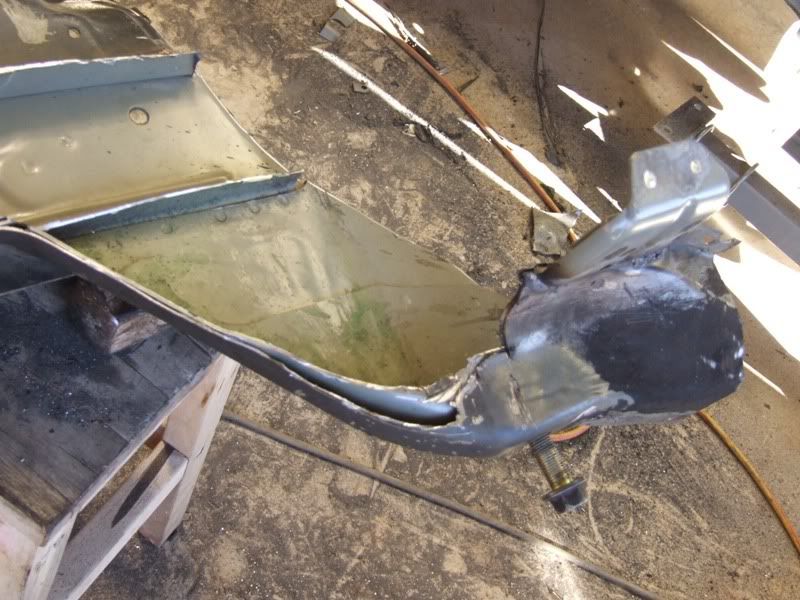
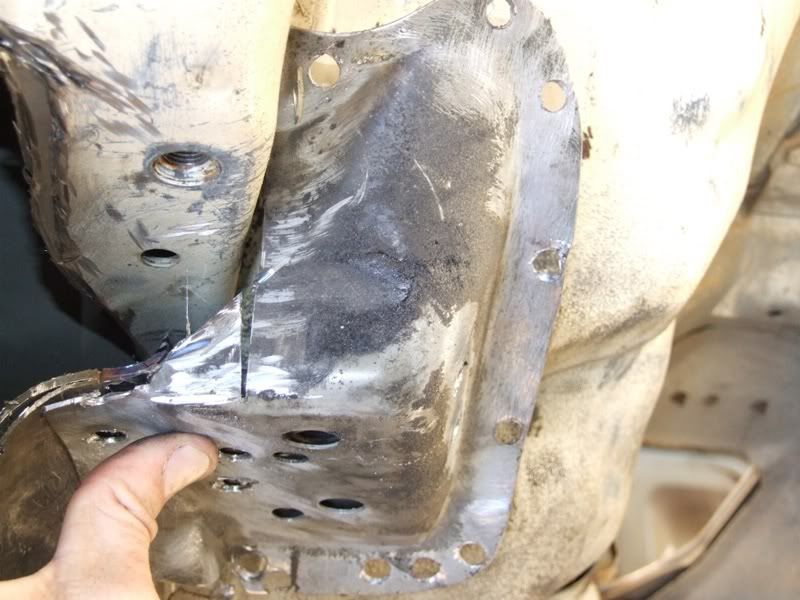
Here you can see where the rear mount for the lower control arm needs to be made :
Image

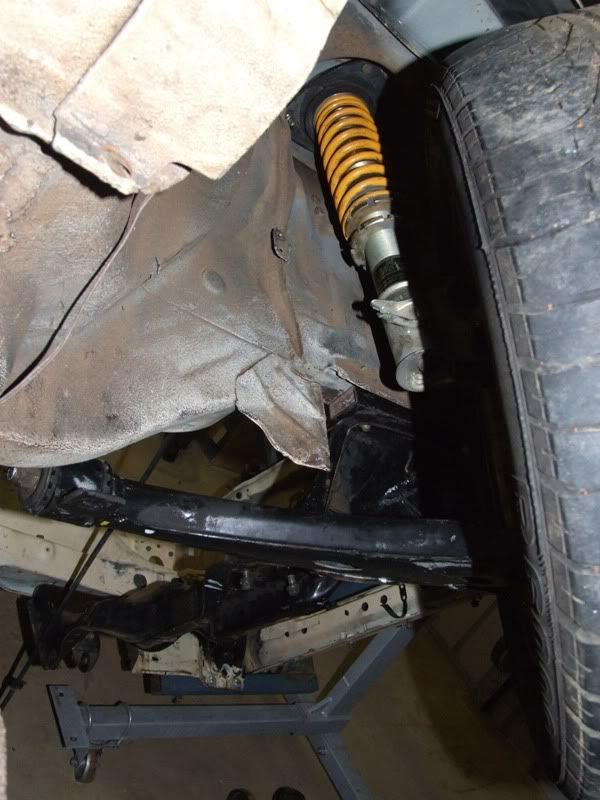
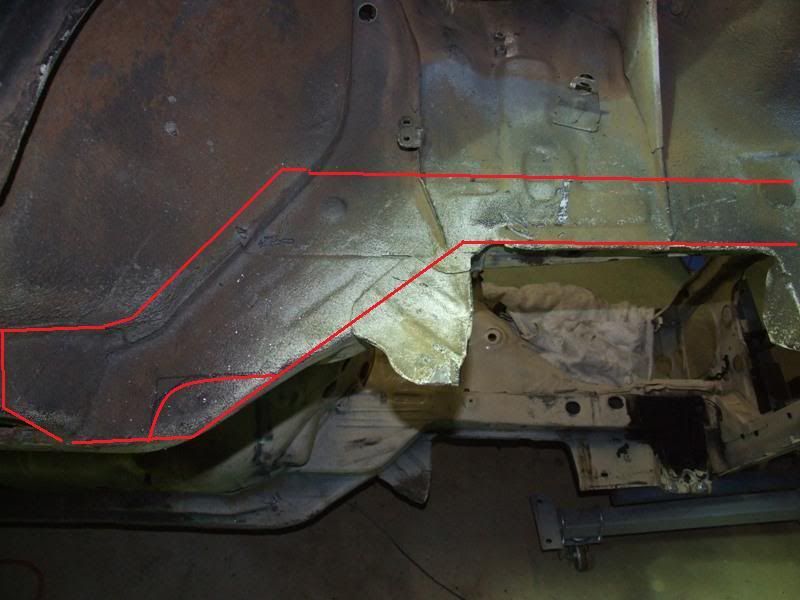
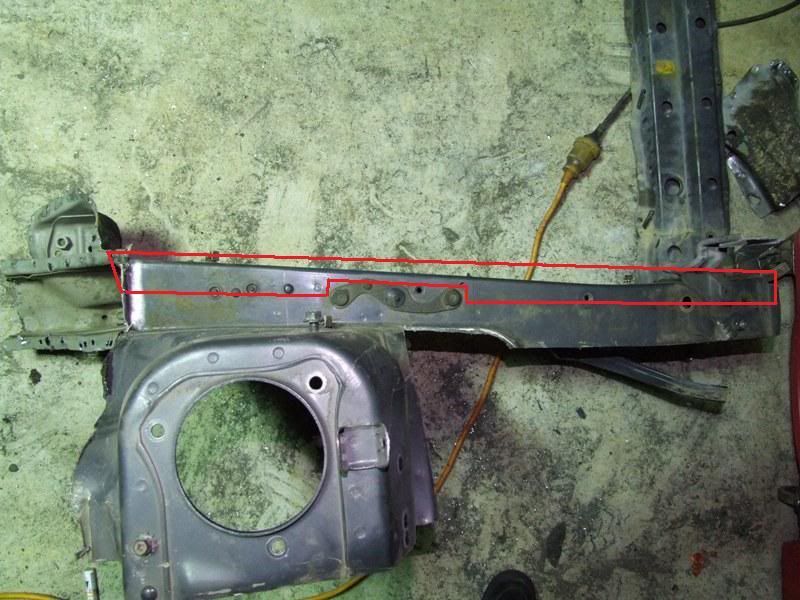
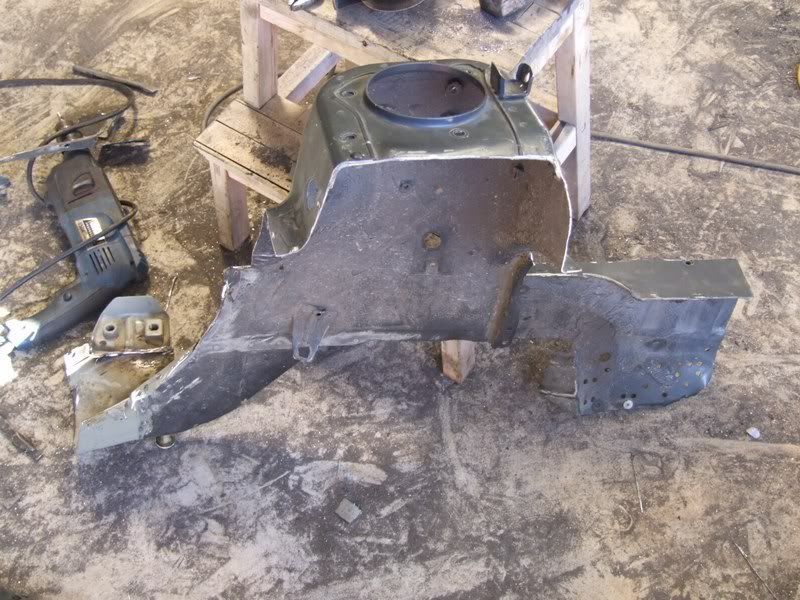
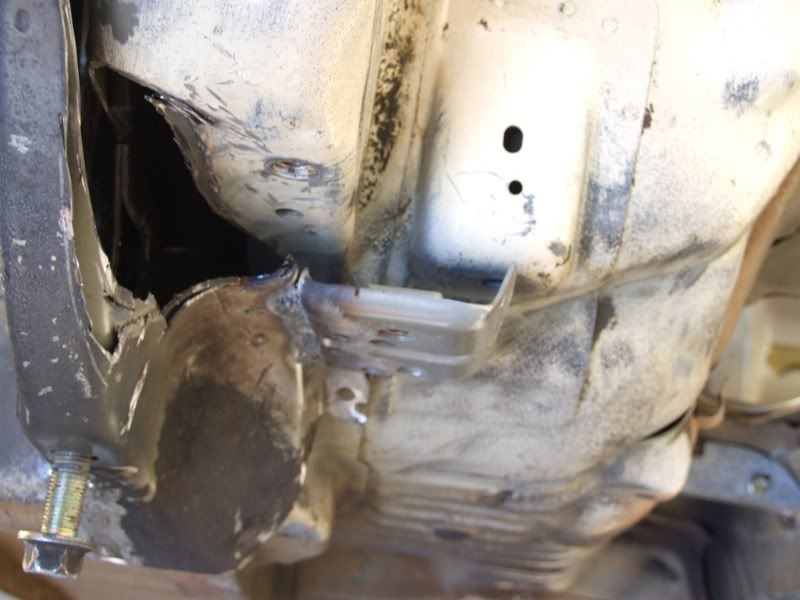
And a shot from below :
Image

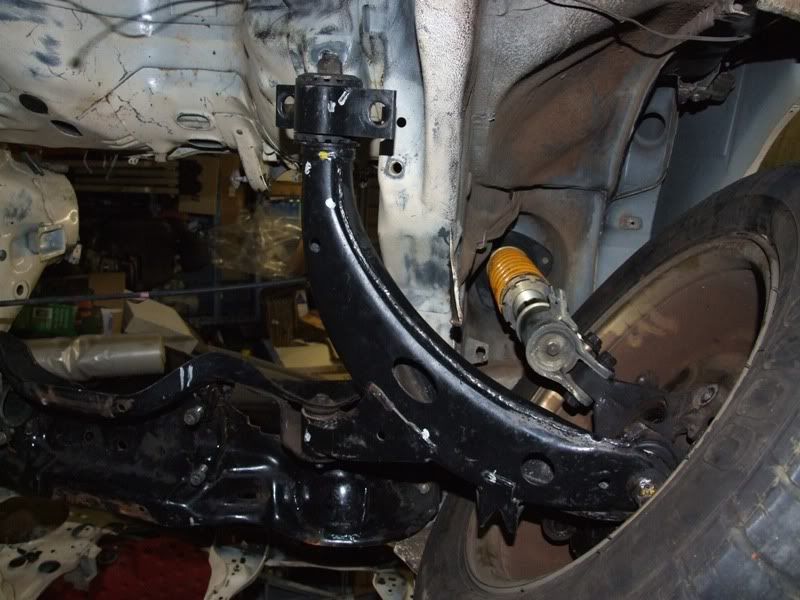
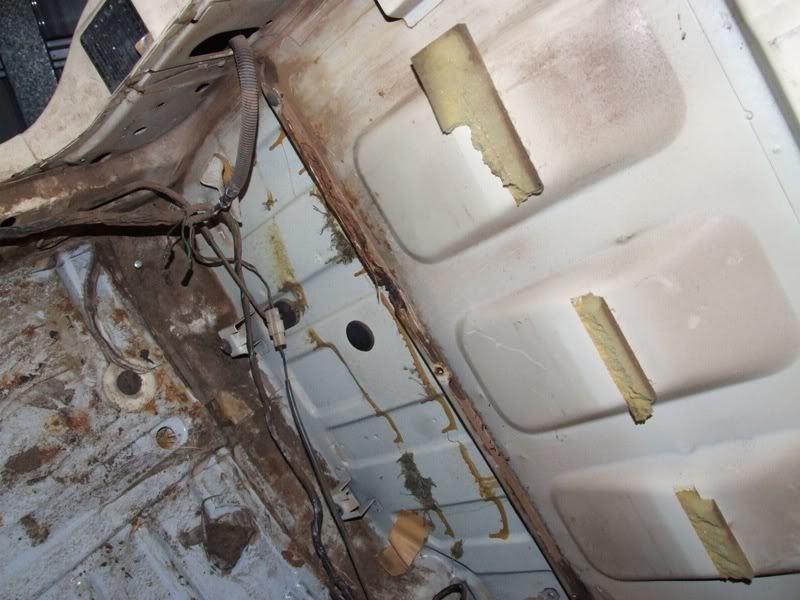
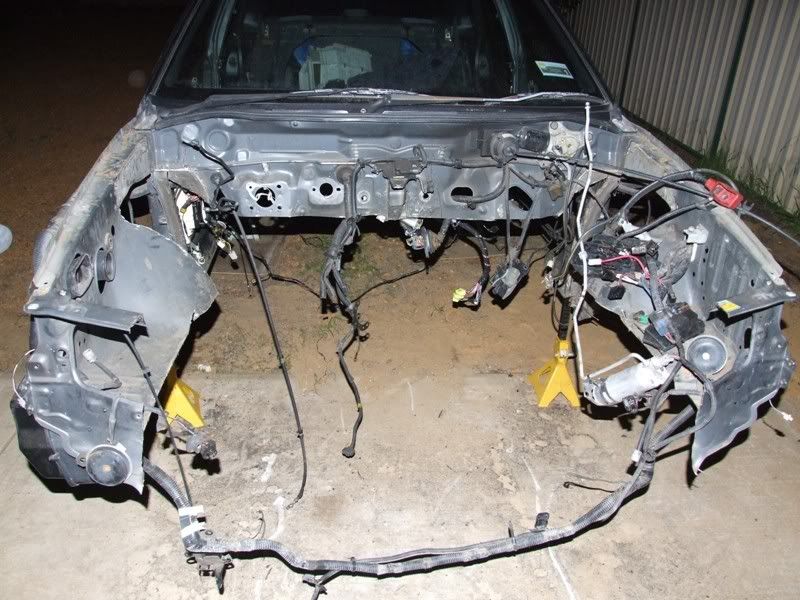
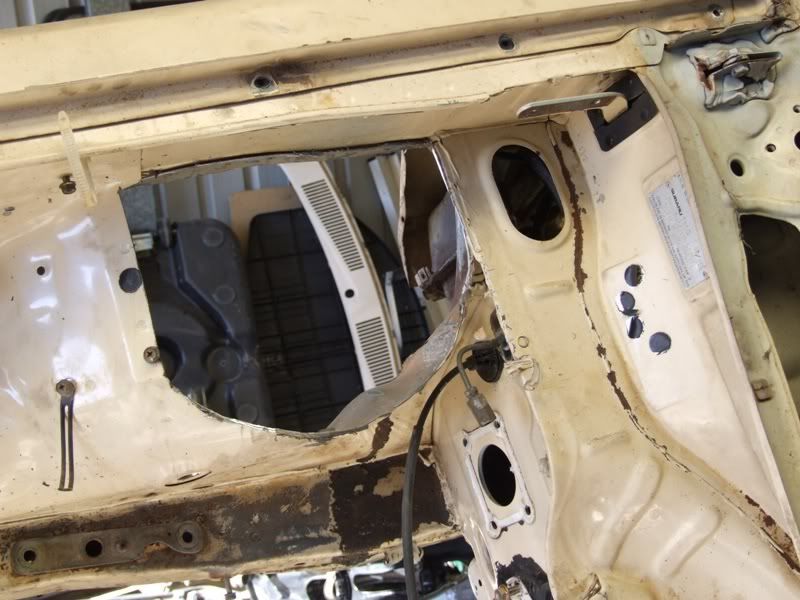
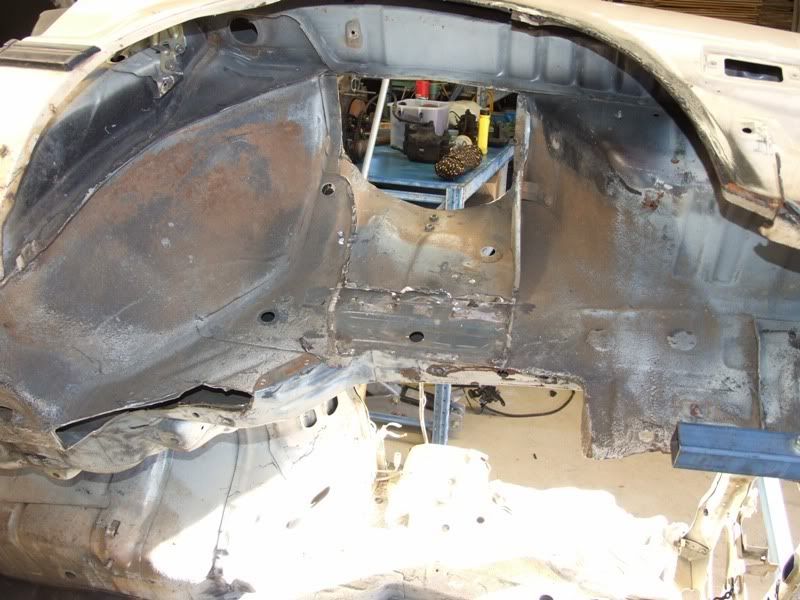
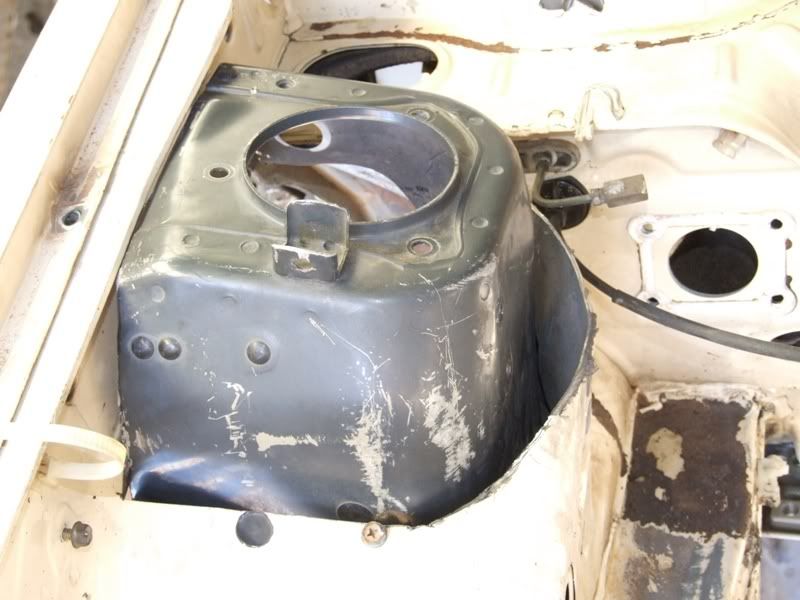
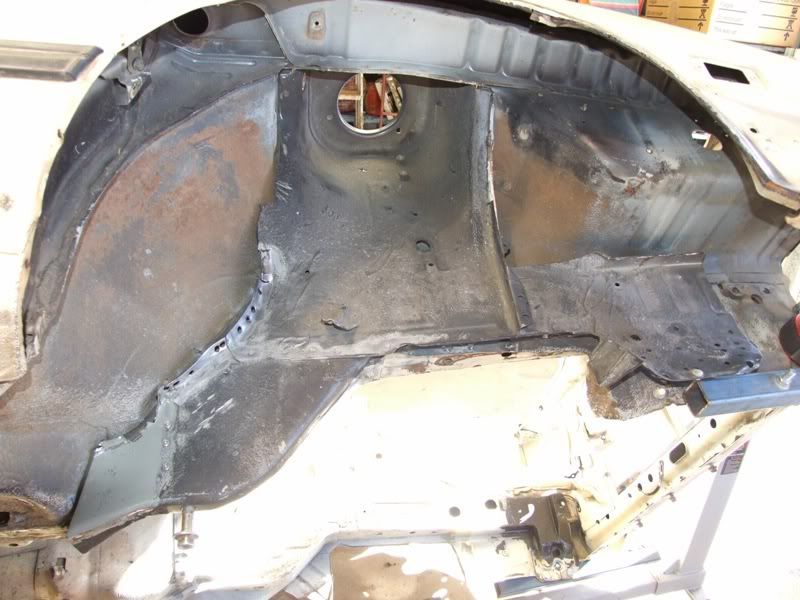
And one form in the engine bay :
Image
[SIGPIC][/SIGPIC]

User avatar
TOONGA
Elder Member
Posts: 5335
Joined: Sat May 30, 2009 10:15 am
Location: Australind closer to where they divided by zero
Contact:

Post by TOONGA » Fri Aug 19, 2011 8:00 am

good lord that last image stretches across to tomorrow any chance you could re size it? :)

looks like you are in for a fun two weeks as well.

TOONGA
Image
PJ Gone but not forgotten
JETCAR AKA the sandwedge Rusted in pieces

User avatar
niterida
General Member
Posts: 1158
Joined: Sun Apr 13, 2008 5:45 pm
Location: Geraldton WA

Post by niterida » Wed Aug 24, 2011 9:41 pm

Notice anything missing :

Image

Image

Yep I did a little bit of cutting today.

The floor is being cut along the red lines and being fitted to the Brumby complete with tunnel and gearbox crossmember mounts. This will be cut to just sit on the existing Brumby chassis rail.

Image

The chassis rail is also being cut along the red line and welded to the outside of the Brumby chassis.

Image

At the rear it will actually straddle the Brumby chassis and be welded to the firewall as well. This requires a little bit to be cut from the Brumby chassis as shown by the red circle/oval shape. This will mean I can also use the factory LCA mounts.

Image

My biggest problem is actually the engine crossmember bolts - they sit exactly on the outside edge of the Brumby chassis. Not 100% sure how to solve this but it will involve a nice piece of RHS inside the 2 chassis rails to join them together and give a decent strong mounting point. Will probably involve dog legging the Liberty rail to run the factory mounts once again.

Image

Now it is not really necessary to run the whole chassis rail - I could just use the LCA mounts and the engine crossmember mount sections but by using the whole lot it will look like it cam from the factory that way (hopefully).

It sounds like a lot of hard work but it is mainly labour which is cheap and it will mean I can run the entire Liberty suspension exactly as it is in the Liberty and the end result should have people scratching their heads to find out exactly how it was done.

And my engineer has approved it as well :D
[SIGPIC][/SIGPIC]

User avatar
guyph_01
Senior Member
Posts: 2515
Joined: Fri Jul 25, 2008 10:24 am
Location: Wilson WA

Post by guyph_01 » Wed Aug 24, 2011 10:20 pm

WOW, Thumbs up, respect. This is going to be quite a build. Maybe one day when i get my own place, My garage and learn some welding skills i'll be able to do something like this.

Good one you:)
The project, EJ22 --->>> EJ25 Quad CAM:D touring wagon
Image
Thinking of going on holidays on a little paradise island, Check out http://www.dodolidays.com

User avatar
niterida
General Member
Posts: 1158
Joined: Sun Apr 13, 2008 5:45 pm
Location: Geraldton WA

Post by niterida » Thu Aug 25, 2011 6:10 pm

Well I have reached the point of no return :

Image

Image

I took a few big deep breaths, thought long and hard about it, looked around a few times to make sure I really wanted to do this. If I cut this car up and it didn't work I would have been wasting a perfectly good $200 shell ;)

And this is what I have done to my Liberty chassis rails :

Image

Image

Image
[SIGPIC][/SIGPIC]

User avatar
niterida
General Member
Posts: 1158
Joined: Sun Apr 13, 2008 5:45 pm
Location: Geraldton WA

Post by niterida » Thu Aug 25, 2011 6:12 pm

So now the 2 of them meet up like so :

Image

Image

And ta-da it almost looks factory :

Image

Once it is welded in and all the gaps filled and painted it will look factory :D

And even the LCA mounts will look factory - although I've got a fairly large hole to plate :(

Image

The other side will be so much easier - just need to copy the cuts from this side. Today was a lot of cutting and grinding taking little bits off here and there and fitting it up to see how it was then taking a bit more off. Fraught with danger in case I took too much off but I didn't do too badly - in fact I'm pretty bloody ecstatic :cool:
[SIGPIC][/SIGPIC]

User avatar
velocityboy
Junior Member
Posts: 90
Joined: Mon May 25, 2009 6:14 pm
Location: kallangur queensland

Post by velocityboy » Thu Aug 25, 2011 7:03 pm

Holly snapping hot camel shit said Abdul, this is an awesomely ambitious project and I am heartened to see there are some people still brave enough (and deaf enough not to hear the nay sayers) to have a go. From someone who has done a few of this type of project let me tell you you are going the right way, and stick with it.

User avatar
niterida
General Member
Posts: 1158
Joined: Sun Apr 13, 2008 5:45 pm
Location: Geraldton WA

Post by niterida » Thu Aug 25, 2011 7:21 pm

velocityboy wrote:Holly snapping hot camel shit
Yeah thats basically what i said followed closely by "WTF have I done ?"

Oh well too late to turn back now - onward and upward.

And wait until you see the way I plan to do my other Brumby :twisted:
[SIGPIC][/SIGPIC]

User avatar
El_Freddo
Master Member
Posts: 12504
Joined: Tue Oct 04, 2005 10:00 am
Location: Bridgewater Vic
Contact:

Post by El_Freddo » Thu Aug 25, 2011 7:27 pm

This is TOPS!!!

We want LOADS of pics and then a summary of the write up of what you ended up with from the start to the end with all the juicy bits in the middle documented in a couple of flow on posts...

Top effort, don't loose sight of the end goal!

Cheers

Bennie
"The lounge room is not a workshop..."
Image
El Freddo's Pics - El_Freddo's youtube

User avatar
steptoe
Master Member
Posts: 11582
Joined: Thu Oct 06, 2005 10:00 am
Location: 14 miles outside Gotham City

Post by steptoe » Thu Aug 25, 2011 7:28 pm

Really is a "build" isn't it, or rebuild - the Gen3 Brumby! Like Fuji shoulda done.

Taking orders yet??

Post Reply

Return to “Restorations and Project Build Ups.”