Brumby build with a difference

Detailed reference pages on Members special projects ...
Post Reply
User avatar
niterida
General Member
Posts: 1158
Joined: Sun Apr 13, 2008 5:45 pm
Location: Geraldton WA

Post by niterida » Thu Aug 25, 2011 7:39 pm

steptoe wrote:Really is a "build" isn't it, or rebuild - the Gen3 Brumby! Like Fuji shoulda done.

Taking orders yet??
haha yeah I was thinking if it was simple enough I might be able to make a kit to sell but it is a bit too complex.

As for building these for someone else ? Maybe a possibility - all I need to do is make accurate measurements a couple of cutting templates and it wouldn't be too hard I guess. I suppose I could make the templates and sell those - hmmmmm mind starts ticking over
[SIGPIC][/SIGPIC]

User avatar
Point
Junior Member
Posts: 311
Joined: Fri Nov 10, 2006 7:44 pm
Location: Townsville

Post by Point » Thu Aug 25, 2011 11:34 pm

are you doing a body lift or is this standard height? I shortened the Lib crossmember and built in a 2" bodylift, and then built brackets for the back of the control arms.
90 Brumby - Stalled EJ project
98 Forester GX
02 Forester XS Luxury

User avatar
niterida
General Member
Posts: 1158
Joined: Sun Apr 13, 2008 5:45 pm
Location: Geraldton WA

Post by niterida » Fri Aug 26, 2011 2:03 am

Point wrote:are you doing a body lift or is this standard height? I shortened the Lib crossmember and built in a 2" bodylift, and then built brackets for the back of the control arms.
haha neither - its going as low as she'll go and then a little bit more :twisted:

I could have solved all my problems by raising it 50mm but it is going to be a performance car not an offroader.
[SIGPIC][/SIGPIC]

User avatar
niterida
General Member
Posts: 1158
Joined: Sun Apr 13, 2008 5:45 pm
Location: Geraldton WA

Post by niterida » Fri Aug 26, 2011 9:52 pm

Got a little bit more done today.

Welded back in some of the metal I took off yesterday trying to make it fit. You can see a bit clearer in this photo exactly how it is being done. You can also see where the Liberty chassis has been sliced - right down the middle of the mounting holes :-( Which is the main reason for me doing all this hard work. The final product will have a piece of RHS welded in across both the Liberty and Brumby chassis - joing them both together and providing a nice strong point for the mounting bolts.

Image

You can see in these next 2 pictures how the Liberty chassis straddles the Brumby one and how the LCA mounting points will weld to the firewall. Little bit of massagin still be done though.

Image

Image

And finally you can see the Liberty strut tower is pretty much flush against the inner fender of the Brumby and will be fully welded in. Gotta get a strut brace first, do the other side, mount the strut brace and then weld it in - that way will ensure it is in the right position.

Image
[SIGPIC][/SIGPIC]

User avatar
steptoe
Master Member
Posts: 11582
Joined: Thu Oct 06, 2005 10:00 am
Location: 14 miles outside Gotham City

Post by steptoe » Sat Aug 27, 2011 3:50 am

they didn't teach you THIS at police college! Keep up the pics and the work. You are sure to be viewed beond Oz on this project!

User avatar
velocityboy
Junior Member
Posts: 90
Joined: Mon May 25, 2009 6:14 pm
Location: kallangur queensland

Post by velocityboy » Sat Aug 27, 2011 9:08 am

I know it's easy to offer advice from the outside but I have done a similar conversion years ago (graft front rail etc into another car). The way I did it, and I realise you are beyond this point now, was I unpicked the whole front of the project car (your brumby) and fitted the whole donor front, includeing inner skirts rad support etc. I then just modified the the top of the skirt to take the projects mudguards and fitted the project radiator support panel to allow the origanal gaurds etc to fit.

User avatar
niterida
General Member
Posts: 1158
Joined: Sun Apr 13, 2008 5:45 pm
Location: Geraldton WA

Post by niterida » Sat Aug 27, 2011 9:49 am

velocityboy wrote:I know it's easy to offer advice from the outside but I have done a similar conversion years ago (graft front rail etc into another car). The way I did it, and I realise you are beyond this point now, was I unpicked the whole front of the project car (your brumby) and fitted the whole donor front, includeing inner skirts rad support etc. I then just modified the the top of the skirt to take the projects mudguards and fitted the project radiator support panel to allow the origanal gaurds etc to fit.
Can't do it that way - its illegal.

Well no so much illegal - just won't get approved for rego because you are using a different chassis number (Liberty) compared to what is on the VIN plate of the Brumby.

Can be done must be registered as an ICV (Individually constructed vehicle) and that costs thousands of dollars and lots of work just to get it passed.

Trust me I did think of this :)
[SIGPIC][/SIGPIC]

User avatar
velocityboy
Junior Member
Posts: 90
Joined: Mon May 25, 2009 6:14 pm
Location: kallangur queensland

Post by velocityboy » Sat Aug 27, 2011 1:17 pm

Yes,we have the same drama about VIN numbers here and that is a prob. I used to do chassis grafts on F100's till they started getting upset about VIN's.

User avatar
mud_king91
Junior Member
Posts: 748
Joined: Tue Apr 19, 2011 8:40 pm
Location: edwardstown SA

Post by mud_king91 » Sat Aug 27, 2011 3:15 pm

This makes me want a brumby

User avatar
niterida
General Member
Posts: 1158
Joined: Sun Apr 13, 2008 5:45 pm
Location: Geraldton WA

Post by niterida » Sat Aug 27, 2011 5:52 pm

mud_king91 wrote:This makes me want a brumby
Thanks - that comment has made my day :-D
[SIGPIC][/SIGPIC]

User avatar
niterida
General Member
Posts: 1158
Joined: Sun Apr 13, 2008 5:45 pm
Location: Geraldton WA

Post by niterida » Mon Aug 29, 2011 7:03 pm

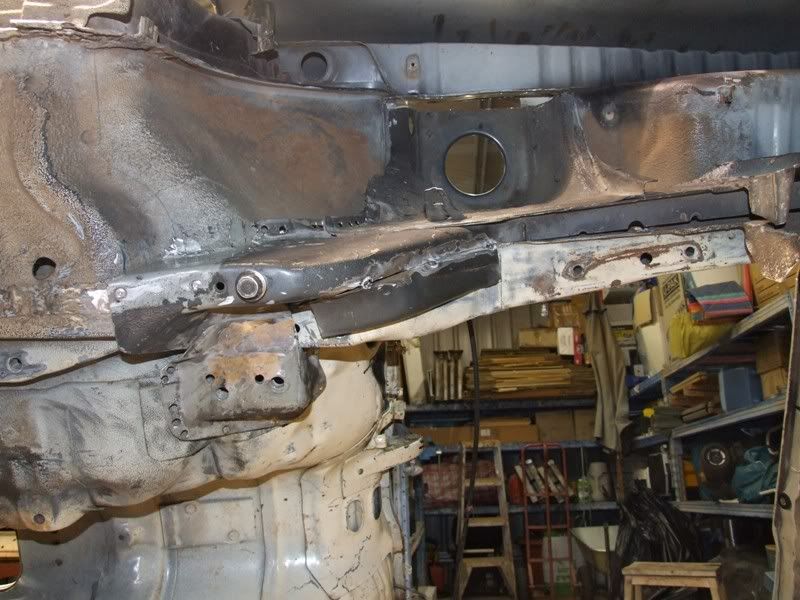
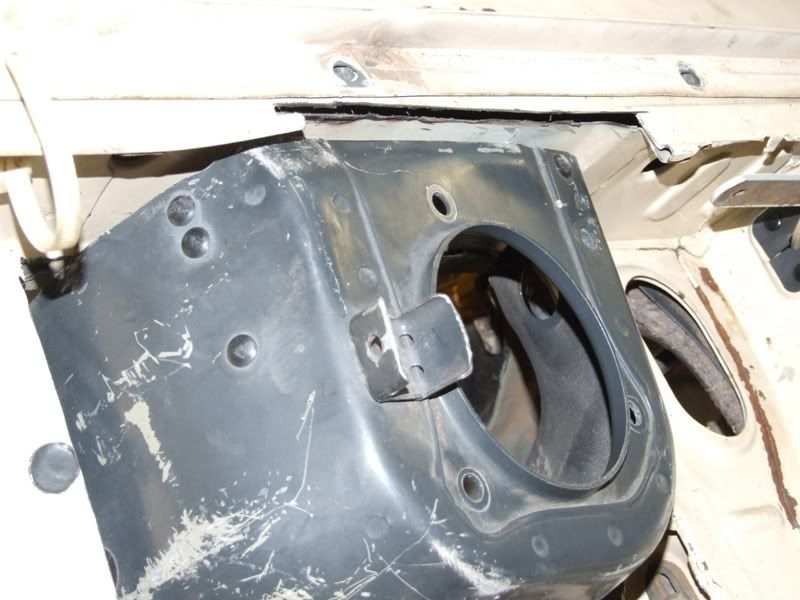
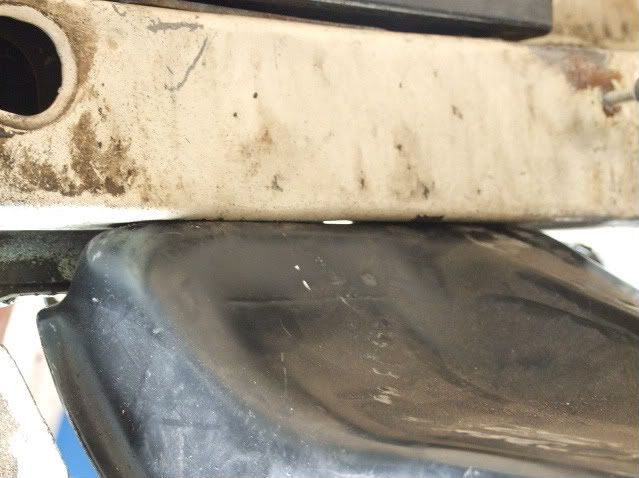
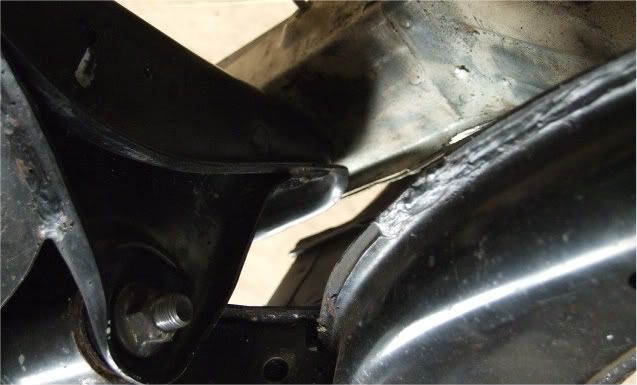
Started on the rear crossmember today. After hours of measuring and scratching my head I finally realised that the Brumby chassis/crossmember is not symetrical !!
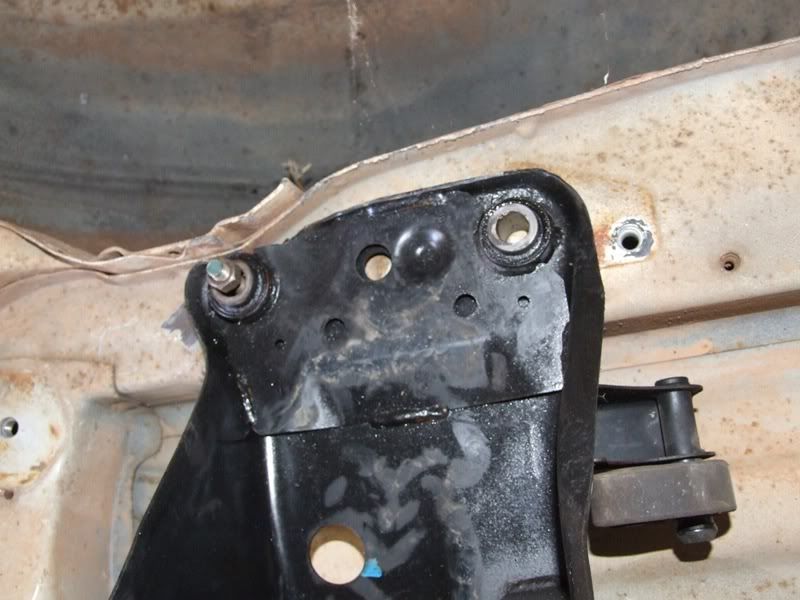
you can see in these pics that the mounting holes and the chassis are not identical on each side :

Image

Image

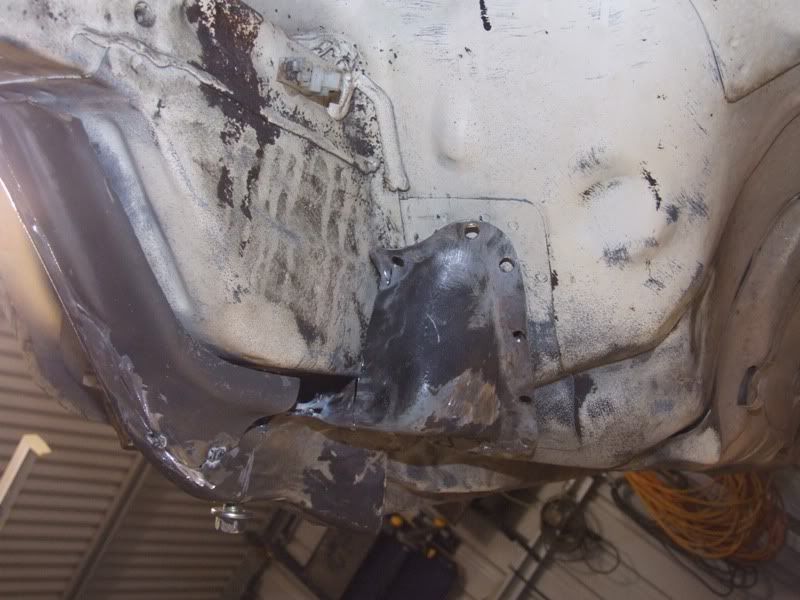
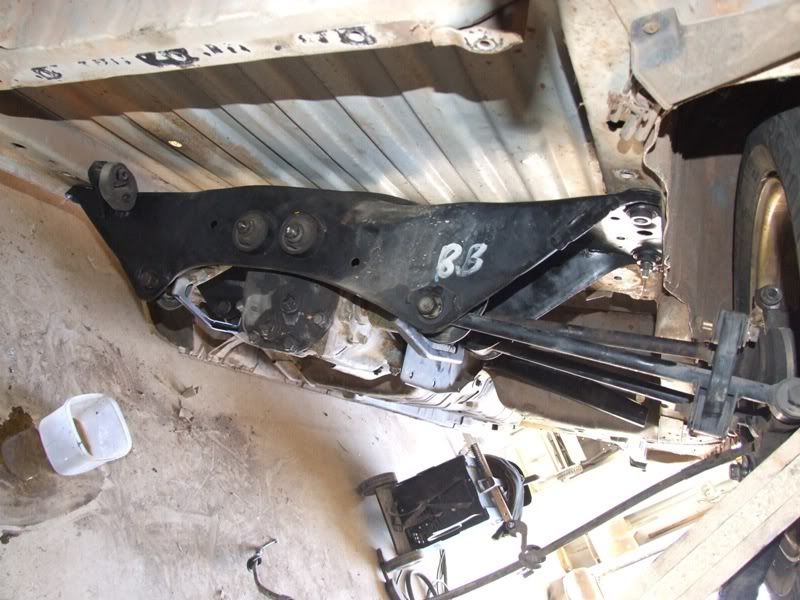
But managed to get the crossmember mounted temporarily so I could suss out the rest of the mounts for the diff hanger and the trailing arms.

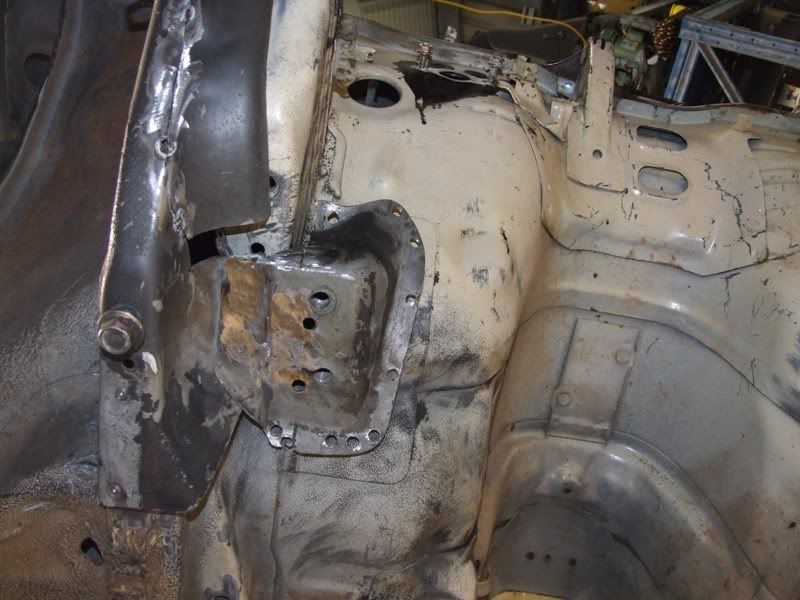
The diff hanger is fairly straight forward - I have cut the arms down to length and just need to bang up some stong mounts using some decent angle and fully weld it into the corner between the chassis rail and the rear of the cabin.

Image

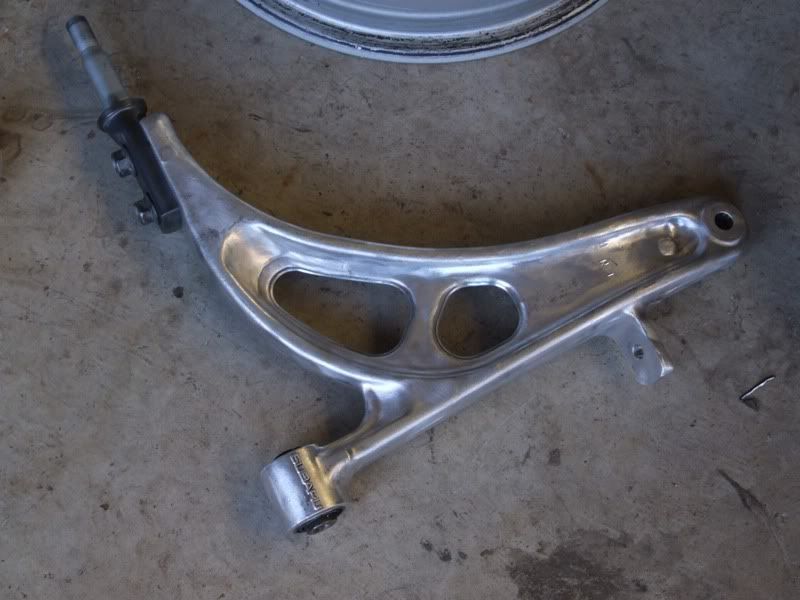
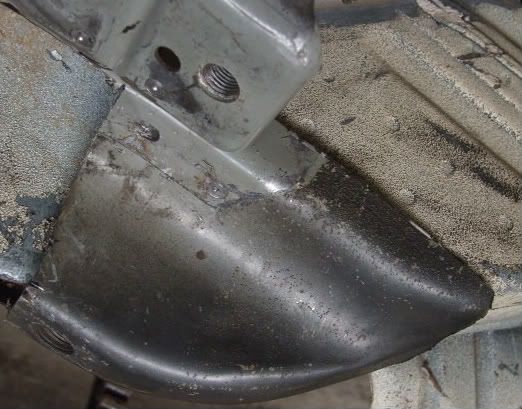
The trailing arms are a different matter - once again things are in exactly the wrong spot - 10mm in any direction and it would be a lot easier. As it stands the mounting brackets are wide and flat but the chassis where they sit is narrow and curved. I don't want to modify the chassis if I can avoid it because it is fairly weak around this area anyway. So not sure yet if I am going to make up new brackets to suit the chassis or mod the chassis and try to strengthen it and tie it into the front chassis a bit better while I am there.

Image

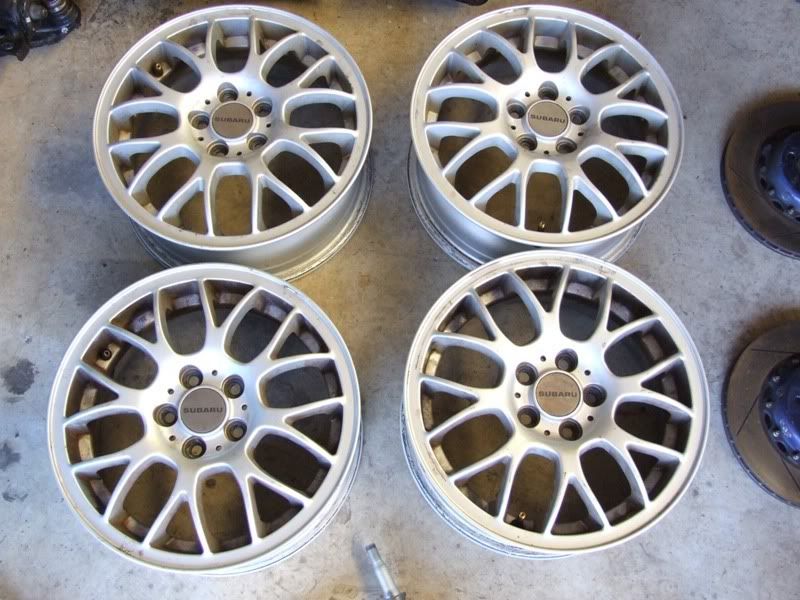
But at least its in and looking reasonable :

Image

Image

Image

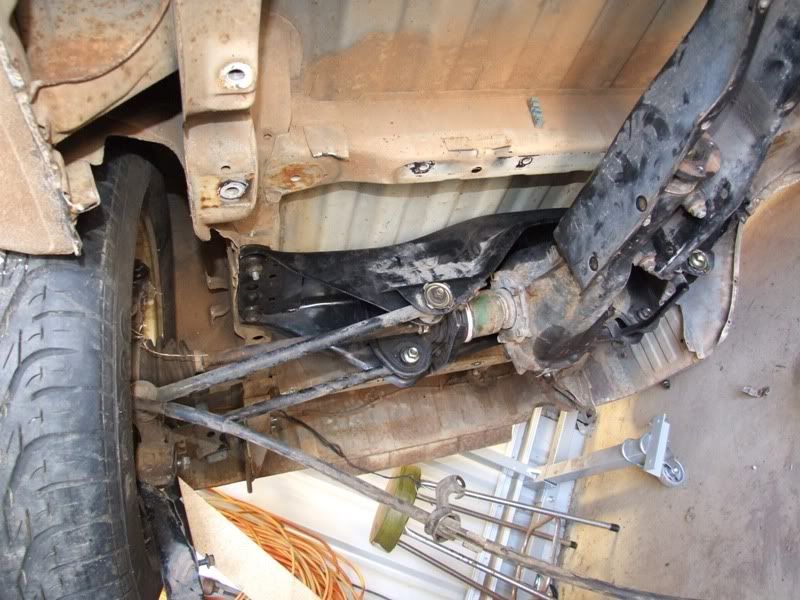
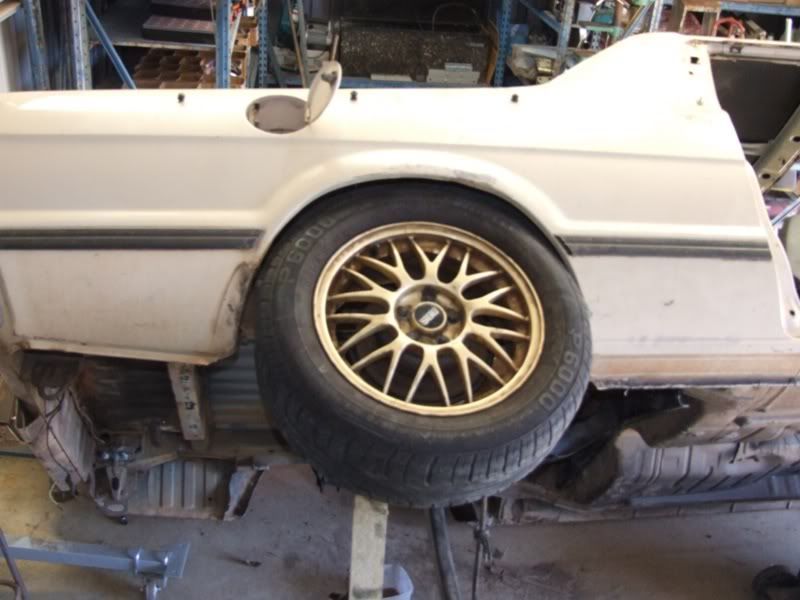
And just to check I got it central in the wheel arch I stuck a rim on it. It sits a tiny bit further forward than backwards but I think this is probably a good thing. The tyres on these rims are 215/60/16 which are Outback sized - will eventually be running something like 215/40/16 which are nearly 90mm smaller in diameter so there will be heaps of clearance and heaps of room to get it real low......

Image
[SIGPIC][/SIGPIC]

User avatar
mud_king91
Junior Member
Posts: 748
Joined: Tue Apr 19, 2011 8:40 pm
Location: edwardstown SA

Post by mud_king91 » Mon Aug 29, 2011 7:16 pm

Looking good

User avatar
El_Freddo
Master Member
Posts: 12502
Joined: Tue Oct 04, 2005 10:00 am
Location: Bridgewater Vic
Contact:

Post by El_Freddo » Tue Aug 30, 2011 12:19 am

I'm waiting to see how these rear strut towers are going to be done... Got some plans hatching for Ruby Scoo :twisted:

Cheers

Bennie
"The lounge room is not a workshop..."
Image
El Freddo's Pics - El_Freddo's youtube

User avatar
niterida
General Member
Posts: 1158
Joined: Sun Apr 13, 2008 5:45 pm
Location: Geraldton WA

Post by niterida » Tue Aug 30, 2011 10:10 am

Not sure yet whether I am going to just use the strut tower or the whole wheel well out of the Liberty. Depends on the shape of the Liberty wheel well really and I haven't even looked at it yet.
[SIGPIC][/SIGPIC]

User avatar
stenno
Junior Member
Posts: 116
Joined: Wed Oct 03, 2007 9:22 pm
Location: Wauchope NSW

Post by stenno » Tue Aug 30, 2011 10:33 am

damn the progress your making is amazing, actually inspiring. Its making me rethink what i had planned to do anyway.

Have you considered using different subaru trailing arms for the rear? maybe the shape changed over the years / models and may suit / make fabrication easier. I know forrester trailing arms are used in the us to drag race GC8's as the mounting angle promotes squat and a better launch. Maybe outback or later imprezza etc.

User avatar
niterida
General Member
Posts: 1158
Joined: Sun Apr 13, 2008 5:45 pm
Location: Geraldton WA

Post by niterida » Tue Aug 30, 2011 11:04 am

stenno wrote:damn the progress your making is amazing, actually inspiring. Its making me rethink what i had planned to do anyway.

Have you considered using different subaru trailing arms for the rear? maybe the shape changed over the years / models and may suit / make fabrication easier. I know forrester trailing arms are used in the us to drag race GC8's as the mounting angle promotes squat and a better launch. Maybe outback or later imprezza etc.
Good idea - might have to have a look into that.
[SIGPIC][/SIGPIC]

User avatar
niterida
General Member
Posts: 1158
Joined: Sun Apr 13, 2008 5:45 pm
Location: Geraldton WA

Post by niterida » Thu Sep 08, 2011 1:14 pm

Work has slowed since real paid work has got in the way and the fact that I have decided to scrap the 2 weeks hard work cutting the Liberty chassis to fit. I have found a much better way of doing it but its topsecret so I won't p[ost anything until it is completely done.

In the meantime I had to go to Perth for business so I picked up a few goodies while I was there.

Genuine Momo steering wheel :

Image

Set of 15's to match my 16's :

Image
Got these because it is easier snd cheaper to find tyres the right size to pass rego and they will be more comfortable in my daily driven Brumby which will only have a 2.5 and auto.

Set of alloy arms to keep the weight down and already polished :

Image

Set of DBA 5000 2 piece rotors to go with my 4 pots :

Image

Set of fibreglass backed reclinable seats for the daily driven Brumby :

Image

and finally a seat of fixed back fibreglass seats for this Brumby :

Image
[SIGPIC][/SIGPIC]

User avatar
niterida
General Member
Posts: 1158
Joined: Sun Apr 13, 2008 5:45 pm
Location: Geraldton WA

Post by niterida » Tue Oct 11, 2011 5:43 pm

Well my new way of getting all the WRX gear into the Brumby is a winner. Its not ready but here are a couple of teaser pics to see if you can work out how I am doing it :

Image

Image

Image
[SIGPIC][/SIGPIC]

User avatar
mud_king91
Junior Member
Posts: 748
Joined: Tue Apr 19, 2011 8:40 pm
Location: edwardstown SA

Post by mud_king91 » Tue Oct 11, 2011 6:06 pm

so this is considered legal ?
GROWING OLD IS COMPULSORY... GROWING UP IS OPTIONAL


WTB
BRUMBY, FORESTER prefferably GT

User avatar
niterida
General Member
Posts: 1158
Joined: Sun Apr 13, 2008 5:45 pm
Location: Geraldton WA

Post by niterida » Tue Oct 11, 2011 6:12 pm

mud_king91 wrote:so this is considered legal ?
Yep sure is - engineer and Dept of Transport approved :cool:
[SIGPIC][/SIGPIC]

Post Reply

Return to “Restorations and Project Build Ups.”