Silverbullets' resto: Interior

Detailed reference pages on Members special projects ...
User avatar
Silverbullet
Senior Member
Posts: 2863
Joined: Mon Aug 23, 2010 6:20 pm
Location: Adelaide

Post by Silverbullet » Fri Feb 05, 2016 10:28 pm

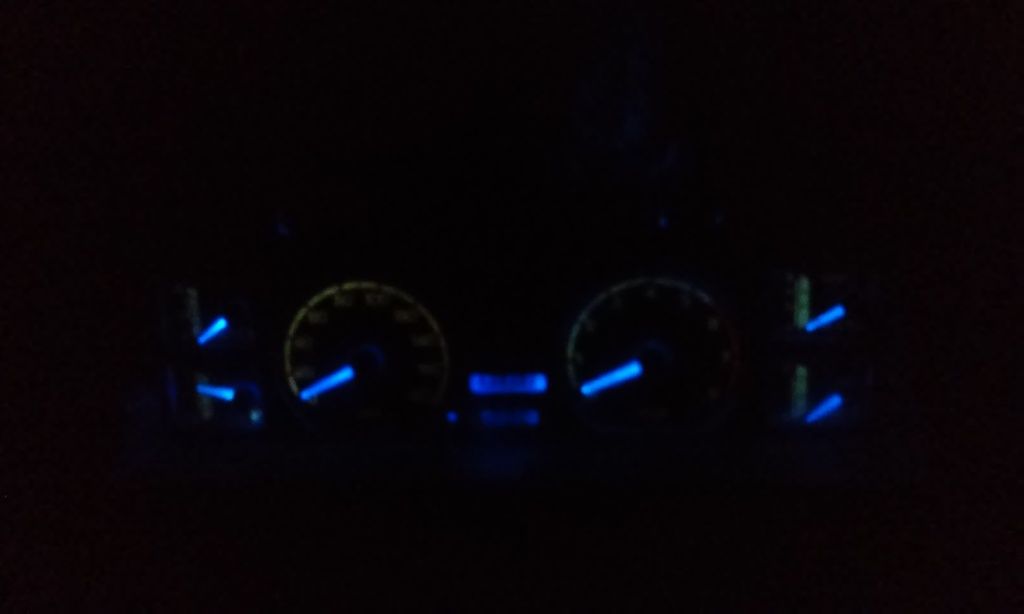
Some exciting developments in the 6 gauge cluster have transpired, namely converting it to full LED illumination and warning lights :cool: Using some 12v LED's such as this in blue I have converted my 6 gauge cluster from its original yellow/orange color scheme (blergh) to blue/green. Also ditching the hungry and dim incandescent bulbs in the process. Apologies for the blurry pic, my phone wouldn't focus in the dark but you get the idea.

Image

I was annoyed to find the yellow filter for the main dials (white numbered areas) is built into the dials and not removable. But in a strange twist of luck, adding super bright blue LED's turned them green, not bad! :p while still having blue needles. They look a bit dim in the photo too, probably because there was only 11.8 volts there. With an alt charging the system at a healthy 12-14 volts they should come up a bit brighter...hopefully!

If you want to do this yourself, the modern LED bulbs plug straight into the original plastic light sockets which you remove by giving them a little twist from the back of the instrument cluster. You will need the "T10 wedge" type LED's to replace the larger incandescents, and "T5 wedge" for the tiny ones like warning lights, get white ones for these. This works with the standard cluster as well. LED's are polarized though so they only work one way, it is a slow process testing each one after installation to make sure it lights.
Will it ever end!?
-EA81 TWIN CARB!!!!
-L series 5 speed
-Custom paint job
-2" lift
-Full custom re-wire
-L series front end
Image

User avatar
El_Freddo
Master Member
Posts: 12495
Joined: Tue Oct 04, 2005 10:00 am
Location: Bridgewater Vic
Contact:

Post by El_Freddo » Fri Feb 05, 2016 10:32 pm

Haha! Looks tops mate. Would be keen on a better pic to see the green back lighting ;)

Cheers

Bennie
"The lounge room is not a workshop..."
Image
El Freddo's Pics - El_Freddo's youtube

User avatar
Bantum
General Member
Posts: 1923
Joined: Sun Jul 29, 2012 4:30 pm
Location: Northern Territory + QLD
Contact:

Post by Bantum » Fri Feb 05, 2016 11:05 pm

Kewl, beat me to it though ... :p

I'm in the process of doing the same to mine, I had thoughts of scraping the yellow paint off ( or scanning & reprinting them ) after finding the same deal when I pulled the cluster apart ... :(

Haven't got round to installing the globes yet ( got a few different types to experiment with ) so can't say with certainty what works best - will post up some picture on my thread when I get to it ...

User avatar
Silverbullet
Senior Member
Posts: 2863
Joined: Mon Aug 23, 2010 6:20 pm
Location: Adelaide

Post by Silverbullet » Sat Feb 13, 2016 9:58 pm

Today, another milestone :) I've got every pin and every wire for the 4 plugs in the 6 gauge instrument cluster connected to something. I count this as a huge milestone, since when I got the instrument cluster I had no idea what any of the wires did and the circuit diagram in both my FSM's was completely different to what my cluster had. To celebrate I thought it was time I hooked the battery up again and did another test. (Admittedly) to my surprise, when I connected the earth to the battery post nothing went snap, crackle or pop and no fuses blew! :rolleyes: No electrical fires to speak of. And as a bonus, everything worked!!! :cool: well nearly everything, the digital clock does not work. I might have to take it apart and see if I can repair the circuit, otherwise I'm a bit stuck for a clock.

I just had to make a vid of this momentous occasion, however crappy quality it may be (phones don't really like filming in the dark)

To get the door lights to come on, because my door switches aren't in yet I had to scrabble around the back in the dark to find the wires and just put them on a bolt or some earth point, same with the 4wd lights. Take note of the factory lo range 4wd light too :cool: I'm not entirely happy with the brightness of the LED backlights, it seems putting blue light through a yellow filter just sucks a bit too much light out of the whole thing. Thinking maybe I can hard wire some more LEDs inside the instrument cluster to throw a bit more light around.

https://www.youtube.com/watch?v=Hq3pniE ... e=youtu.be
Will it ever end!?
-EA81 TWIN CARB!!!!
-L series 5 speed
-Custom paint job
-2" lift
-Full custom re-wire
-L series front end
Image

User avatar
TOONGA
Elder Member
Posts: 5335
Joined: Sat May 30, 2009 10:15 am
Location: Australind closer to where they divided by zero
Contact:

Post by TOONGA » Sun Feb 14, 2016 8:54 am

Well done Sam, that's a great job. The way you are working I see this being a finished car very soon :)

TOONGA
Image
PJ Gone but not forgotten
JETCAR AKA the sandwedge Rusted in pieces

User avatar
El_Freddo
Master Member
Posts: 12495
Joined: Tue Oct 04, 2005 10:00 am
Location: Bridgewater Vic
Contact:

Post by El_Freddo » Sun Feb 14, 2016 12:52 pm

Always a good feeling when it all works as it should!

Cheers

Bennie
"The lounge room is not a workshop..."
Image
El Freddo's Pics - El_Freddo's youtube

User avatar
Silverbullet
Senior Member
Posts: 2863
Joined: Mon Aug 23, 2010 6:20 pm
Location: Adelaide

Post by Silverbullet » Sat Jul 09, 2016 7:20 pm

Some progress on the interior has been made :o Today I trekked over to the north side of town to Subareck and got some really useful bits that I've been chasing for a while. Namely some decent seats, these are out of a Gen 3 outback (I think?) they're not the leather kind but they were the only pair of seats within reach I could find that weren't green from damp :rolleyes: or worn out, and that had a good chance of fitting in the wagon . They've got the two adjuster wheels on the side, drivers seat has a lower back support adjustment. They're in quite good condition but still need a proper wash. Good enough for now that I can fit them.

Looks like I got the right ones, the physical size of them is just right to go between the trans tunnel and sill. The rails/runners don't line up perfectly, I could get one bolt in at the front, the other front was 30mm to one side and the rear ones are way off. I opted to use the rails that were on it instead of retrofitting the MY rails. I was able to un-bolt the outer rail so I could modify (read - cut, weld, grind, fabricate) the mounts then bolt it back to the seat and drop it in. The rear inner mount is going to be a bit more tricky. In the pics below the big threaded hole you can see on the trans tunnel is usually for the seatbelt buckle, but the new seats have the buckle bolted to them so I can use this hole to mount the seat.

Pics below. Yes I scratched the hell out of my floor paint but I don't much care, I'll just touch it up before I put the carpet down. Also these seats are bloody heavy!

Rear inner mount. just a little bit off.
Image

Rear outer mount, had to move it over 55mm and push it forward 50mm
Image

Front inner mount lines up!
Image

Front outer just 30mm off, and no that wiring isn't crushed under the seat - photograph illusion
Image

Front outer mount modded with 3mm plate
Image
Attachments
20160709_170443 (Medium).jpg
20160709_170443 (Medium).jpg (92.69 KiB) Viewed 8675 times
20160709_141342 (Medium).jpg
20160709_141342 (Medium).jpg (106.19 KiB) Viewed 8675 times
20160709_141326 (Medium).jpg
20160709_141326 (Medium).jpg (107.68 KiB) Viewed 8674 times
20160709_141232 (Medium).jpg
20160709_141232 (Medium).jpg (108.69 KiB) Viewed 8675 times
20160709_141218 (Medium).jpg
20160709_141218 (Medium).jpg (111.16 KiB) Viewed 8675 times
Will it ever end!?
-EA81 TWIN CARB!!!!
-L series 5 speed
-Custom paint job
-2" lift
-Full custom re-wire
-L series front end
Image

User avatar
Silverbullet
Senior Member
Posts: 2863
Joined: Mon Aug 23, 2010 6:20 pm
Location: Adelaide

Post by Silverbullet » Sat Jul 09, 2016 7:25 pm

Rear outer mount modded. CAD helps alot here (cardboard aided design)
Image

Bolted up
Image

She's in! Perfect height and positioning too.
Image

Might I say, these seats are bloody comfortable :) Having sat on Brumby seats for the last 3 years with no side support or lower back support, these Outback seats are out of this world :) Really supportive, can tell it will hold me really well through those tight corners :twisted:

And now I've got something to sit on for the upcoming test drive :twisted:
Attachments
20160709_172506 (Medium).jpg
20160709_172506 (Medium).jpg (106.12 KiB) Viewed 8680 times
20160709_172113 (Medium).jpg
20160709_172113 (Medium).jpg (105.17 KiB) Viewed 8682 times
20160709_170456 (Medium).jpg
20160709_170456 (Medium).jpg (89.22 KiB) Viewed 8677 times
Will it ever end!?
-EA81 TWIN CARB!!!!
-L series 5 speed
-Custom paint job
-2" lift
-Full custom re-wire
-L series front end
Image

User avatar
Silverbullet
Senior Member
Posts: 2863
Joined: Mon Aug 23, 2010 6:20 pm
Location: Adelaide

Post by Silverbullet » Sun Jul 17, 2016 7:00 pm

And the other seat is in! :) Well, 3 bolts are in like the drivers side at least. Still scratching my head on what to do with that last bolt position. Just realized today the passenger doesn't have all the height adjustment stuff in it (duh) which makes it a) lighter but also b) sits higher overall than the drivers seat. Not alot, it's not uncomfortable at all, just a bit close to the headlining. Too late to do anything about it now though. I'm taller than most and am not up against the roof so for anyone else it should be fine.

Really pleased how these seats have turned out, $50 for both of them was a steal too. Just need a steam clean up and they'll be good as new. Also you might see in the photo below, I've fitted the interior trim panel to the drivers side that goes down beside the seat. I had to cut off most of the part that goes under the stock seat (this was a sacrificial panel, I've got good grey ones in the boot) but other than that fits fine, even fits my 2x stock girth wiring harness :rolleyes:

The flash highlights the brown stain lol :rolleyes:
Image
Attachments
20160717_180711 (Medium).jpg
20160717_180711 (Medium).jpg (111.57 KiB) Viewed 8671 times
Will it ever end!?
-EA81 TWIN CARB!!!!
-L series 5 speed
-Custom paint job
-2" lift
-Full custom re-wire
-L series front end
Image

User avatar
Silverbullet
Senior Member
Posts: 2863
Joined: Mon Aug 23, 2010 6:20 pm
Location: Adelaide

Post by Silverbullet » Sat Jul 30, 2016 6:59 pm

Last week I went down to U-pull it and found 4 MY wagons to choose from :) One had a really good condition interior so I nabbed the rear seat from it to replace my original one that was pretty knackered. I will still get this one re-upholstered since it has sun-cracked parts in the top corners and also to match the front seats colour. For now they were good enough to bolt in to get a look at how everything fits with the new front seats too. Pleased to say everything looks good even with the larger Outback seats up front. I can still fold the rear seat down flat and have comfortable leg room in the front. Likewise can have passable leg room for rear passengers and also still good in the front :cool:

The rear seat will stay in there now until I get it re-upholstered to free up some much needed shed space.

Image

Image
Attachments
20160730_133601 (Medium).jpg
20160730_133601 (Medium).jpg (104.92 KiB) Viewed 8656 times
20160730_133530 (Medium).jpg
20160730_133530 (Medium).jpg (101.72 KiB) Viewed 8656 times
Will it ever end!?
-EA81 TWIN CARB!!!!
-L series 5 speed
-Custom paint job
-2" lift
-Full custom re-wire
-L series front end
Image

User avatar
Silverbullet
Senior Member
Posts: 2863
Joined: Mon Aug 23, 2010 6:20 pm
Location: Adelaide

Post by Silverbullet » Sat Oct 01, 2016 9:07 pm

Not much going on with the wagon lately :(

But I spent most of today working on the custom tacho circuit - using a NE555 timer chip. I've made a piece of prototyping PCB that will go in place of the original circuit board, today I mocked up the circuit on a bread board to make sure it was going to work. Amazingly, it worked! :cool: Check out the video below; there are 2 relays (working bloody hard!) being triggered at 60hz by an Arduino to simulate the "points" signal to the circuit. Calibration is just using a trimpot and adjusting the needle to read 3k rpm at 60hz which will make it right for anyone else. In my case because I'm using a twin coil pack that gets fired half as often I have to make it read 6k rpm...when it's all put together in the instrument cluster.

https://www.youtube.com/watch?v=LZxh6VA ... ture=share
Will it ever end!?
-EA81 TWIN CARB!!!!
-L series 5 speed
-Custom paint job
-2" lift
-Full custom re-wire
-L series front end
Image

User avatar
Silverbullet
Senior Member
Posts: 2863
Joined: Mon Aug 23, 2010 6:20 pm
Location: Adelaide

Post by Silverbullet » Sun Oct 02, 2016 8:14 pm

Ta da! :)

Image

Image

Took 2 attempts to get this to work, which included ripping everything that I'd done off the board once because the circuit I followed didn't work. Then the second iteration didn't work initially, I found I'd put a junction of 2 resistors on the wrong side of a a capacitor. Fixed that and it works pretty nice :) The needle is a little jumpy on the lower positions hopefully I can smooth that out somehow. Have yet to test it in the car. The little blue thing you can see in the second photo is the trimpot for calibration.
Attachments
20161002_153521.jpg
20161002_153521.jpg (102.23 KiB) Viewed 8880 times
20161002_153505.jpg
20161002_153505.jpg (99.12 KiB) Viewed 8880 times
Will it ever end!?
-EA81 TWIN CARB!!!!
-L series 5 speed
-Custom paint job
-2" lift
-Full custom re-wire
-L series front end
Image

User avatar
El_Freddo
Master Member
Posts: 12495
Joined: Tue Oct 04, 2005 10:00 am
Location: Bridgewater Vic
Contact:

Post by El_Freddo » Sun Oct 02, 2016 10:22 pm

Awesome work SB!

Will you be creating an analogue speedo driven by an electronic device as well?

That'd be sweet!

Keep up the good work!

Cheers

Bennie
"The lounge room is not a workshop..."
Image
El Freddo's Pics - El_Freddo's youtube

User avatar
Proton mouse
Junior Member
Posts: 378
Joined: Mon Nov 06, 2006 11:35 pm
Location: Diagonally parked in a parallel universe

Post by Proton mouse » Mon Oct 03, 2016 12:11 am

Great work Sam!!
Is there anything you cant do??
Cheers John

User avatar
Silverbullet
Senior Member
Posts: 2863
Joined: Mon Aug 23, 2010 6:20 pm
Location: Adelaide

Post by Silverbullet » Sun Dec 04, 2016 6:28 pm

This isn't interior related but whatevs :rolleyes:

Got new tooters for the wagon, installed them today. They are nice and loud, which is what I wanted. Managed to fit one behind the grille, had to remove some of the flare from the horn and sand some little scallops into the back of the grille to clear everything. The other horn had no chance of going behind the grille on the other side, so I found a perfectly sized nook behind the RH headlight, in front of the battery.

A short demo below, ignore the bomb site that is the front dash/instruments :oops: I've been tidying and tying up the wiring loom, it's nearly ready to be wrapped. Also needed the instrument cluster out for something else.

https://www.youtube.com/watch?v=P4jieo-7Qsg
Will it ever end!?
-EA81 TWIN CARB!!!!
-L series 5 speed
-Custom paint job
-2" lift
-Full custom re-wire
-L series front end
Image

User avatar
Silverbullet
Senior Member
Posts: 2863
Joined: Mon Aug 23, 2010 6:20 pm
Location: Adelaide

Post by Silverbullet » Thu Dec 29, 2016 5:45 pm

Another step towards having a fully functional 6 gauge instrument cluster :) When I got this instrument cluster from NZ the digital clock did not work. I touched up all the solder joints on the PCB inside etc but it didn't come back to life :( The old clocks display is fascinating, it is one big sealed glass block with the digits inside. The construction is something akin to a nixie tube and not LED's. Without a circuit diagram for the clock I had no chance of repairing it, if the main IC was dead it would have been impossible to replace as that is hidden under the numerical display. I wasn't keen on de-soldering 30+ individual legs to remove the numerical display :shock:

I knew it was going to be impossible to find another clock for this instrument cluster so much searching on eBay later and I found a decent quality 12v clock (from NZ again :rolleyes: )

http://www.ebay.com.au/itm/252684193008 ... EBIDX%3AIT

There is alot of cheap chinese rubbish on eBay when it comes to 12v clocks but this one is quite good. It has pretty much the same functionality as the old one (except "reset" but who needs that anyway) And importantly has the same size digits on the LED display. It comes in a plastic housing meant for popping into a rectangular shaped hole but I pulled it apart and fit the PCB/display into the old clock housing, so it looks as good as the real thing. Even better was the buttons for setting the time were wired onto the board remotely, which meant I could easily wire the original switch onto the new clock to set the time as per original.

Pretty chuffed with the result, now this instrument cluster is 100% functional again and all wired up to work with my car. I've got a little bit more fiddling to do on it in the clock area (just mounting hardware to make sure it never breaks loose inside there) and have to give the front perspex a final clean/polish but other than that it's pretty much done!

Image

Image

Image

https://www.youtube.com/watch?v=18u50Ng ... e=youtu.be
Attachments
20161229_153519 (Medium).jpg
20161229_153519 (Medium).jpg (82.55 KiB) Viewed 8770 times
20161217_165929 (Medium).jpg
20161217_165929 (Medium).jpg (107.33 KiB) Viewed 8770 times
20161217_162909 (Medium).jpg
20161217_162909 (Medium).jpg (107.84 KiB) Viewed 8770 times
Will it ever end!?
-EA81 TWIN CARB!!!!
-L series 5 speed
-Custom paint job
-2" lift
-Full custom re-wire
-L series front end
Image

User avatar
El_Freddo
Master Member
Posts: 12495
Joined: Tue Oct 04, 2005 10:00 am
Location: Bridgewater Vic
Contact:

Post by El_Freddo » Thu Dec 29, 2016 9:25 pm

Bugger me mate, that's crazy good! Nice find.

Cheers

Bennie
"The lounge room is not a workshop..."
Image
El Freddo's Pics - El_Freddo's youtube

User avatar
Silverbullet
Senior Member
Posts: 2863
Joined: Mon Aug 23, 2010 6:20 pm
Location: Adelaide

Post by Silverbullet » Thu Jan 05, 2017 6:43 pm

Warning - wall of text ahead probably all boring so don't read if you don't want to :rolleyes:

About time I told anyone following this build - the project has been well and truly stalled for some time now :( Most recent plans were for this car to be on the road and 90% done by the end of last year, well we can all see how that turned out :mad: All because of one little part that I haven't been able to find which has held up pretty much EVERYTHING else. This little $2 item has caused me so much headache and frustration, searching online for hours and hours for a suitable replacement. But luckily a single spur of the moment trip to U pull it the other day has solved everything.

The rubber grommets for the wiring in the door jambs to each door. They are so car specific that the same part from any other car just does not fit. The holes in this car are so small (20mm) that nothing else even comes close. I should have enlarged the holes back when I had the doors off but oh well. Anyway because of that I couldn't wire up the doors, couldn't lay the carpet until the wiring is complete, couldn't do anything else on the interior until the wiring is complete etc etc. The grommets are special as well with a little rubber tail for the loom tape to wrap onto and seal out the moisture. Regular household rubber grommets are no where near right :( So on that spur of the moment U pull it trip the other day I found a pretty much untouched 84' touring wagon with power windows...with all the rubber grommets for the window wiring intact - BINGO!!! :p:p:

Long story short I nabbed them all for every door (sorry to anyone who goes and wants the window wiring intact hehe) plus some other choice interior goodies and have been working furiously on my interior wiring ever since. Have got all the wires run out to all the doors (windows, locks, speakers, and a courtesy light) So now there is not alot of work until I can lay the carpet and start getting stuff to a nearly finished stage on the inside FINALLY! Now I have to buy all the stereo stuff like speakers and amp, sub woofer and head unit.

So todays picture is of the speakers I'm going with in the front doors which I think is the max that will fit depth wise. JL Audio C2-600x are 6" coaxials with 60mm mounting depth. I'm putting mine flush in the door which leaves about 5mm clearance when the window is down. Going with the same speakers but 4" in the back doors, these are a bit shallower. Also an 8" slim sub woofer in the tailgate. All powered by a very slim low profile Clarion 5 channel marine amp under the passengers seat when it arrives. I'm also ditching the tablet PC idea because I think it's just going to be all too hard to wire it up nicely and have all the functionality I want. I'm on the hunt for a "mechless" double din touch screen head unit with no CD player (these are slimmer) but the options are severely limited unless you've got an iphone which I don't. Apparently all the major brands will be releasing this years new models soon so hopefully there is a decent mechless double din/sat nav/touchy screen unit among them.

Image

Here is one of the back doors mocked up (for fun mainly) it will be different colors when it's done for real though.
Image
Attachments
20170105_183457 (Medium).jpg
20170105_183457 (Medium).jpg (73.17 KiB) Viewed 8762 times
20170105_183430 (Medium).jpg
20170105_183430 (Medium).jpg (100.94 KiB) Viewed 8761 times
Will it ever end!?
-EA81 TWIN CARB!!!!
-L series 5 speed
-Custom paint job
-2" lift
-Full custom re-wire
-L series front end
Image

User avatar
Bantum
General Member
Posts: 1923
Joined: Sun Jul 29, 2012 4:30 pm
Location: Northern Territory + QLD
Contact:

Post by Bantum » Fri Jan 06, 2017 5:32 am

Awesome work as usual, like the clock fix - Got a shot of the install in situe ? ( from the back ) Might have to do the same to mine - haven't checked if it works yet ... :/

Other option for door wiring grommets is the bung stops in fire wall ...

On the home stretch now ... :)

Ciao, Bantum ...

User avatar
El_Freddo
Master Member
Posts: 12495
Joined: Tue Oct 04, 2005 10:00 am
Location: Bridgewater Vic
Contact:

Post by El_Freddo » Fri Jan 06, 2017 8:14 pm

So that's what's been holding you up! Totally knew something was up :???:

I've got the same issue with the RS build. While I still need to sort the engine I'm looking for a little seal for the intercooler pump that no one seems to make :evil:

I feel your frustration prior to finding what you needed. The other thing is may have had a set on a parts bomb at m&d's - I'll have a look next time I'm there.

Cheers

Bennie
"The lounge room is not a workshop..."
Image
El Freddo's Pics - El_Freddo's youtube

Post Reply

Return to “Restorations and Project Build Ups.”