Monster wagon

Post Reply
User avatar
AndrewT
Senior Member
Posts: 4777
Joined: Tue Oct 04, 2005 10:00 am
Location: WA
Contact:

Post by AndrewT » Thu Oct 30, 2008 11:26 pm

Image
Image
Image
Image
Image
Image

Image

User avatar
GOD
Junior Member
Posts: 754
Joined: Sun May 04, 2008 10:04 pm
Location: Tom Price WA

Post by GOD » Thu Oct 30, 2008 11:46 pm

Looking good. But are they cobwebs inside the wheels? You should be ashamed :).

Look forward to seeing it in action.

Dane.

User avatar
Subafury
Senior Member
Posts: 2985
Joined: Sun Apr 30, 2006 10:00 am
Location: Duncraig, WA

Post by Subafury » Fri Oct 31, 2008 12:31 am

yeee haw!!! keep the progress a comin
Image

User avatar
Shark
Junior Member
Posts: 122
Joined: Thu Jul 24, 2008 1:08 am
Location: Rockingham

Post by Shark » Fri Oct 31, 2008 1:46 am

Well impressed matey, keep it up... You must be hanging to get it on the road again..

User avatar
Fatz
General Member
Posts: 1003
Joined: Tue Oct 04, 2005 10:00 am
Location: Tasmania

Post by Fatz » Fri Oct 31, 2008 7:38 am

ahh.. brings back memories. :):)
Good on ya mate.
keep it up
Image

User avatar
stamp_licker
General Member
Posts: 1066
Joined: Wed Oct 05, 2005 10:00 am
Location: Kallangur.Bris North

Post by stamp_licker » Fri Oct 31, 2008 3:36 pm

Looking good.Can't wait to see some pics of the front end in place.OOOPS just went back a page...
[SIGPIC][/SIGPIC]aka the_postie
Building a hardcore postie:D

User avatar
BrennyV
Senior Member
Posts: 2573
Joined: Wed Oct 05, 2005 10:00 am
Location: Pussy Town

Post by BrennyV » Fri Oct 31, 2008 3:54 pm

crap gear oil :P
[SIGPIC][/SIGPIC]
VER7 STI (FOR SALE) & RIP EJ22 AWD LEONE
PIX @ www.webshots.com/user/4muff

I hate to advocate drugs, alcohol, violence, or insanity to anyone, but they've always worked for me.
Hunter S. Thompson
http://www.brainyquote.com/quotes/quote ... 02861.html

User avatar
Bumpty
General Member
Posts: 1299
Joined: Fri Aug 24, 2007 11:44 pm
Location: Tas

Post by Bumpty » Fri Oct 31, 2008 4:40 pm

Wowsoweeee

User avatar
AndrewT
Senior Member
Posts: 4777
Joined: Tue Oct 04, 2005 10:00 am
Location: WA
Contact:

Post by AndrewT » Fri Oct 31, 2008 5:40 pm

BrennyV wrote:crap gear oil :P
yeah thats what I put in the last MY gearbox I had in WackyBug, it got kicked under monsterwagon somehow - now that it's so tall it's easy to store stuff underneath heh.

User avatar
AndrewT
Senior Member
Posts: 4777
Joined: Tue Oct 04, 2005 10:00 am
Location: WA
Contact:

Post by AndrewT » Sun Nov 02, 2008 10:12 am

Got to work making up a new custom gearbox crossmember yesterday.
Normally with a Liberty one you have 3 sections, the rear crossmember, the front crossmember and a centre section that runs between the first two and has the rubber mount for the gearbox bolted to it.

Previously in this car I had a modified rear section to bolt up to the body where there is normally just a little plate that does nothing (or on EA82 automatics there is a crossmember there). The centre section was normal, but then I'd modified an EA82 front crossmember to bolt to the centre section. This EA82 front crossmember bolted to the car in the usual position at the radius rod mounts.

Now I don't have any radius rod mounts and my modified rear crossmember no longer lined up to the bolts in the body (I guess the position of the engine and gearbox may have changed slightly).


So I bolted up the centre section to the gearbox and marked out where the holes in the rear crossmember needed to be. I then welded two layers of 3mm flat bar (total 6mm thick) to the outer edges of the rear crossmember and marked where the new holes had to go. Drilled the new holes and bolted it all together.

Now all that needs doing is make the front section. From what I can tell this should work out very well... The two front subframes are pretty much exactly either side from where the centre crossmember is hanging (currently supported by a jack). I've already cut a section of 40x40x4 galvanised box section to the right length and drilled the required holes. This section will bolt directly between the two front subframes and not only become the front section of the gearbox crossmember, but provide extra bracing to the subframes as a bonus.


In other news I've now bolted up the passenger side control arm, slapped the front wheels on and dropped her down off the car stands. I jumped up and down on the bullbar a few times and it's clear I will definitely need to get those Outback struts and springs soon as these GX ones are pretty sloppy. But I'm happy with the camber so far. If it was a Liberty I think there would be pretty bad positive camber on the front, but being an L series (narrower car) the strut towers are closer together and this has brought the front wheels to a very neutral position - this will no doubt change abit once I start driving it but at least I have some small adjustment with the EJ struts. I'm hoping it may even go slightly negative but we shall see.

Anyway, fairly useless without photos so if I can get there this afternoon to finish the front gearbox crossmember section I will take more pics.

User avatar
AndrewT
Senior Member
Posts: 4777
Joined: Tue Oct 04, 2005 10:00 am
Location: WA
Contact:

Post by AndrewT » Sun Nov 02, 2008 9:46 pm

So I knocked up the front bit of the gearbox crossmember today. Still not quite finished, it needs some of the blank parts closed off and some holes drilled, and obviously painted but the bulk of it is done now.

Pics;

Image
Image
Image
Image
Image
Image

User avatar
AndrewT
Senior Member
Posts: 4777
Joined: Tue Oct 04, 2005 10:00 am
Location: WA
Contact:

Post by AndrewT » Sun Nov 02, 2008 9:47 pm

I roughly bolted it in place under the car for the purposes of the pics - not actually bolted to the gearbox in these pics;

Image
Image
Image

Some general pics of the car sitting on it's wheels;

Image
Image
Image

User avatar
T'subaru
Junior Member
Posts: 733
Joined: Mon Oct 13, 2008 9:13 am
Location: T'sunami Coast, Wa. ( usa )

Post by T'subaru » Mon Nov 03, 2008 7:58 am

Thats sick ! With that lift are you regulated to off road only?, or do you think you'll have enough stability for hiway too.

User avatar
bluesteel
Junior Member
Posts: 892
Joined: Wed Oct 05, 2005 10:00 am
Location: Hobart, Tasmania

Post by bluesteel » Mon Nov 03, 2008 8:52 am

looking good andrew :D a work of art all that metal!

only thing id change is where that horizontal bolt goes through the crossmember, they tend to knock and rattle unless they are done up very tight and stay that way!
Image

User avatar
AndrewT
Senior Member
Posts: 4777
Joined: Tue Oct 04, 2005 10:00 am
Location: WA
Contact:

Post by AndrewT » Mon Nov 03, 2008 9:46 am

She should drive fine on the highway, the centre of gravity isn't really raised by a massive amount as with all body lifts.
Correct on the bolting arrangement, it is likely to start making abit of noise in it's current form. While those two do fit very snugly at the moment I will likely add two more bolts a little further along on each side.

User avatar
bluesteel
Junior Member
Posts: 892
Joined: Wed Oct 05, 2005 10:00 am
Location: Hobart, Tasmania

Post by bluesteel » Mon Nov 03, 2008 10:05 am

good to see youre already on it! :D

keep up the good work!
Image

User avatar
AndrewT
Senior Member
Posts: 4777
Joined: Tue Oct 04, 2005 10:00 am
Location: WA
Contact:

Post by AndrewT » Fri Dec 12, 2008 7:33 pm

Did a few things yesterday;

- fitted new KYB Gen2 Outback front struts and standard height Outback Kings Springs
- re-fitted the fuel pump (borrowed it for WackyBug a while ago)
- re-fitted all the engine sensors (borrowed them for the RX a while ago) and re-connected all the engine bay stuff. Ran new fuel lines while I was at it.
- connected up the power steering lines to the rack
- reconnected the hydraulic clutch system, bleed


Didn't get to start her up due to a problem with my immobiliser that seems to have developed, I will have to bypass this when I am there next as a temporary measure before I get a new alarm system.

Here are a couple of pics;

Image
New Outback struts / Springs

Image
A quick measurement

I jumped up and down on the bullbar quite a bit to get the front struts/springs to settle down abit. I took a very quick measurement and she has over 500mm clearance from the garage floor to the bottoms of the doors now. This is with low profile tyres which are going slightly flat. Obviously other things like the control arms and rear diff are situated alot lower than this, I will have to measure them soon, but they should be higher than most L series after the new tyres are fitted.

I am picking up a set of 15" PT Cruiser rims this week which should have a better offset than the Forester GT mags. The current mags are abit too close to the rear K frame for my liking. If the PT rims fit well then I will take them down to the tyre shop asap and get the 29" muddies fitted.

**edit - oh yeah the gearbox crossmembers pictured above are all painted and fully bolted up tight underneath now.

User avatar
AndrewT
Senior Member
Posts: 4777
Joined: Tue Oct 04, 2005 10:00 am
Location: WA
Contact:

Post by AndrewT » Sun Dec 14, 2008 11:58 am

Yesterday I did a couple more things.

Got the ignition working again, thanks heaps to Subarino for your pointers on the phone mate. It pretty much was just 1 main ignition wire that had been bypassed into the immobiliser. Cut the immobiliser out and re-connected and everything works fine now. Still not enough juice in the car battery to kick the starter motor over but she should start next time I go up there.

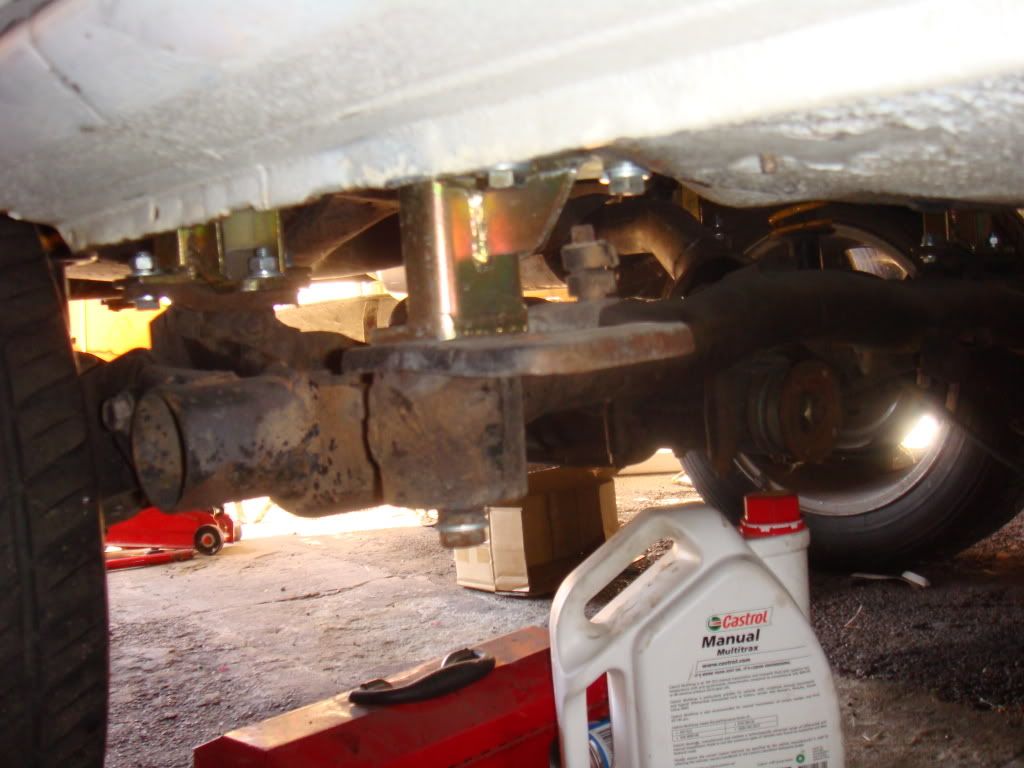
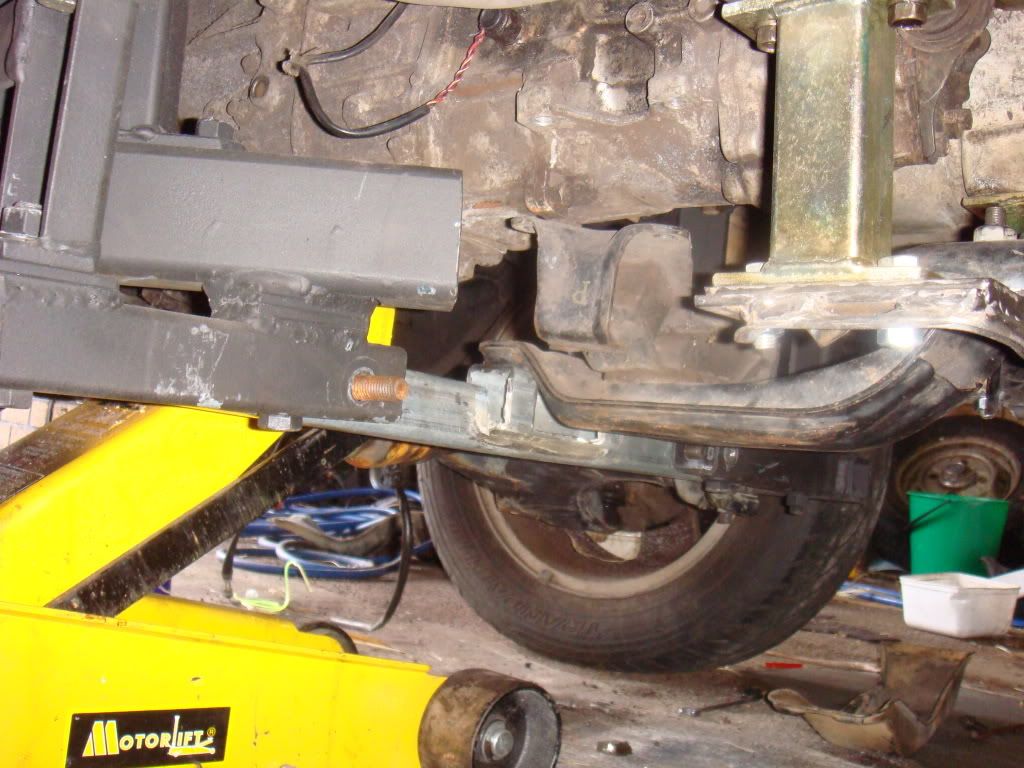
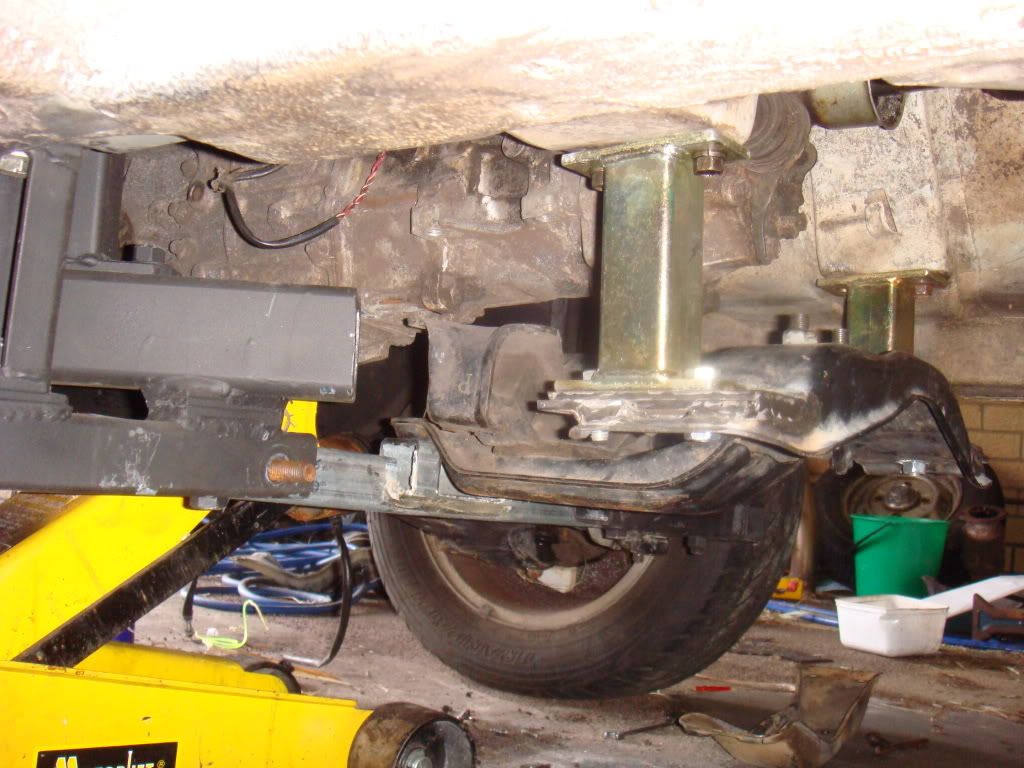
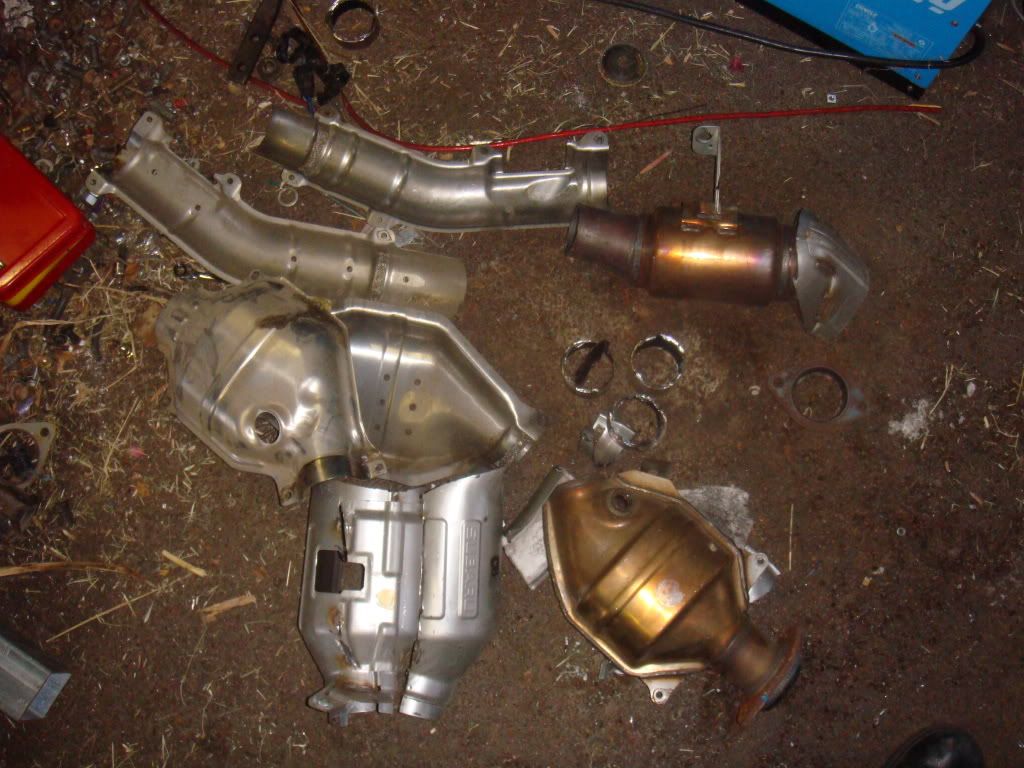
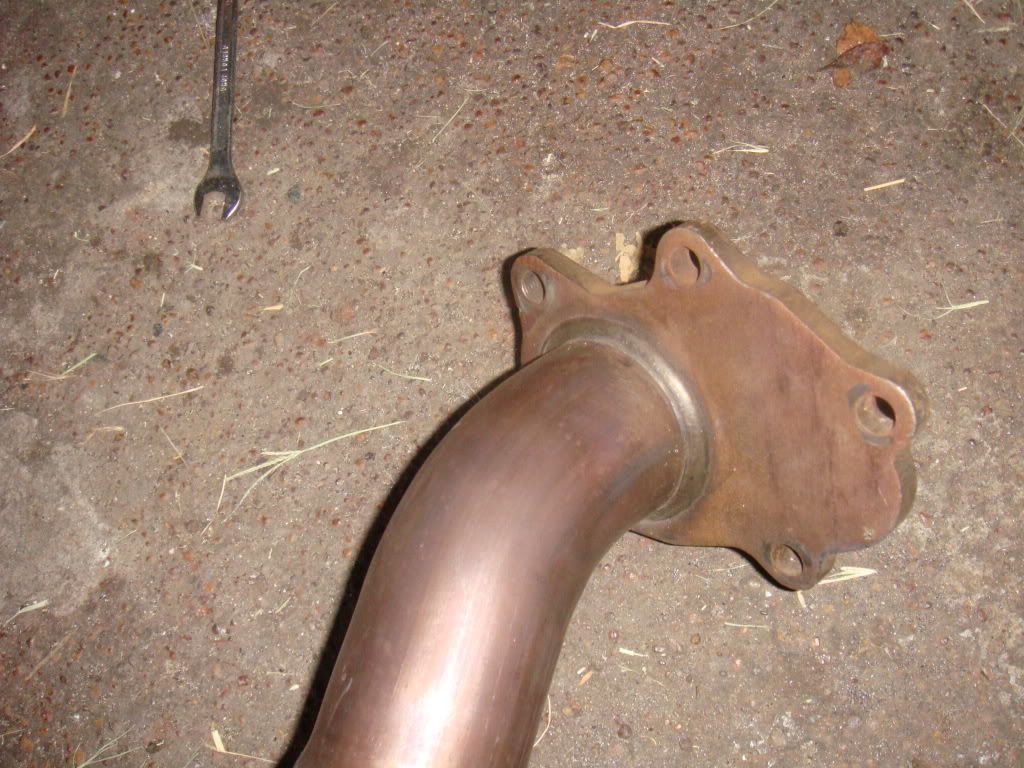
A few days ago I picked up a pretty much brand new looking WRX turbo dump pipe (Thanks Matatak!). I've ditched the old 3" stainless one because of the clearance issues. The new dump pipe while it will now clear the steering knuckle properly, it will need to be heavily modified to thread past the lift frames.
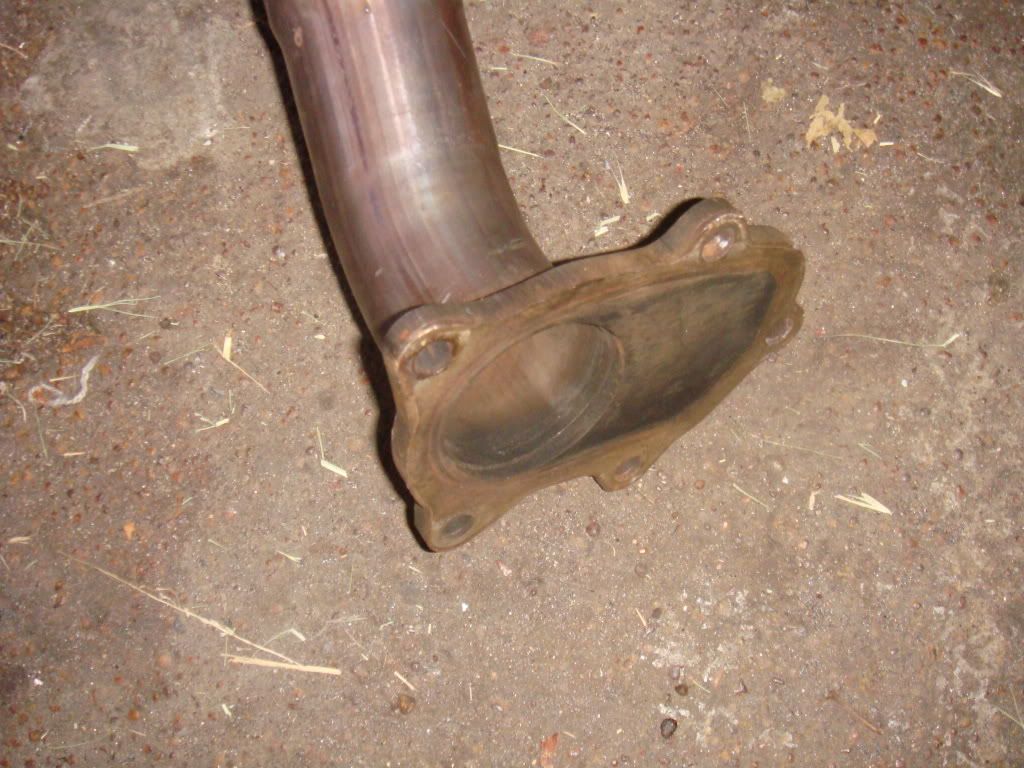
Firstly I set about totally dismantling (munting) it with an angle grinder, separated out just the part with the turbo flange, discovered that some of the rest of the pipe from further down was pretty much already bent at the correct angle I needed, cut and re-cut and test fitted a fair bit, tacked it together, then welded it proper.
Image
Image
Image
Image
Image


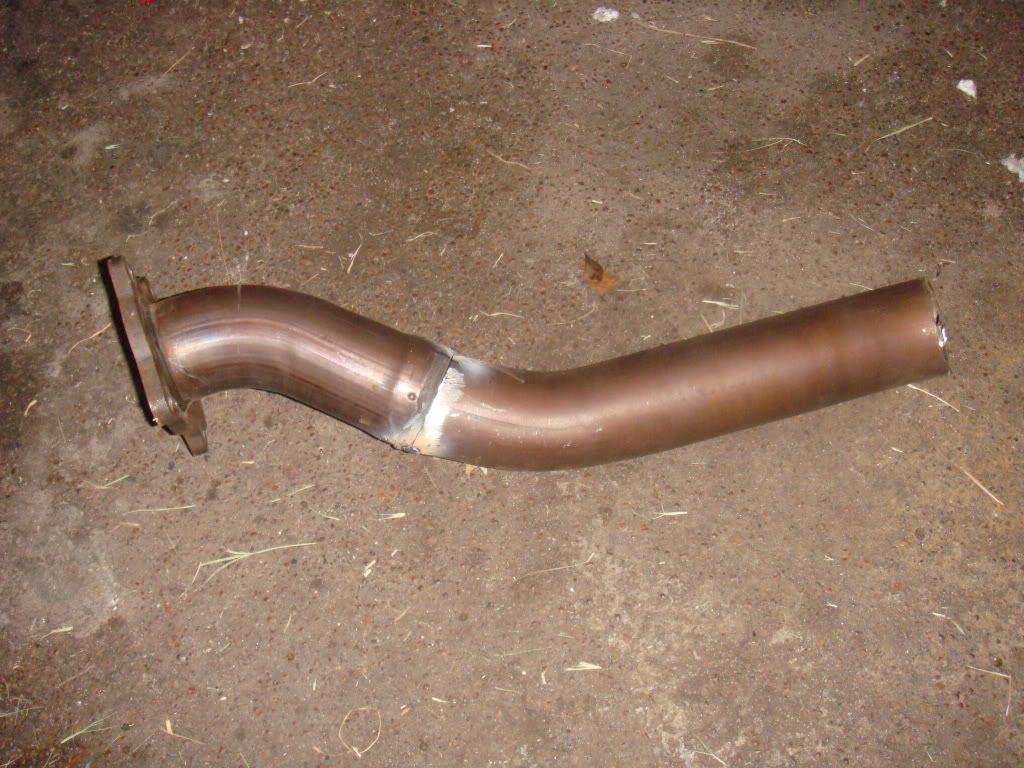
It sits nice and snug in between the body and the lift frames and will thread around the side of them rather than dip down underneath, giving maximum clearance - I don't want to be bashing it on things.

I will need to goto an exhaust shop and buy a few more bends and short lengths of pipe, and sort out a flange adaptor to step it back up to 3" where it will connect to the rest of the 3" stainless system after the Cat.
I will also need to make a hole and weld on a big nut for the O2 sensor to mount into.

I'll have to pick up some heat wrap for the dump pipe too. Now that all the Subaru shielding is missing it will probably get abit too hot for the clutch and brake master cylinders. It wasn't an issue with the 3" pipe with no shielding but I figure I may as-well do it anyway.

User avatar
vidler
General Member
Posts: 1055
Joined: Thu Oct 06, 2005 10:00 am
Location: Hamersley WA

Post by vidler » Tue Dec 16, 2008 10:27 pm

what size are those forester mags? if your replacing them i might be keen to take them off your hands
09 Forester XT Touring Wagon

User avatar
AndrewT
Senior Member
Posts: 4777
Joined: Tue Oct 04, 2005 10:00 am
Location: WA
Contact:

Post by AndrewT » Tue Dec 16, 2008 10:32 pm

They are 16". Having not yet collected the PT Cruiser wheels I am still undecided, but if they end up going you will be the first to know. They cost me approx $400 and having not actually used them I'd like to recover most of that :) This of course does not necessarily have to come in the form of actual money.
Will decide very soon whether to quit them or not!

Post Reply

Return to “AndrewT”