Monster wagon


cool man definitely post pics soon as u can!
EZ30 L series - Monsterwagon
https://www.ausubaru.com.au/viewtopic.php?f=71&t=26163
https://www.ausubaru.com.au/viewtopic.php?f=71&t=26163
Did a little more on her today...
I dropped the engine crossmember down and replaced the 3" blocks with the 6" ones. Well now, who said it was hard to swap out the coils and spark plugs in an L series with an RS turbo motor!! Just add a 6" lift kit...You can pretty much see the coils when you look into the wheel arch =)
I can almost go back to keeping my spare wheel in the engine bay too, the motor is half hanging out the bottom of the car. Mega bash plate will be required, you can almost see the crank pulley by looking at the car head on.
Unfortunately my phone was flat so I couldnt take any pics today but just look at Fatz' thread haha
When I dropped the original body bolts through the front chassis rails to bolt up the 6" blocks it just seemed like it was abit weak, especially given the extra flex thats probably going to occur with this kit. So I made a few changes.
The original little plate which goes in the engine bay to spead the weight has now been replaced with 5mm thick flat bar, a piece about 40cm long which runs from down under the brake master cylinder to right up the front basically all the way along the top of the chassis rail. This will be welded in soon. Two holes are drilled in this for the bolts to drop through. I also enlarged the bolt holes through the chassis rails slightly so I could fit bigger, thicker bolts through.
Still to do!
- fit the 6" kit to the rear of the car
- fix the captive nuts and rig up extra bracing for the radius rod plates
- fit up the front struts and hubs (this has to wait for captive nuts to be fixed)
- figure out how on earth the 3" stainless turbo dump pipe is supposed to fit past the new steering extension!
- completely re-do the exhaust to sit up near the body
- extend shifter linkages
- fit crossbred rear handbrake
EZ30 L series - Monsterwagon
https://www.ausubaru.com.au/viewtopic.php?f=71&t=26163
https://www.ausubaru.com.au/viewtopic.php?f=71&t=26163


well about 10 months since the last update here's another one.
Been doing some stuff over the last few weeks.
She now has the rear part of the lift kit completely installed - no problems here. I might have to modify one part of it, the moustache bar has naturally dropped 6 inches. I would prefer it to be up further and have just the diff itself dropped so I may change that later.
Vidler came over the other day and repaired one of the captive nuts which had been ripped out of the floor of my car previously, this is now very strong.
The front end is where all the action is now...
I didn't want to keep running the standard L series radius rod setup so I've made a few changes. I've slotted the mounting holes in a Liberty engine crossmember slightly and fitted that. This means that I'll be running the Liberty wishbone control arms. It also means I will be running EJ (Outback) struts and springs, and the EJ front hubs and brakes. I won't actually need the custom L series control arms that came with the Crossbred kit now. I'll also be able to run a Liberty power steering rack & tierod ends, and a Liberty front sway bar. Naturally the track of the wheels at the front is going to be slightly wider.
Recently I got the steering rack in and all connected up to the hubs and steering wheel, all is good there.
What I'm working on right now is some adapters to allow the Liberty control arms to bolt to the car.
The normal 6" blocks which used to drop the radius rod mount down are still being used, and my adapters will just bolt to them. This means no actual modification to the car itself.
My adapters are going to be braced backwards to the floor of the car - some mounting brackets will be welded to the car (the only bit to actually need changing on the car), and braced forwards to the engine crossmember lift blocks too. The engine crossmember lift blocks are also going to be braced forwards and bolted to the front radiator support of the car (the front radiator support of my car is a huuge heavy piece of box section these days).
Basically with everything connected together it's going to form kindof a sub-frame or chassis for the whole front end.
This weekend coming I'm hoping to have the sub frame all tack welded together. Once this is done I can remove it as pretty much one piece, at which point I will transport it to good old Vidler's place who is going to expertly "weld the shit out of it" - it should be boonta-strong after that!. I'll coat it all in cold galv soon as that's done.
Then when that's fitted to the car there is pretty much only easy stuff left to do
- Refit motor and gearbox
- Refit gearbox crossmembers (might require abit of modification)
- Rehang 3" stainless exhaust - this will need quite a few changes at an exhaust shop to bring it back up close to the car
- Finish the custom fitting of the Magna handbrake lever and cables for the rear handbrake
- Get some custom length flexible brake lines made up
- Get a custom length hydraulic clutch fluid line made up
- Figure out some extra long radiator hoses
- Figure out how on earth I'm going to get a very very long speedo cable sorted
Once she's driving I'll keep the 16" street tyres on for a little while to give me a chance to test drive it plenty and iron out any teething issues.
After that I'll slap on some 29" muddies - the ones on Vidler's Orange wagon (the ex-BYB01 car) seem pretty decent and quite affordable.
I should have some pics up Sunday arvo I'd say.
EZ30 L series - Monsterwagon
https://www.ausubaru.com.au/viewtopic.php?f=71&t=26163
https://www.ausubaru.com.au/viewtopic.php?f=71&t=26163


-
stamp_licker

- General Member
- Posts: 1066
- Joined: Wed Oct 05, 2005 10:00 am
- Location: Kallangur.Bris North
Yeah I *might* post up some pics of how it sits at the moment but it doesn't look very good right now with my very shitty tack welds, odd bolts and lack of extra bracing 
EZ30 L series - Monsterwagon
https://www.ausubaru.com.au/viewtopic.php?f=71&t=26163
https://www.ausubaru.com.au/viewtopic.php?f=71&t=26163
-
stamp_licker
- General Member
- Posts: 1066
- Joined: Wed Oct 05, 2005 10:00 am
- Location: Kallangur.Bris North
might have to look into that although it would want to be pretty long. There's enough room to swing FatCat between the gearbox and the tranny tunnel now, almost to the point where I don't actually need a tranny tunnel!
EZ30 L series - Monsterwagon
https://www.ausubaru.com.au/viewtopic.php?f=71&t=26163
https://www.ausubaru.com.au/viewtopic.php?f=71&t=26163
Small update,
Still haven't done a lot of what I said I'd be doing last weekend, I keep getting sidelined with other things, there just isn't enough time!
Yesterday I was able to spend a couple of hours on it, I fitted the engine and gearbox temporarily to check clearances.
- The 3" turbo exhaust dump fit *just* clears the steering linkage. It's close but then again, it was back with the 3" lift kit too. Should work fine.
- The gearbox clears the sub frame adapters
- The front of the motor still clears the radiator but this isn't as important as it used to be. The thermo fans will now pretty much be completely above the engine and it's pulleys.
- Interestingly the position of the motor might actually allow me to revert back to the good old "spare wheel under the bonnet" scenario - it's low!
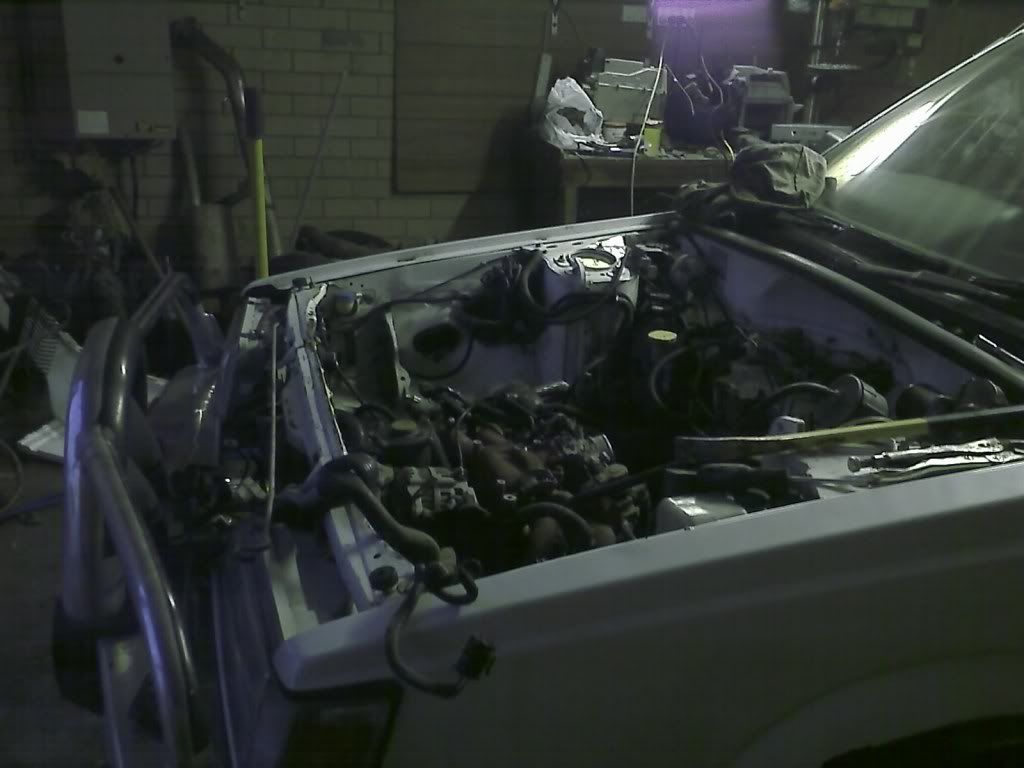
Sorry for the crappy pic, it's all I could get in the low light before my phone's battery died.
Still haven't done a lot of what I said I'd be doing last weekend, I keep getting sidelined with other things, there just isn't enough time!
Yesterday I was able to spend a couple of hours on it, I fitted the engine and gearbox temporarily to check clearances.
- The 3" turbo exhaust dump fit *just* clears the steering linkage. It's close but then again, it was back with the 3" lift kit too. Should work fine.
- The gearbox clears the sub frame adapters
- The front of the motor still clears the radiator but this isn't as important as it used to be. The thermo fans will now pretty much be completely above the engine and it's pulleys.
- Interestingly the position of the motor might actually allow me to revert back to the good old "spare wheel under the bonnet" scenario - it's low!
Sorry for the crappy pic, it's all I could get in the low light before my phone's battery died.
EZ30 L series - Monsterwagon
https://www.ausubaru.com.au/viewtopic.php?f=71&t=26163
https://www.ausubaru.com.au/viewtopic.php?f=71&t=26163

good to see the engine back in 
[SIGPIC][/SIGPIC]
VER7 STI (FOR SALE) & RIP EJ22 AWD LEONE
PIX @ www.webshots.com/user/4muff
I hate to advocate drugs, alcohol, violence, or insanity to anyone, but they've always worked for me.
Hunter S. Thompson
http://www.brainyquote.com/quotes/quote ... 02861.htmlI hate to advocate drugs, alcohol, violence, or insanity to anyone, but they've always worked for me.
Hunter S. Thompson
probably only temporary. She needs a fair few oil seals changed, probably a timing belt etc. Ill need to pull her back out again to weld up the frames anyways.
EZ30 L series - Monsterwagon
https://www.ausubaru.com.au/viewtopic.php?f=71&t=26163
https://www.ausubaru.com.au/viewtopic.php?f=71&t=26163
thats what bash plates are for. it should end up having the same clearance engine wise as any Liberty with 29" tyres and Outback struts
EZ30 L series - Monsterwagon
https://www.ausubaru.com.au/viewtopic.php?f=71&t=26163
https://www.ausubaru.com.au/viewtopic.php?f=71&t=26163


just make sure you make the bash plates out something substantial like 6mm ali. i wouldn't go any less. and no, that wasn't me volunteering:)AndrewT wrote:thats what bash plates are for. it should end up having the same clearance engine wise as any Liberty with 29" tyres and Outback struts
09 Forester XT Touring Wagon
hehe yes okay, I'll pretend you don't have a tig welder after all
I'll see how I go but yeah, I do plan to use rather thick ally, and rather alot of it!
I'll see how I go but yeah, I do plan to use rather thick ally, and rather alot of it!
EZ30 L series - Monsterwagon
https://www.ausubaru.com.au/viewtopic.php?f=71&t=26163
https://www.ausubaru.com.au/viewtopic.php?f=71&t=26163