Whoops - 1985 MY wagon addition!

Moderator: El_Freddo

Post Reply
User avatar
El_Freddo
Master Member
Posts: 12502
Joined: Tue Oct 04, 2005 10:00 am
Location: Bridgewater Vic
Contact:

Whoops - 1985 MY wagon addition!

Post by El_Freddo » Fri Jul 07, 2023 5:25 pm

I’m not sure how this “keeps” happening. Anyway, this happened today after stumbling across it in a wrecker’s yard last week!

Image

I always thought these MY models ended in 1984 with exception to the Brumby that continued onto 1991. This one is a 1985 model. I haven’t looked at the build date yet.

Got a lot to do on it. Body is quite tidy and rust free for its age. Interior for the most part is shot. Seats will require some reupholstery work. Mechanically it’s an unknown at this stage. All glass rubbers need replacing which will be an interesting exercise

But it should be a good little project to get running again and eventually put on club rego all going well.

Updates as they trickle in.

Cheers

Bennie
"The lounge room is not a workshop..."
Image
El Freddo's Pics - El_Freddo's youtube

User avatar
Silverbullet
Senior Member
Posts: 2867
Joined: Mon Aug 23, 2010 6:20 pm
Location: Adelaide

Re: Whoops - 1985 MY wagon addition!

Post by Silverbullet » Sat Jul 08, 2023 11:31 pm

Welcome to the club! :razz: Good to see another MY wagon saved from the scrapper, they're more rare than Brumbys by a large margin. All the best with it ;)

User avatar
El_Freddo
Master Member
Posts: 12502
Joined: Tue Oct 04, 2005 10:00 am
Location: Bridgewater Vic
Contact:

Re: Whoops - 1985 MY wagon addition!

Post by El_Freddo » Sun Jul 09, 2023 10:45 pm

You’re not wrong there Sam about how rare they are! Funny how the tide turns as it used to seem like wagons were dime a dozen compared to Brumbys!

I decided today to spend half an hour to play with this and see if I could get it to kick over - or it would even turn over by hand. Turned out it turned over quite well and showed resistance of compression too which was good.

I put some oil in it as it was on the bottom of the dip stick. NB: always wipe and check - I didn’t and later added about 2L of oil to bring it halfway up the dipstick!

Since it’s missing the PS rack I removed the PS pump’s belt to avoid oil potentially being sprayed everywhere.

When the battery was connected the radio came to life - it seems to be the original dial and button AM/FM radio!! It also turned out the key was removed with the ignition barrel in the ACC position, hence the radio firing up.

With a wire to trigger the starter motor, the sweet spot of the ignition in the ON position found and some fuel down the carb we had some scenes like this one (thanks Subarino for sending me this screen shot from the video I sent him!):

Image

I played with the timing to retard the spark timing that was set and after this she fired up without all the pops and farts! Sounded like a strong engine but kind of hard to tell when there’s no exhaust fitted! Still pretty stoked though!

After playing around I checked the oil again only to find it wasn’t on the dipstick :cry: Luckily it had enough in it to maintain the bearings etc so it should be good for a long time.

Next is to get onto the interior removal. Haz suits may be needed to extract this health hazard of an “interior”…

Sam, any leads on where to source new window rubbers for the windscreen, side and rear glass windows? All of these are totally shot and you’re the most recent (read ONLY) person to source these items in new or usable condition. Any leads would be appreciated by me but not Mrs El_Freddo or my wallet!

Cheers for now.

Bennie
"The lounge room is not a workshop..."
Image
El Freddo's Pics - El_Freddo's youtube

User avatar
Silverbullet
Senior Member
Posts: 2867
Joined: Mon Aug 23, 2010 6:20 pm
Location: Adelaide

Re: Whoops - 1985 MY wagon addition!

Post by Silverbullet » Mon Jul 10, 2023 10:04 pm

Exciting! I've never had mine throw flames from the carbie(s) before, that timing must have been way off :lol: It's always the ignition system on these engines that people set up wrong or neglect, always causes problems.
El_Freddo wrote:
Sun Jul 09, 2023 10:45 pm
Sam, any leads on where to source new window rubbers for the windscreen, side and rear glass windows? All of these are totally shot and you’re the most recent (read ONLY) person to source these items in new or usable condition. Any leads would be appreciated by me but not Mrs El_Freddo or my wallet!

Cheers for now.

Bennie

If you're talking about the fixed glass rubbers, I sourced mine from a few different places over the years.

- Front windscreen I scored a genuine one from Bunbury Subaru on eBay, Liam I think his name was but not so active any more I don't think. I see around the traps that new aftermarket are still available from a couple of sources. E.g O'briens seem to be able to get them in.

- Rear windscreen rubber, Liam to the rescue again with a genuine unit sourced from Japan. I can get a part number for you if you want, but the only people who can request genuine from Japan are Subaru Australia and none of the dealers/service places want anything to do with anything older than 20 years :roll: That's why Liam was so good.

- Rear quarter glass, I scored a single RH genuine one from eBay (NOS in Ireland of all places) shipped over. Then I took it to a mates brother who has a business making auto glass rubbers for classic cars and restos. He copied it as best he could for the other side. It doesn't look identical but it's close enough and doesn't leak. I could explore this option for you if you like. He might be able to do the rear windscreen rubber too but would probably need a sample profile to copy. Think I've got an old broken one here somewhere...

If it's the door and door glass seals you're after, second hand is the only option I'm aware of :(

User avatar
El_Freddo
Master Member
Posts: 12502
Joined: Tue Oct 04, 2005 10:00 am
Location: Bridgewater Vic
Contact:

Re: Whoops - 1985 MY wagon addition!

Post by El_Freddo » Wed Jul 12, 2023 9:47 pm

Thanks for the info Sam. I was thinking about it and for now I might look into using some sikaflex or something to plug the holes and keep the water out - when the time comes.

As for the flames it takes a special type! :mrgreen: Nah, really that came about because I rotated the dizzy the wrong way. After that I went back to the original position and then a little further - complete guess work. And that’s when it fired up after that little change.

I went looking for the build date plate - but it’s MIA. So I assume it’s a late ‘84 build in the last run before being shipped to Oz and complianced in ‘85. I’ve just never heard of these to be an ‘85 model as such - and never seen one until now.

In the owners manual paperwork, I found out that this wagon still sports its original engine! Another thing I’ve not seen before… this wagon gets more and more interesting! And it was originally sold in East Hawthorn in Melbs.

That’s it for now.

Cheers

Bennie
"The lounge room is not a workshop..."
Image
El Freddo's Pics - El_Freddo's youtube

User avatar
El_Freddo
Master Member
Posts: 12502
Joined: Tue Oct 04, 2005 10:00 am
Location: Bridgewater Vic
Contact:

Re: Whoops - 1985 MY wagon addition!

Post by El_Freddo » Sat Jul 15, 2023 7:07 pm

Time for more pics and bits.

Engine bay as it is atm:

Image

I pumped out all the dead fuel I could using the factory fuel system then added about 12L of fresh fuel, pumped more until it went clear, the dead stuff was cloudy.

Now it fires up and idles until you turn the key off. When I first got it going (after pulling the top of the carb off as the fuel pump was just filling the carb with fuel the other night - all seems well now) the idle must’ve been near 3000rpm and without an exhaust on it everyone scattered!
Disconnected the throttle cable and it idled with a bit of labouring since it was cold. I also filled the cooling system with water…

We got into the interior removal today. This is what it looked like when we picked it up and before work started - full mank-spec:

Image

Image

Image

And this is where we left it for the night - rear seat base is out too.

Image

The scuff plates are removed to help aid removing the carpet once the centre console is out. And we got the rear right door open after removing the interior trim and manipulating the latching mechanism. There might be a broken spring involved, I need to investigate this further.

I’m also having some trouble getting the inner screws on the rear door scuff plates out. One cracked my screwdriver head on the impact driver (hammer style, not electric) so they remain in place for now, this means the rear carpet is also still hanging around in there.

So far it’s coming apart well. Putting it back together will be another story though!!

Cheers

Bennie
"The lounge room is not a workshop..."
Image
El Freddo's Pics - El_Freddo's youtube

User avatar
TOONGA
Elder Member
Posts: 5335
Joined: Sat May 30, 2009 10:15 am
Location: Australind closer to where they divided by zero
Contact:

Re: Whoops - 1985 MY wagon addition!

Post by TOONGA » Fri Aug 04, 2023 8:34 am

nicely done I have seen way worse interiors on the old wagon, in cars that were still on the road 30 years ago :(

Good luck with the build

I wish I had not sold my sports wagon but at least I know that the owner isn't going to part it out.

TOONGA
Image
PJ Gone but not forgotten
JETCAR AKA the sandwedge Rusted in pieces

User avatar
Silverbullet
Senior Member
Posts: 2867
Joined: Mon Aug 23, 2010 6:20 pm
Location: Adelaide

Re: Whoops - 1985 MY wagon addition!

Post by Silverbullet » Fri Aug 04, 2023 7:34 pm

Oh those pics bring back memories :razz: Something about yours threw me off a bit...now I realized it has a grey touring wagon interior on a non-touring body, and with the non-touring dash/instruments.

Fun and games. This is where you realize there's a lot more to do than on a Brumby. There's almost twice as much of everything; doors, windows, locks, trims, seats etc :lol:

User avatar
El_Freddo
Master Member
Posts: 12502
Joined: Tue Oct 04, 2005 10:00 am
Location: Bridgewater Vic
Contact:

Re: Whoops - 1985 MY wagon addition!

Post by El_Freddo » Sat Aug 05, 2023 10:47 am

Photos don’t do this interior justice Toonga!! In the pics it looks like you can use this interior, the reality couldn’t be further from the truth! It was wet in places, fabric was brittle and would tear if you sat or lent on it, rats had dedicated everywhere!

Since it’s had rats in it I’m surprised at the little amount of damage from chewing found so far. Dashboard is yet to come out so that could change once we’re behind there!

Today it’ll get a steering rack fitted and we’ll move it for the first time since it arrived here about a month ago. It’ll be interesting to see how it goes as I’m curious as to why this wagon was seemingly retired to the wreckers as a complete unit.

Current thoughts are:
- shot clutch
- dead reverse gear
- just wasn’t worth anything and they wanted to upgrade

Cheers

Bennie
"The lounge room is not a workshop..."
Image
El Freddo's Pics - El_Freddo's youtube

User avatar
El_Freddo
Master Member
Posts: 12502
Joined: Tue Oct 04, 2005 10:00 am
Location: Bridgewater Vic
Contact:

Re: Whoops - 1985 MY wagon addition!

Post by El_Freddo » Sun Aug 20, 2023 9:27 am

Got some time on the wagon yesterday with the young fella. We got a manual setting rack fitted.

Image

Haven’t done the exhaust Y pipe yet namely because I worked out that I don’t have any nuts that fit the EA81 exhaust studs. Stuff up on my part for not forward thinking. Once this is on I should be able to haz-suit up and move it under its own power without waking the next town over.

Also found out the front brake lines were cut when whoever nabbed the front struts from it in the yard. To get it to me I had a couple of struts that were thrown in to get it on and off the trailer. They’re properly bolted in at the hubs now so one less thing to tick off there. Got the front handbrake for brake while moving so I’ll source the brake lines when the time comes. I’ll look into the rear brakes around the same time too, make sure they’re good to go.

That’s about it for now!

Cheers

Bennie
"The lounge room is not a workshop..."
Image
El Freddo's Pics - El_Freddo's youtube

User avatar
El_Freddo
Master Member
Posts: 12502
Joined: Tue Oct 04, 2005 10:00 am
Location: Bridgewater Vic
Contact:

Re: Whoops - 1985 MY wagon addition!

Post by El_Freddo » Mon Aug 21, 2023 8:39 pm

So fitting the replacement Y pipe because this MY didn’t come with one, it was quickly apparent that I need the cast exhaust blocks used for the EGR emissions on the later model brumby that this Y pipe came from. Also turned out that this EA81 shares the same exhaust nut as the EJ engines. I thought they were smaller in diametre from memory. It could also be a case of someone having changed the factory studs for larger units like the EJ had.

The manual rack went in without any issues which was good. Just waiting on this exhaust to be fitted before dropping the front wheels back to earth. Might also fit the replacement brake lines while the front is up on stands…

Cheers

Bennie
"The lounge room is not a workshop..."
Image
El Freddo's Pics - El_Freddo's youtube

User avatar
El_Freddo
Master Member
Posts: 12502
Joined: Tue Oct 04, 2005 10:00 am
Location: Bridgewater Vic
Contact:

Re: Whoops - 1985 MY wagon addition!

Post by El_Freddo » Wed Sep 20, 2023 9:52 pm

So after inspecting my mini me’s work on fitting the steering shaft and knuckle I need to do some investigation work as to why the steering shaft is sitting gently on the CV boot… Hopefully an easy fix.

I got the exhaust spacer blocks to fit the later model Y pipes. One side has a port on it for the EGR anti pollution gear etc and the other is just a spacer block. This is why they were fitted, it was the easiest way to retro fit the EGR stuff to the engine without major reconfiguration.

I thought it would be easy to get a plug for this hole but apparently not because it’s a fine thread. Everything plumbing is a coarse thread. I wasn’t keen on welding it.

Fast forward a couple of weeks and pick a part brings a brumby in. So I paid them a visit and scored the spacer block without the port in it. So now I *just* need to bolt them on my engine. Yeah, easier said than done. These use all four holes in the head for the exhaust ports, the old Y pipe only used two. Two in the mix are studs that hold the Y pipe on, the other two are smaller bolts with a Hex head and torx slot in them. You need the torx to get them in and out with the engine in the car - a socket doesn’t fit past the ridge where the Y pipe bolts on. A spanner can be used but it’s super painful especially if the engine mount is fitted. And those unused threads in the head need to be cleaned out for the two bolts.

Add in the fact that the previous owner put a helicoil kit in the two rear holes on an angle and it gets more fun as the longer studs don’t hold the spacer square to the head. So after trimming the excess coil that wasn’t in the hole I put the spacer on with the two bolts then fitted the studs. Looked at it and saw it was misaligned with the exhaust port so did it all again with the spacer orientated the other way… for the same result *facepalm* Hopefully those studs hold otherwise it’s back to the drawing board there as another helicoil won’t do the trick plus they’re a complete bitch to do properly upside down.

What a fight but I finally got one fitted:

Image

I’m yet to do the other side with the exhaust spacer block - I need to remove a nut on one of the studs, got the second one sorted already, I just ran out of time to get it done as the nut is corroded so much it’s not a 14mm and the 13mm doesn’t fit because the nut is too big. Shifter is needed and if that doesn’t work I’ll be busting out the angle grinder.

Once all of this is done we can finally move it from the car port under it’s own steam and get vehicle access to our back yard again. Can’t wait for that!

Cheers

Bennie
"The lounge room is not a workshop..."
Image
El Freddo's Pics - El_Freddo's youtube

User avatar
Suby Spanner
Junior Member
Posts: 108
Joined: Wed Apr 29, 2015 9:02 pm
Location: Adelaide, Australia

Re: Whoops - 1985 MY wagon addition!

Post by Suby Spanner » Fri Sep 22, 2023 2:19 pm

Getting there Benny, good work.
Those EGR blocks.... Always suck to repair on high mileage ones, as they often pull the threads out... On my first Brumby, a 10,000km old 92 model (a long time ago) I kept blowing those damn gaskets: My tradeschool teacher told me to use silicon on them (not exhaust putty that dries hard) and you know what: It sealed tight!

As for front struts, I don't know if the wagons had adjustable height, but it looks as though Gabriel are making them again (I got genuine for my brumby) as I come across them on Ebay the other night: https://www.ebay.com.au/itm/14145456110 ... R5aXtLHXYg
Posting doesn't mention adjustable, but the picture sure looks like it.

I'm retro fitting AC into my cream brumby ATM: wasn't aware I need the loom, so I'll have to go back to the donor and get it all, by the looks.

User avatar
El_Freddo
Master Member
Posts: 12502
Joined: Tue Oct 04, 2005 10:00 am
Location: Bridgewater Vic
Contact:

Re: Whoops - 1985 MY wagon addition!

Post by El_Freddo » Sat Sep 23, 2023 9:57 pm

G’day Suby Spanner,
That’s a great trick using the high temp silicone for exhaust gaskets. I’ve done it for many years now but failed to do it to that one in the pic. I put some on the second one today as well as on both of the Y pipe mating surfaces. Worked a treat!

As for the struts I’ve already sourced some second hand ones so it was quite a quick drop in affair when I picked up the wagon from the wreckers.

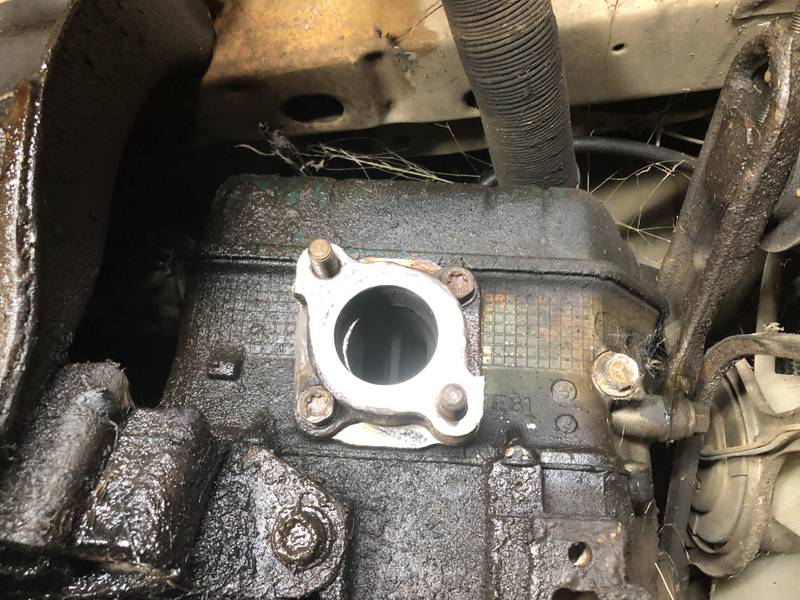
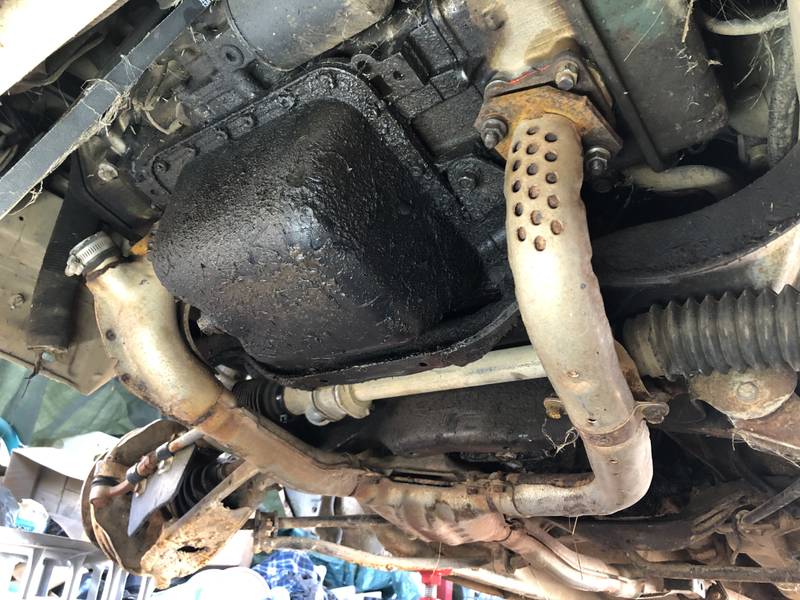
Today was finally the day where I found out if it drives or not. But there was a bit of work to do first. I fitted the passenger’s side spacer block for the exhaust and had to use one of the original shorter stubs for the second torx bolt because the one I had was somehow bent. It can be seen in the pic below. This side went quite smoothly since I knew the process.

Image

I fired it up and let it idle. It was nice to be able to hear other noises rather than a light aircraft spec noise since it now has a whole exhaust on it. This was the point I started finding all the little painful issues such as the sticky throttle pedal. The pivot is rusty and even though I got it moving and lubed up it just wasn’t enough to return to its resting position.

So pedal swap time it was. Luckily for me the brumby halfcut project still sported its pedal box with an operational accelerator pedal. Out it came then off to the wagon for the same treatment. It was easier to remove the wagon’s cutch pedal and cable off the pedal box and drop the steering down to get it out than it was to keep the clutch pedal attached.

Image

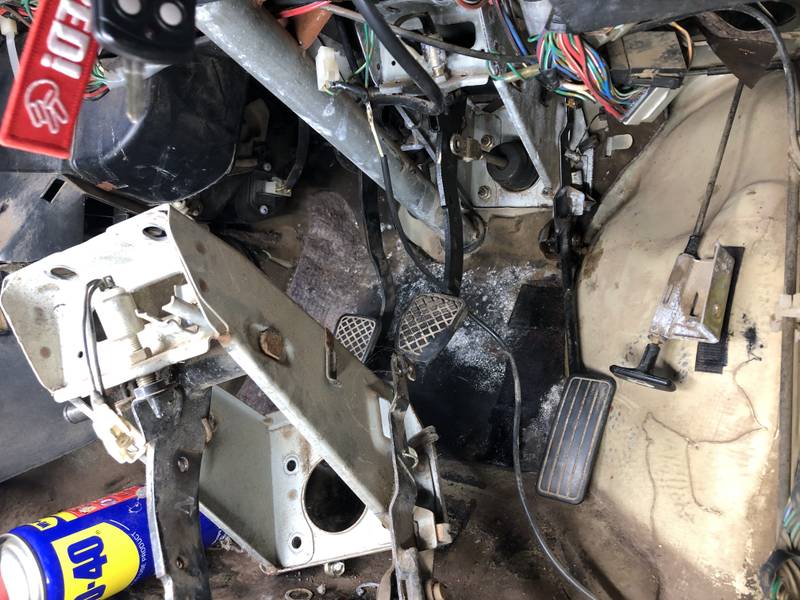
^ brumby pedal box waiting to go in. I didn’t really want to go to this extent but my hand was forced and in the end it was much easier anyway.

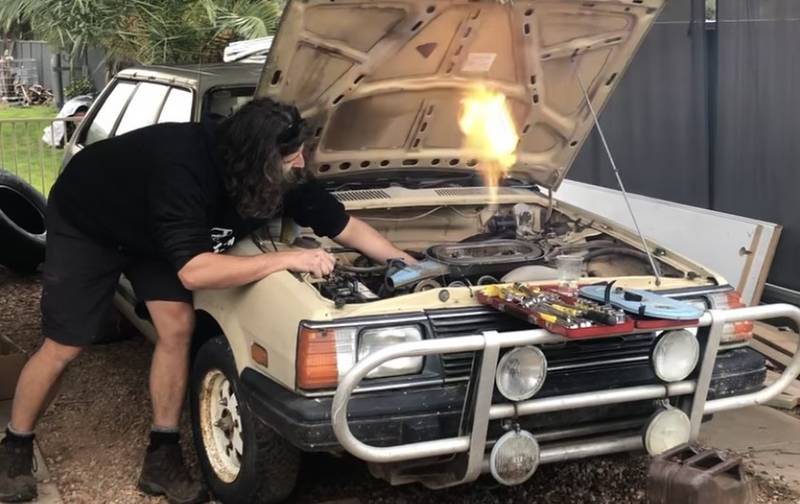
With that sorted I found a pin hole in the upper radiator hose and the clutch cable was fitted weirdly. Whoever was at it last time had used the two nuts to clamp the clutch fork rather than have the two nuts lock together at the appropriate spot for good clutch pedal feel. So that’s sorted. Next up was a miss at idle. That issue seemed to be cyl3’s spark plug lead being a bit too short and wasn’t seating properly at the spark plug. I removed the boot at the plug a rerouted the lead so both ends engaged properly.

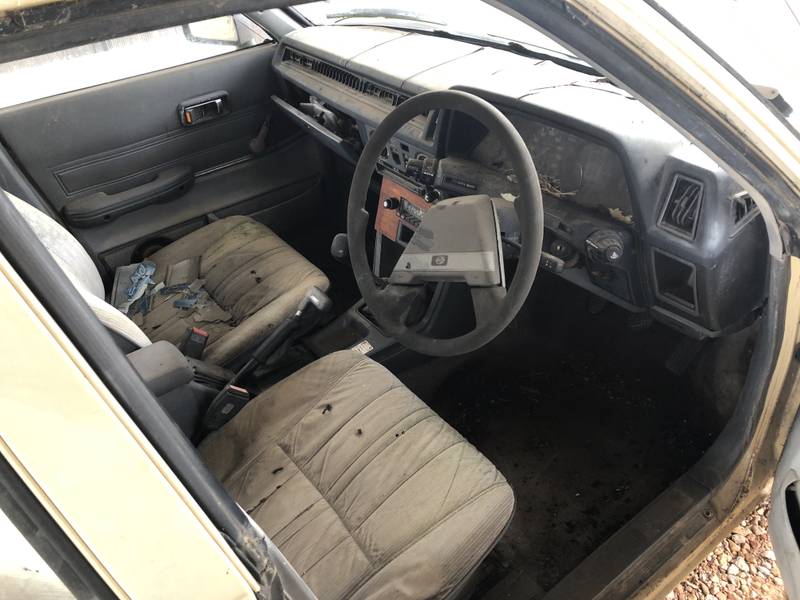
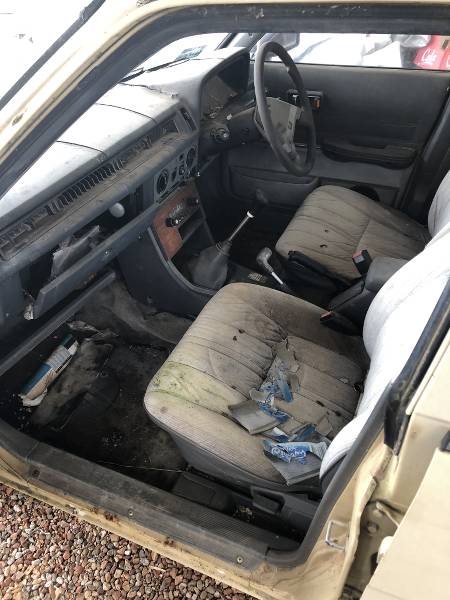
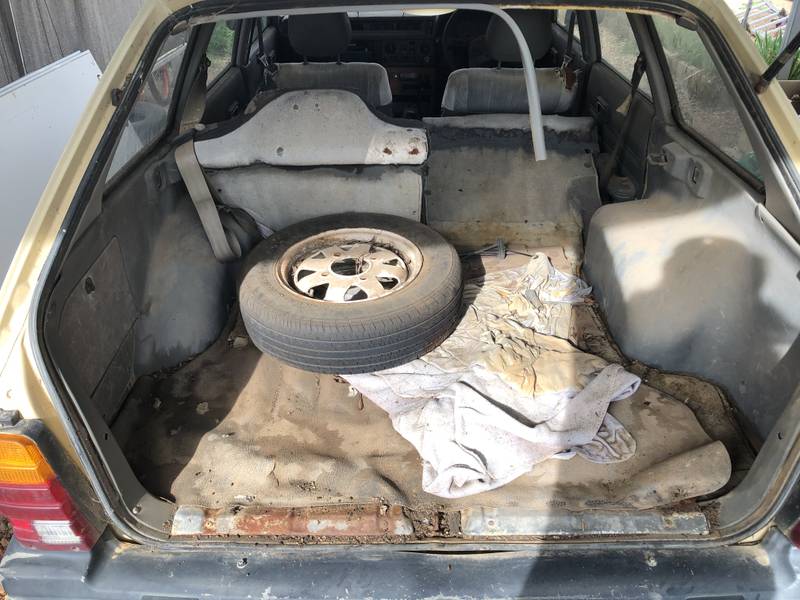
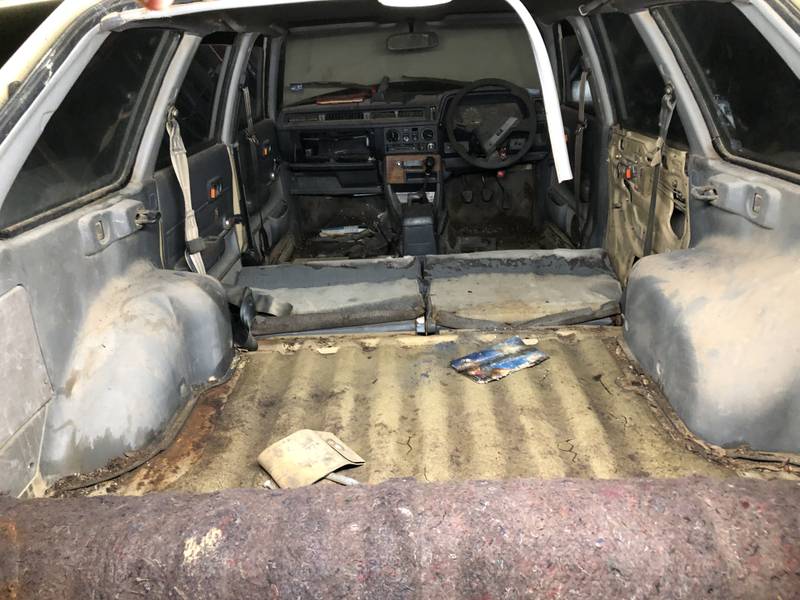
Then it was time for a short drive - mainly in reverse and without brakes at the pedal, and no interior because that is still beyond grose… but it went well!

Image

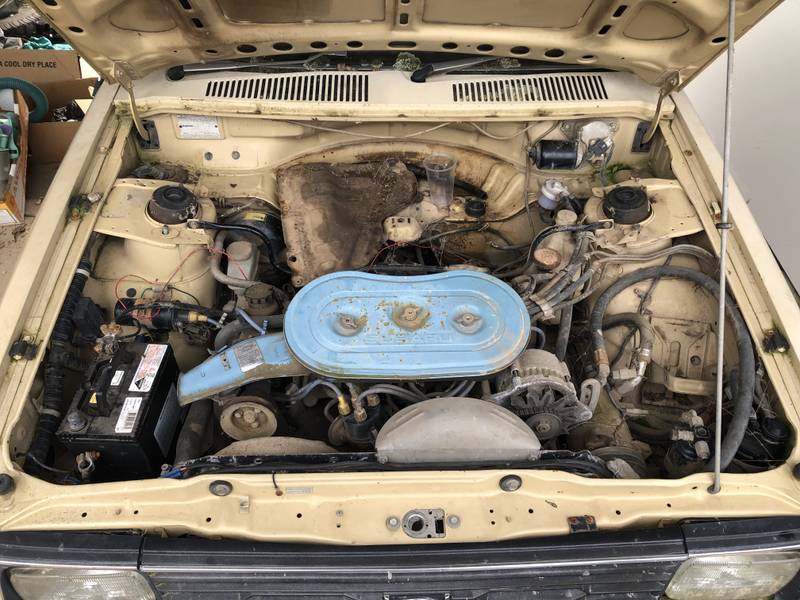
I was pretty stoked to have it moving under its own steam. There was another issue I found and that was the thermo fan not kicking in, I thought the temp gauge was lying to me as it was up at the HOT line but then came down after a rev or two but was then back up at it again. A check of the temp sensor wiring to ensure it wasn’t earthing out confirmed it was fitted to the temp sensor properly. There wasn’t any boiling sounds or overheated sounds that I’ve heard before with overheated engines so wasn’t stressed.

Then moving the wagon it was up on the hot line again. I checked the thermo fan wiring and visually it looked like it was connected to the thermo switch at the radiator, but upon physically checking the plug it wasn’t connected with anything other than the outer sheath, that was flicked off and the connector gently squeezed then fitted, the thermo fan kicked in and pulled the temp down quick which was good. It then clicked on and off at the just over half temp mark as it should so that confirmed the gauge was working properly. Happy days.

The AC was tested and it turns on, the gas window at the dryer had the little bubbles that usually indicates it’s working ok, they were consistent anyway. It was blowing hot in the cab. I didn’t realise the heater was on and it seems turning the knob to cold didn’t do anything so there’s something to look into there, either a stuck heater tap and/or a cable that’s slipped its mount.

So good day had and I feel a great result too. Very stoked!

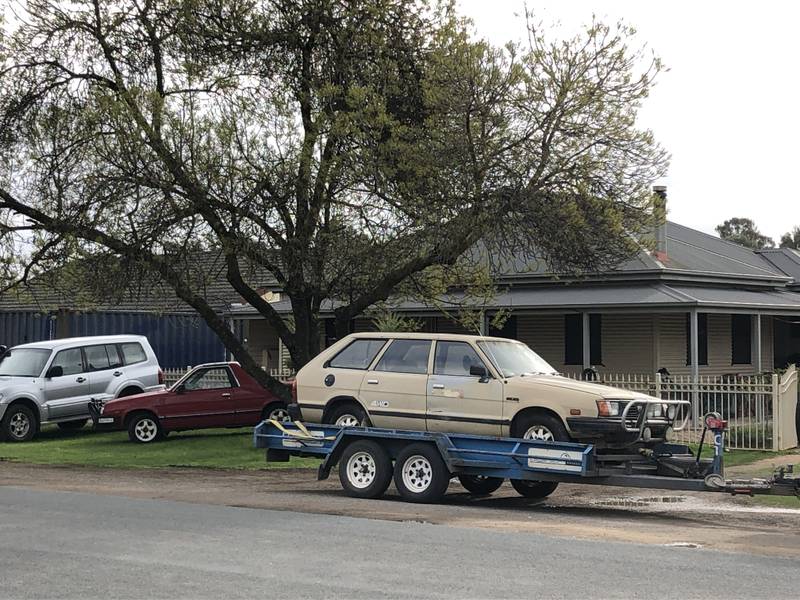
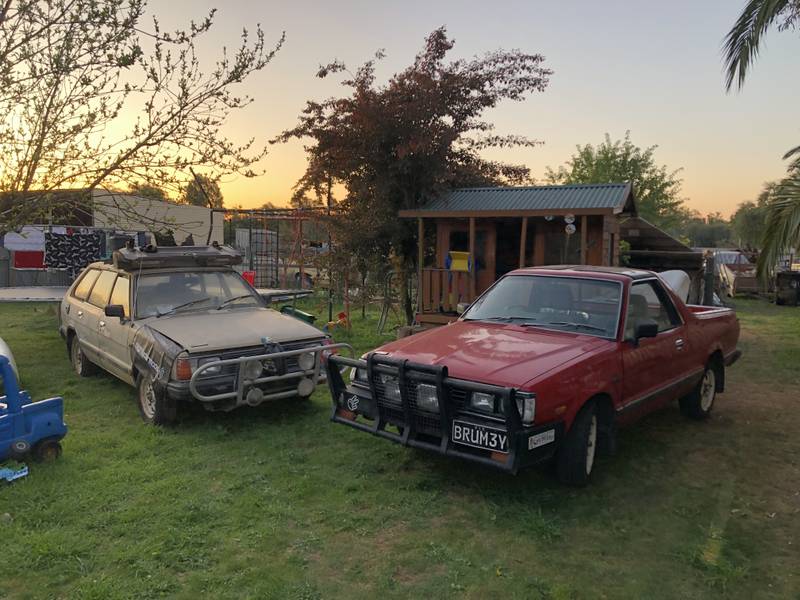
Of course it was a good time for a pic of the two moving MYs at home:

Image

Now to work out where to go from here with the wagon…

Cheers

Bennie
"The lounge room is not a workshop..."
Image
El Freddo's Pics - El_Freddo's youtube

User avatar
Silverbullet
Senior Member
Posts: 2867
Joined: Mon Aug 23, 2010 6:20 pm
Location: Adelaide

Re: Whoops - 1985 MY wagon addition!

Post by Silverbullet » Sun Sep 24, 2023 7:45 pm

Top effort Bennie ;) Funny how we all end up fiddling with the same issues on these cars. Those exhaust spacers look like a pain, I'm thankful for never having had them on any of my cars. And those threads in the head for the exhaust studs seem to strip for everyone. If your helicoiled thread fails again, you'll need to go to a solid threaded insert like I did, look up time-sert, although mine was custom made. The tools required might mean you're better off getting a machinist to look at it though, if it ever arises.

The pedal box too, always an audible groan in my shed when that needs to come out :lol:

Well done for bringing the old wagon back to life, saved from the scrapper. I was shocked to find in my own suburb, two identical beige MY wagons in somebodies front yard, one registered. Here I was having seen 1 other wagon on the road in 10 years and this guys got 2 in his front yard just streets away :lol:

User avatar
El_Freddo
Master Member
Posts: 12502
Joined: Tue Oct 04, 2005 10:00 am
Location: Bridgewater Vic
Contact:

Re: Whoops - 1985 MY wagon addition!

Post by El_Freddo » Mon Sep 25, 2023 3:21 pm

I’m hoping not to go down the threadsert road if I don’t have to SB!

I wouldn’t say it’s saved yet, there’s loads to do. The question is where do you stop?

Have you made an inquiry about the two wagons? Both DLs or touring wagons? And how rusty do they look? It could be cool if you can hook someone up with a wagon project of their own!

Cheers

Bennie
"The lounge room is not a workshop..."
Image
El Freddo's Pics - El_Freddo's youtube

Post Reply

Return to “El Freddo”