Pezimm's 2007 Forester


As promised, the bar is on!
Took me a good while to get the job done, but I'm happy with it being finally installed. Here's how it went:
The car as I got the front of it in the garage

And the detail of the headlight washers. The cover just unclips top and bottom. Quite easy actually

And 7 clips later, the entire bumper cover is out. Once again, smooth sailing up to here.

Decided on turfing the headlight washer, rather than cutting the bar to keep them. This is the hose that feeds water to them. Note how it has a nice little clip to disconnect, quite handy!

This is the end of the stripping. It's all up-hill from here...

Wrapped the headlight washer hose in plastic. Disconnected the terminal to the pump and wrapped both ends also.

Bolted the steel mounting bracket and this is trial fitting the bar for alignment. Took a loooong time to align horizontal and get even gaps both sides. When I was satisfied with that, bar was off and bolts on the bracket were tightened.

From then, got the bar mounted with the fog lights, spent about 1 hour trying to align it to close all gaps on headlights, side fender panels and still be able to tighten the bolts. When finished, it was a mater of connecting fog light terminals, re-installing the sump guard (with the SubaXtreme adaptor of the front lip) and out for a ride...

I'm a 100% happy with the bar. I will keep it this colour for a while as I quite like the effect. But I'm only about 80% happy with the install. At some point, when I re-group, I will loosen the bolts again and attempt a better alignment...
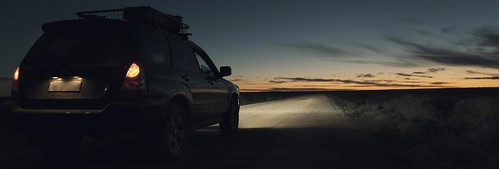
Now I gotta put it to good use off-road for the improved approach angles. Just hope I never have to use it for protection, but it's good to know it's there if I need it.
Cheers,
Pedro.
Took me a good while to get the job done, but I'm happy with it being finally installed. Here's how it went:
The car as I got the front of it in the garage
And the detail of the headlight washers. The cover just unclips top and bottom. Quite easy actually
And 7 clips later, the entire bumper cover is out. Once again, smooth sailing up to here.
Decided on turfing the headlight washer, rather than cutting the bar to keep them. This is the hose that feeds water to them. Note how it has a nice little clip to disconnect, quite handy!
This is the end of the stripping. It's all up-hill from here...
Wrapped the headlight washer hose in plastic. Disconnected the terminal to the pump and wrapped both ends also.
Bolted the steel mounting bracket and this is trial fitting the bar for alignment. Took a loooong time to align horizontal and get even gaps both sides. When I was satisfied with that, bar was off and bolts on the bracket were tightened.
From then, got the bar mounted with the fog lights, spent about 1 hour trying to align it to close all gaps on headlights, side fender panels and still be able to tighten the bolts. When finished, it was a mater of connecting fog light terminals, re-installing the sump guard (with the SubaXtreme adaptor of the front lip) and out for a ride...
I'm a 100% happy with the bar. I will keep it this colour for a while as I quite like the effect. But I'm only about 80% happy with the install. At some point, when I re-group, I will loosen the bolts again and attempt a better alignment...
Now I gotta put it to good use off-road for the improved approach angles. Just hope I never have to use it for protection, but it's good to know it's there if I need it.
Cheers,
Pedro.
GONE
Now occasionally driving a Ford barge...
-
ScubyRoo
- Junior Member
- Posts: 584
- Joined: Thu Oct 09, 2008 2:55 pm
- Location: Templestowe, Vic (When in Aus)

Lookin shmick pedro! Great find!
What tires are you looking at to go on those 16s?
What tires are you looking at to go on those 16s?
The Green Machine is up for sale  . Lifted, bars, exhausts... View Gumtree ad

-
thunder039

- Junior Member
- Posts: 998
- Joined: Mon Jun 20, 2011 6:41 pm
- Location: victoria AUS
Sorry Owen, missed this...ScubyRoo wrote:What tires are you looking at to go on those 16s?
I'm tossing between Cooper Discovery A/T3 and the BFGs A/T.
Not getting anything until later this year, so this might change as we go...
Pedro.
GONE
Now occasionally driving a Ford barge...
-
ScubyRoo
- Junior Member
- Posts: 584
- Joined: Thu Oct 09, 2008 2:55 pm
- Location: Templestowe, Vic (When in Aus)
Nice choice, did the cooper STT make it onto your short list? Would be a great tire for victoria 
The Green Machine is up for sale . Lifted, bars, exhausts... View Gumtree ad
It's a matter of size... I'm going with 215/70R16, so top three options at this stage are:ScubyRoo wrote:Nice choice, did the cooper STT make it onto your short list? Would be a great tire for victoria
- BFG ATs
- Cooper AT3
- Yoko A/T-S
GONE
Now occasionally driving a Ford barge...
Happy Easter everyone!
A couple days off added to the weekend and I'm trying to complete a couple things in the car and garage.
First up is my ScanGauge location. I had it blue tacked in front of the gauge cluster for about a year now. I reckon it's the ideal position, but it intrudes just a little on the gauges themselves (Can't see them bottom of the odometer without moving my head up).
A while ago I got a spare plastic surrounding to play with and come up with the best possible location for the ScanGauge. This is what I looked earlier this arvo:

And the plan was to slot the gauge in the middle as per the pencil line:

About a third of the way there...

I was using a little hack-saw and a stanley knife to cut through. It would have been ideal to have a rotary tool to get a nice finish and go nicely around corners - once again, the beauty of having a trial piece!
First trial fitment and it didn't go in. Had to shave a little more out of it.

Realised it wouldn't be possible to keep it in the centre given the trip meter button was in the way, so plan was adjusted to off-set it to the left, where it wouldn't interfere with any gauges

And voilá! Little mounting brackets also in:

And the final product:

Might have to visit Bunnings tomorrow and get a rotary tool and some tips to cut through the definitive plastic surrounding and have it look schmick!
Cheers,
Pedro.
A couple days off added to the weekend and I'm trying to complete a couple things in the car and garage.
First up is my ScanGauge location. I had it blue tacked in front of the gauge cluster for about a year now. I reckon it's the ideal position, but it intrudes just a little on the gauges themselves (Can't see them bottom of the odometer without moving my head up).
A while ago I got a spare plastic surrounding to play with and come up with the best possible location for the ScanGauge. This is what I looked earlier this arvo:
And the plan was to slot the gauge in the middle as per the pencil line:
About a third of the way there...
I was using a little hack-saw and a stanley knife to cut through. It would have been ideal to have a rotary tool to get a nice finish and go nicely around corners - once again, the beauty of having a trial piece!
First trial fitment and it didn't go in. Had to shave a little more out of it.
Realised it wouldn't be possible to keep it in the centre given the trip meter button was in the way, so plan was adjusted to off-set it to the left, where it wouldn't interfere with any gauges
And voilá! Little mounting brackets also in:
And the final product:
Might have to visit Bunnings tomorrow and get a rotary tool and some tips to cut through the definitive plastic surrounding and have it look schmick!
Cheers,
Pedro.
GONE
Now occasionally driving a Ford barge...
Well, I already got another surround on hand! Actually the one I cut was the extra one I got cheap, so the original is still intact and will get done nicely!!El_Freddo wrote:Bugger about the cut below the trip meter button, it'd look very, very neat without that. I guess if you're happy with it it's all good, but if another surround is easily and cheaply sourced it could be worth the effort
Still a top effort mate! Your foz is certainly coming along well!
Cheers
Bennie
Pedro.
GONE
Now occasionally driving a Ford barge...
Oh good, it will look great plus be very functional when finishedpezimm wrote:Well, I already got another surround on hand! Actually the one I cut was the extra one I got cheap, so the original is still intact and will get done nicely!!
[SIGPIC][/SIGPIC]
Owner SubieLiftOz, lift kits for Subarus
'97 Forester: EJ22E; 4" Custom Body Lift; JDM STi plated LSD; 20mm WRX RSB; Snorkel; Kings
Owner SubieLiftOz, lift kits for Subarus
'97 Forester: EJ22E; 4" Custom Body Lift; JDM STi plated LSD; 20mm WRX RSB; Snorkel; Kings
A bit of maintenance work, I was getting annoyed with the headlight lenses looking dull like this:

Note the white stains on the lens, no clue where that came from...

Got myself a tube of Turtle Wax Headlight Lens Restorer and here's the results:

ˆStains are gone...

They look brand new again! Not bad...
Pedro.
Note the white stains on the lens, no clue where that came from...
Got myself a tube of Turtle Wax Headlight Lens Restorer and here's the results:
ˆStains are gone...
They look brand new again! Not bad...
Pedro.
GONE
Now occasionally driving a Ford barge...
A while ago I got some 16in Forester steelies to replace my 17in. Well, the time has come to actually get some tyres on the rims.
After a bit of debating and the fact that I probably won't want to be swapping wheels backwards and forwards, I decided to stick to the 215/65R16, which fits nicely and won't look terrible bigger than stock. Also, decided to go back to the Yoko A/T-S, because of my good experiences in the past and the long-life they seem to provide.
But before any rubber goes on, I had to restore 2 of the rims that were a bit rusty, so here's my first endeavour into setting up a "paint-booth":

And the final result on a wheel:

Because the silver was a little different than the original Subaru silver, I ended up re-painting all 6 rims that I will be using (yeah, 2 spares!). So this morning I took them out of the cold garage to cure the paint a bit before tyres go on tomorrow:

I'll post some more later with the tyres fited.
Pedro.
After a bit of debating and the fact that I probably won't want to be swapping wheels backwards and forwards, I decided to stick to the 215/65R16, which fits nicely and won't look terrible bigger than stock. Also, decided to go back to the Yoko A/T-S, because of my good experiences in the past and the long-life they seem to provide.
But before any rubber goes on, I had to restore 2 of the rims that were a bit rusty, so here's my first endeavour into setting up a "paint-booth":
And the final result on a wheel:
Because the silver was a little different than the original Subaru silver, I ended up re-painting all 6 rims that I will be using (yeah, 2 spares!). So this morning I took them out of the cold garage to cure the paint a bit before tyres go on tomorrow:
I'll post some more later with the tyres fited.
Pedro.
GONE
Now occasionally driving a Ford barge...
