Rear wheel / jerry can carrier

General Subaru Talk - Media / News / Stories ...
User avatar
chrisk
Junior Member
Posts: 25
Joined: Thu Feb 19, 2009 8:45 pm
Location: melbourne

Rear wheel / jerry can carrier

Post by chrisk » Wed Dec 30, 2009 3:50 pm

Hi all, just thought I'd share this with you.
4 nights in the shed, a lot of beer and a bit of cursing have all come to fruition.
After trying to find a rear bumper spare wheel carrier for my 14 inch spare without any success I ended up building one from scratch.
Using some bits off ebay, a couple of gas shocks from the warranty bin at work, a heap of steel and a lot of elbow grease, my mate and myself managed to put together this nifty carrier which utilises the existing bumper.
After removing plastic bumper off the tin, we cut off the existing chassis mounts. Welded these onto a steel beam and boxed them in for strength. The beam was then hole sawed to add lightness. Then ran a couple of 8mm straps underneath to an existing towbar bolt on each side as well for stability.
We gutted the original metal bar reo and wrapped that around the steel beam, cut holes in it and the plastic bar and mounted two bearing hubs for each swing arm, which have a gas damper that opens the arms out.
It's crude, overengineered, but given the limited time we had, I think we did a good job.
:)

Image

Image

Image
Attachments
28122009404.jpg
28122009404.jpg (96.24 KiB) Viewed 4220 times
28122009397.jpg
28122009397.jpg (103.71 KiB) Viewed 4212 times
23122009384.jpg
23122009384.jpg (101.72 KiB) Viewed 4214 times
Confucius say: always remember the 6 P's - Planning & Preparation Prevent Piss Poor Performance....

User avatar
AndrewT
Senior Member
Posts: 4777
Joined: Tue Oct 04, 2005 10:00 am
Location: WA
Contact:

Post by AndrewT » Wed Dec 30, 2009 3:57 pm

That's bloody awesome, great job! Can you post any details on the Ebay parts? I'm going to have a crack at this one day.

User avatar
TOONGA
Elder Member
Posts: 5339
Joined: Sat May 30, 2009 10:15 am
Location: Mandurah where they divided by zero
Contact:

Post by TOONGA » Wed Dec 30, 2009 4:32 pm

well done it looks like one you would buy from a shop

I do hope you made provision for locks

TOONGA
Image
PJ Gone but not forgotten
JETCAR AKA the sandwedge Rusted in pieces

User avatar
Gannon
Senior Member
Posts: 4580
Joined: Sat Nov 05, 2005 10:00 am
Location: Bowraville, Mid Nth Coast, NSW

Post by Gannon » Wed Dec 30, 2009 4:47 pm

Well done!!!

A very neat job.

You should have made plans, so you could make more and sell them.
Current rides: 2016 Mitsubishi Triton GLS & 2004 Forester X
Ongoing Project/Toy: 1987 RX Turbo EA82T, Speeduino ECU, Coil-pack ignition, 440cc Injectors, KONI adjustale front struts, Hybrid L Series/ Liberty AWD 5sp
Past rides: 92 L series turbo converted wagon, 83 Leone GL Sedan, 2004 Liberty GT Sedan & 2001 Outback
------------------------------------------

User avatar
Captain Obvious
General Member
Posts: 1292
Joined: Wed Oct 05, 2005 10:00 am
Location: maryborough

Post by Captain Obvious » Wed Dec 30, 2009 5:23 pm

that is awesome!!! looks like it should be there!!
[SIGPIC]http://www.ausubaru.com/forum/image.php ... 1468060434[/SIGPIC]


The 4x4: 2004 Nissan Navara d22 ZD30 dual cab.
The Wifes car: 2005 SG9 Facelift forester 2.5l auto XS

User avatar
Bumpty
General Member
Posts: 1299
Joined: Fri Aug 24, 2007 11:44 pm
Location: Tas

Post by Bumpty » Wed Dec 30, 2009 5:47 pm

Nicely executed!!
1+ on the Ebay parts :)

User avatar
RSR 555
Elder Member
Posts: 6951
Joined: Sat Nov 10, 2007 10:42 am
Location: ATM... stuck in Rockingham

Post by RSR 555 » Wed Dec 30, 2009 6:25 pm

chrisk wrote:It's crude, overengineered, but given the limited time we had, I think we did a good job.
:)
CRUDE ??? Not from where I'm sitting... That is bloody awesome :) GREAT JOB!

+2 for parts off ebay and would really love to see any more pictures (if available) as I'd love to make one myself.
You know you are getting old when the candles on your birthday cake start to cost more than the cake itself.

RSR Performance
Home of the 'MURTAYA' in Oz
Subaru Impreza WRX based Sportscar
[SIGPIC][/SIGPIC]

Disclaimer: Not my website but hyperlink here to Subaru workshop manuals

User avatar
GOD
Junior Member
Posts: 754
Joined: Sun May 04, 2008 10:04 pm
Location: Tom Price WA

Post by GOD » Wed Dec 30, 2009 9:57 pm

Great work, not crude at all. Should be strong and reasonably light weight too.

Gonna move that number plate?

Dane.
[SIGPIC][/SIGPIC]
1993 EA82/EJ18/EJ22/EJ22/EJ20/EJ22 L Series perpetual project

User avatar
subarooster
Junior Member
Posts: 204
Joined: Tue Feb 26, 2008 7:03 pm
Location: Coolgardie, WA

Post by subarooster » Thu Dec 31, 2009 6:35 am

wow, thats really well done. If you decide to do a write up of how it was manufactured i'd be interested ;)

Current Projects: *Offroad Racing MY Touring Wagon.
* EA82T Jap spec L series Wagon.

Previous rides: *Supercharged EJ25 Rwd Brumby
* 2 x 91' L series Ej20, 3 inch lift, mud tyres.
01' Liberty B4.

User avatar
chrisk
Junior Member
Posts: 25
Joined: Thu Feb 19, 2009 8:45 pm
Location: melbourne

Post by chrisk » Thu Dec 31, 2009 9:34 am

Hi all :)
Yes I will be moving the number plate to the rear of the fuel can holder and if I get the inclination I might even put a couple of pad locks on where the R clips go through on the ends of the swingarms.
The swingarm ends have 5mm plate with a hole into which the 20mm locating pins go through. This combined with the bearing hubs should eliminate any vertical movement which could flog the entire thing to pieces when 4wd'ing. I used a couple of latch hooks to secure the swing arms and hold them tightly against the bumper http://www.lewisautomation.com.au/tc.htm, then added the R clips that go through the locating 20mm pins as added security. In hindsight the hook clamps may have been avoided all together, but there you have it.

If anyone is truly interested I could talk you through the process a bit more thouroughly, provide material sizes, etc.
The most important thing with anything like this is to measure.
Measure twice, cut once.
A LOT of measuring to get the clearances right and make sure the whole damned Heath Robinson contraption actually fits, works and looks half decent.

Some have asked about the ebay bits. The main one was the hub and stub axle used to mount the swing arms: http://cgi.ebay.com.au/SWING-AWAY-SPARE ... 27ab9e96f9
If you had access to a lathe you could turn up the sleeve and buy the stub axle, bearings, seals from a trailer shop and save some money, but I don't have a lathe.

I also got a number plate light which isn't listed on ebay any more: http://cgi.ebay.com.au/ws/eBayISAPI.dll ... K:MEWNX:IT
You could really use anything for this part.

The lockable and adjustable jerry can holder http://cgi.ebay.com.au/ws/eBayISAPI.dll ... K:MEWNX:IT
once again not listed anymore, but I believe is available from Autobarn?
http://www.autobarn.com.au/products/1/7/4213915/
Looking back on it, it would have been easier and probably cheaper to make a sheet metal folded box for the jerry can and just mount that, but I like the fact the holder has an anti syphon panel and a lock.
Confucius say: always remember the 6 P's - Planning & Preparation Prevent Piss Poor Performance....

User avatar
Gannon
Senior Member
Posts: 4580
Joined: Sat Nov 05, 2005 10:00 am
Location: Bowraville, Mid Nth Coast, NSW

Post by Gannon » Thu Dec 31, 2009 10:35 am

Can you post more pics?

The one where it is competed is a little dark, and maybe a pic with a wheel and jerry can installed.

If you want to show the pics in the thread, just right click the attachment, and select 'copy shortcut' then click the little Image at the top of the reply box and paste the shortcut in there
Current rides: 2016 Mitsubishi Triton GLS & 2004 Forester X
Ongoing Project/Toy: 1987 RX Turbo EA82T, Speeduino ECU, Coil-pack ignition, 440cc Injectors, KONI adjustale front struts, Hybrid L Series/ Liberty AWD 5sp
Past rides: 92 L series turbo converted wagon, 83 Leone GL Sedan, 2004 Liberty GT Sedan & 2001 Outback
------------------------------------------

User avatar
ScubyRoo
Junior Member
Posts: 584
Joined: Thu Oct 09, 2008 2:55 pm
Location: Templestowe, Vic (When in Aus)

Post by ScubyRoo » Thu Dec 31, 2009 10:43 am

chrisk wrote: It's crude, overengineered, but given the limited time we had, I think we did a good job.
:)
There is no such thing as over engineered! Looks good, sturdy and tidy. Is that powder coated or sprayed?

So that bar that goes across the the rear under the plastic bumpber wasn't originally a part of the tow bar?

Great work and some food for thought! I'm sure there's lots of interested readers on here as it's a bit of a necessity for any of us who go with bigger wheels...
The Green Machine is up for sale :(. Lifted, bars, exhausts... View Gumtree ad

User avatar
RSR 555
Elder Member
Posts: 6951
Joined: Sat Nov 10, 2007 10:42 am
Location: ATM... stuck in Rockingham

Post by RSR 555 » Thu Dec 31, 2009 2:54 pm

chrisk wrote:If anyone is truly interested I could talk you through the process a bit more thouroughly, provide material sizes, etc.
Truly Truly :)
You know you are getting old when the candles on your birthday cake start to cost more than the cake itself.

RSR Performance
Home of the 'MURTAYA' in Oz
Subaru Impreza WRX based Sportscar
[SIGPIC][/SIGPIC]

Disclaimer: Not my website but hyperlink here to Subaru workshop manuals

User avatar
chrisk
Junior Member
Posts: 25
Joined: Thu Feb 19, 2009 8:45 pm
Location: melbourne

Post by chrisk » Mon Jan 04, 2010 8:05 pm

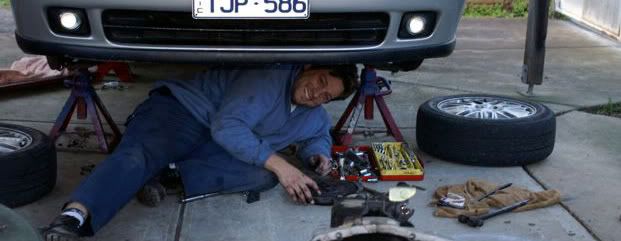
Suparoo - More pics as requested, hope they are clear enough.

ScubyRoo - That is correct. The main beam is separate to the tow bar and had to be manufactured from scratch. It's the main load bearing and structural component in this contraption. Have a good squiz at one of the shots below, in the middle of the pic you can see the strap that comes off the main beam and is bolted with a high tensile bolt into an existing tow bar bolt hole/nut. This is only really there to stop the main beam trying to twist itself off the mounts that go into the chassis rails, not a load bearing component. You can also see a bit of the stitching of the original bumper reo where it was welded onto the main beam.

RSR555 - Let me know when you're ready to build and I'll give you some lengths as well ( have to go out with a tape measure).
Long and short of it is the majority is made from 2mm wall thickness box sections like 50x50 for the swingarms and the little box sections on the end of the main beam, the two pieces that come off the spare tyre upright and are welded onto the triangular plate which has 3 high tensile bolts onto which the spare is secured.The main beam was 50x75, 20x50 for the jerry can uprights, 50x8 plate for the tow bar mount straps, and sections of 50x5 plate for the ends of the swingarms where the fastener latches and securing pins are. The securing pins are 20mm solid lengths which are welded to a couple of box sections attached to the main beam to bring them out more or less to be inline with the plastic bumper.
Used a sheet of plate to mount the jerry can holder on and then a piece of 20x50 box cut diagonally to make to triangular gussets to support the holder as it is mounted right on the edge of the swingarm.

A couple pieces of angle were used to weld the nuts for the gas struts on the beam in a position as far out to the edge of the plastic bar as possible. 2 more nuts were welded onto the underside edge of the swignarms, as close as possible to the the tailgate. Very important to get the angles and measurements right for this. When closing the swingarms, the gas strut is compressed fully a bit before the swingarm arrives at its fully closed position. During the last few degrees of travel the strut actually lengthens a bit, therefore assisting in shutting the swingarm. It also means the arm doesn't swing out violently when the securing latch is detached.
The gas struts are a GG Mazda 6 sedan boot lid struts. Perfect length for this application. The ball mounts for these I got from work too. You could probably source something similar elsewhere: wreckers? or your local Mazda dealer.

The hole saw played a big part as well as the air powered dremel, in carving out holes in the plastic and bumper reo and also to get a nice cut on the swingarms to fit the bearing hubs. The hubs a pretty solid and I looked at the clearance between the plate and securing 20mm pins there is oxygen all the way around the pin. I have been driving around without the R clips in and the latches hold well enough, but for serious off roading I think I'll stick them in.

There is a fair bit of rooting around in order to gut the bumper reo, cut holes in appropriate places, etc, but the end result is worth it. To get the chassis mounts right, you have to insert the main beam into the gutted reo and use the beam as a straight edge between the two upper corners on the vehicle side of the bumper reo and where that line intersects the mounts, cut them off (the reo and plastic bumpers are in fact curved not straight). A lot of measuring all the way! Make sure you get the vertical and horizontal measurements before you cut as these will determine the end result of whether you can actually close your tailgate over the plastic bumper and also give you enough clearance for the latch hooks as well.
The bought stub axles have a square base and the top of the square part was pretty much inline with the top of the main beam, but the outer bottom corner had to cut off to match the profile of the plastic bumper.

This should give you some idea, as I said, when you are ready to build let me know. Happy to help :)
Image

Image

Image

Image

Image
Attachments
04012010449.jpg
04012010449.jpg (103.55 KiB) Viewed 4066 times
04012010447.jpg
04012010447.jpg (110.06 KiB) Viewed 4057 times
04012010446.jpg
04012010446.jpg (111.76 KiB) Viewed 4061 times
04012010445-001.jpg
04012010445-001.jpg (107.79 KiB) Viewed 4060 times
04012010444-001.jpg
04012010444-001.jpg (109.48 KiB) Viewed 4071 times
Confucius say: always remember the 6 P's - Planning & Preparation Prevent Piss Poor Performance....

User avatar
RSR 555
Elder Member
Posts: 6951
Joined: Sat Nov 10, 2007 10:42 am
Location: ATM... stuck in Rockingham

Post by RSR 555 » Mon Jan 04, 2010 11:14 pm

Thanks Chrisk.. That is a great insight. I'm looking to start building now and will send you a PM. Cheers
You know you are getting old when the candles on your birthday cake start to cost more than the cake itself.

RSR Performance
Home of the 'MURTAYA' in Oz
Subaru Impreza WRX based Sportscar
[SIGPIC][/SIGPIC]

Disclaimer: Not my website but hyperlink here to Subaru workshop manuals

User avatar
AndrewT
Senior Member
Posts: 4777
Joined: Tue Oct 04, 2005 10:00 am
Location: WA
Contact:

Post by AndrewT » Tue Jan 05, 2010 12:41 pm

Great stuff chrisk.

Hey RSR I might be interested in having a gander at this in progress, maybe even building a second one for my wagon at the same time. Need to catch up with you anyways. :)

User avatar
Venom
General Member
Posts: 1044
Joined: Sun Feb 03, 2008 10:04 am
Location: Ballarat

Post by Venom » Tue Jan 05, 2010 2:57 pm

Great work chrisk, that is a very neat looking setup you've come up with. Very, very cool. I want one. Does the rear door open alright with a jerry can in place? It looks pretty close in those photos, but maybe thats just the angle of the picture.
[SIGPIC][/SIGPIC]

User avatar
chrisk
Junior Member
Posts: 25
Joined: Thu Feb 19, 2009 8:45 pm
Location: melbourne

Post by chrisk » Tue Jan 05, 2010 3:08 pm

Venom - You are spot on with that observation and the jerry can holder lock down bar does indeed foul on the tail gate. I am going to have to give a tweak in the vice a little on one corner. That was one thing I screwed up a bit. We checked to see if the holder will clear but not with the water jerry I bought for it. It works well enough with a petrol jerry but.
Confucius say: always remember the 6 P's - Planning & Preparation Prevent Piss Poor Performance....

User avatar
AlpineRaven
Senior Member
Posts: 3682
Joined: Wed Oct 19, 2005 10:00 am
Location: Melbourne, Victoria, Australia.

Post by AlpineRaven » Tue Jan 05, 2010 3:40 pm

Nice setup there, nice workmanship..
Cheers
AP
Subarus that I have/had:
1995 Liberty "Rallye" - 5MT AWD, LSD - *written off 25/8/06 in towing accident.
1996 Liberty Wagon - SkiFX AWD 5MT D/R, Lifted.. Outback Sway Bar, 1.59:1 Low Gearing see thread: 1.59:1 in EJ Box Page
Sold at 385,000kms in July 2011.
2007 Liberty BP Wagon, 2.5i automatic
Image

User avatar
RSR 555
Elder Member
Posts: 6951
Joined: Sat Nov 10, 2007 10:42 am
Location: ATM... stuck in Rockingham

Post by RSR 555 » Tue Jan 05, 2010 5:06 pm

Ok Chrisk, I know have all all info printed off and going through it bit by bit. I would to know if there is anything else that you brought that you might not have mentioned yet?
You know you are getting old when the candles on your birthday cake start to cost more than the cake itself.

RSR Performance
Home of the 'MURTAYA' in Oz
Subaru Impreza WRX based Sportscar
[SIGPIC][/SIGPIC]

Disclaimer: Not my website but hyperlink here to Subaru workshop manuals

Post Reply

Return to “Subaru Chat”