This write up is designed to help those who are after information for dropping an EJ series motor into an L series Subaru. While the write up is heavily weighted to my experiences it will not answer all your questions, particularly if you’re using a late model EJ – wiring may be slightly different in the later models and where a factory immobilizer is involved this will need to be retained. I hope that you do find an understanding of what’s involved and save you asking some questions later…
First of all you need to decide how you are going to do the conversion:
- Do it yourself or with help from others/have a mechanic do it for you
- Adaptor plate or EJ gearbox or shove the EA box into the EJ casing
- Donor vehicle/halfcut/gather the parts
-EJ18/20/22/25 – put a decimal point between the two numbers and you have its capacity in litres. Eg – EJ18 = 1.8 litres in capacity.
In terms of parts – if you’re going to collect the parts yourself the best bit of advice I can give is in terms of the wiring: Make sure you get the wiring that matches the ECU and that of the engine, this is the wiring that plugs into the loom near the battery, it will be two or three plugs and passes under the intake manifold to the various sensors and injectors. Best practice would be to get the sensors too as I’m not sure about the difference in sensor wiring between the years/models if any.
Other than the wiring, the rest of the mechanical bits can be a mix and match. I have read recently that the EJ18 does not have a cam gear angle sensor for the firing of injectors in 2 batches. Some say this is the reason why they use more fuel. If your wiring loom has a cam sensor, I believe this will fit the EJ18 as there is a mounting point provided.
If you’re going to get a donor vehicle or a half cut it’ll have everything you need. If you’re going to do a [url=http://www.*********performance.com/]c r o s s b r e d brake conversion[/url] a donor vehicle will have the brakes to match the engine conversion.
To get you started, what you need:
-EJ motor, matching pollution gear and exhaust Y pipe
-wiring loom – all wiring under the dashboard and under the bonnet. This will need to be cut down (refer below)
- sensors:
-> Mass Air Flow Metre or AFM – located on the air filter box, you’ll need the top of this box too.
-> Oxygen sensor, found in the exhaust Y pipe
->Cam angle sensor (on motor near the bottom of oil filler pipe)
-> Crank angle sensor (on motor directly above crankshaft, under the alternator)
-> Temp sensor (back of water channel, under intake manifold on driver’s side [Aust])
-> Throttle position sensor (side of throttle body)
-> Knock sensor (on top of block near bell housing on passenger’s side [Aust])
- EJ alternator
- High pressure fuel pump (EFI rated – VL turbo is what everyone goes for, a VN 5 litre V8 one will do the same and probably be a lot cheaper too)
- PS pump – if you have power steering or will be adding it (worthwhile exercise to do)
- EJ flywheel and clutch if using the gearbox or swapping internals
- Radiator modified to take the 40mm radiator hose from the EJ. Best option here is to upgrade the radiator to a twin core custom job that will handle the cooling needed for the EJ. You can fit the liberty radiator in but you’ll need to chop the body cross-member below the L’s radiator and replace it with something that will retain its strength. A few members have done this on the forum (Subafury comes to mind). Here’s my Radiator – custom 3 core for the L, with now modified ports – different angle and 40mm as shown in the pic:

edit: This radiator does not leave much room for thermo fans. Go for a dual core at the most!
Double edit (2019): I’ve been running an N13 pulsar radiator for several years now without issue. You have to roll the top lip of the radiator support panel and I’ve drilled new mounting holes in the lower support bar to fit the radiator as far left as possible, this allows the lower outlet to clear the cam cover. I’m also now running a dual core copper core with plastic end tanks. No way around that. Radiator hoses are adapted with stock liberty upper and lower hoses and a smaller diametre Camry top hose.
Other pieces you’ll need from the local auto store are:
- fuse panel – a 4 fuse panel did the job for me
- electrical clips, joiners and shrink tube
- some sort of protecting cover for the wiring. I used spiral wrap with a layer of electrical tape.
- new water pump and timing (cam) belt. It’s usually best practice to do while the engine is out, especially if you don’t know the history of the motor. Head gaskets can be done too.
For the wiring there’s two ways I’ve seen it done. The one that I have no experience with is wrapping up all the wiring in a protective conduit, connecting everything that needs to be connected (motor only), working out what is power (fused), ignition (fused), fuel pump (fused), oil warning and temp wires. Only the important wires when into the cab, including the ECU wiring and ECU.
The way I have done mine was to cut out anything that was not needed – I started by tracing the wiring back from the engine plugs, taping together the wiring that I needed and cutting out the rest. When I got into the nitty gritty’s (when it became very messy) I traced all wires to the ECU and taped them with a marking tape (green/yellow electrical earth tape). I then refered to Ben’s wiring diagrams (link dead now) to get the wiring cut down completed. You can find the wiring diagrams from numbchux conversions website - a legacy is the same as a liberty.
The wires you need to find to run the EJ wiring:
(Fused):
- main power
- back up power (join to main power)
- ignition
- fuel pump
- starter circuit wire
(non-fused):
- oil warning light (I used the factory L’s wiring)
- temp guage wire (temp guage will sit lower than it did with the EA – again, I used the factory L’s wiring)
- ECU dash light – will most likely need to be added unless its an MPFI touring wagon
- speed sensor wire – this can be left out, I’ve connected mine because I aim to add cruise later on.
Other wires you can find are:
- AC relay wire [edit: used to tell the ECU the AC compressor is on, the ECU will up the idle. Wire this wire the to the AC compressor's clutch wire]
- AC cut wire
- AC fan wire [edit: This wire triggers the thermo fans and can be wired into the factory AC fan trigger wire without harm to the ECU]
- plus a few I can’t remember
Fitting the wiring to your L:
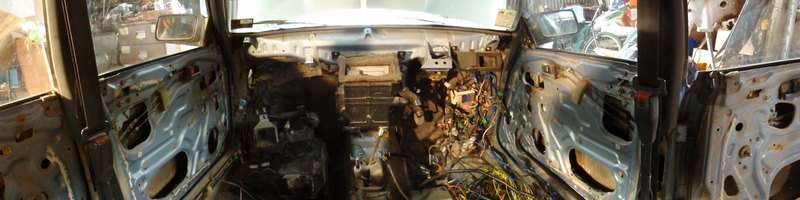
The engine plug wiring was run under the dash along the front of the heater then up over the AC box before passing through the rubber grommet on the left and continuing under the guard (oz passenger’s side). The EJ engine plugs are mounted roughly where the old EA coil was mounted.
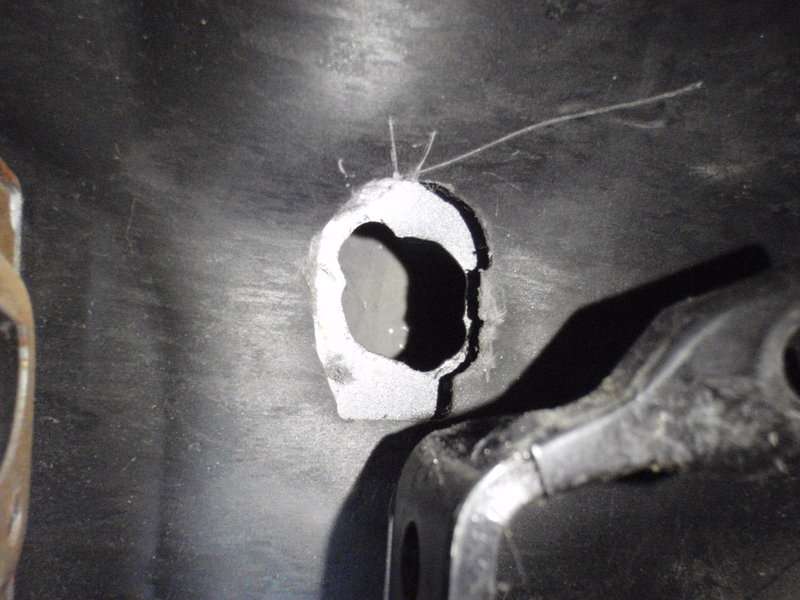
Wiring from the rear top of the EJ engine and the AFM wiring passed through the fire wall through an unused hole near the clutch cable’s hole. Using an old clutch cable grommet the wiring was threaded through and the grommet sealed with a few layers of electrical tape. This made it neat and easy to do.
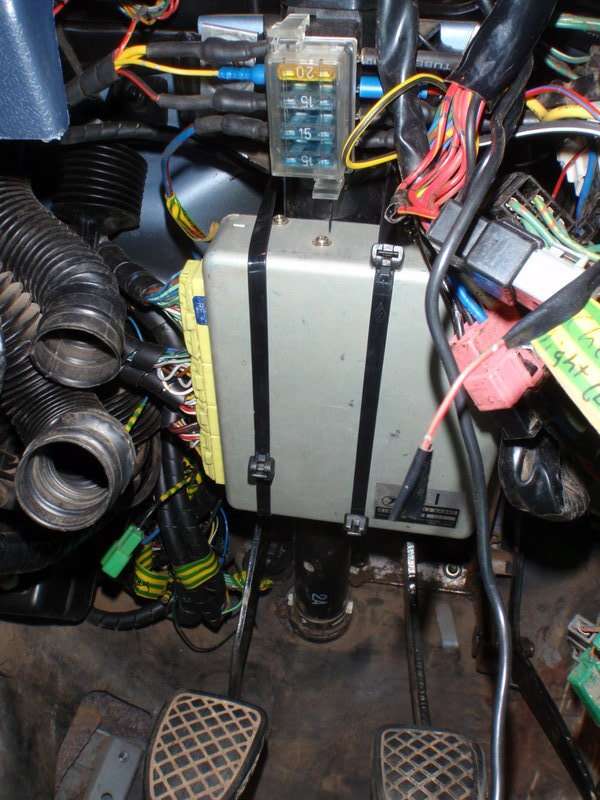
The relays for the ECU and fuel pump have been mounted above the plugs for the dashboard. I took the dash out to fit the wiring in. The ECU is mounted on the steering column above the driver’s feet; I used some thick cable ties. The 4 blade fuse panel is mounted on the column above the ECU – this made for easy tapping of ignition wires for power (always hot), ignition and start.
I used a standard touring wagon wiring loom so the fuel pump wiring was already there – if you have a carbie L you’ll need to run a new wire to the fuel pump. You’ll have to work out something for an ECU dash light (as again mine was there with the touring loom).
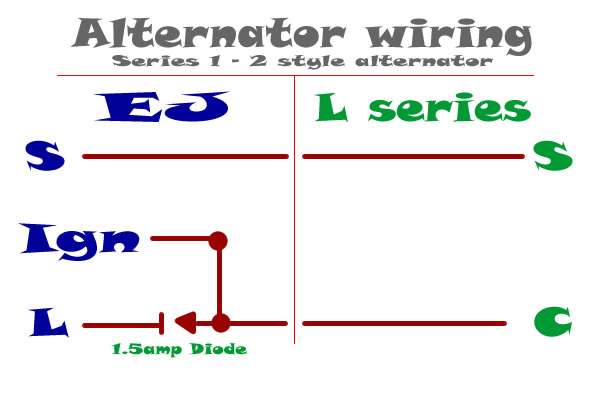
The alternator will need to be wired in. On the bottom of the EJ alternator will be a pin-out diagram for the round plug on top. To wire them in using the standard L wiring, use this diagram (thanks to Outback Bloke):
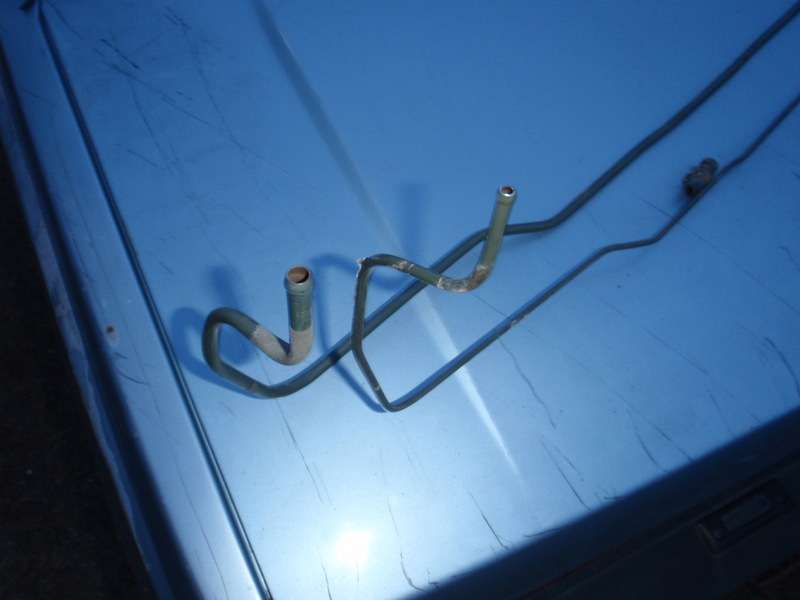
For the fuel return line I used another carbie L’s fuel “in” line as the new return. Others have swapped the fuel return for the evaporation pipe. I did this with my EA MPFI and had surging issues that I thought was a result of this so I upgraded the size of the return line to a standard L’s fuel “in” pipe. Your fuel lines run down the passenger side of the L (and MY). This is the standard return line diameter compared to the L’s standard “in” line:
If you have a carbie L you might want to work out a surge tank to protect the high pressure fuel pump – these pumps use the fuel to keep them cool and lubricated. Running them dry doesn’t do them any favours. You can source an MPFI L fuel tank, these have a larger fuel out pipe to the pump and are apparently designed to keep fuel to the pump. I ran without a surge tank or MPFI fuel tank for a few years when I had the MPFI installed and didn’t have any issues with running dry – just make sure there’s always fuel in the tank...
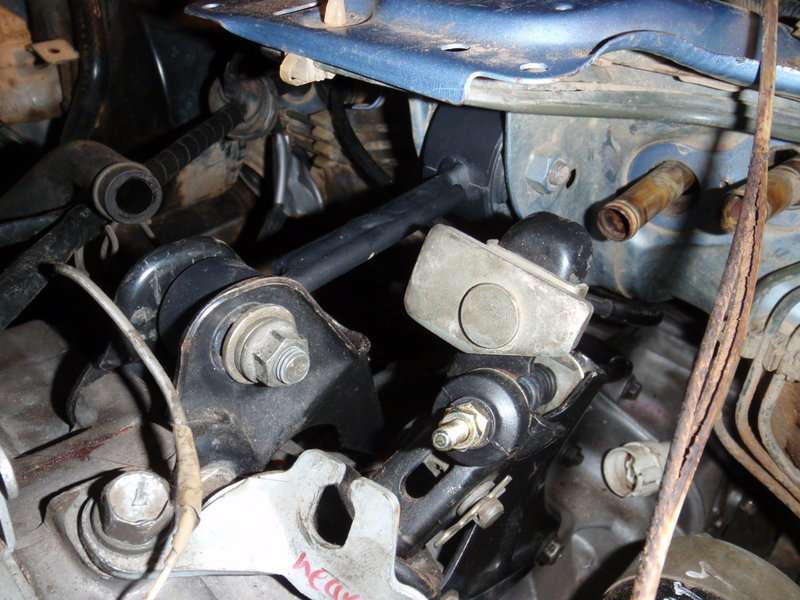
The L’s engine cross-member needs to have its engine mount holes filed out about 5mm – towards the outside of the subi on each side. You’ll also need to make some wedges to keep the engine mounts on a natural angle to prolong their life. I hammer the top of the engine mounting face flat as there’s a bit of a lip there. On my conversion I used a pair of wedges from the steering columns of a couple of old holdens, a bit of shaving and its all looking good. Square mounts are stronger than the round units from what I’ve been told. Shaved wedge for the engine mount (upside down on engine stand):

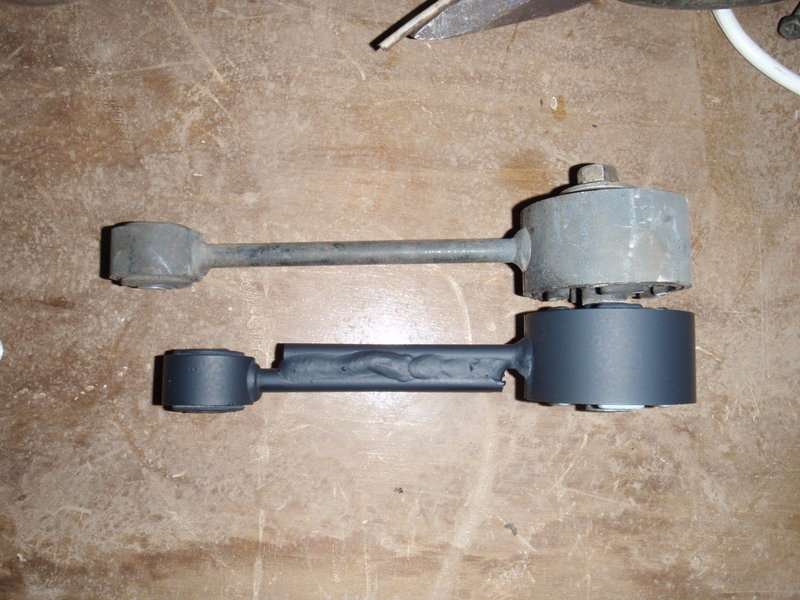
If you want to retain the engine stabilizer rod – the one above the gearbox that mounts to the firewall, you’ll have to source an EJ’s stabilizer rod’s bracket from the top of the gearbox, mount this on your gearbox (two or three bolts, pretty simple) then cut and weld your standard stabilizer arm to fit. Mine looked like this – welded one mine, non-welded is a standard lib unit: