Ruby Scoo’s epic build, ten years and counting...

Moderator: El_Freddo

User avatar
El_Freddo
Master Member
Posts: 12626
Joined: Tue Oct 04, 2005 10:00 am
Location: Bridgewater Vic
Contact:

Post by El_Freddo » Tue Jan 17, 2012 1:05 pm

Interior bits pretty much done, just need to make up the plate for the brake pedal mounts and weld it in on the driver's side floor:

Image

Captive nut replacement:

Image

All closed up:

Image

Image

^ Dummied up - a replacement plate was welded in where I cut out the crappy metal

Welded in:

Image

And that's were I'm up to basically. I've spend this morning cutting plates to weld in over each captive nut to help with more strength. Hopefully they'll be welded in this arvo.

Cheers

Bennie
"The lounge room is not a workshop..."
Image
El Freddo's Pics - El_Freddo's youtube

User avatar
Venom
General Member
Posts: 1044
Joined: Sun Feb 03, 2008 10:04 am
Location: Ballarat

Post by Venom » Tue Jan 17, 2012 4:06 pm

It must be true love Bennie :D

Nice work so far. Great to see she is coming along and getting closer to been back on the road. I see some hints of your stitch welding too ;)

I think you should go for a EJ25 while you are at it, she should be able to handle the extra power after all of your hard work. Apparently they run straight off a EJ22 loom? Just need to source a good motor.

Good luck finishing her off!
[SIGPIC][/SIGPIC]

User avatar
NachaLuva
General Member
Posts: 1930
Joined: Wed Aug 31, 2011 5:05 pm
Location: SE Melbourne

Post by NachaLuva » Tue Jan 17, 2012 11:37 pm

Poor girl, sitting there with her skirt up for all the world to see :p

Looks good Scott, should be nice n strong now. Lot of work though :mrgreen:

BTW, love that rotisserie, looks very strong & very stable.
[SIGPIC][/SIGPIC]
Owner SubieLiftOz, lift kits for Subarus :twisted:

'97 Forester: EJ22E; 4" Custom Body Lift; JDM STi plated LSD; 20mm WRX RSB; Snorkel; Kings

User avatar
El_Freddo
Master Member
Posts: 12626
Joined: Tue Oct 04, 2005 10:00 am
Location: Bridgewater Vic
Contact:

Post by El_Freddo » Wed Jan 18, 2012 8:47 pm

Venom wrote:It must be true love Bennie :D
If you speak to Kez she'd say the same too. But I do have her approval for this work and the amount of time required to do it.
Venom wrote:Nice work so far. Great to see she is coming along and getting closer to been back on the road. I see some hints of your stitch welding too
Yeah it was going well until I ran out of wire tonight - got up to welding the plates in, was hoping to flip her over to have her ready to start welding from the other angle with the driver's side down... Will be doing the ring around tomorrow for some wire.
Venom wrote:I think you should go for a EJ25 while you are at it, she should be able to handle the extra power after all of your hard work. Apparently they run straight off a EJ22 loom? Just need to source a good motor.
Dunno where I'd get one of those from :rolleyes: Dunno if I'm ready for that yet, the EJ22 is doing well and if I dropped the EJ25 in I'd want to do a couple of things before I put it into action, preventative maintenance = money I don't have at the moment :( Some day it will happen though. Frankenmotor :twisted: With a set of low torque cams... That's one thing I'd love to do with the EJ at the moment, but don't have the funds for it.
Venom wrote:Good luck finishing her off!
Cheers mate! Going to need it - pressure is on to get it done, I'm waiting on some jobs to get back to me, I've harassed them enough so the ball is in their court :???: Can't wait to be cruising in here again, even more so I'm keen to get her offroad and do some touring again!
nachaluva wrote:Poor girl, sitting there with her skirt up for all the world to see
Hadn't thought about it like that! I've taken all the "juicy bits" out anyway :p
nachaluva wrote:Looks good Scott, should be nice n strong now. Lot of work though :mrgreen:

BTW, love that rotisserie, looks very strong & very stable.
Loads of work! But when things don't get in the way it's amazing how quickly it all progresses. Putting her back together will be the slow bit!

The rotisserie goes very well! It was a bit hairy getting it setup with the body on it but in reality I was just being over cautious. Makes working on her super easy!

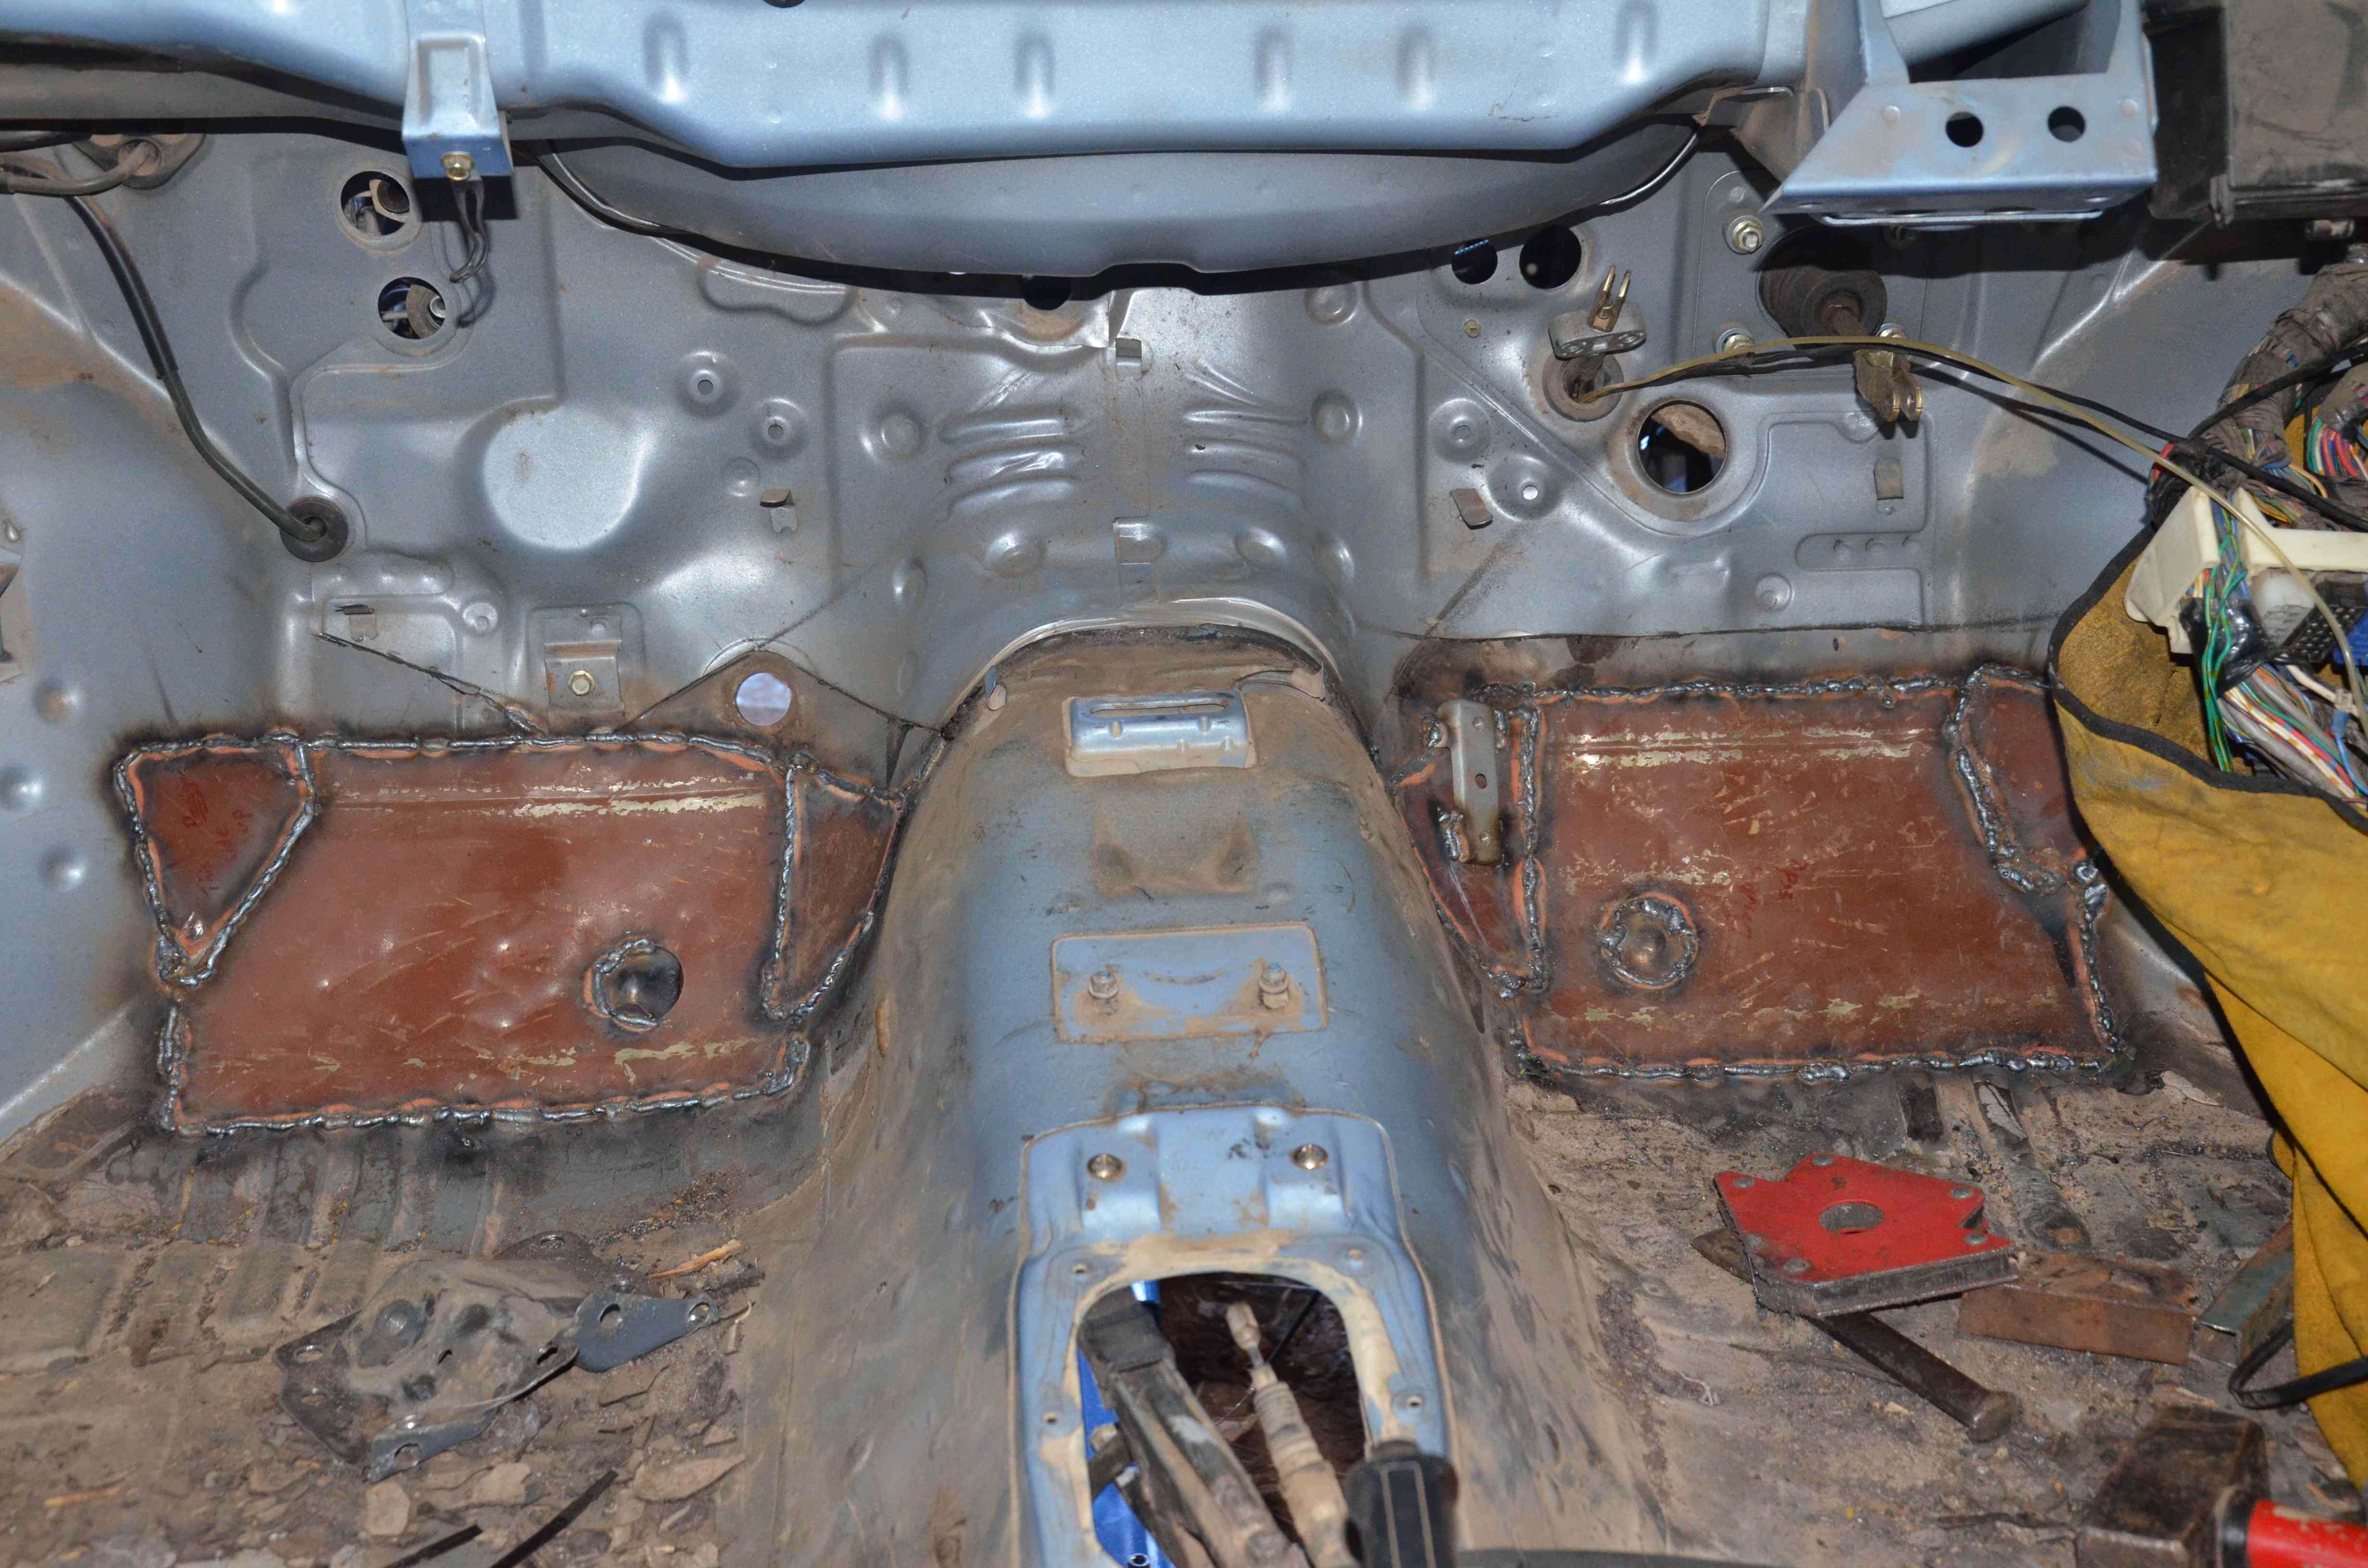
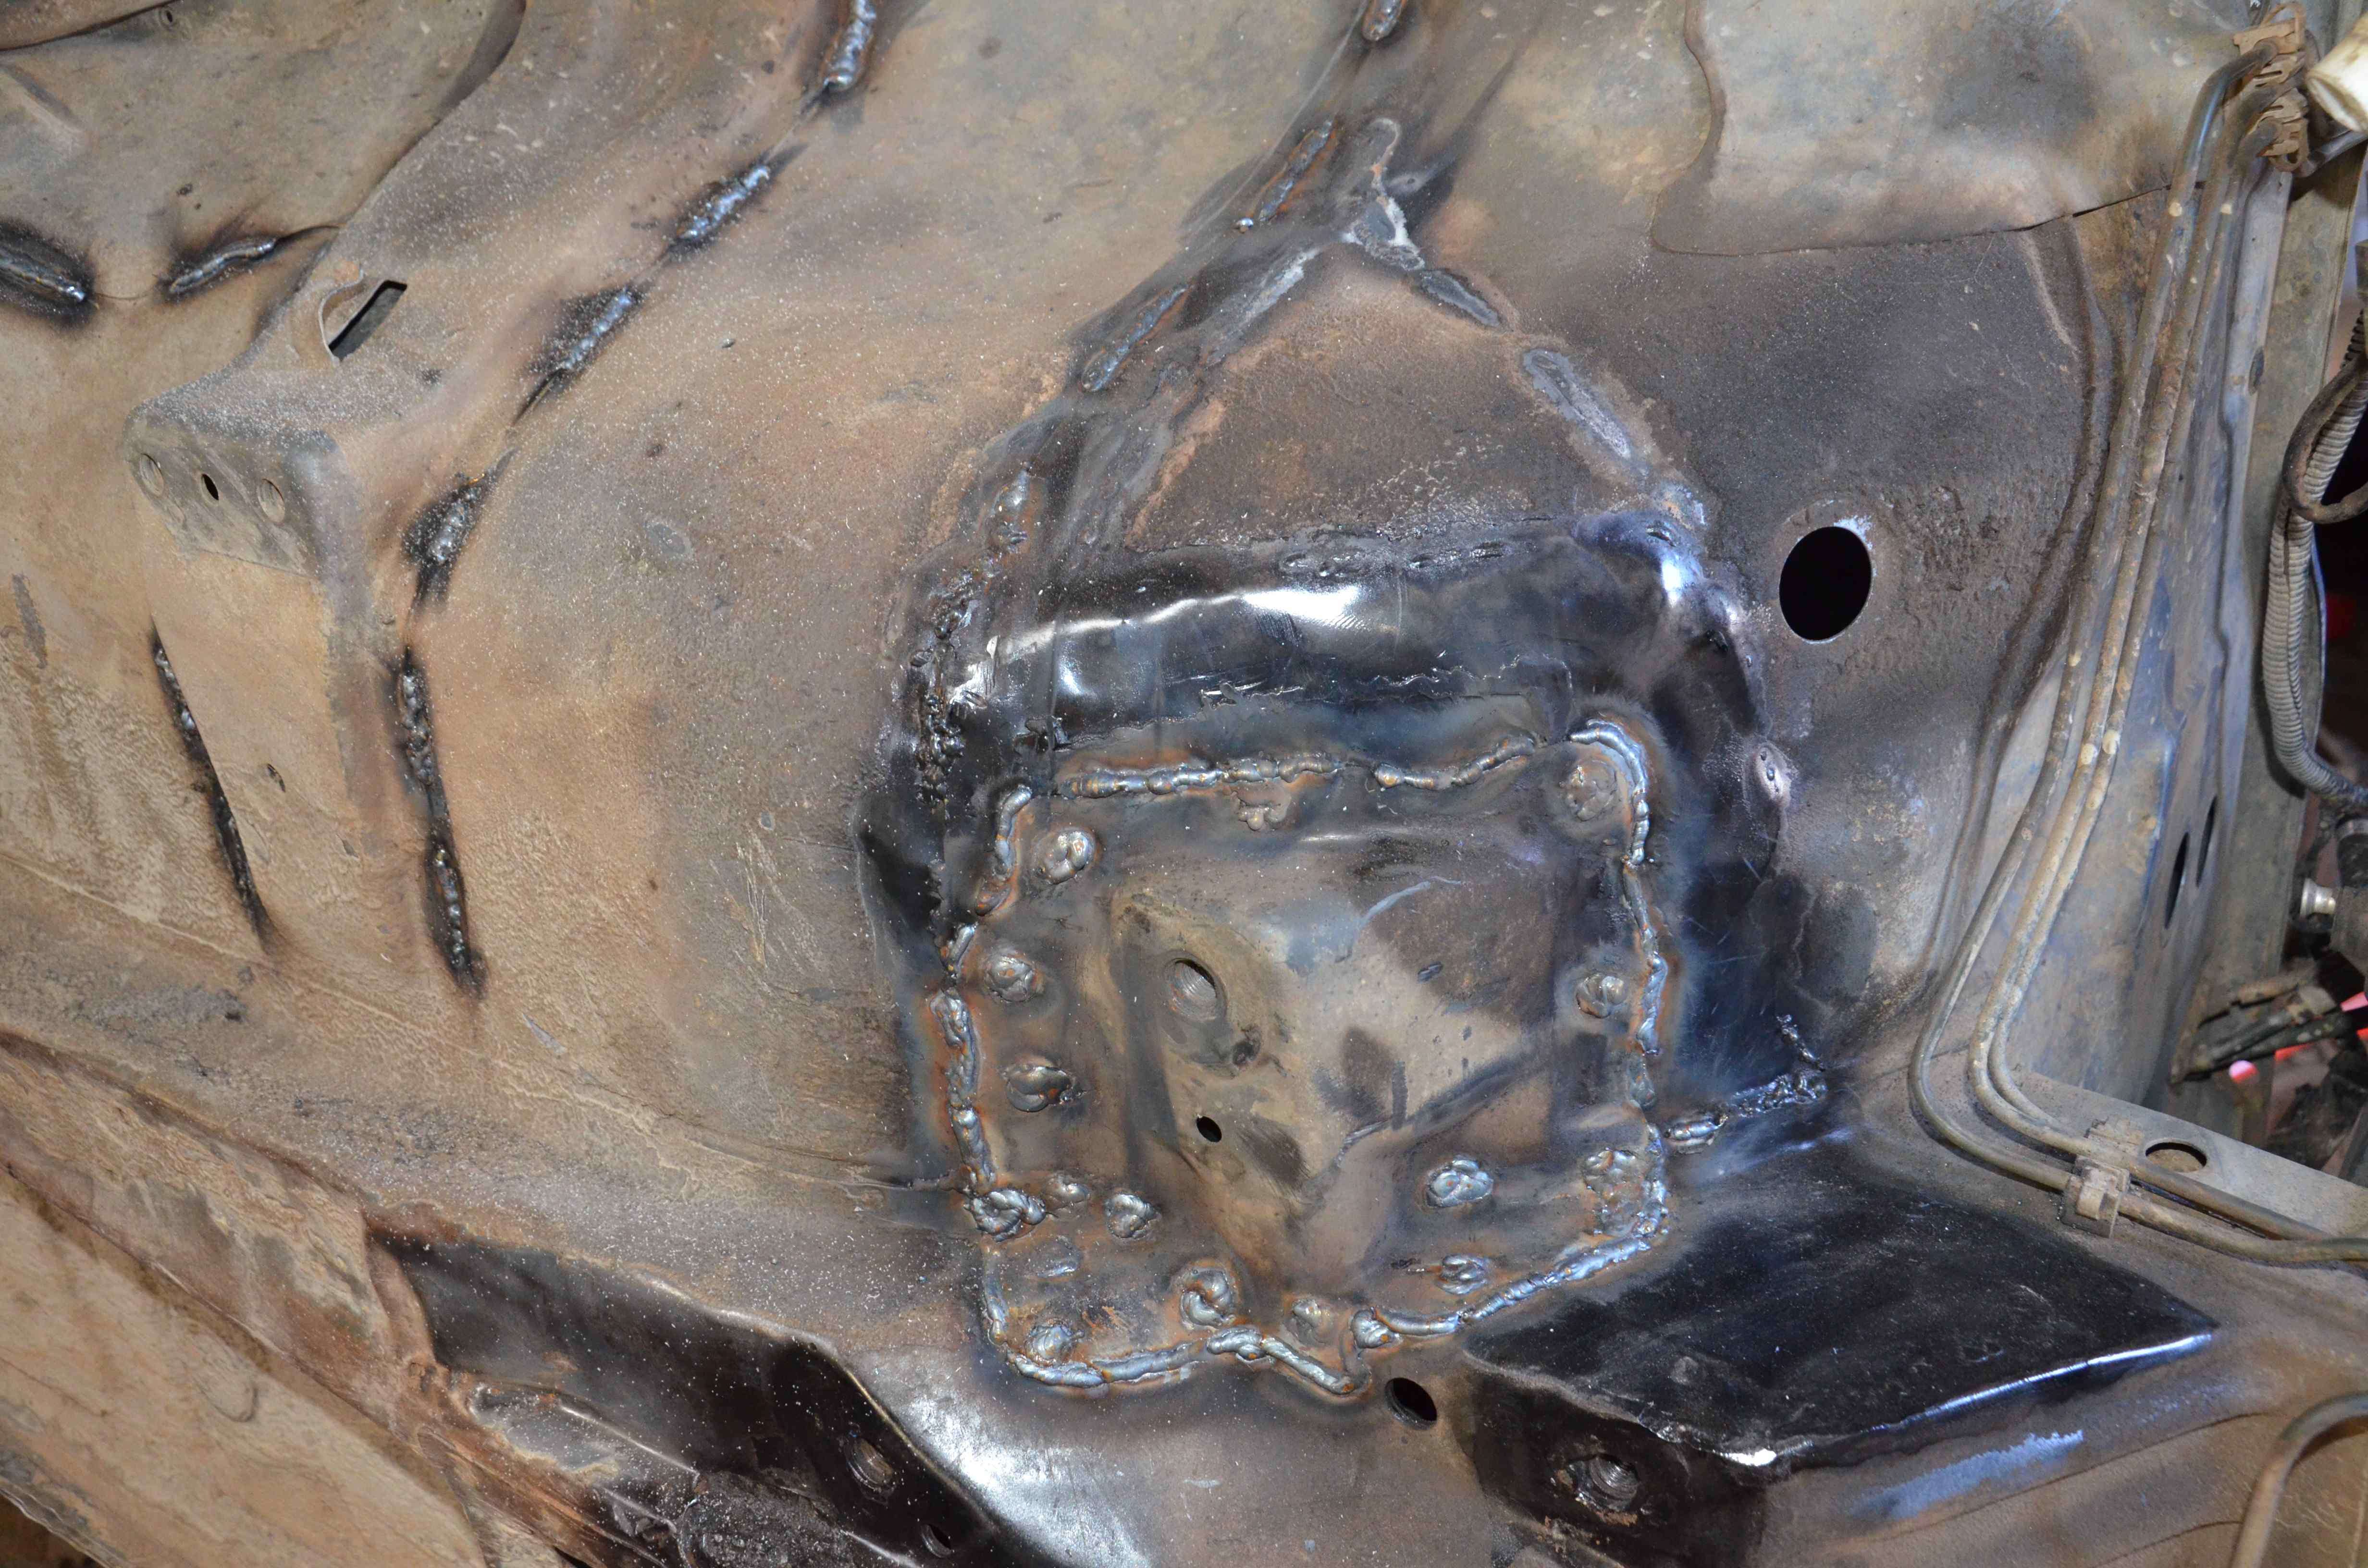
After a day in Benders trying to sort out this scooter rego (bloody bureaucratic agencies) I got home late arvo today to get the welding of the plates done - I knocked up the plates yesterday - I got two plates welded as much as I could on this side and got onto a third one when I ran out of wire. So much for my night of welding I had planned - bloody Murphy!

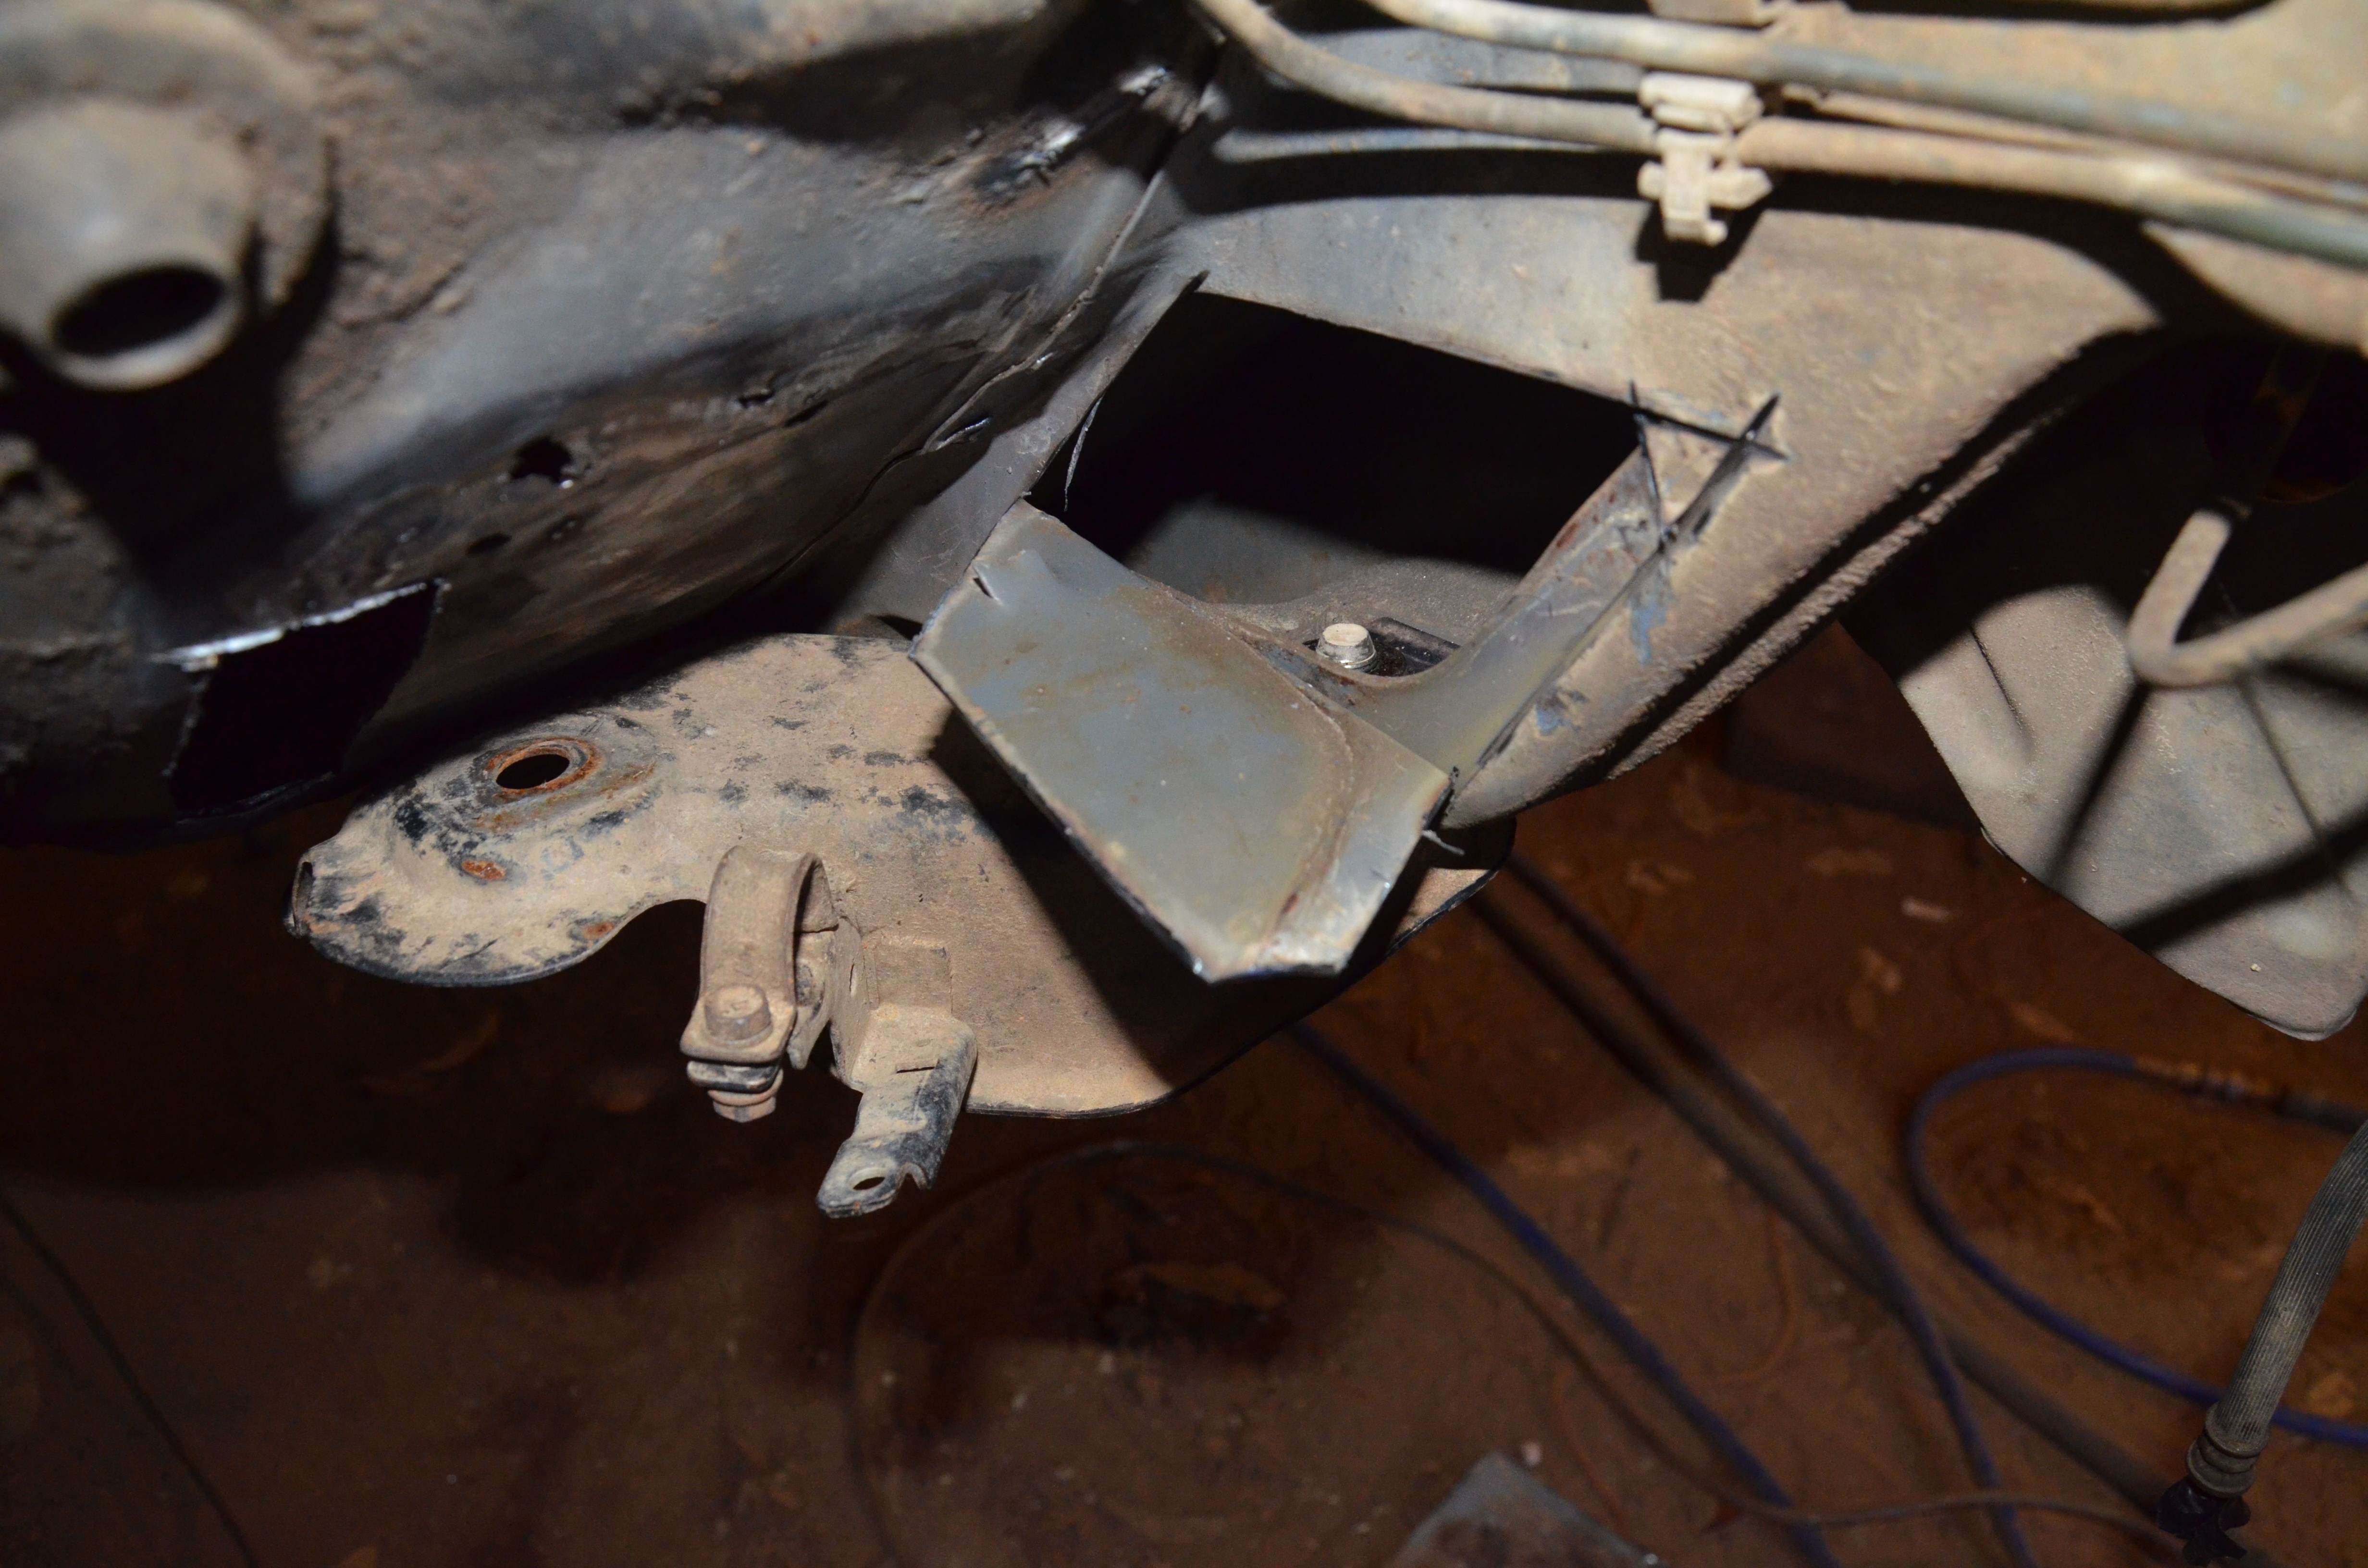
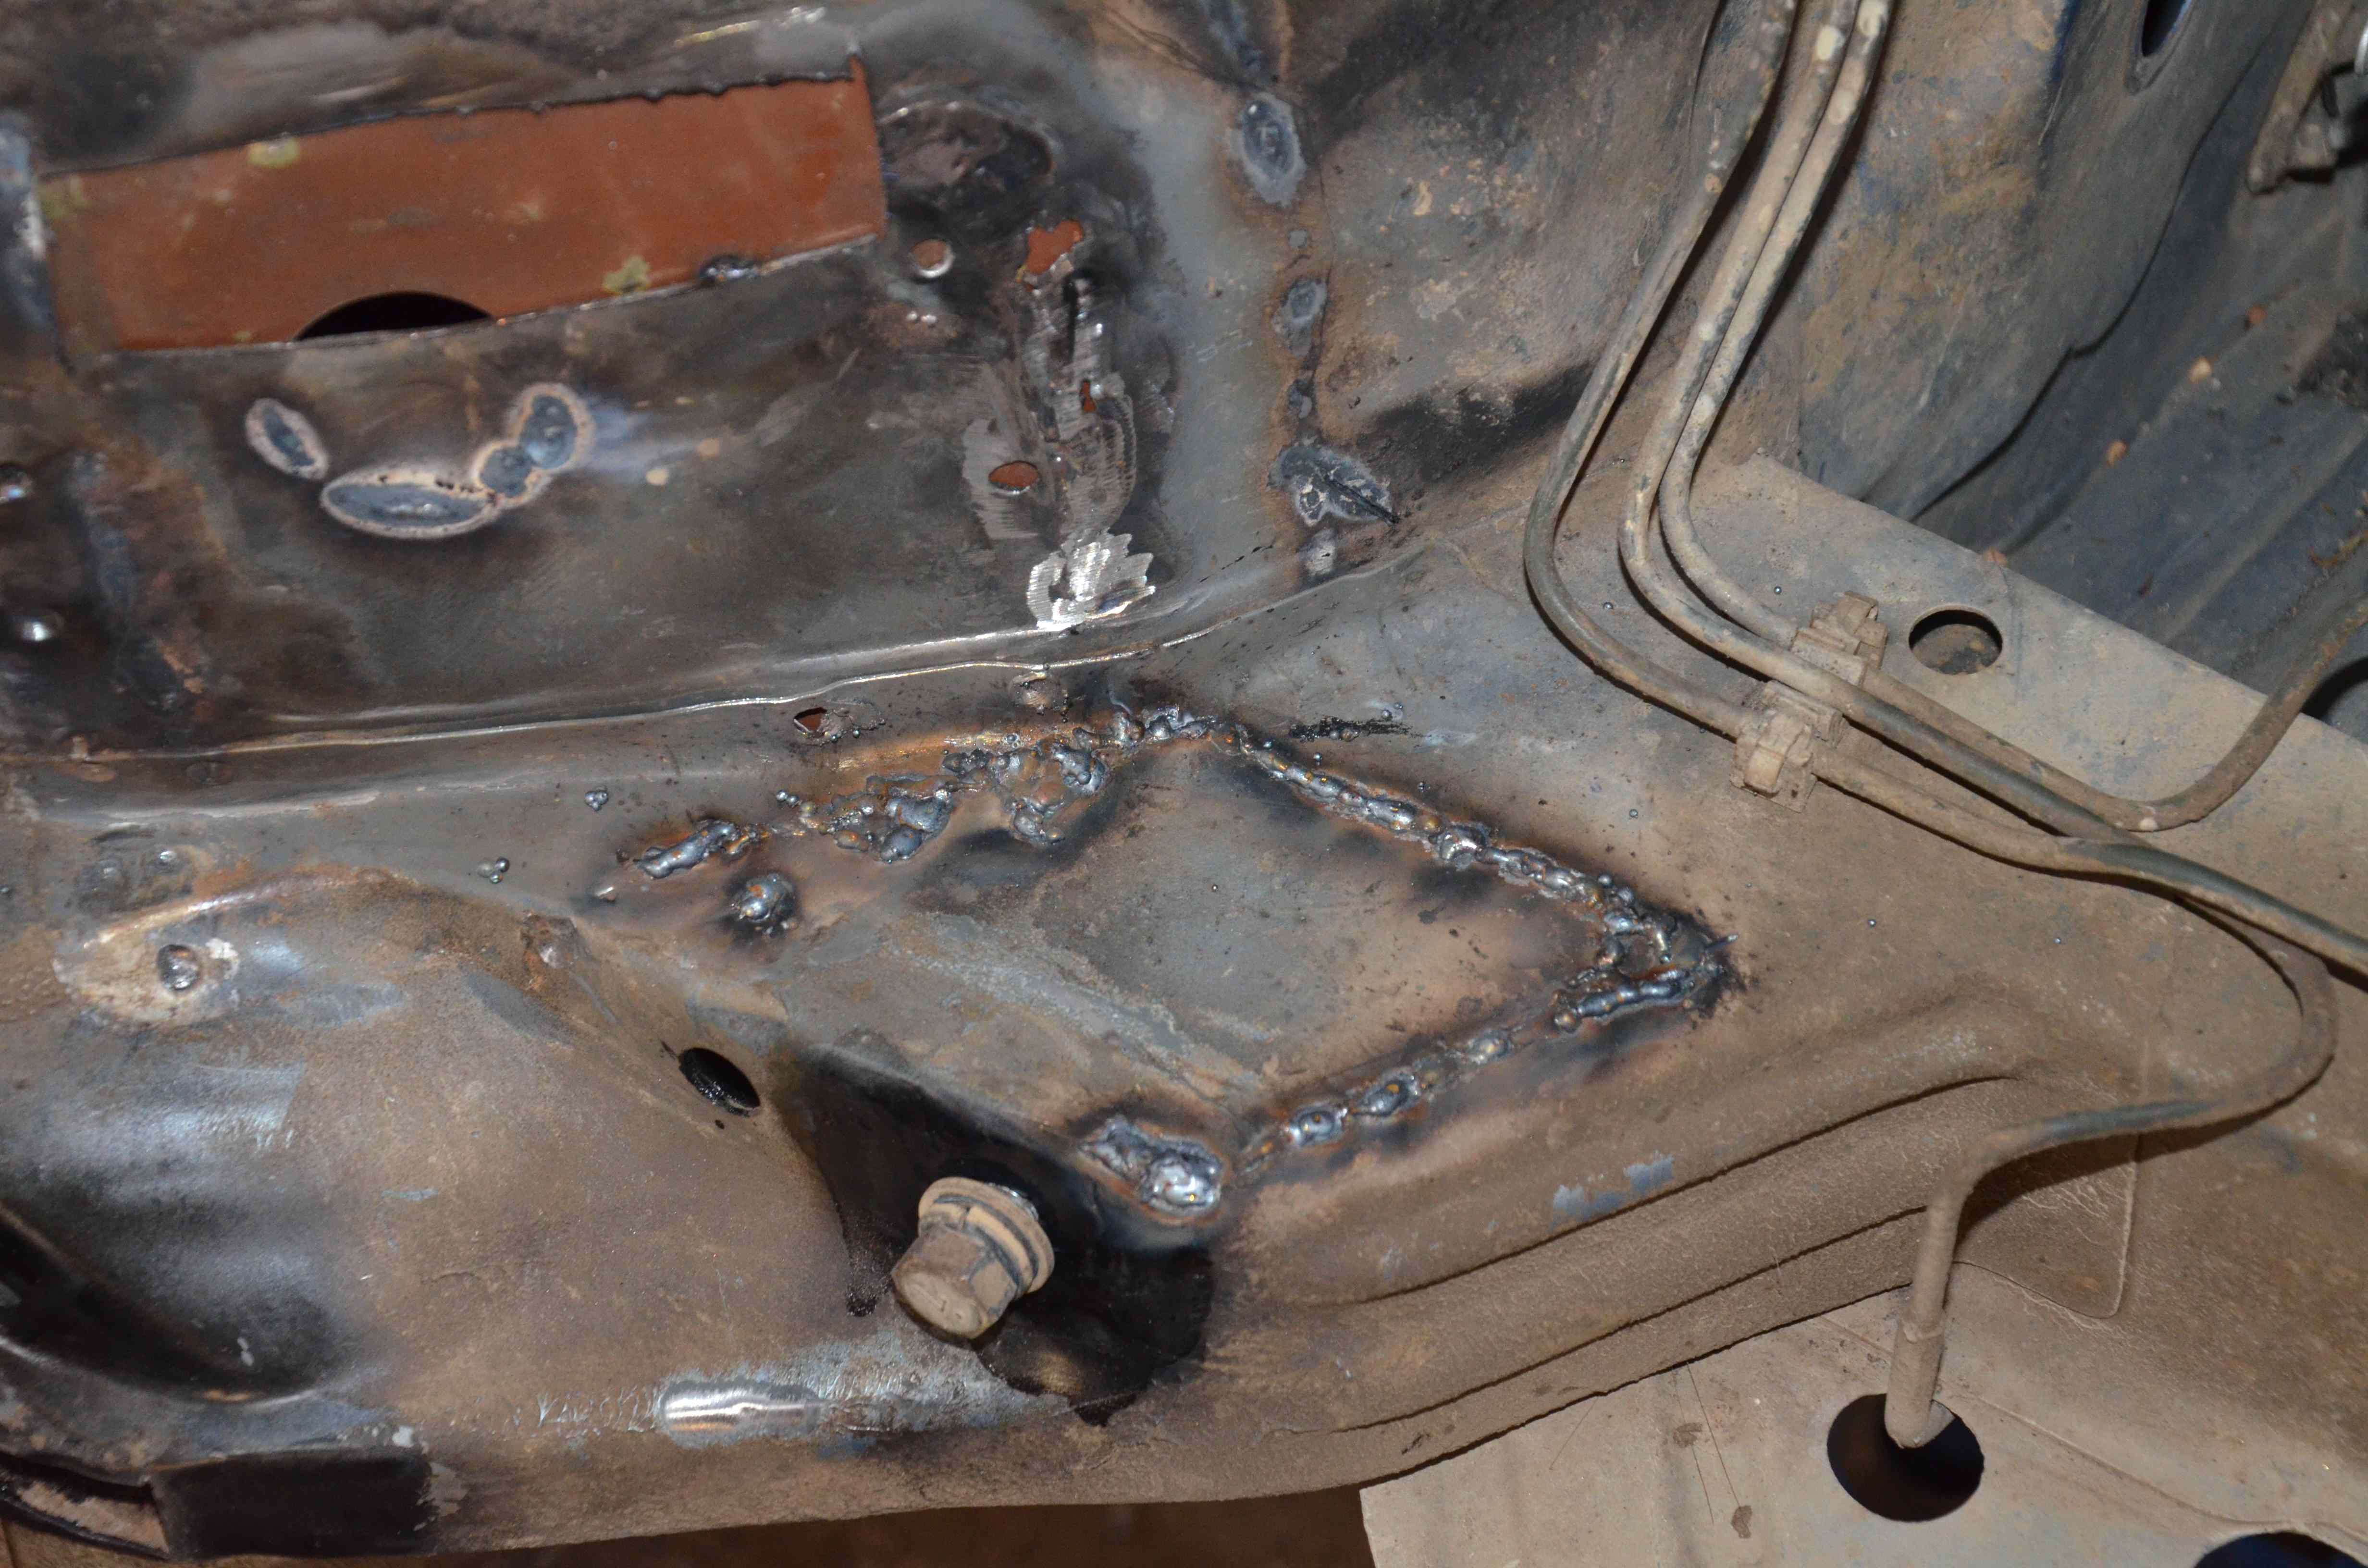
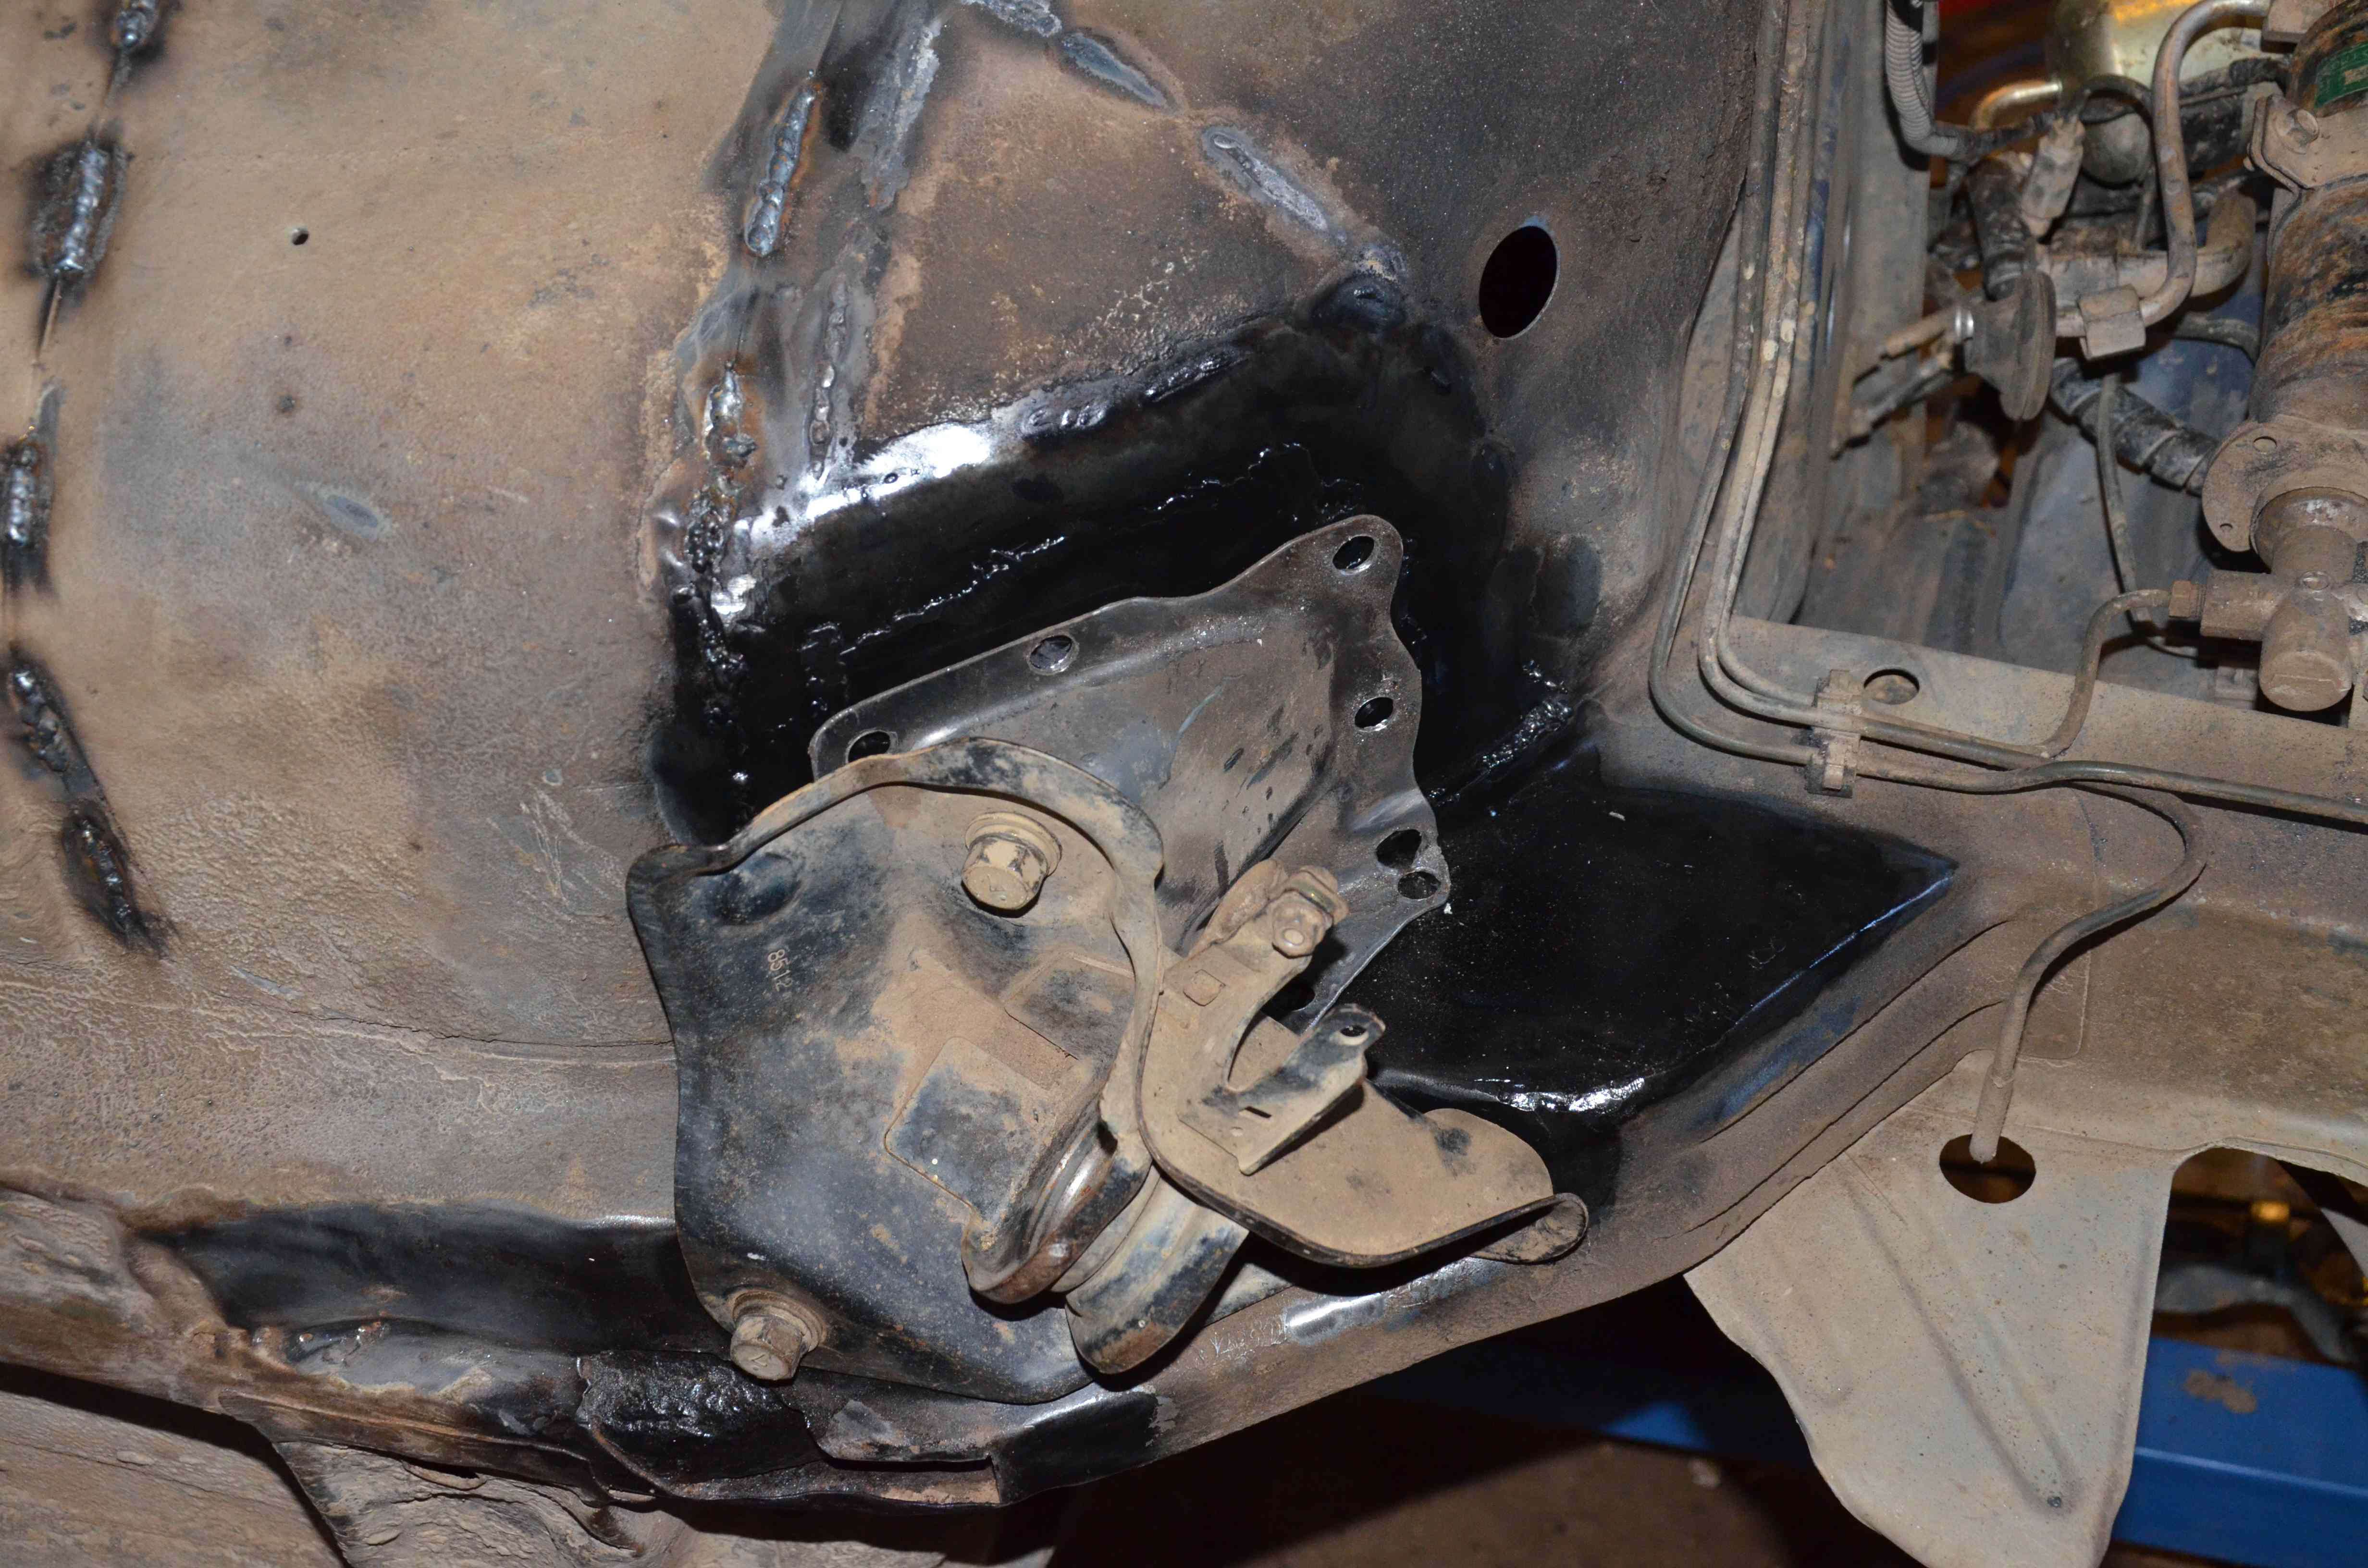
Here's some of the plates welded in, the rear where matt found the cracks is getting the same treatment, pics of that later:

Image

It's been lots of fun shaping the pieces, also a lot of moving around the shed to use the bench vice and the anvil while always checking for what's needed to get the right shape. Should be good and strong once she's all back together! Looking forward to it - just have to put the work in to get her back into one piece.

Now to get the wire to crack on again tomorrow. Time is ticking and after this weekend I'm away for the best part of next week plus Australia day on Thursday kind of gets in the way.... No Oz week this year which is disappointing but circumstances don't allow it in 2012.

Cheers

Bennie
"The lounge room is not a workshop..."
Image
El Freddo's Pics - El_Freddo's youtube

User avatar
ScubyRoo
Junior Member
Posts: 584
Joined: Thu Oct 09, 2008 2:55 pm
Location: Templestowe, Vic (When in Aus)

Post by ScubyRoo » Thu Jan 19, 2012 6:58 am

Great work bennie, keep it up mate! The peice of mind from getting all that extra bracing in will be well worth it!

How's the progress going on the chassis stiffening? Had you considered a H-brace like what is used in some race cars?

Image

I'm thinking about making one that integrates the lift blocks at the attachment points for Frank.
The Green Machine is up for sale :(. Lifted, bars, exhausts... View Gumtree ad

User avatar
NachaLuva
General Member
Posts: 1930
Joined: Wed Aug 31, 2011 5:05 pm
Location: SE Melbourne

Post by NachaLuva » Thu Jan 19, 2012 11:14 am

El_Freddo wrote: Frankenmotor :twisted: With a set of low torque cams...
Whats a low torque cam? Did you mean high torque?
It's been lots of fun shaping the pieces, also a lot of moving around the shed to use the bench vice and the anvil while always checking for what's needed to get the right shape.
keep an eye out for the road runner..beep beep :mrgreen:
ScubyRoo wrote: How's the progress going on the chassis stiffening? Had you considered a H-brace like what is used in some race cars?

Image

I'm thinking about making one that integrates the lift blocks at the attachment points for Frank.
Thats a great idea...hmmm.... ;)
[SIGPIC][/SIGPIC]
Owner SubieLiftOz, lift kits for Subarus :twisted:

'97 Forester: EJ22E; 4" Custom Body Lift; JDM STi plated LSD; 20mm WRX RSB; Snorkel; Kings

User avatar
ScubyRoo
Junior Member
Posts: 584
Joined: Thu Oct 09, 2008 2:55 pm
Location: Templestowe, Vic (When in Aus)

Post by ScubyRoo » Thu Jan 19, 2012 11:15 am

Come on over and we'll 'brew' up an idea some point next week?
The Green Machine is up for sale :(. Lifted, bars, exhausts... View Gumtree ad

User avatar
NachaLuva
General Member
Posts: 1930
Joined: Wed Aug 31, 2011 5:05 pm
Location: SE Melbourne

Post by NachaLuva » Thu Jan 19, 2012 1:39 pm

ScubyRoo wrote:Come on over and we'll 'brew' up an idea some point next week?
Yep sounds good. PM me when you're free...
[SIGPIC][/SIGPIC]
Owner SubieLiftOz, lift kits for Subarus :twisted:

'97 Forester: EJ22E; 4" Custom Body Lift; JDM STi plated LSD; 20mm WRX RSB; Snorkel; Kings

User avatar
El_Freddo
Master Member
Posts: 12626
Joined: Tue Oct 04, 2005 10:00 am
Location: Bridgewater Vic
Contact:

Post by El_Freddo » Thu Jan 19, 2012 9:46 pm

nachaluva wrote:Yep sounds good. PM me when you're free...
Drop in tomorrow :D

Once the wire rocked up it was all go for welding. Had a good day at it:

Image

Image

Image

Image

Image

^ Once this is touched up it'll be time to rotate the other way to do the other side, then level out for a few other pieces - and knock up some plates according to these:

Image

Got them printed and they've come out rather un-pixelated compared to what they look like on screen :D

Getting there.

Cheers

Bennie
"The lounge room is not a workshop..."
Image
El Freddo's Pics - El_Freddo's youtube

User avatar
The Loyale
Junior Member
Posts: 53
Joined: Fri Aug 17, 2007 2:56 pm
Location: Waukesha, WI. United States
Contact:

Post by The Loyale » Sun Jan 22, 2012 8:33 am

Wow, Thats really cool...!
'92 Loyale - Safariwagon (Under Restoration)
130,000

'92 Toyota Landcruiser - Safariwagon-II "Nimble as an Ox!"
181,000
[SIGPIC][/SIGPIC]

User avatar
steptoe
Master Member
Posts: 11582
Joined: Thu Oct 06, 2005 10:00 am
Location: 14 miles outside Gotham City

Post by steptoe » Sun Jan 22, 2012 9:05 am

PHWOAR you are keen - give you that much !!

Got all the bits meticulously labeled or just everywhere - except the lounge room?

User avatar
Tweety
General Member
Posts: 1253
Joined: Mon Jul 04, 2011 9:45 am
Location: ea81 powered trike Victoria

Post by Tweety » Sun Jan 22, 2012 9:08 am

looks really promising Bennie....I mean Scott (I'm confused mate please explain!)

That rotor would save your back!
[SIGPIC][/SIGPIC]Tweety trike- EA81 (full reco 2014) 32/36 weber, SPFI manifold, 9.5:1 CR, VW auto.

User avatar
El_Freddo
Master Member
Posts: 12626
Joined: Tue Oct 04, 2005 10:00 am
Location: Bridgewater Vic
Contact:

Post by El_Freddo » Sat Jan 28, 2012 12:39 pm

The Loyale wrote:Wow, Thats really cool...!
Really hot actually - the shed gets some good radiant heat off it's tin roof in this hot summer heat. Loving it though - it's actually summer down here this year :twisted:
steptoe wrote:PHWOAR you are keen - give you that much !!

Got all the bits meticulously labeled or just everywhere - except the lounge room?
No real labelling - I know where it all goes. Some of the wiring I've got photos of for reference as I'm hoping to move the ECU and immobiliser to higher ground so to speak. Some wiring will need to be modified to make it work though.
Tweety wrote:looks really promising Bennie....I mean Scott (I'm confused mate please explain!)

That rotor would save your back!
Bennie is what I got called at school and uni all the time when I started out on the forums. Bennie's still used regularly by forum members and mates, I've grown with it so it's all good to keep on with the Bennie ;) I answer to both anyway.

And the rotisserie is awesome - makes the work sooo much easier! Having someone to flick the locking pin makes it even easier to rotate her...

Here's where I got up to last weekend before Oz day just before I took the welder back to it's home:

Image

Image

Image

Now to start the painting for rust protection and then put her back together. I'm actually looking forward to it. I might even complete the interior as I should have when I did the EJ conversion...

Cheers

Bennie
"The lounge room is not a workshop..."
Image
El Freddo's Pics - El_Freddo's youtube

User avatar
MTB92
Junior Member
Posts: 204
Joined: Thu May 12, 2011 10:58 pm
Location: Koongamia WA

Post by MTB92 » Sat Jan 28, 2012 3:28 pm

you should come over here if you like the heat, Perth just ticked over 40 and its meant to get a bit warmer yet. stinking hot in the shed!

with all that welding and strengthening she is going to struggle off road, you will be losing the only bit of articulation the L series has! :p

Looks great what you have done!

User avatar
Silverbullet
Senior Member
Posts: 2920
Joined: Mon Aug 23, 2010 6:20 pm
Location: Adelaide

Post by Silverbullet » Sat Jan 28, 2012 4:24 pm

Wow you've certainly stripped her down! Did any dollars fall out of the interior when you rolled it on that rotisserie? :mrgreen: Looks like alot of fun, especially all that welding. Just curious here; what will all those stitch welds do to improve strength? And did you have any areas that were falling apart? ;)

*Edit* never mind about that last question, read back a few pages.
Will it ever end!?
-EA81 TWIN CARB!!!!
-L series 5 speed
-Custom paint job
-2" lift
-Full custom re-wire
-L series front end
Image

User avatar
NachaLuva
General Member
Posts: 1930
Joined: Wed Aug 31, 2011 5:05 pm
Location: SE Melbourne

Post by NachaLuva » Sat Jan 28, 2012 5:32 pm

MTB92 wrote: with all that welding and strengthening she is going to struggle off road, you will be losing the only bit of articulation the L series has! :p
Haha :p

I was thinking of putting in a rear strut brace for some strengthening but I reckon I'll lose too much articulation too lol :rolleyes:

It looks very thorough Scott :mrgreen:
[SIGPIC][/SIGPIC]
Owner SubieLiftOz, lift kits for Subarus :twisted:

'97 Forester: EJ22E; 4" Custom Body Lift; JDM STi plated LSD; 20mm WRX RSB; Snorkel; Kings

User avatar
El_Freddo
Master Member
Posts: 12626
Joined: Tue Oct 04, 2005 10:00 am
Location: Bridgewater Vic
Contact:

Post by El_Freddo » Sun Jan 29, 2012 8:17 pm

MTB92 wrote:with all that welding and strengthening she is going to struggle off road, you will be losing the only bit of articulation the L series has! :p
I quietly shat my dacks when I read this on my emails... Then I read this:
MTB92 wrote:Looks great what you have done!
nachaluva wrote:It looks very thorough
Yeah Matt, I wanted to do the stitch welding, but do a proper job between both front and rear wheels - so I've welded every seam I could find without removing the fuel tank. In the rotated interior photo you can see some of the welding on the inside of the mud guard - there's some nice thick panels in that area, I wasn't expecting that!

Cheers

Bennie
"The lounge room is not a workshop..."
Image
El Freddo's Pics - El_Freddo's youtube

User avatar
subaruby
Junior Member
Posts: 261
Joined: Mon Jun 04, 2007 9:22 am
Location: geelong

Post by subaruby » Tue Jan 31, 2012 8:13 am

Love your work, but must be hard not having her on the road to drive.

Almost looks like the southern franchise for the Subieboys.

Do you think the rotisserie could hold a complete car?
[SIGPIC][/SIGPIC]2006 Forester, AT tyres, Bash plate.
Suspension lift.

User avatar
El_Freddo
Master Member
Posts: 12626
Joined: Tue Oct 04, 2005 10:00 am
Location: Bridgewater Vic
Contact:

Post by El_Freddo » Wed Feb 01, 2012 5:51 pm

subaruby wrote:Love your work, but must be hard not having her on the road to drive.
Too right mate!
subaruby wrote:Almost looks like the southern franchise for the Subieboys.
Nah, not even close! I've just pulled her apart, welded up some stuff and now I'm going to slap her back together - properly, don't get me wrong there!
subaruby wrote:Do you think the rotisserie could hold a complete car?
A light subi maybe. It's rated to a ton or 950kg total. The real issue would be the mounting points on the subi - I'm using the front and rear bumper's mounting points. I'm not sure that they'll hold the weight of the vehicle once you start to roll it over...

Remove the engine and gearbox and you'll be sweet IMO.

Cheers

Bennie
"The lounge room is not a workshop..."
Image
El Freddo's Pics - El_Freddo's youtube

User avatar
El_Freddo
Master Member
Posts: 12626
Joined: Tue Oct 04, 2005 10:00 am
Location: Bridgewater Vic
Contact:

Post by El_Freddo » Fri Feb 03, 2012 9:17 pm

Back on the clutch issue after the swap from last year:
El_Freddo wrote:The clutch issue that I've got as mentioned is most likely because I have not touched the piviot on the clutch fork. I'm not sure how much meat was taken off the flywheel - probably should have taken a photo of the thickness before it when in and what it is now to compare. Anyway... I guess i'll pull the engine again near christmas to make it right - for now I'll have to not push real hard to use the clutch as it's not going all the way to the floor, I think this is due to the pivot not being pushed out and the clutch fork is now hitting the bell housing when I put the foot in...
Ok - so I've split the engine and gearbox apart to find that there's no adjustment in that little pivot ball - I thought I remembered adjusting the pivot ball in the L series back when I first put her back together, I guess I was wrong.

So no adjustment, still no fix on the clutch fork adjustment (now lack of since the new clutch went in). It could be either the difference in the throw out bearing thickness (I may have used an L series throw out bearing) but I can't find the old one to compare, or the other one is the amount of meat that's been removed when they machined the heat stress out of the flywheel - I don't know how much they removed :???:

Any ideas as to how I can make this adjustment so I can get some thread adjustment back on my clutch cable and the clutch fork doesn't hit the back of the hole it pokes out from?
The Loyale wrote:Still on the topic of Power Steering pumps, I want to say that the first gen EJ22 (OBD-I) has an almost perfect match P/S pump, where as the 2nd gen EJ22 and up has a slightly different design. Something I read on USMB once. :)
I had forgotten about this mention of the same PS pumps between the EA and EJ! I got another one as it was the easier option and it was cheap - but I went to put it on tonight and the bloody thing is the same bolting pattern as the L series one! So it doesn't fit either - which means the fix for this is to go back (2hr one way drive) to get the bracket that suits this PS pump - then I'll have a spare one! :cool:

I wire wheeled the welds under Ruby S today, painted them up with some rust converter/sealer - need to get more. The next step is to do the cab then fish oil all of them and paint over with some kill rust enamel paint. I'm pretty sure that should do the trick ;)

Cheers

Bennie
"The lounge room is not a workshop..."
Image
El Freddo's Pics - El_Freddo's youtube

Post Reply

Return to “El Freddo”