Sunnie the Brumby.
Moderator: El_Freddo


-
El_Freddo

- Master Member
- Posts: 12704
- Joined: Tue Oct 04, 2005 10:00 am
- Location: Bridgewater Vic
- Contact:
Today I removed Sunnie's radiator as I started works to restore the cooling system and sort out a carbie issue - he won't start on cold mornings, at least, not without a lot of cranking and pumping of the throttle (no choke!)
I think I've found the source of Sunnie's main cooling issue and where he's been dropping all this coolant. THE RADIATOR! It's shot, got multiple leaks, is now multi coloured in areas too.
I'll drop a pic later in the day - I'm yet to bust out the camera.
After this I'm going to do the water pump, fix the oil pump and replace the EA81 intake manifold with the EA82's.
Anyone know of any issues in this swap? Would I be better off getting an adaptor plate to fit the EA82 carb on the EA81 manifold?
Cheers
Bennie
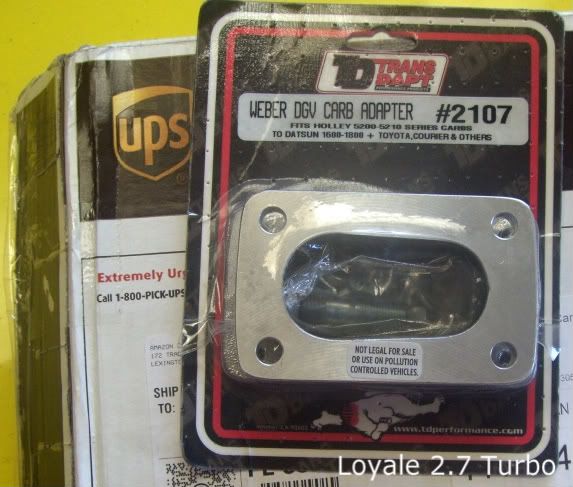
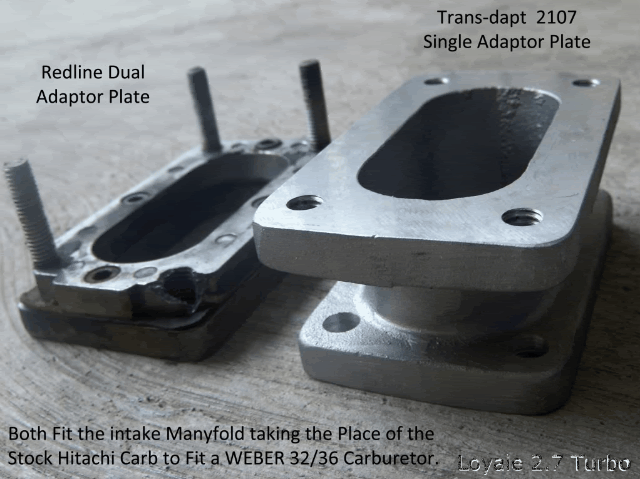
I am doing the ea82 intake + weber onto ea81 now (well slowly anyway). For an adapter i used a transdapt #2107 from JEGS. it was the best looking one i could find after stuffing around with a redline one and attempting to make my own. looks like this

Height is an issue apparently on an unlifted vehicle, i havent got the motor back in but the answer is to use a lower profile filter (50mm approx) than the usual 70mm tall "weber" filter. Otherwise mod the stock filter like this
Weber air cleaner alternative? on USMB

Then the vac advance on the disty needs bending up more to clear the manifold, the crankcase breather needs bending down and the bottom of the ea82 manifold needs clearancing and you can knock off all the unneeded bolt mounts etc. can be easily done with a cutting wheel and a flap disk on a angle grinder in 10 minutes.
There are a few water outlets on the ea82 manifold that need to be sealed shut. one near the thermostat and another in the carby warmer water channel at the front. Just cut off and get tigged over or drill out, tap and use grub screws and gasket sealer.
For radiator hose (Non Power steering) (outlets at thermostat face different directions), apparently EA82 lower hose works as a top radiator hose.
Only use genuine subaru intake gaskets to heads as the other paper ones are rubbish and leak far easier.
Thats as far as i have got so far. i can grab some photos if you need later when the rain stops.
Height is an issue apparently on an unlifted vehicle, i havent got the motor back in but the answer is to use a lower profile filter (50mm approx) than the usual 70mm tall "weber" filter. Otherwise mod the stock filter like this
Weber air cleaner alternative? on USMB
Then the vac advance on the disty needs bending up more to clear the manifold, the crankcase breather needs bending down and the bottom of the ea82 manifold needs clearancing and you can knock off all the unneeded bolt mounts etc. can be easily done with a cutting wheel and a flap disk on a angle grinder in 10 minutes.
There are a few water outlets on the ea82 manifold that need to be sealed shut. one near the thermostat and another in the carby warmer water channel at the front. Just cut off and get tigged over or drill out, tap and use grub screws and gasket sealer.
For radiator hose (Non Power steering) (outlets at thermostat face different directions), apparently EA82 lower hose works as a top radiator hose.
Only use genuine subaru intake gaskets to heads as the other paper ones are rubbish and leak far easier.
Thats as far as i have got so far. i can grab some photos if you need later when the rain stops.
the link in this thread shows all the manifold trimming that needs to happen too, just ignore the weber info
weber install guide
weber install guide
-
El_Freddo
- Master Member
- Posts: 12704
- Joined: Tue Oct 04, 2005 10:00 am
- Location: Bridgewater Vic
- Contact:
Thanks Stenno - there was some good information in there that I hadn't thought about!
Here's the radiator pics that are a little late
Front side:

Rear side:

Previous to us getting this vehicle it appeared that it had run into a fallen tree/branch, thus the fan mark in the radiator - this however didn't cause the leak, something else did - probably old age did it in...
If the other radiator I've got doesn't come up well in it's pressure and flow testing it'll be new radiator time - not that I want to be spending that sort of coin at the moment!
Cheers
Bennie
Here's the radiator pics that are a little late
Front side:
Rear side:
Previous to us getting this vehicle it appeared that it had run into a fallen tree/branch, thus the fan mark in the radiator - this however didn't cause the leak, something else did - probably old age did it in...
If the other radiator I've got doesn't come up well in it's pressure and flow testing it'll be new radiator time - not that I want to be spending that sort of coin at the moment!
Cheers
Bennie
-
El_Freddo
- Master Member
- Posts: 12704
- Joined: Tue Oct 04, 2005 10:00 am
- Location: Bridgewater Vic
- Contact:
Got the radiator back, zero charge! I can't talk up Bendigo Radiators enough, they're in Adam St if anyone happens to be looking for them.
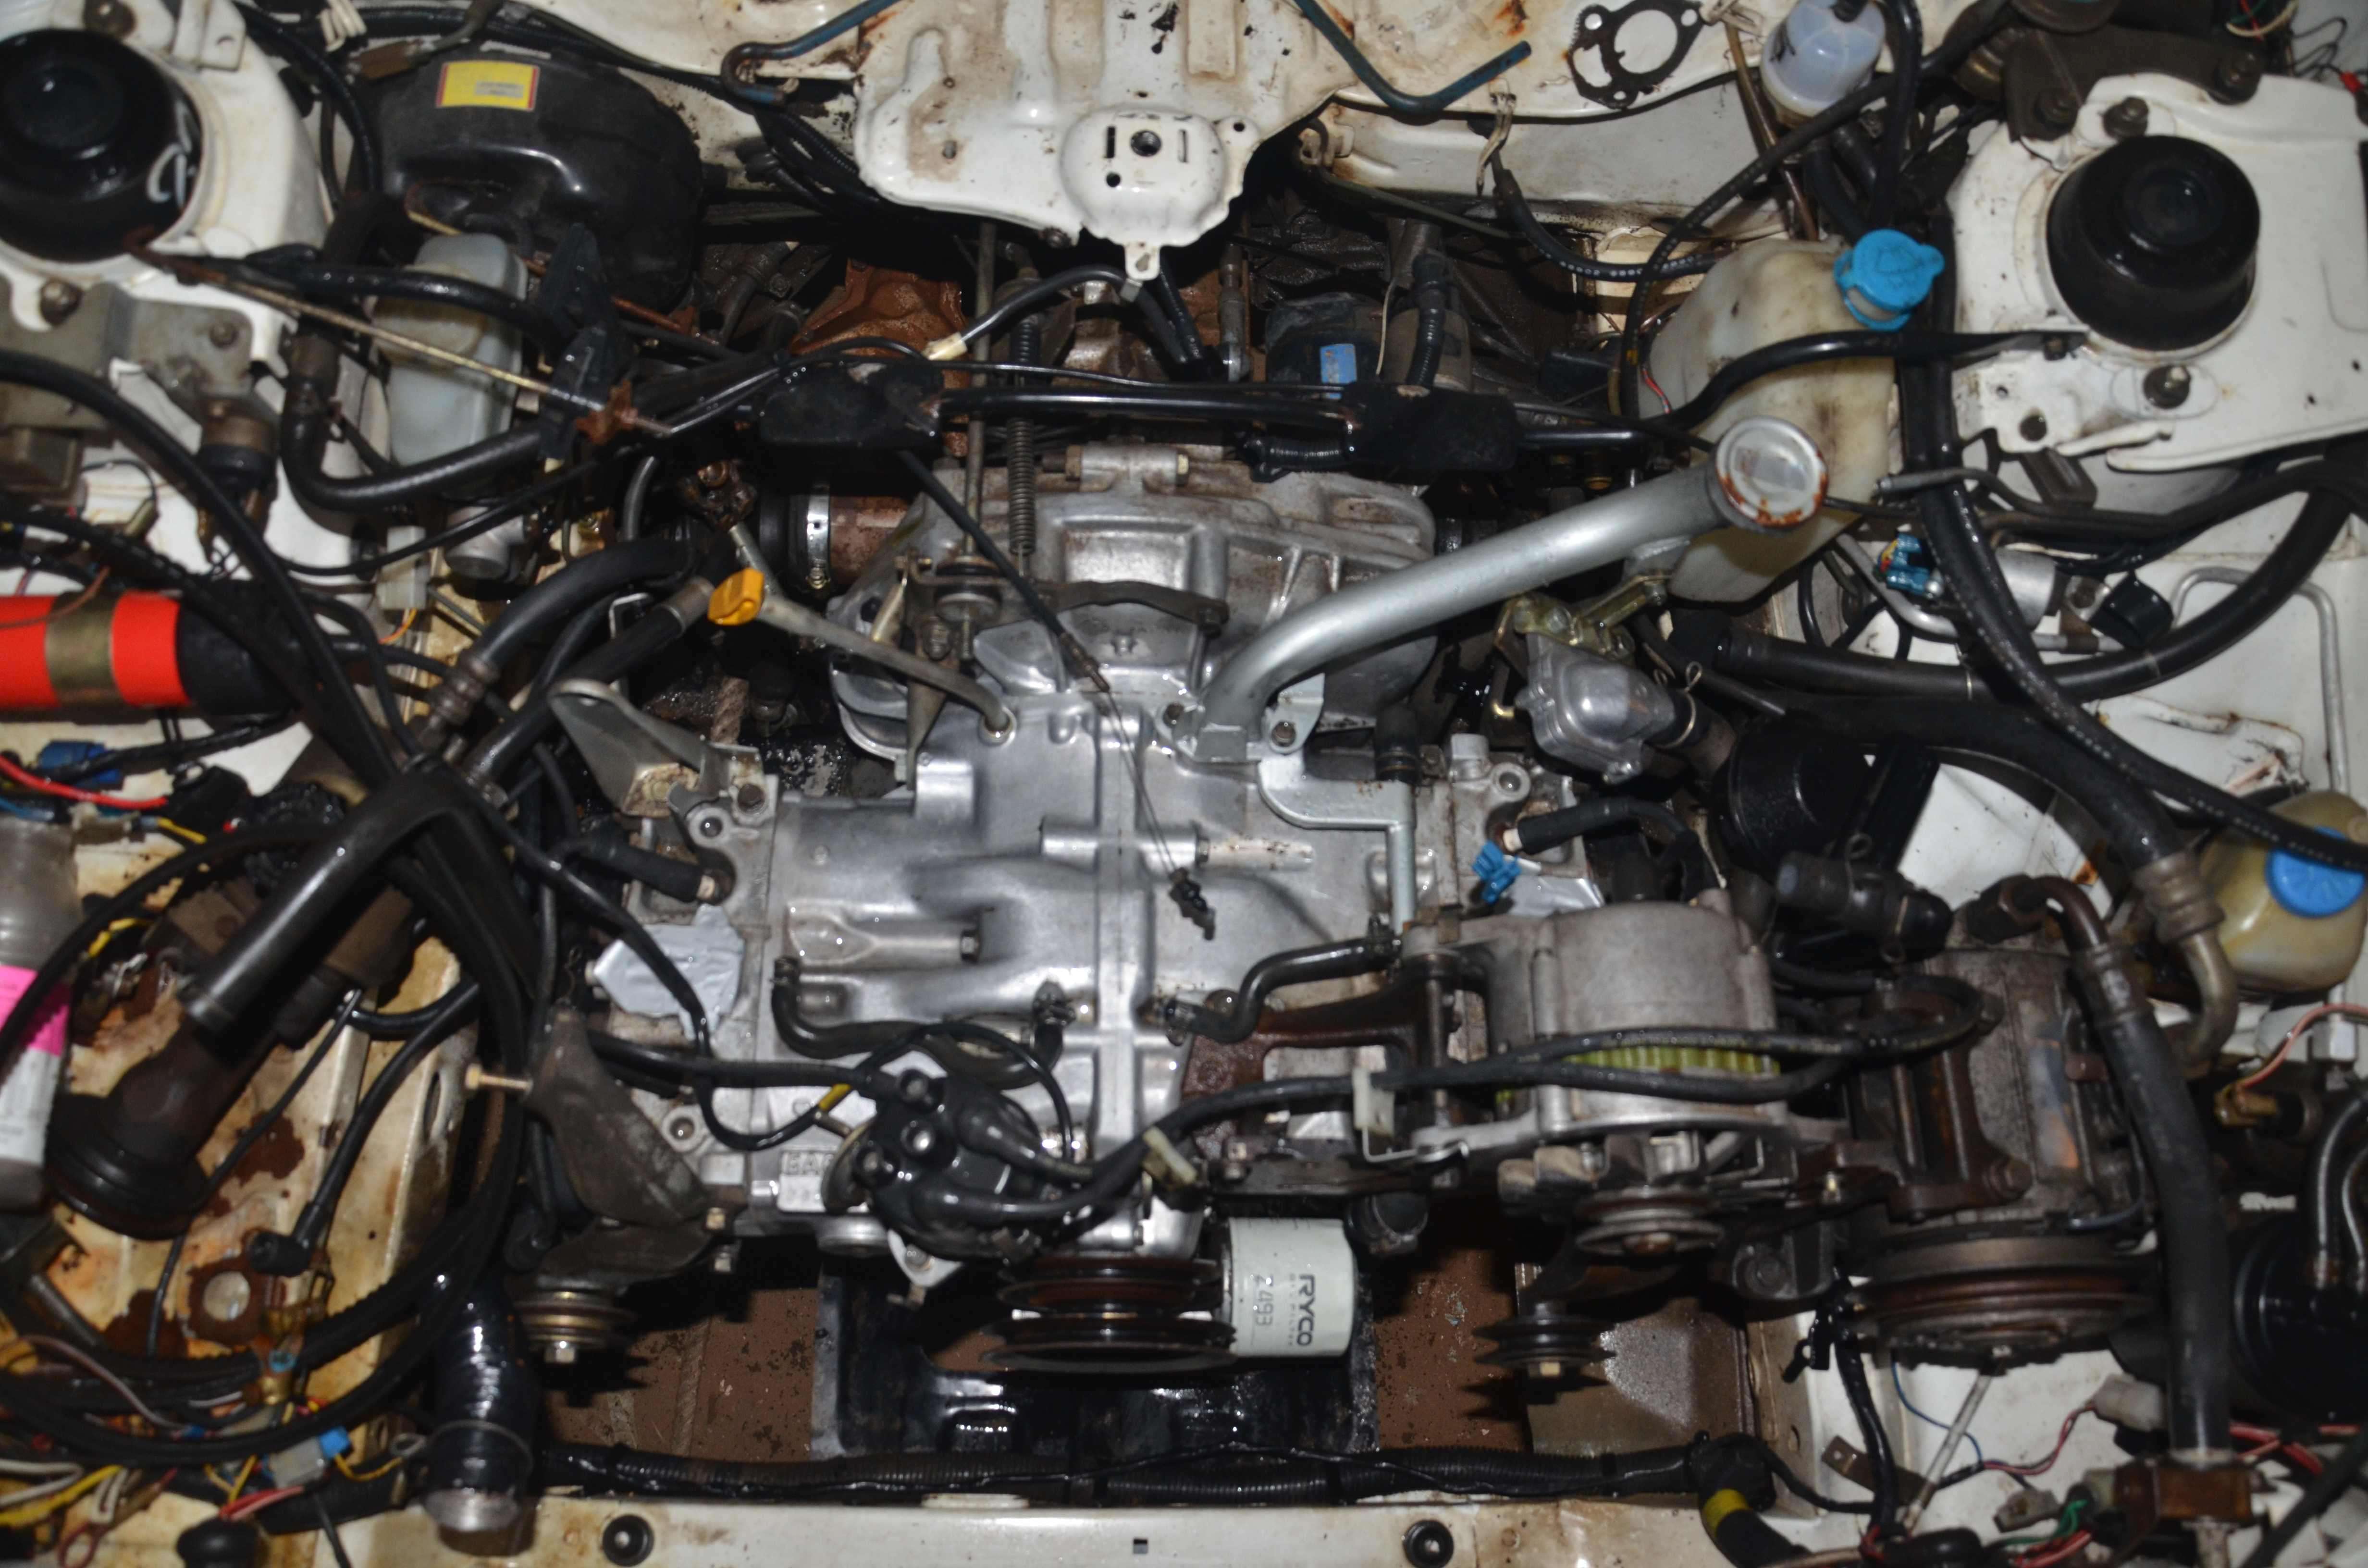
Today I stripped down the engine, I've forgotten to get a photo of the water pump, while the impeller is in great condition the port that the radiator hose mounts to is very corroded.
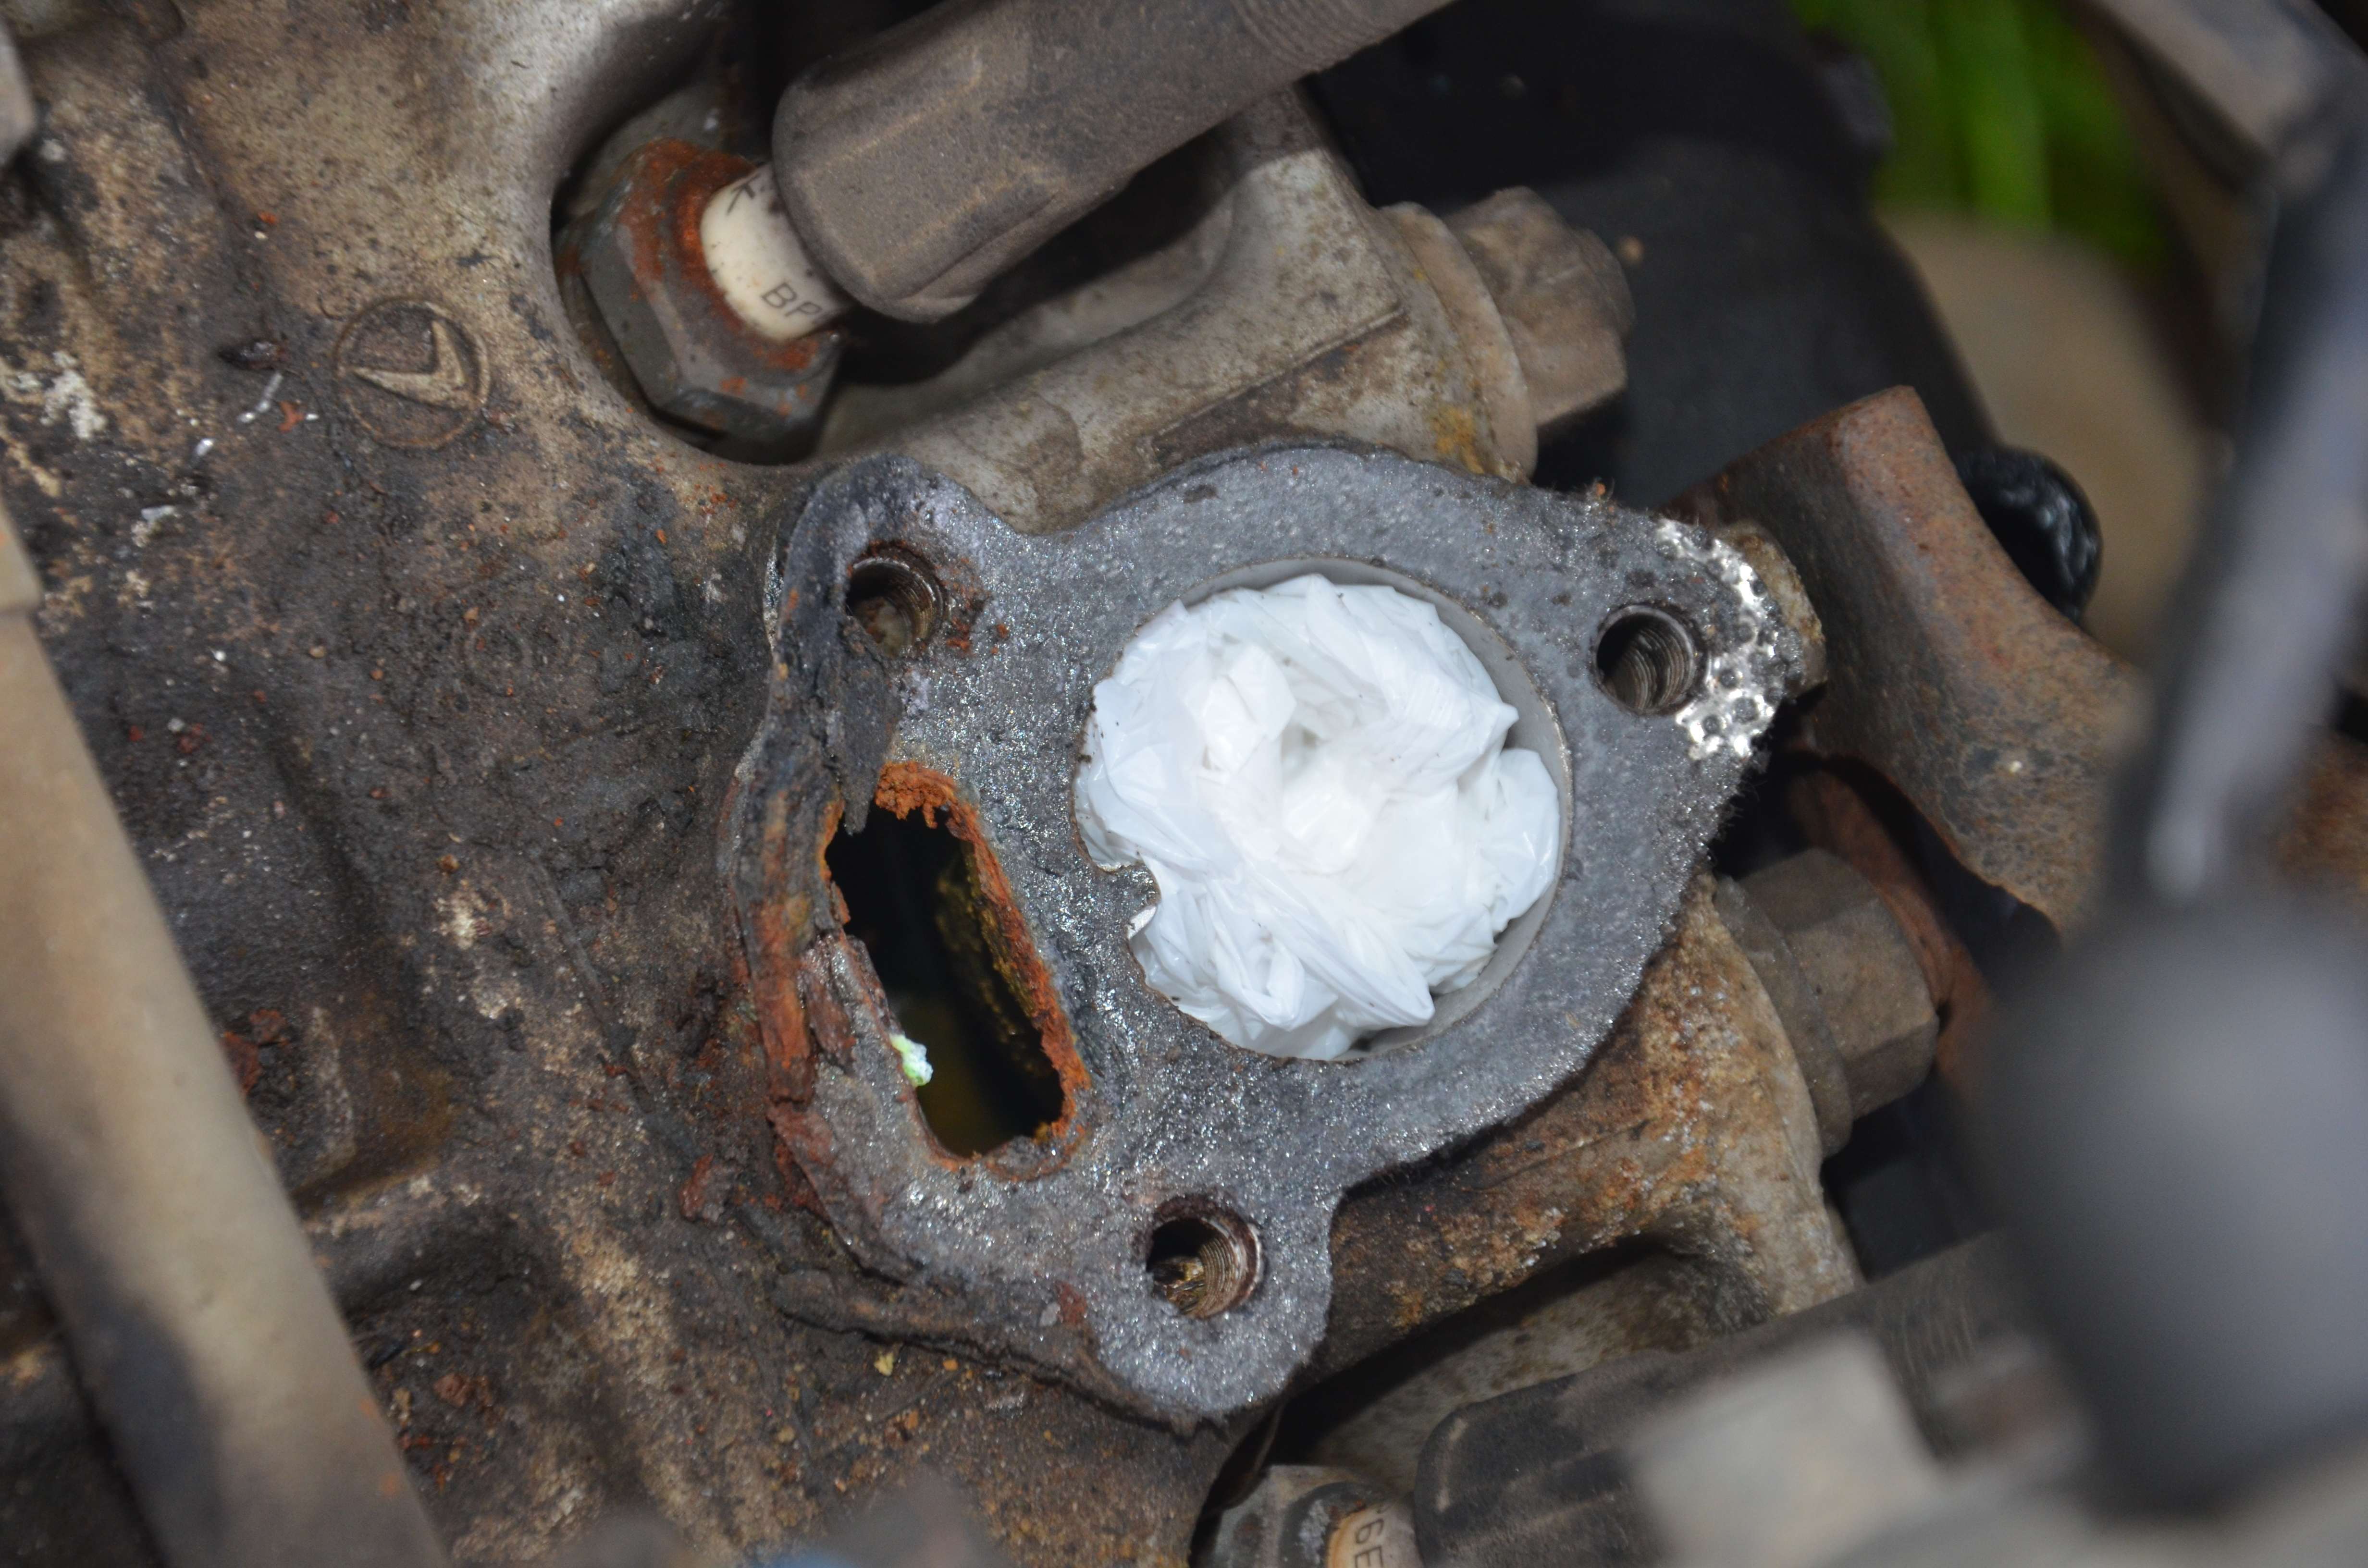
I've removed the inlet manifold to replace the gaskets, I'm glad I decided to do this, the pass side was clearly leaking and the driver's side didn't seem to very far behind. I also fount a pin hole that was leaking from the top radiator hose
Here's the passenger's side inlet port:
Looking forward to having Sunnie back on the road for Gail; all I need to do is rebuild the oil pump, remove clean and re-seal the powersteering rack, sort out a carbie issue, replace the windscreen rubber, fix a hole in the cab's rear wall, clean up and paint a set of roll bars before mounting them and returning the brumby to it's "rightful" owner
Cheers
Bennie
Today I stripped down the engine, I've forgotten to get a photo of the water pump, while the impeller is in great condition the port that the radiator hose mounts to is very corroded.
I've removed the inlet manifold to replace the gaskets, I'm glad I decided to do this, the pass side was clearly leaking and the driver's side didn't seem to very far behind. I also fount a pin hole that was leaking from the top radiator hose
Here's the passenger's side inlet port:
Looking forward to having Sunnie back on the road for Gail; all I need to do is rebuild the oil pump, remove clean and re-seal the powersteering rack, sort out a carbie issue, replace the windscreen rubber, fix a hole in the cab's rear wall, clean up and paint a set of roll bars before mounting them and returning the brumby to it's "rightful" owner
Cheers
Bennie
-
El_Freddo
- Master Member
- Posts: 12704
- Joined: Tue Oct 04, 2005 10:00 am
- Location: Bridgewater Vic
- Contact:
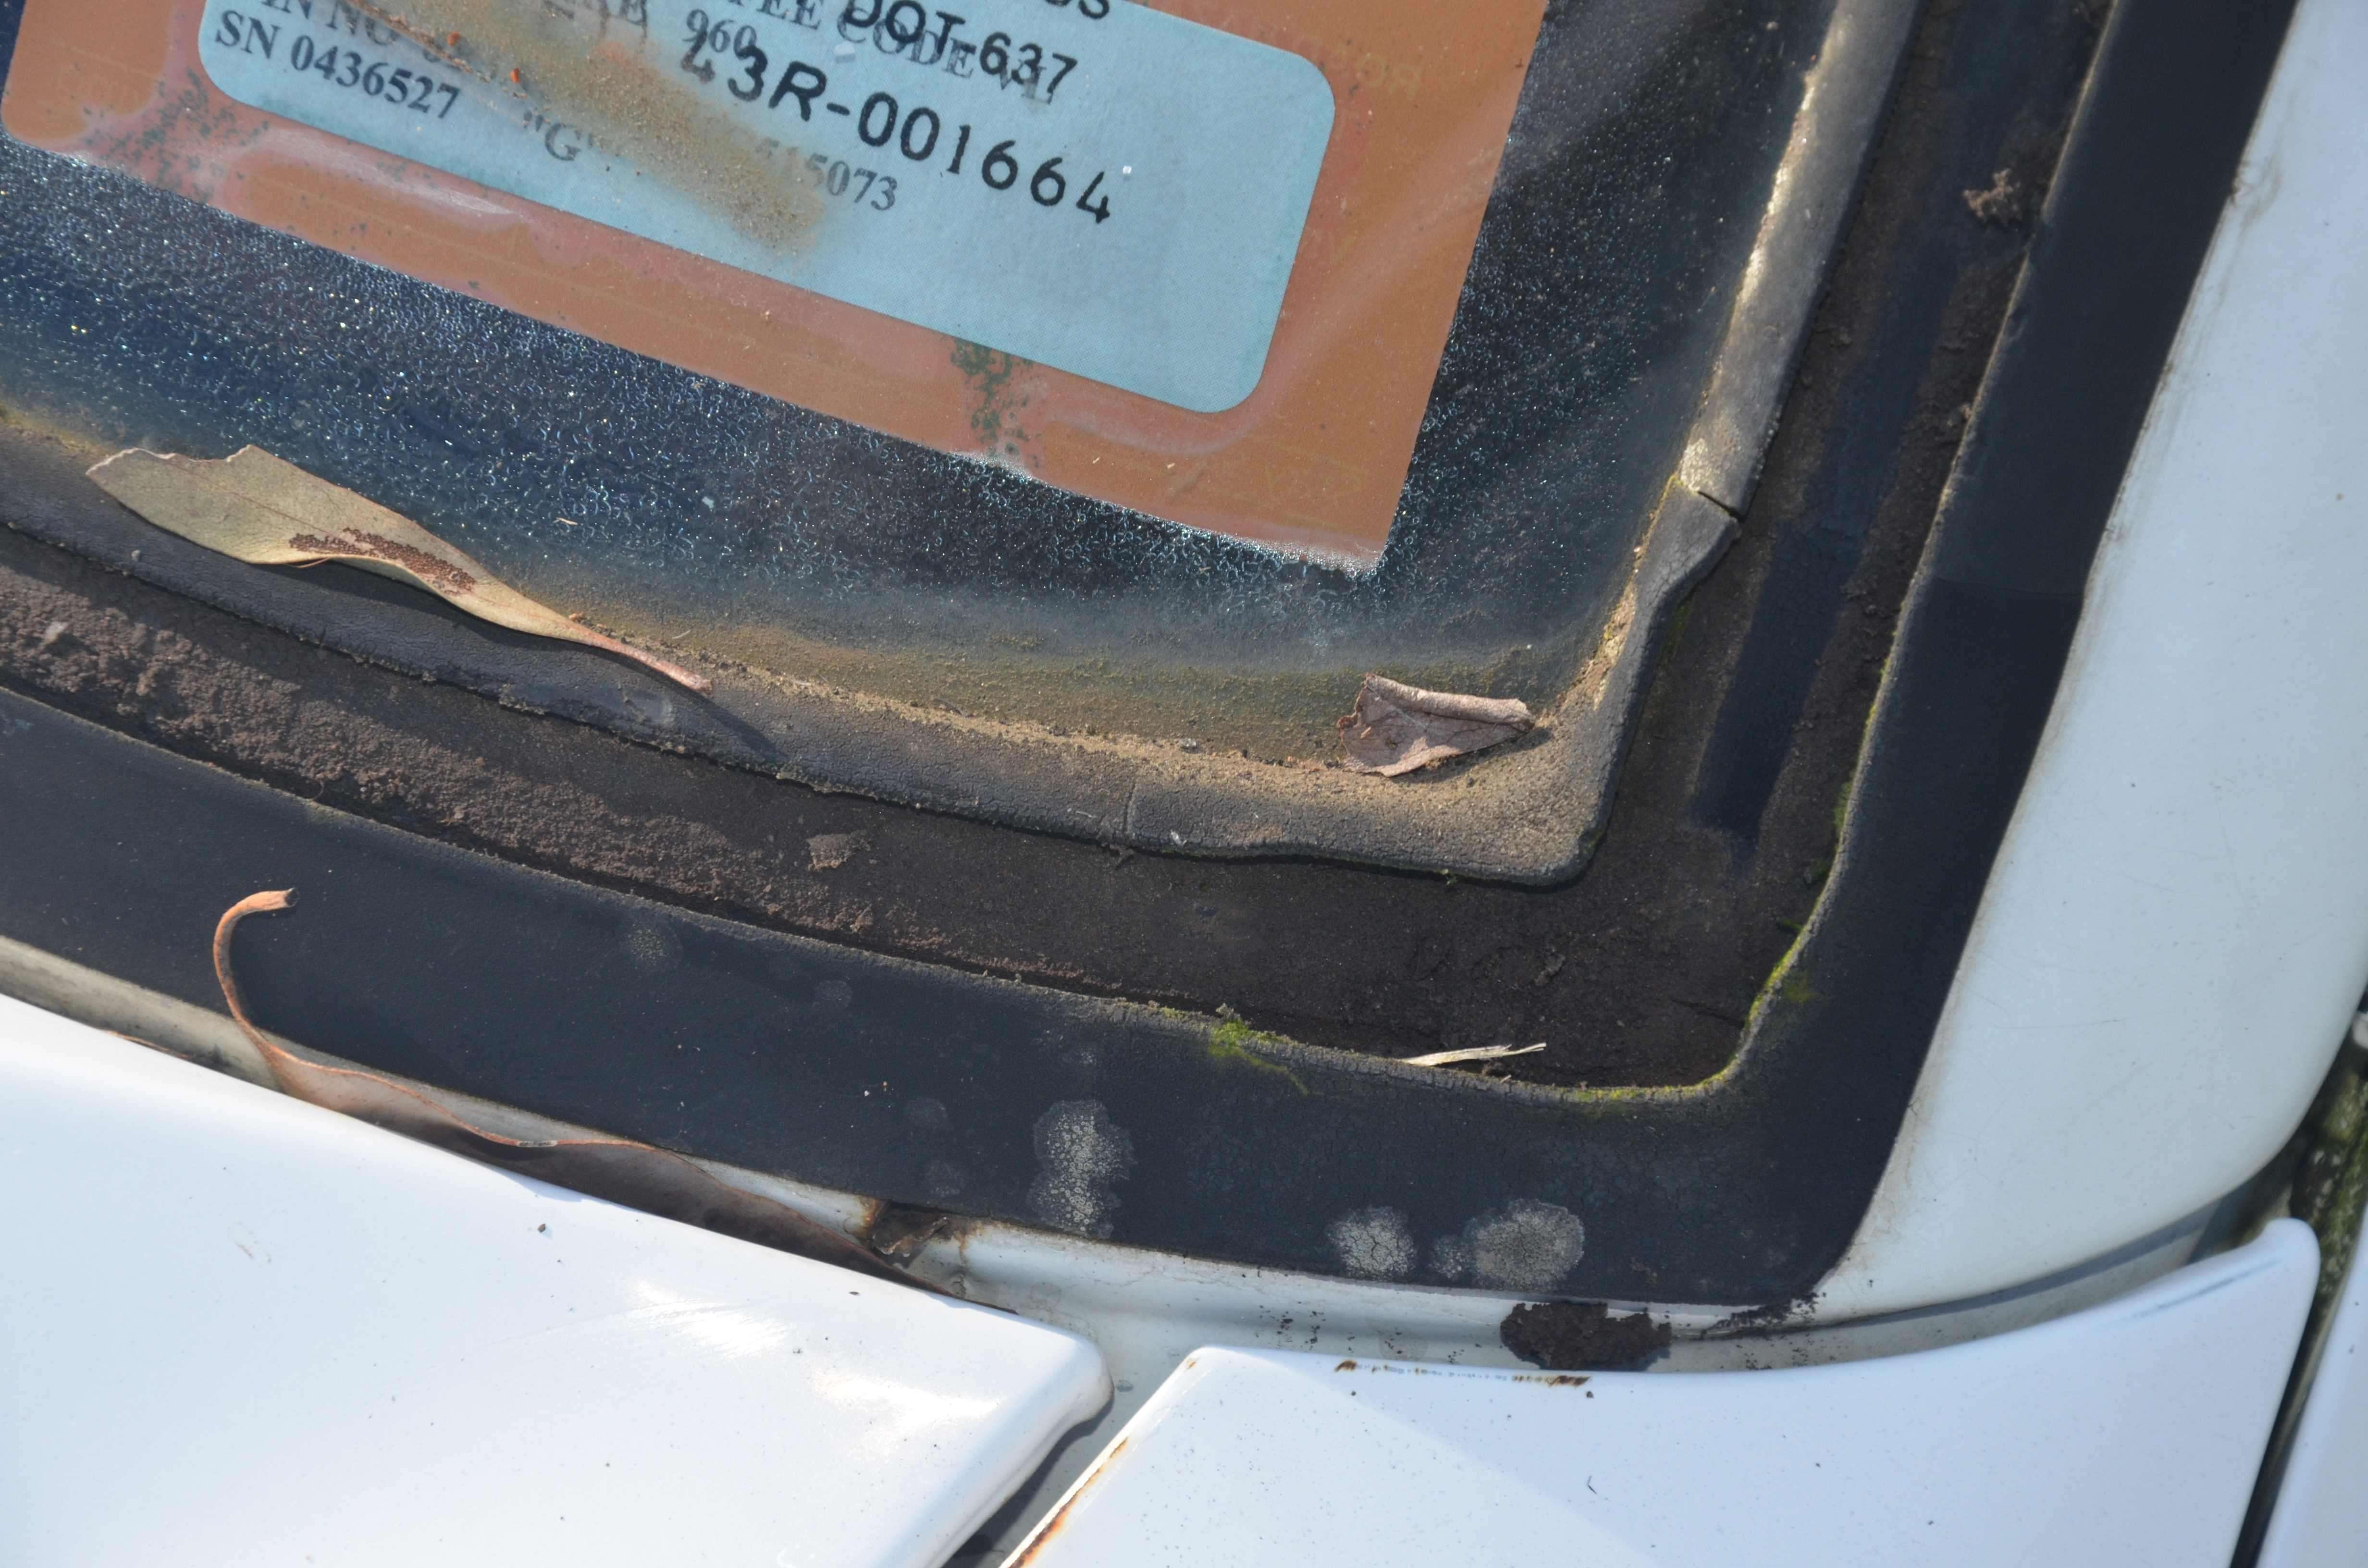
On saturday I removed the old windscreen rubber and was going to replace it with a new one. Here's the old one that was leaking on the driver's side - should have got a new one when we got the repair on this corner originally:
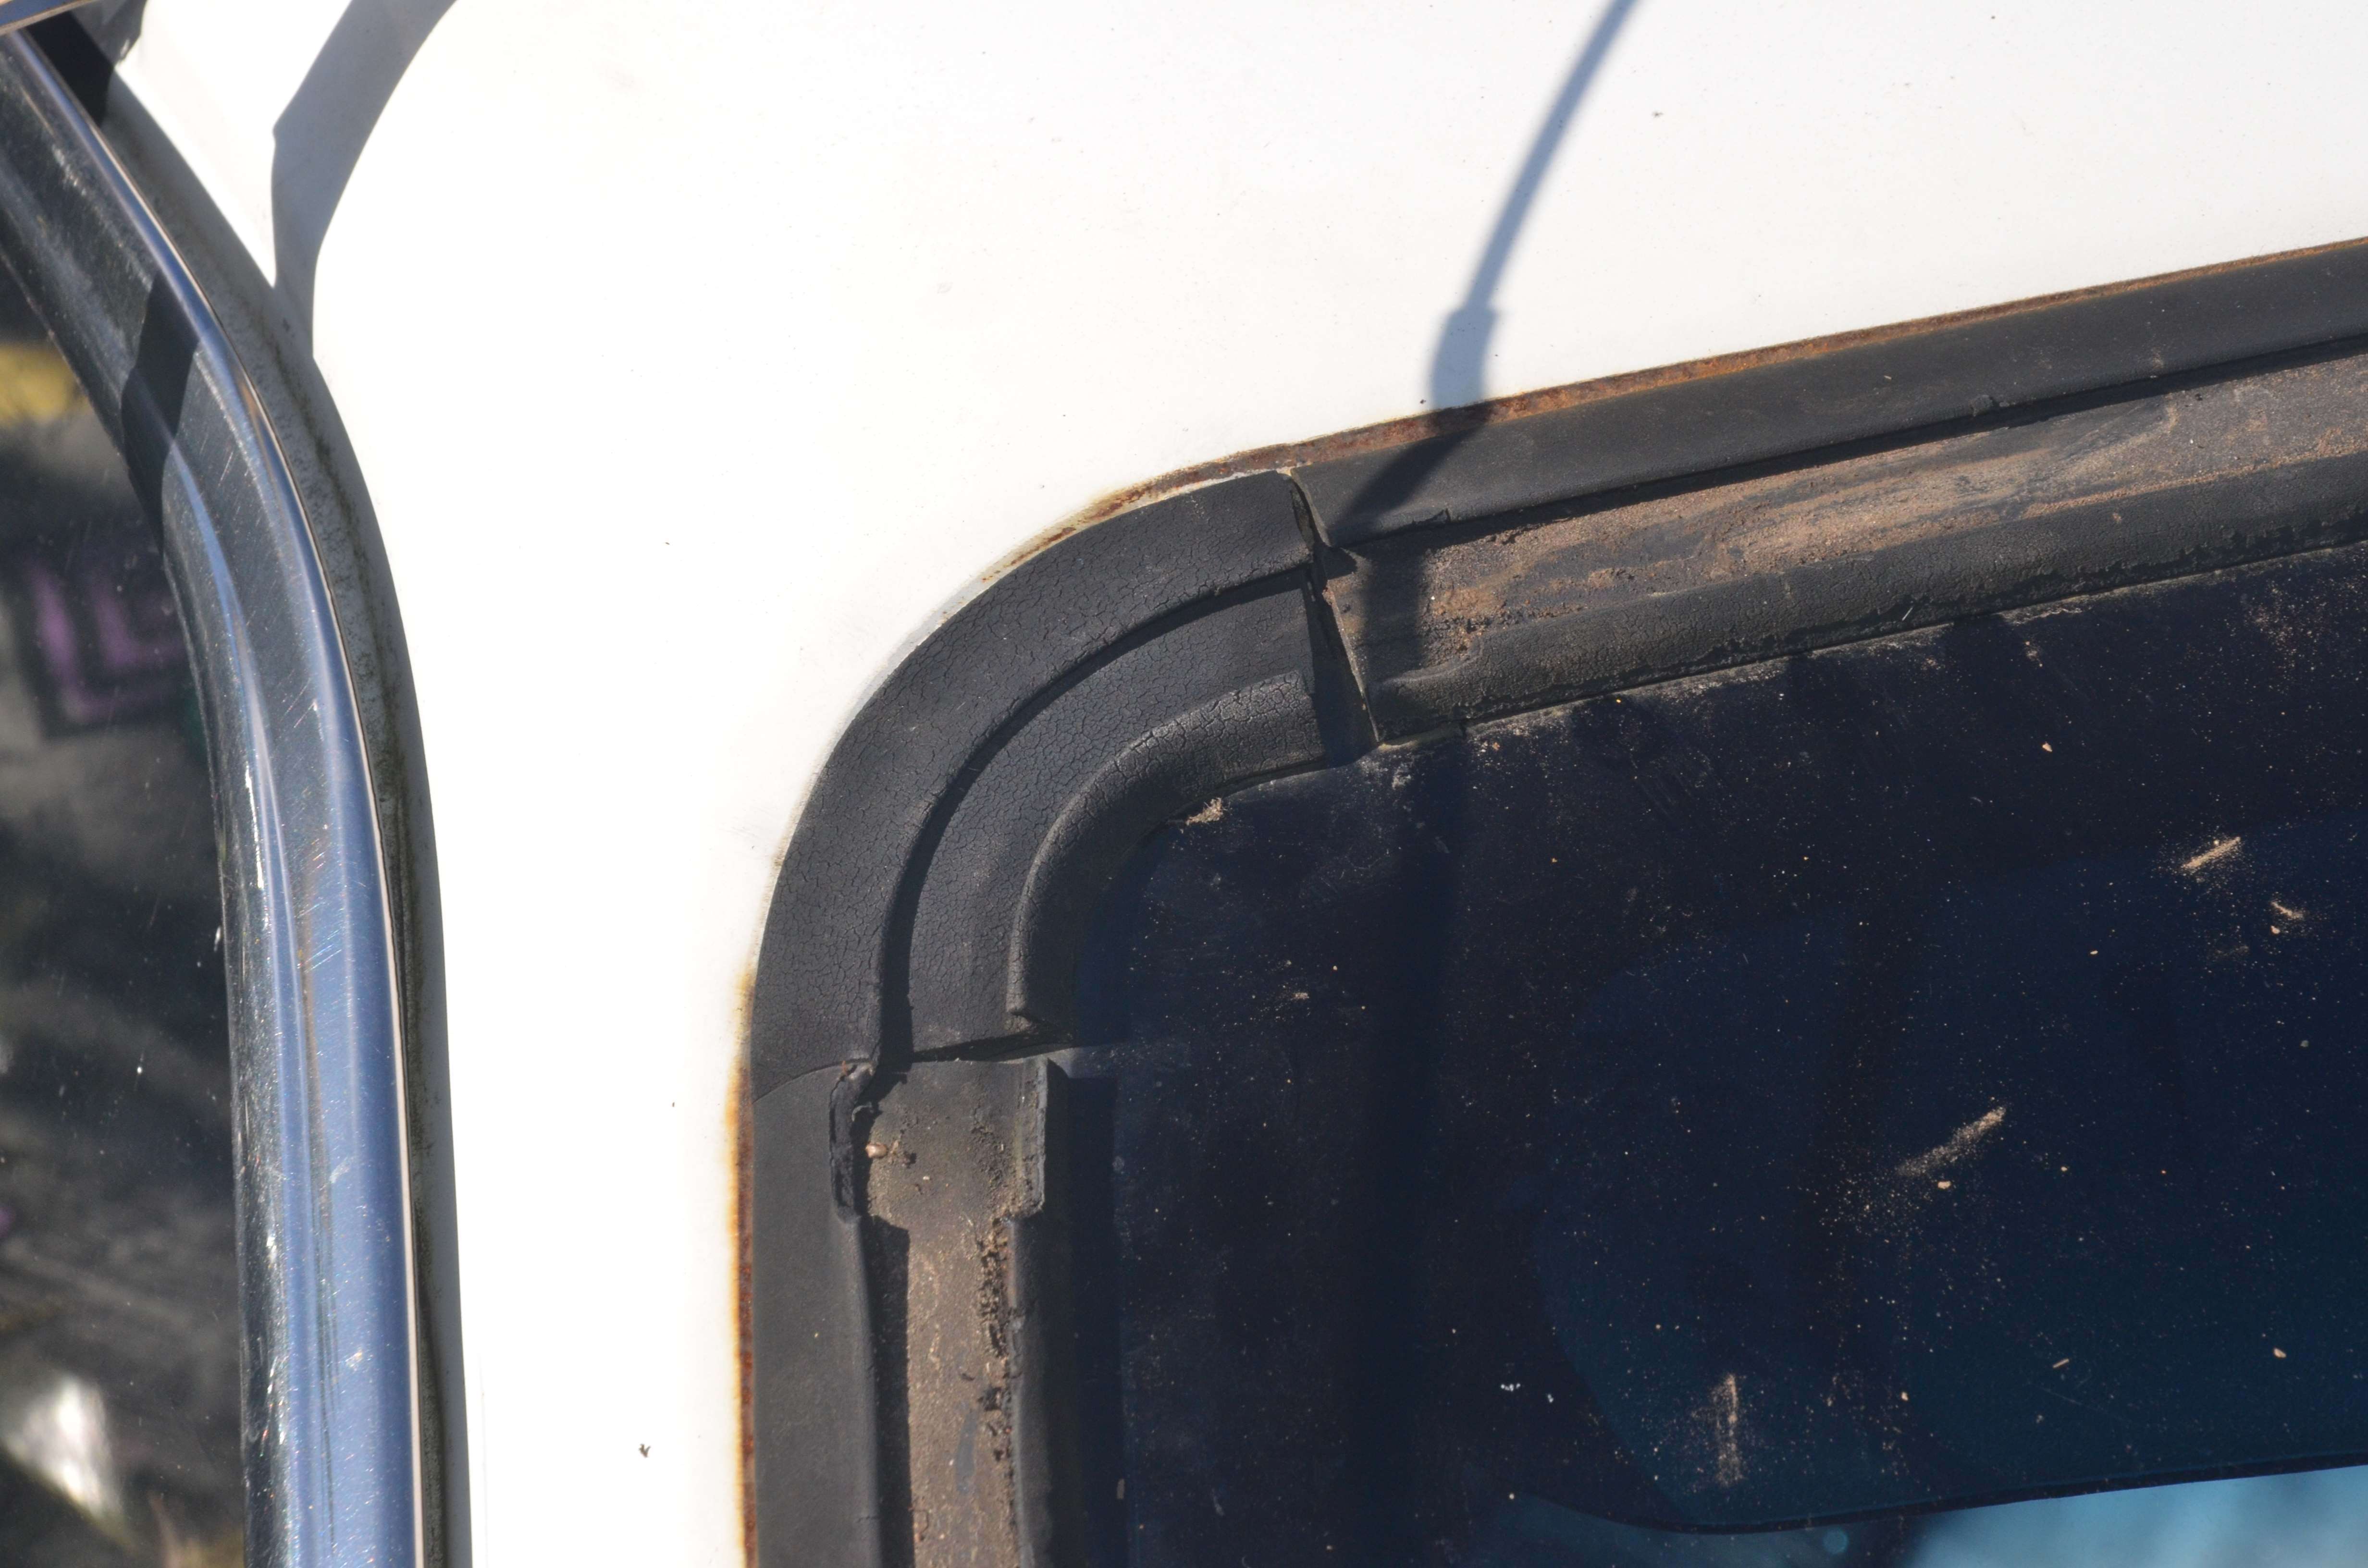
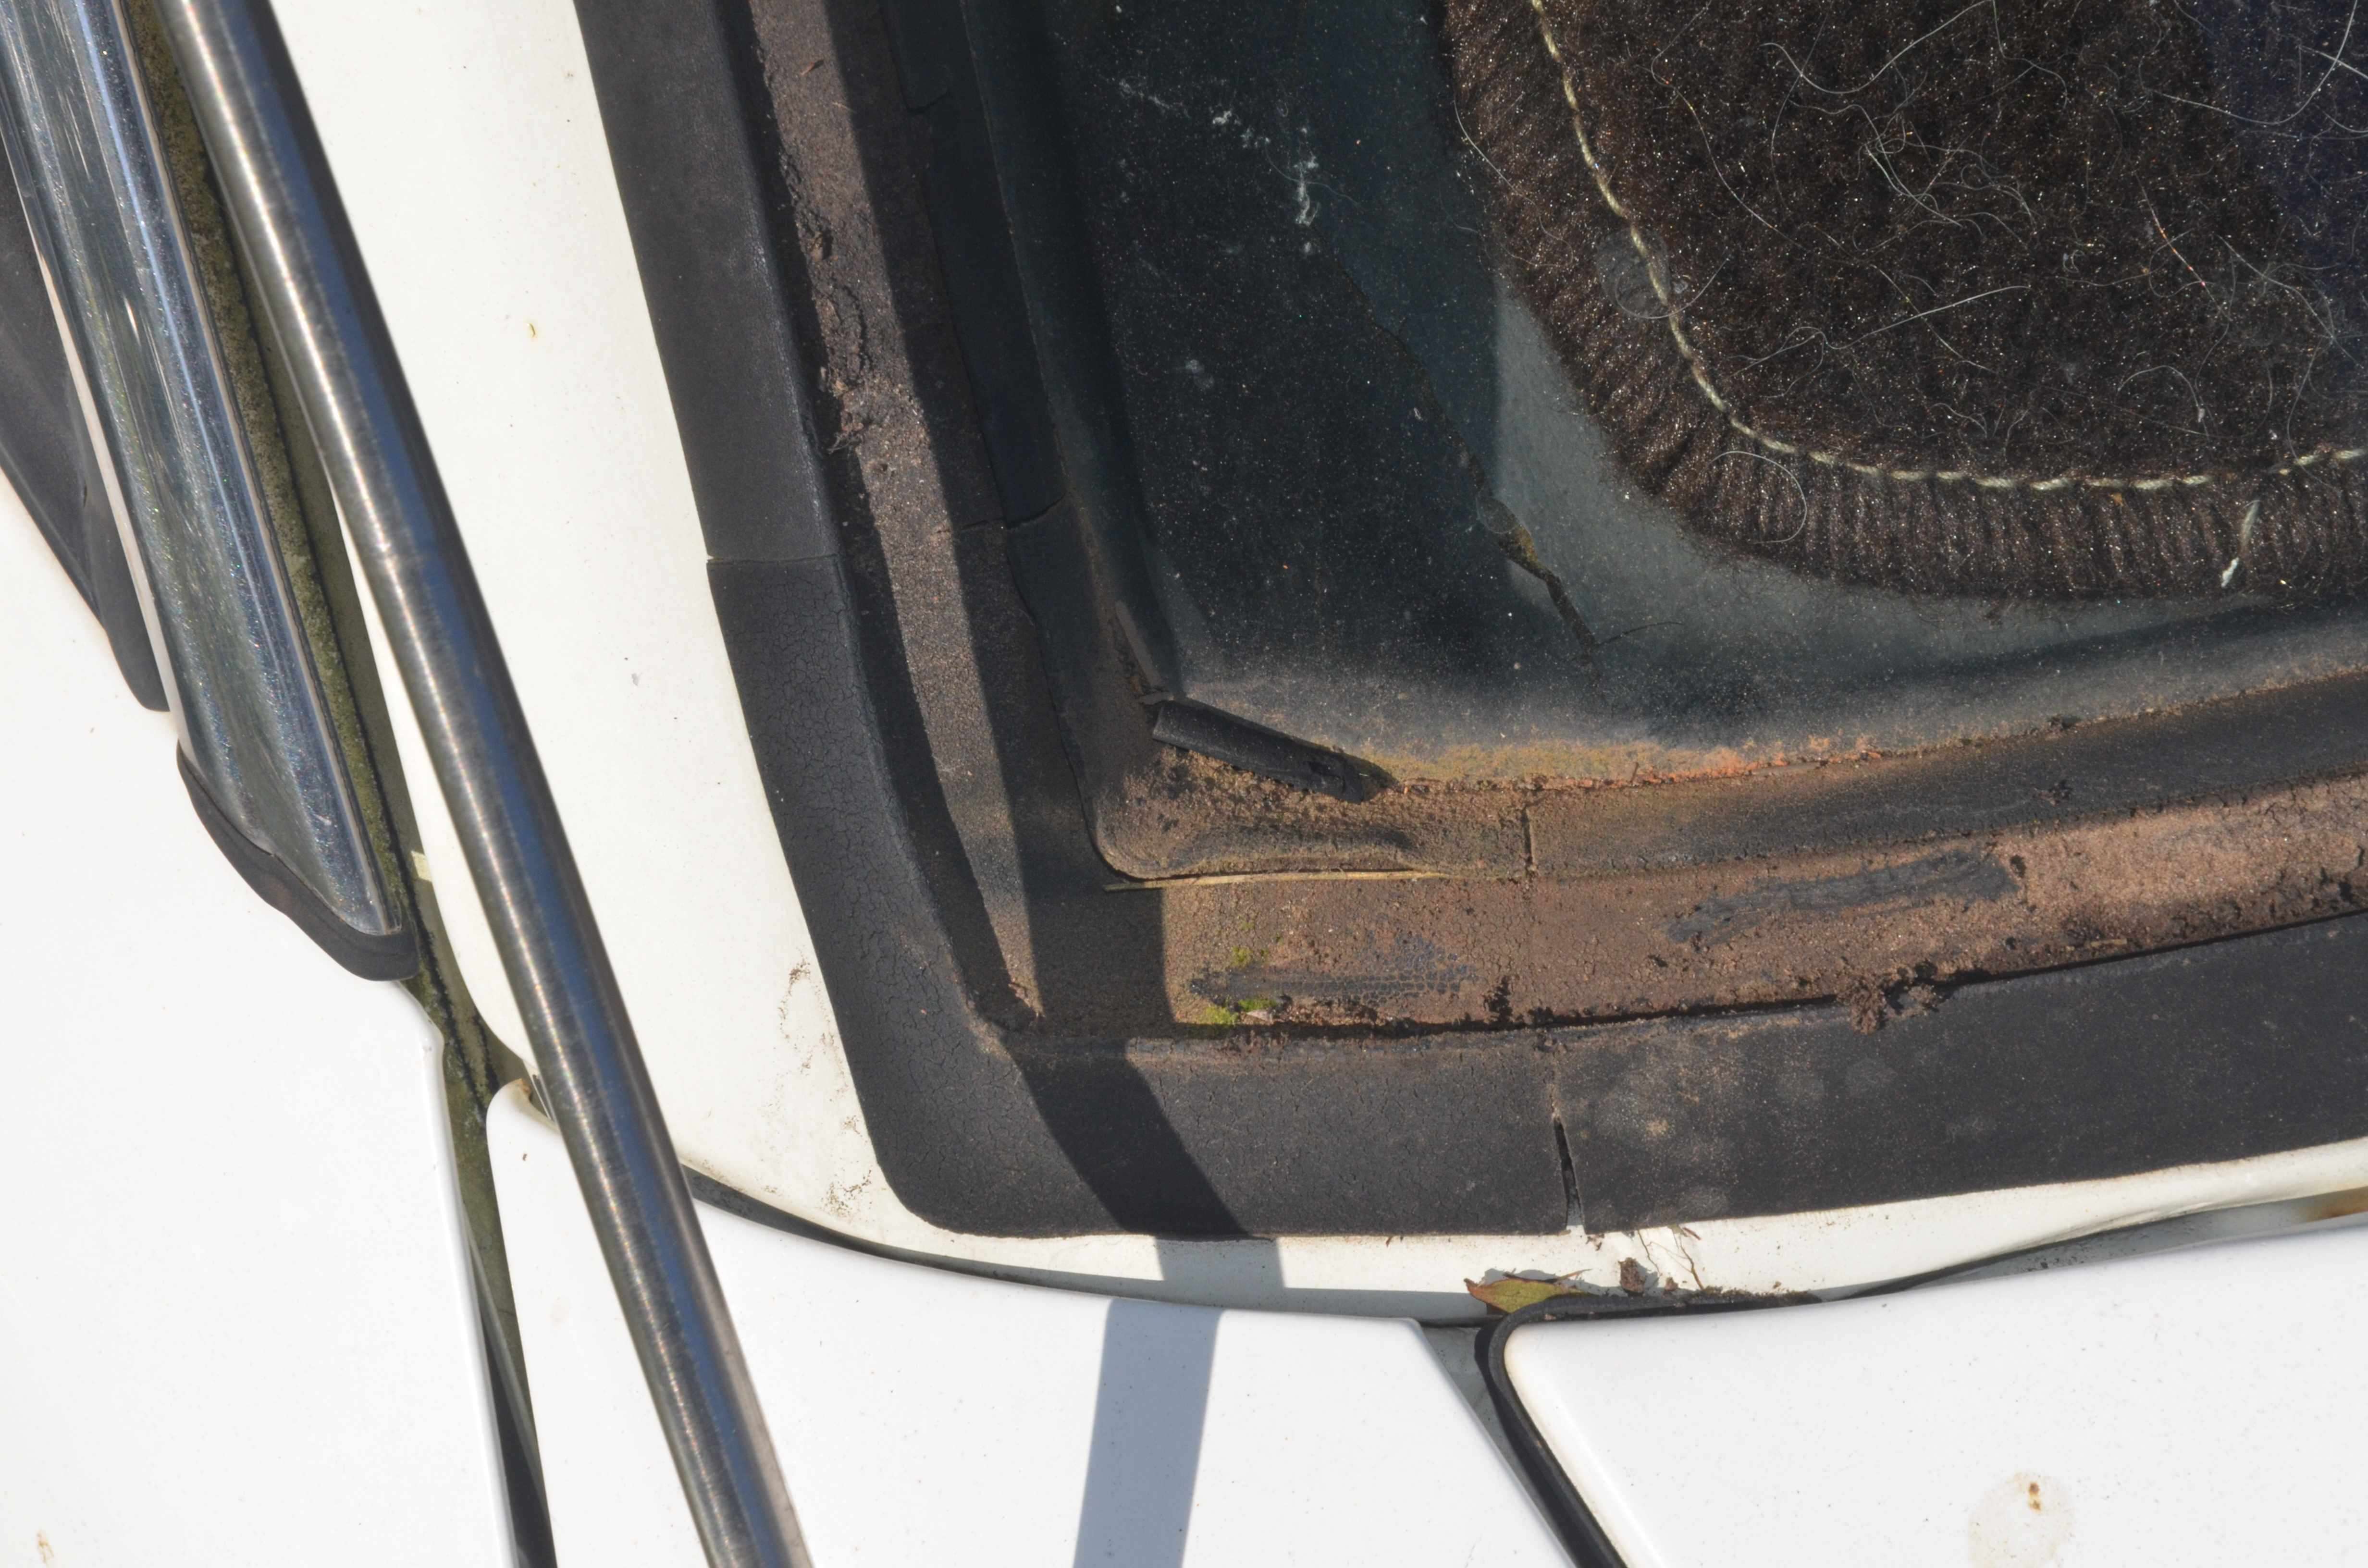
I don't know how you remove those chrome strips without damaging them, one's now flaking and two have slightly deformed edges when I tried to carefully lever up an edge with a small screwdriver
This is what I found: - Passenger's side:
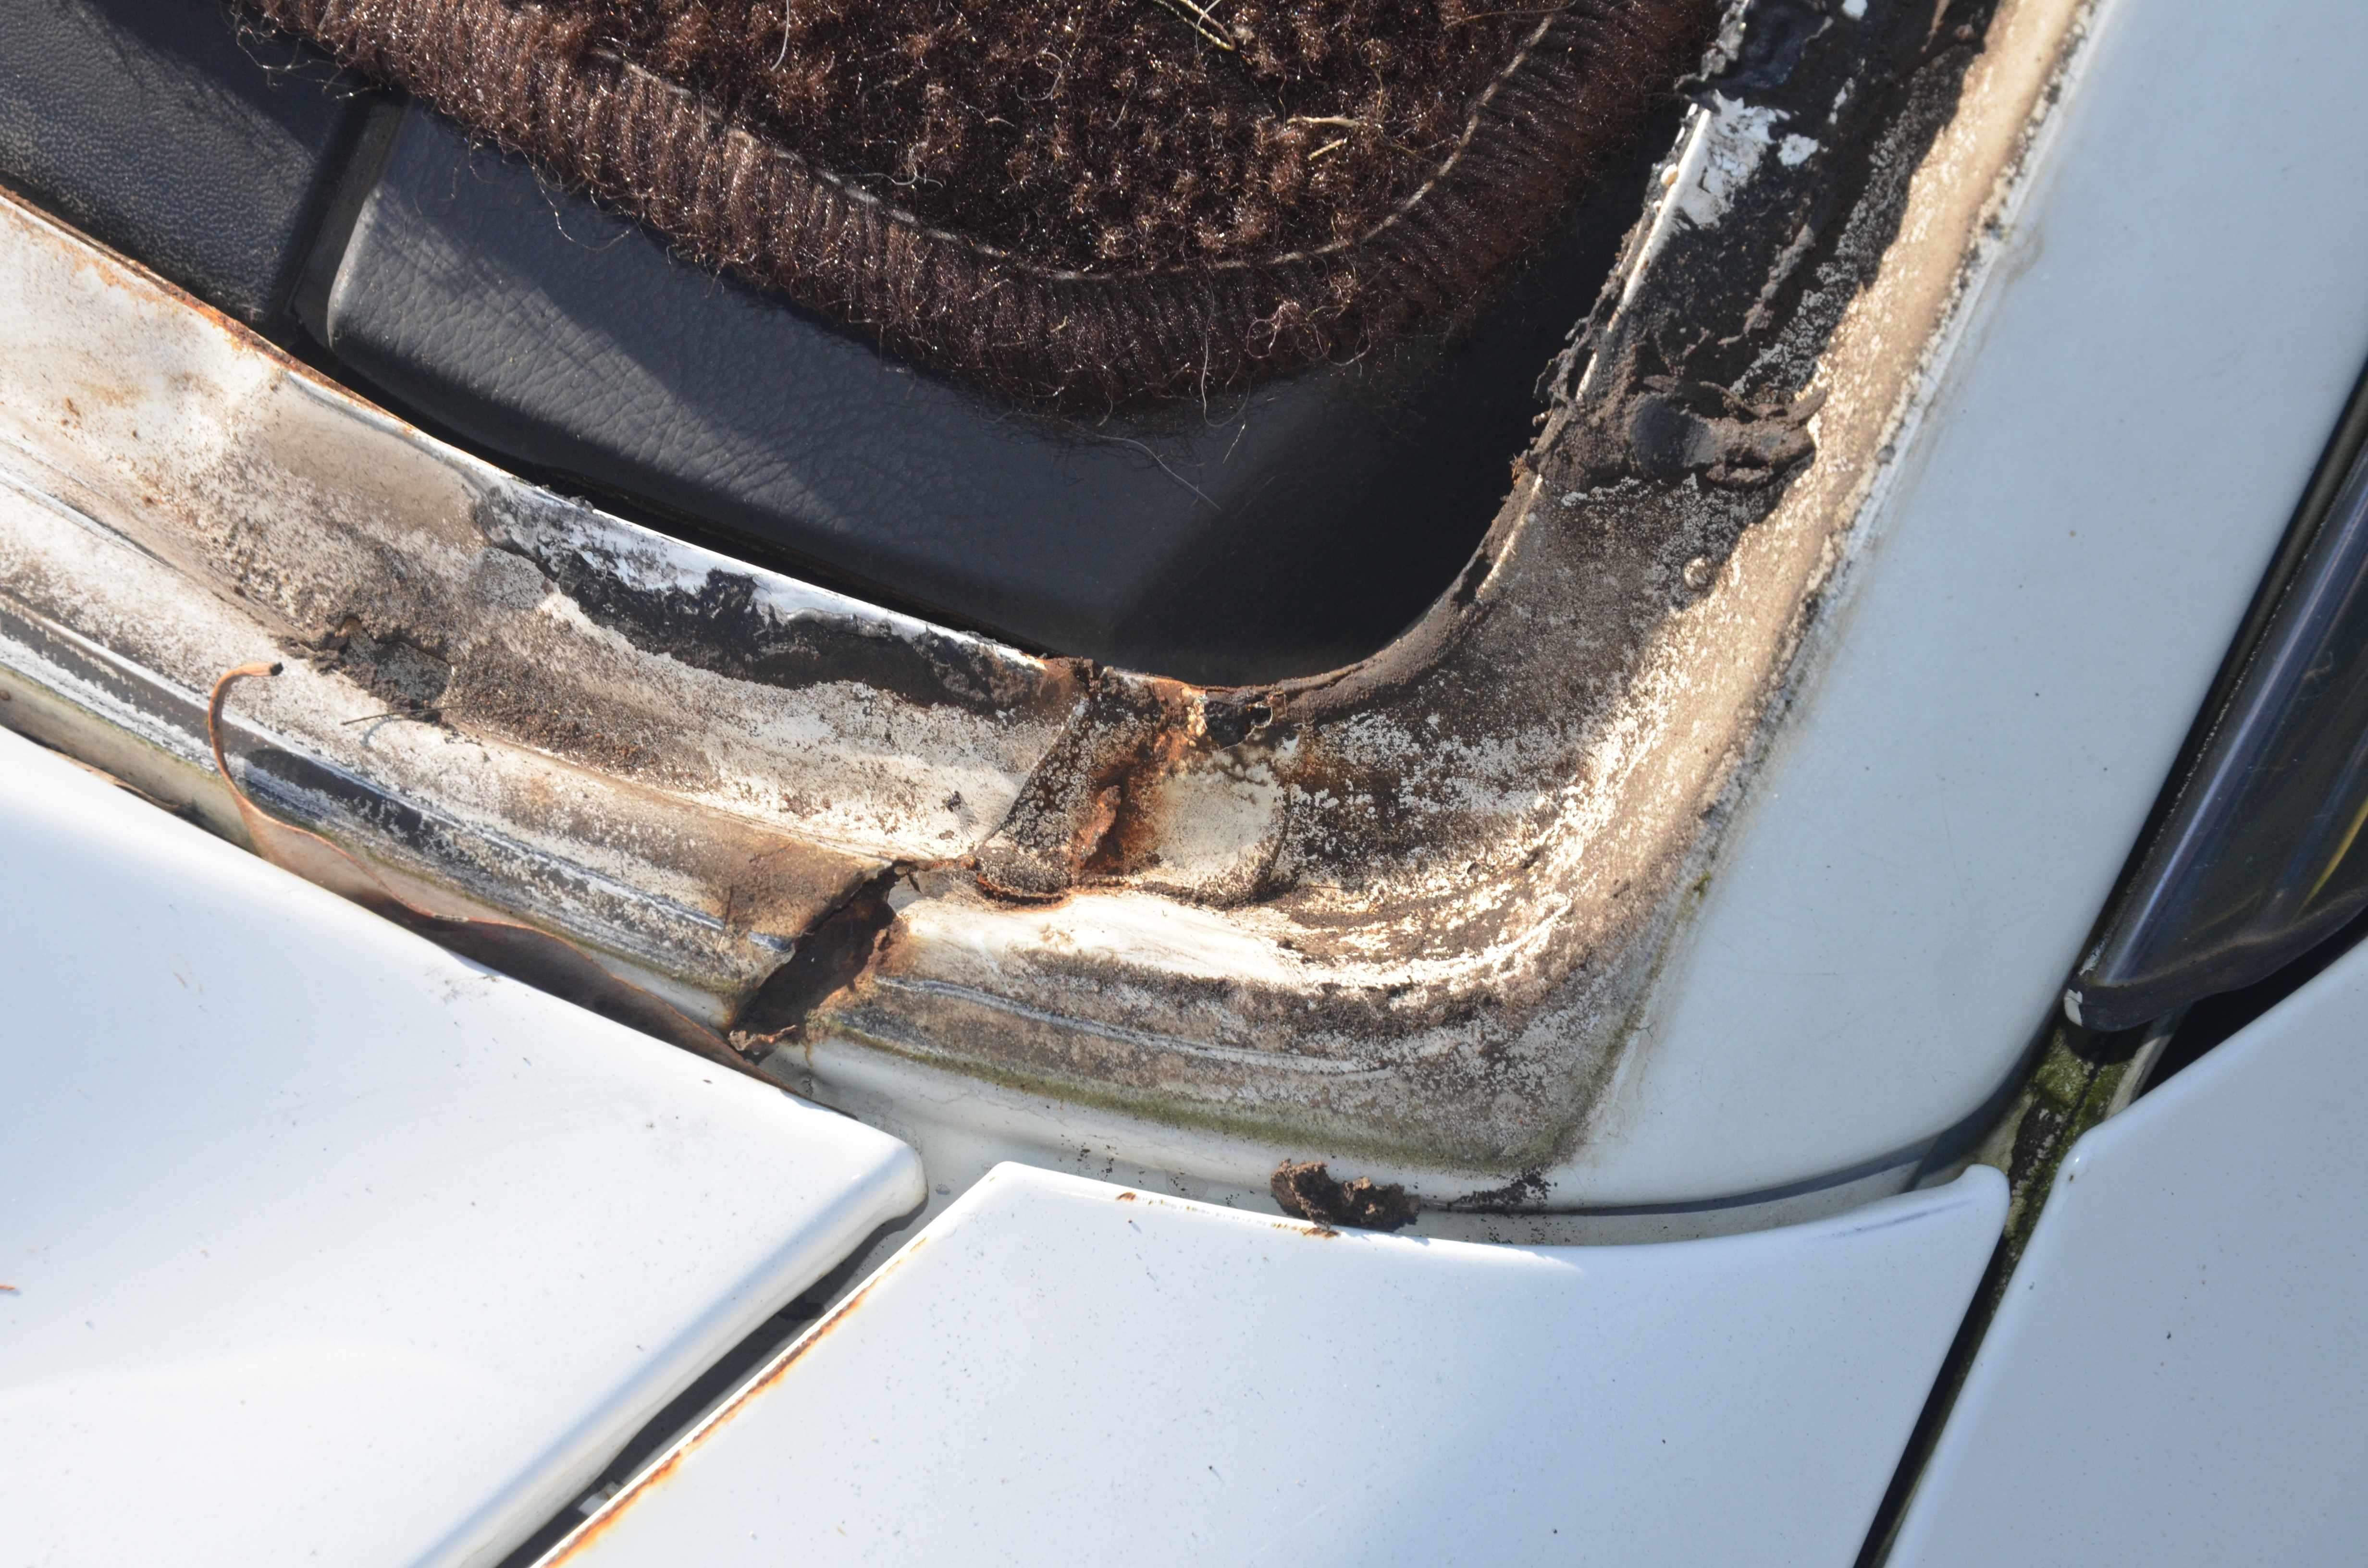
Driver's side (repaired previously):
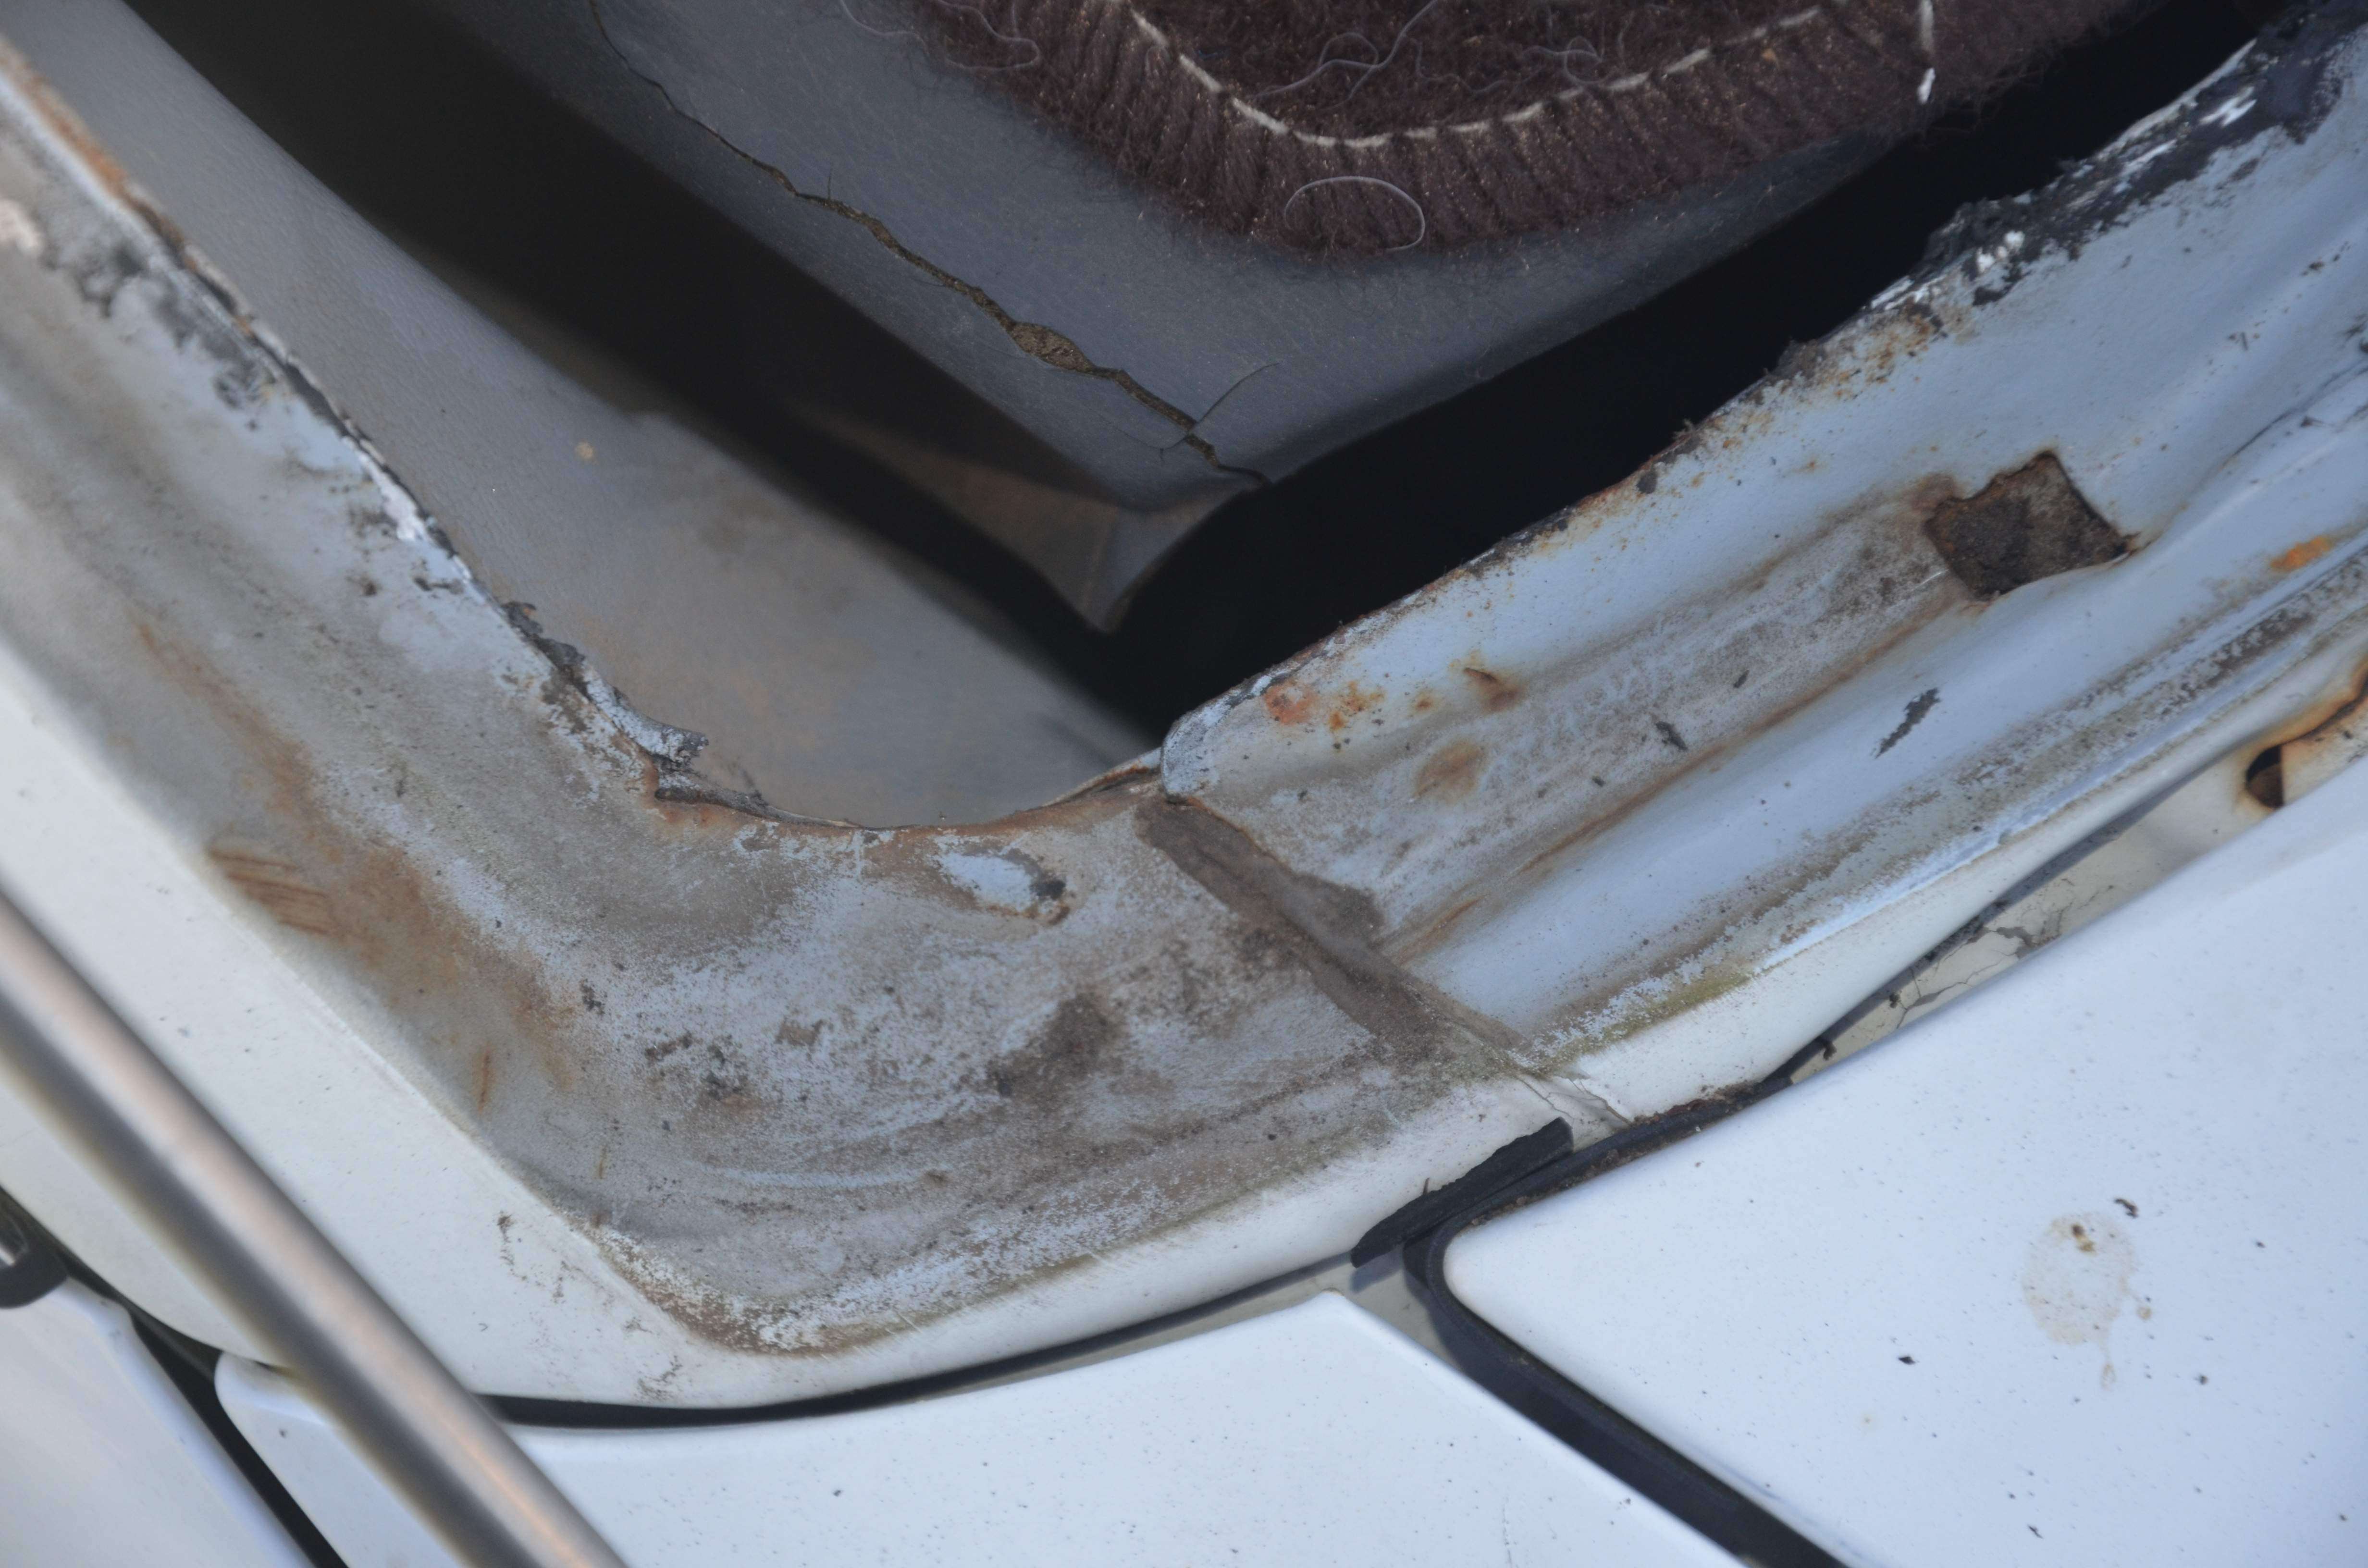
And this is primarily what's put the new seal on hold:
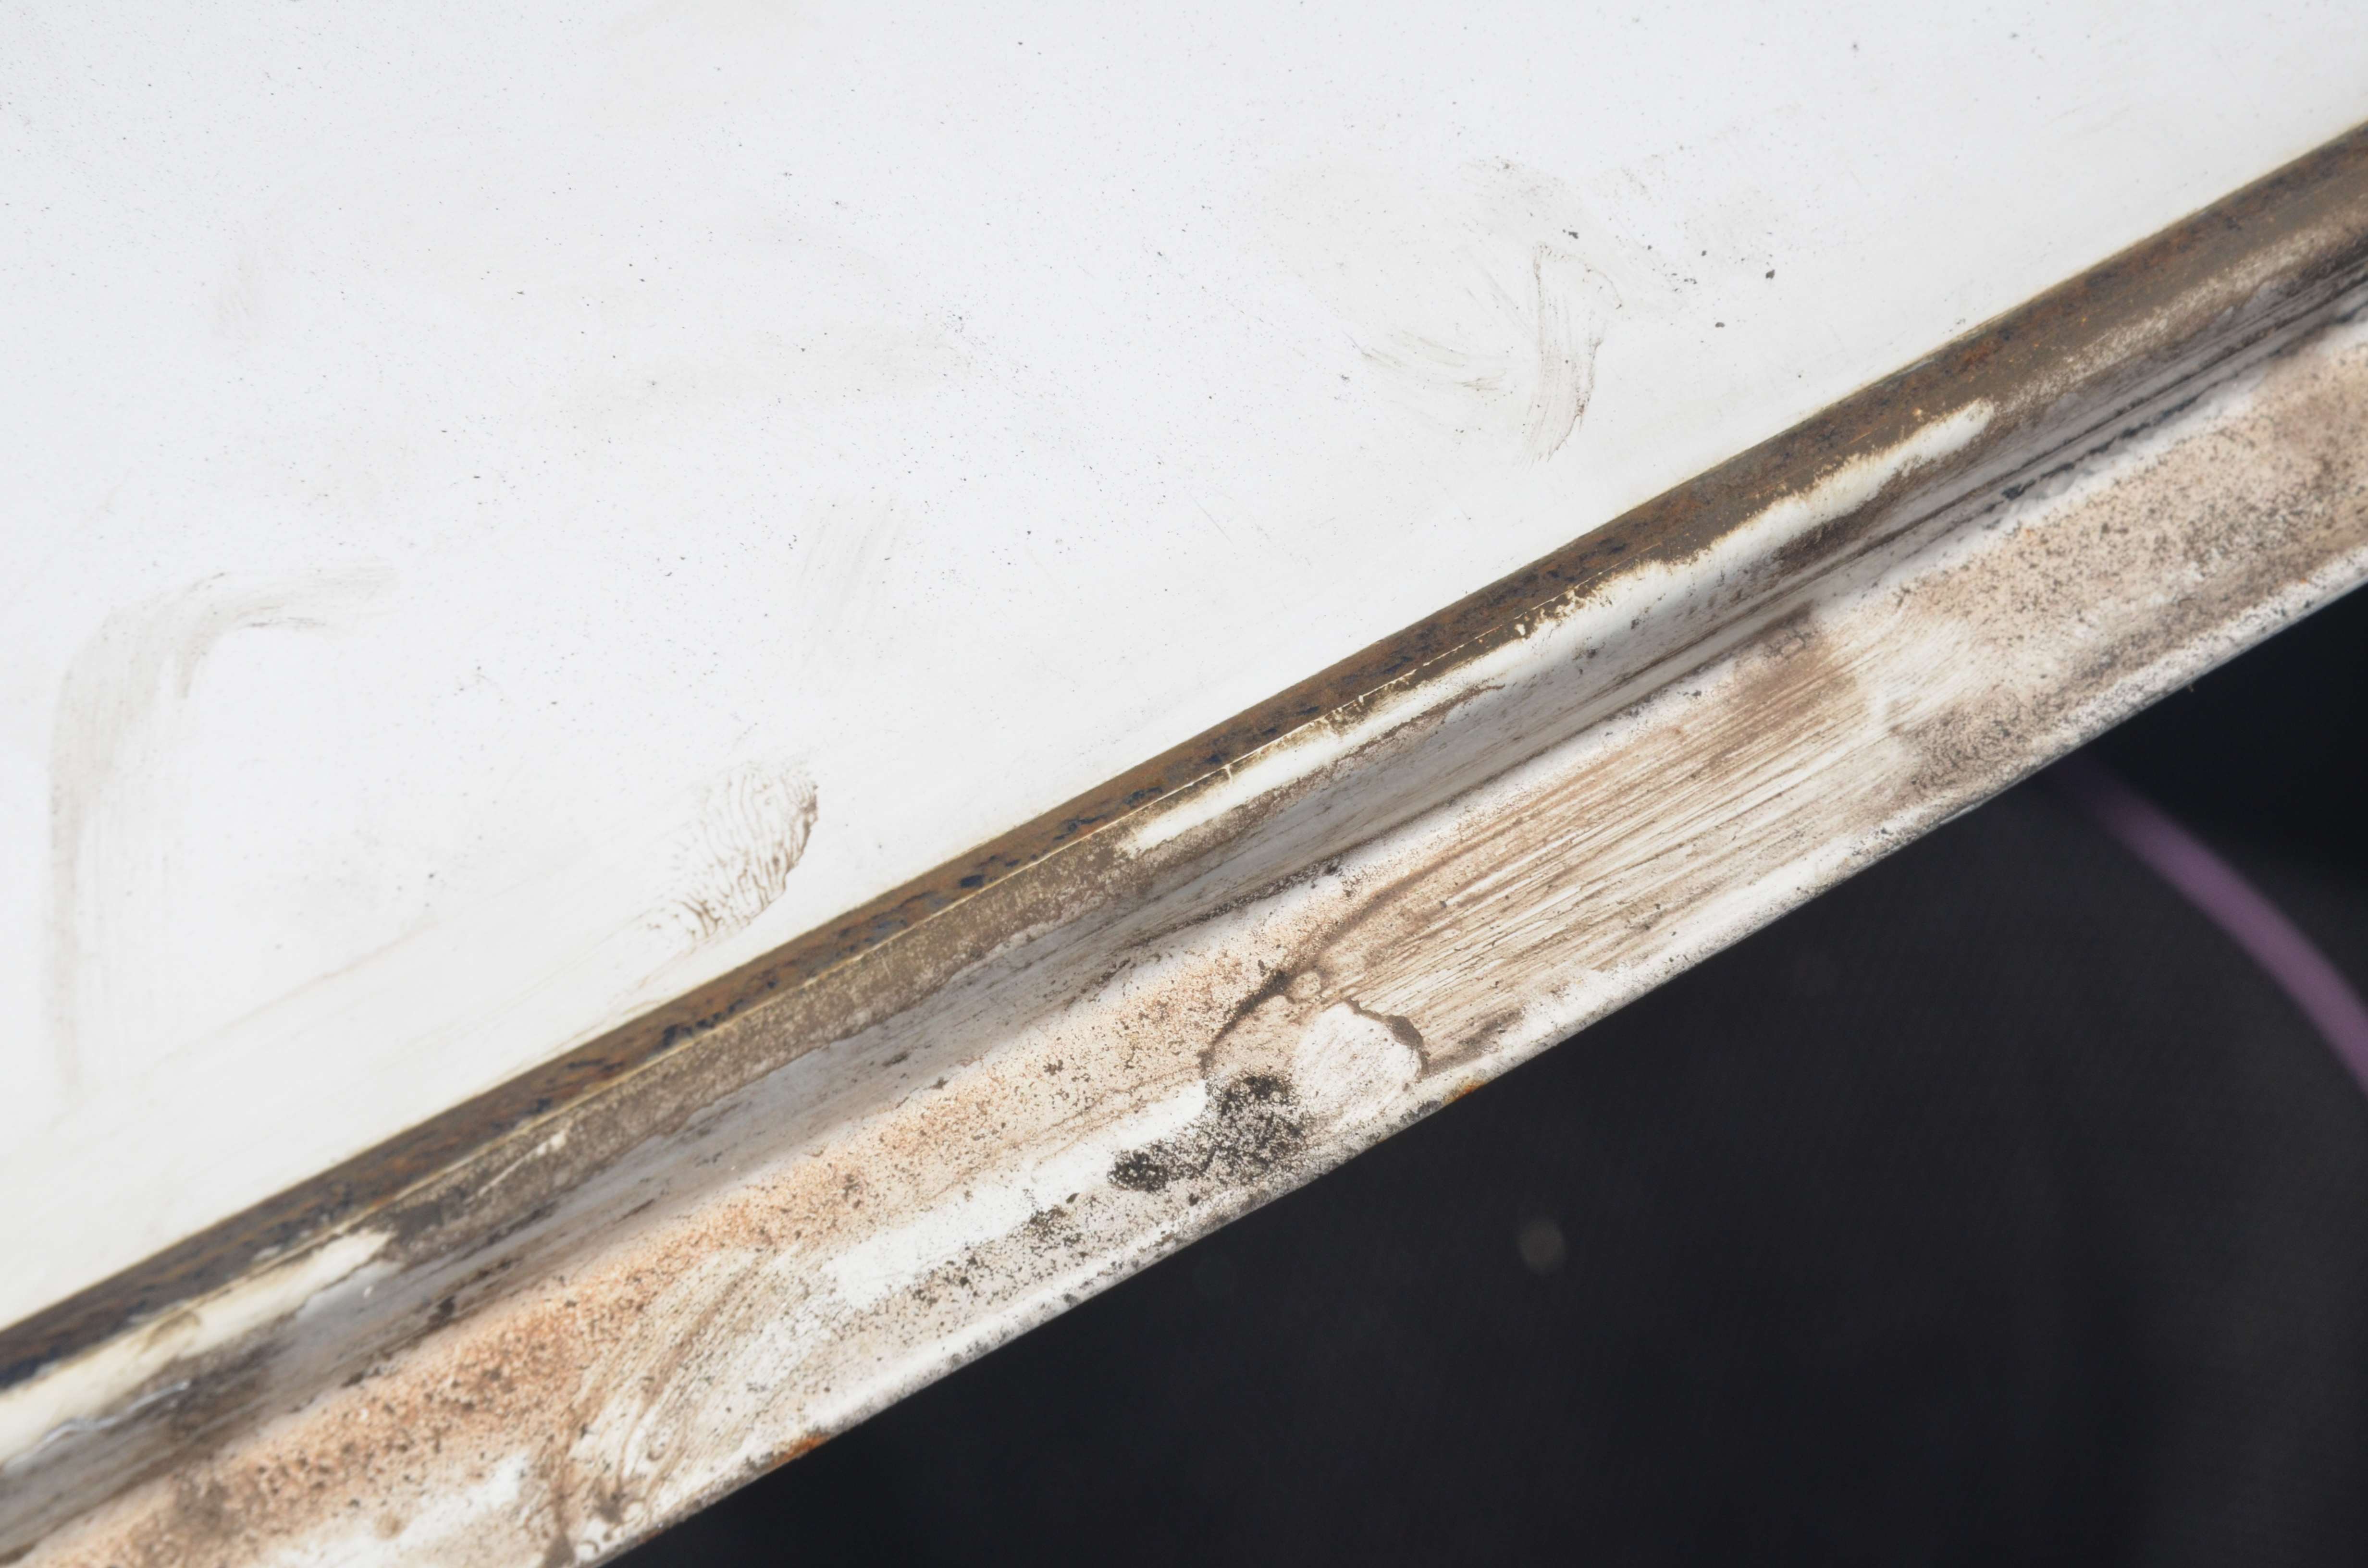
^ This is the upper edge of the windscreen, the old hard seal has rubbed away at the paint exposing the metal below. I need to clean this up and protect this properly before I put the new seal in. Now I'm waiting for the weather to clear up. The passenger's corner isn't as hard as there's less area to cover and I don't have to be as fussy about the paint surface around this area unlike the roof.
For now I'll get onto the engine stuff while I wait for another "slow moving high" to come around again.
Cheers
Bennie
I don't know how you remove those chrome strips without damaging them, one's now flaking and two have slightly deformed edges when I tried to carefully lever up an edge with a small screwdriver
This is what I found: - Passenger's side:
Driver's side (repaired previously):
And this is primarily what's put the new seal on hold:
^ This is the upper edge of the windscreen, the old hard seal has rubbed away at the paint exposing the metal below. I need to clean this up and protect this properly before I put the new seal in. Now I'm waiting for the weather to clear up. The passenger's corner isn't as hard as there's less area to cover and I don't have to be as fussy about the paint surface around this area unlike the roof.
For now I'll get onto the engine stuff while I wait for another "slow moving high" to come around again.
Cheers
Bennie

-
El_Freddo
- Master Member
- Posts: 12704
- Joined: Tue Oct 04, 2005 10:00 am
- Location: Bridgewater Vic
- Contact:
One tip: It would pay massive dividends to check the long range weather forecast before ripping off the windscreen rubber! More so if you're stuck out side like I am at the moment!AshR wrote:glad you're testing this on sunnie before I get around to replacing the seal on mine
You'll be very surprised/disheartened as to how bad it is under there - many nasties lurking
I'm now waiting for some weather where I can be warm enough to get on with the job and not get blown away/wet at the same time...
Cheers
Bennie
-
El_Freddo
- Master Member
- Posts: 12704
- Joined: Tue Oct 04, 2005 10:00 am
- Location: Bridgewater Vic
- Contact:
Last week was a busy one for me on the brumby.
New water pump, oil pump re-sealed, and in the pipeline I've got all new coolant hoses and am nutting out a new crossover pipe that runs under the intake from the water pump. The old one is rotted badly at each end where the coolant hoses connect.
I've also given the block a good clean - the only comparison I have to it's previous condition are the inlet pics on the previous page. Here's the block cleaned up, it looks like new, especially with the flash on the camera:
Now I'm waiting for the weather to fine up so I can spray the windscreen surround. I'm wishing we had the same weather we had two weeks ago...
For now I need to make up a new gasket for the oil filler pipe and get this cross over pipe sorted, then the intake can go back on and after a bit more work I should be able to start him back up and see what the oil pump does.
Almost forgot, I've also had the PS rack out and apart to hopefully seal it up so no more leaks. Time will tell on that one. It's an interesting piece of kit to say the least! I'll upload a pic of the input shaft later. While I had it out both steering boots were replaced, makes it easy work on the bench.
I'm looking forward to having this one out of the shed and back to it's true owner... Still quite a bit of work to do.
Cheers
Bennie
-
El_Freddo
- Master Member
- Posts: 12704
- Joined: Tue Oct 04, 2005 10:00 am
- Location: Bridgewater Vic
- Contact:
Still working on this one - slowly!
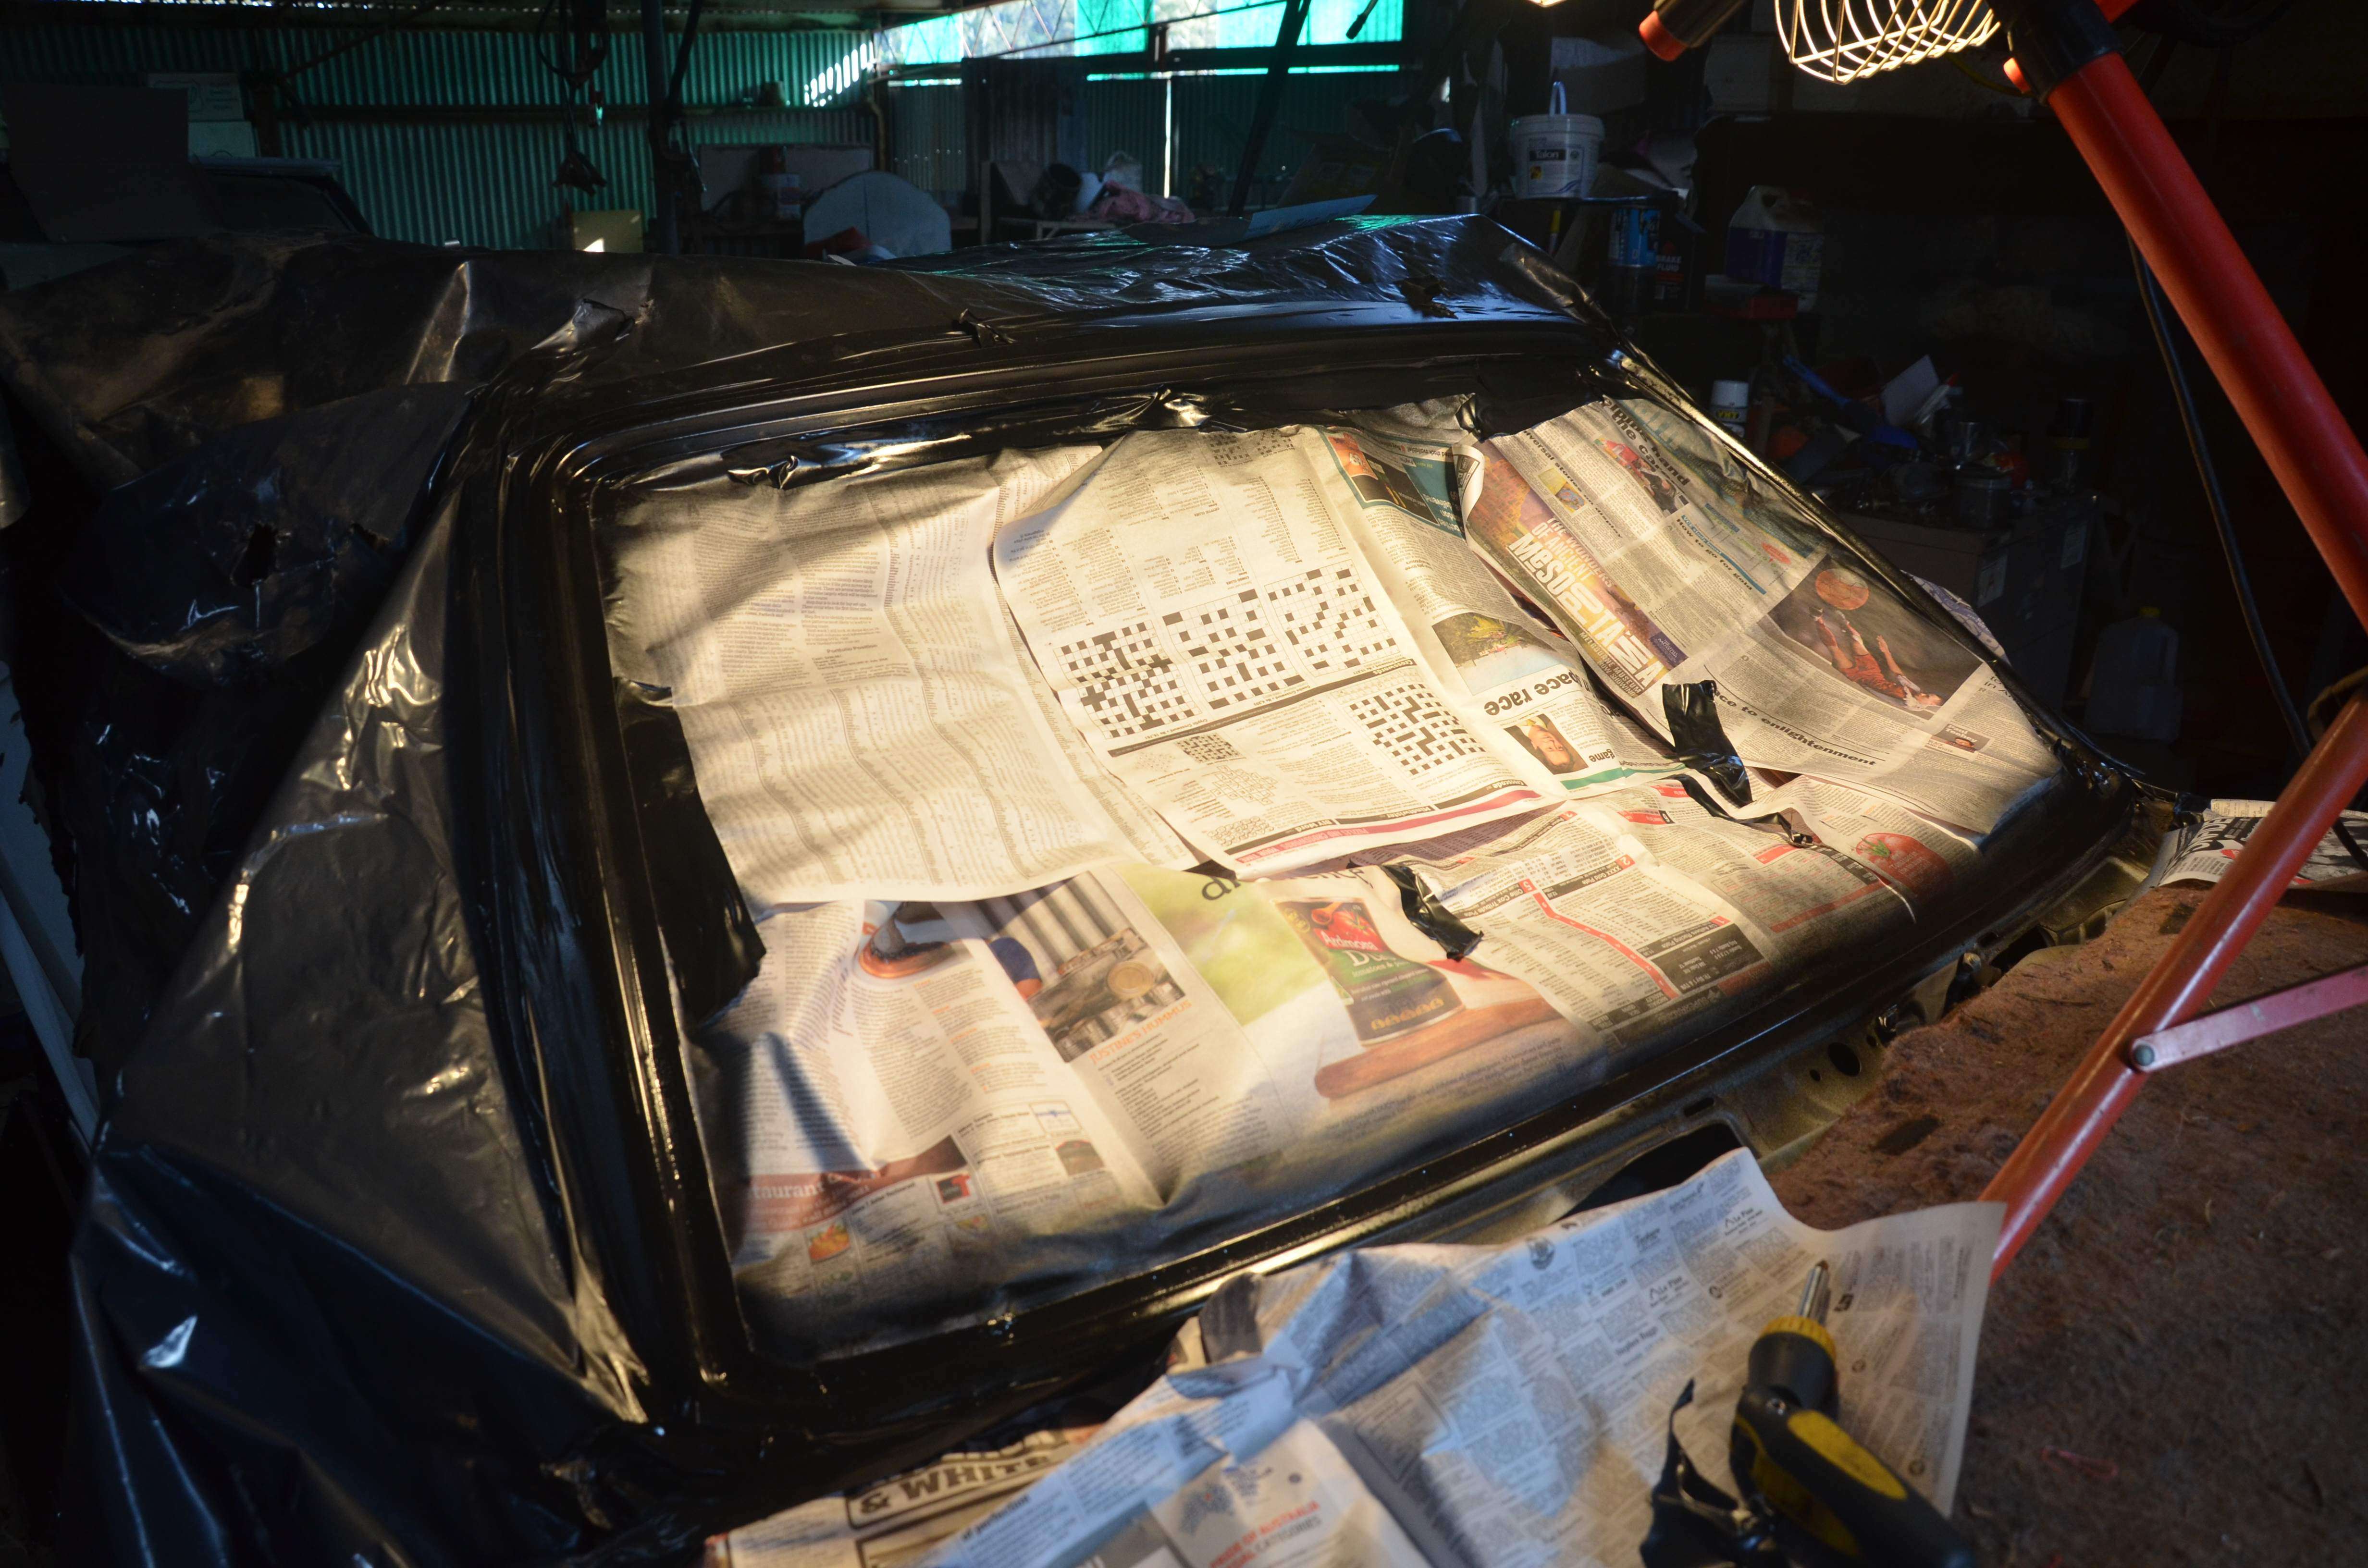
This is certainly not the time of year to be spraying - I really didn't think this one through. But I want to make sure it's done properly before re-installing the windscreen. Big lights help with heat and humidity:
I've also had to work out a way to get around a rotted cross over pipe - the one from the heater core to the water pump. I found a good way to do it - pics to come on that one.
Now to finish off the windscreen bit then put the engine back together. Then do some other things that need to be done that I can't remember at this time of night...
Cheers
Bennie
-
El_Freddo
- Master Member
- Posts: 12704
- Joined: Tue Oct 04, 2005 10:00 am
- Location: Bridgewater Vic
- Contact:
Pics:El_Freddo wrote:I've also had to work out a way to get around a rotted cross over pipe - the one from the heater core to the water pump. I found a good way to do it - pics to come on that one.


^ That little brass part is actually two pieces. In total I think it cost either $27 or $33 - again I can't remember exactly. The smaller barbed piece has had about half of it's threaded end shaved down so that it's not blocking the coolant flow in the feeder pipe from the water pump.
I'm hoping that once the intake manifold goes back on this will be a relatively easy area to access if we need to renew any hoses. So far I've got new upper and lower radiator hoses, new heater hoses to the H piece tap and I've also renewed the little hoses to the bottom of the carbie so pretty much all cooling system hosing is replaced other than that under the dashboard.
Cheers
Bennie
-
El_Freddo
- Master Member
- Posts: 12704
- Joined: Tue Oct 04, 2005 10:00 am
- Location: Bridgewater Vic
- Contact:
Well, a lot had happened since the last post!
Moved it up to Shepp, it over heated several times on smooth level roads, the temp didn't budge through the hills - go figure. I spoke to a mate and he said that the issue is the missing factory plates under the engine, these create a negative pressure situation in the engine bay that sucks the air through the radiator. So the bullbar and the driving lights are safe from any mods/deletes.
The windscreen is in and sorted. Unfortunately the tape I used pulled some paint off the A pillars. Pissed about that! Dunno exactly what I'm going to do with that yet (win tatts and respray the whole thing!).
For now I'm after some tips about fitting the roll bar. My idea is to get some plates to put under the mount points to help sandwich the tray metal so the load is spread. The tips I'm after are any tricks to get it dead centre. Currently I'm going with the measure twice, drill once theory.
A rubber strip will be put under each mount point as well. This will help reduce the risk of rust through vibration and hopefully naturally correct any difference in the height of all the plates as it doesn't sit perfectly flat at all four points.
Anyway, here are some pics. We're going to sand it and paint it black, we think it would look better this colour plus it's what the true owner wants!


I want to change these hooks to a loop and drop them below the roof line view so you can't see them like you can in the pic above:


I should look good once it's painted etc. The first task will be to brush off this rust, acid treat it, buff off, prime, buff, prime, buff, sealer, then for the hole I'll have a crack at using this stuff:

Once all the rust has been treated, primed, sealed, double sealed and painted with a kill rust enamel white the roll bar will see some attention.
Other things to do on this beast are: Install the carpet I purchased on ebay years ago (now); Thinking of better seats, we'll see what happens there; clean up the interior as it's just dirty. I wouldn't mind doing the five speed conversion, just time and equipment I don't have up here at the moment, so will probably wait on that one.
Front and rear brakes will be seen to. Thinking of new rotors and pads up front to improve the braking response. Fresh brake fluid might be the go too.
I'll keep you posted as to what happens
Cheers
Bennie
Moved it up to Shepp, it over heated several times on smooth level roads, the temp didn't budge through the hills - go figure. I spoke to a mate and he said that the issue is the missing factory plates under the engine, these create a negative pressure situation in the engine bay that sucks the air through the radiator. So the bullbar and the driving lights are safe from any mods/deletes.
The windscreen is in and sorted. Unfortunately the tape I used pulled some paint off the A pillars. Pissed about that! Dunno exactly what I'm going to do with that yet (win tatts and respray the whole thing!).
For now I'm after some tips about fitting the roll bar. My idea is to get some plates to put under the mount points to help sandwich the tray metal so the load is spread. The tips I'm after are any tricks to get it dead centre. Currently I'm going with the measure twice, drill once theory.
A rubber strip will be put under each mount point as well. This will help reduce the risk of rust through vibration and hopefully naturally correct any difference in the height of all the plates as it doesn't sit perfectly flat at all four points.
Anyway, here are some pics. We're going to sand it and paint it black, we think it would look better this colour plus it's what the true owner wants!
I want to change these hooks to a loop and drop them below the roof line view so you can't see them like you can in the pic above:
I should look good once it's painted etc. The first task will be to brush off this rust, acid treat it, buff off, prime, buff, prime, buff, sealer, then for the hole I'll have a crack at using this stuff:
Once all the rust has been treated, primed, sealed, double sealed and painted with a kill rust enamel white the roll bar will see some attention.
Other things to do on this beast are: Install the carpet I purchased on ebay years ago (now); Thinking of better seats, we'll see what happens there; clean up the interior as it's just dirty. I wouldn't mind doing the five speed conversion, just time and equipment I don't have up here at the moment, so will probably wait on that one.
Front and rear brakes will be seen to. Thinking of new rotors and pads up front to improve the braking response. Fresh brake fluid might be the go too.
I'll keep you posted as to what happens
Cheers
Bennie
- Attachments
-
- dsc3045permaworld.jpg (43.88 KiB) Viewed 26082 times
-
- dsc3029sunniethebrumbyr.jpg (85.44 KiB) Viewed 26081 times
-
- dsc3026rollbar4.jpg (37.64 KiB) Viewed 26083 times
-
- dsc3033rollbar3.jpg (50.76 KiB) Viewed 26083 times
-
- dsc3043sunniethebrumbyr.jpg (44.69 KiB) Viewed 26087 times
-
El_Freddo
- Master Member
- Posts: 12704
- Joined: Tue Oct 04, 2005 10:00 am
- Location: Bridgewater Vic
- Contact:
Well I've managed to do some work on Sunnie the Brumby!
It's going well, still need to get some paint but for now the acid can hold it up for now.
Here's what's been going on:
Used a flapper disc on the grinder to clean up the surface rust areas and some spots that had light rust due to loss of paint:

I've also attacked the rust areas that the tonneau cover has created. It's not going to look show quality when it's done but there won't be any rust in there which is what I want.

Re-doing the rust repairs from a few years ago. That didn't go so well. Learnt a lot since then (hopefully!):

More on the rear of the tray - mainly aiming at the seam area where it seems to have taken hold, it's not serious rust but it would be one day. There's one hole in this area too:

And the seam where it all began - and what I am ultimately out to resolve:

Next post (maxed out attachment limit) I talk more about this seam - I'm very glad I looked further into it!
.
It's going well, still need to get some paint but for now the acid can hold it up for now.
Here's what's been going on:
Used a flapper disc on the grinder to clean up the surface rust areas and some spots that had light rust due to loss of paint:
I've also attacked the rust areas that the tonneau cover has created. It's not going to look show quality when it's done but there won't be any rust in there which is what I want.
Re-doing the rust repairs from a few years ago. That didn't go so well. Learnt a lot since then (hopefully!):
More on the rear of the tray - mainly aiming at the seam area where it seems to have taken hold, it's not serious rust but it would be one day. There's one hole in this area too:
And the seam where it all began - and what I am ultimately out to resolve:
Next post (maxed out attachment limit) I talk more about this seam - I'm very glad I looked further into it!
.
- Attachments
-
- dsc4169rustseam.jpg (33.41 KiB) Viewed 26048 times
-
- dsc4168rusttray.jpg (46.43 KiB) Viewed 26051 times
-
- dsc4167rustworktray.jpg (39.9 KiB) Viewed 26048 times
-
- dsc4165rusttreated.jpg (20.74 KiB) Viewed 26048 times
-
- dsc4164wirewheeledrust.jpg (47.51 KiB) Viewed 26050 times
-
El_Freddo
- Master Member
- Posts: 12704
- Joined: Tue Oct 04, 2005 10:00 am
- Location: Bridgewater Vic
- Contact:
In this image you can see the areas that I've hit with the rust buster that are a dull grey, the bits I've missed are still shiny:

This is where I'm glad I looked into it further. This is the seam from in the cab. Near the knife you can see a little brown area along the seam, this is what I wanted to look into further:

With the seam sealer removed you can see more. It really is a cancer:

And a better image of that rust with the seam sealer removed:

Then I spent some time wire wheeling the whole seam area. You can really see the rust in the area now - there's even more than what I thought was there after removing the seam sealer. This was then covered with rust buster and is currently sitting there doing it's thing:

Looking forward to having all of this cleaned up during the week then applying the first coat of paint - red oxide. Then it'll be primer followed by some white kill rust.
Cheers
Bennie
This is where I'm glad I looked into it further. This is the seam from in the cab. Near the knife you can see a little brown area along the seam, this is what I wanted to look into further:
With the seam sealer removed you can see more. It really is a cancer:
And a better image of that rust with the seam sealer removed:
Then I spent some time wire wheeling the whole seam area. You can really see the rust in the area now - there's even more than what I thought was there after removing the seam sealer. This was then covered with rust buster and is currently sitting there doing it's thing:
Looking forward to having all of this cleaned up during the week then applying the first coat of paint - red oxide. Then it'll be primer followed by some white kill rust.
Cheers
Bennie
- Attachments
-
- dsc4208seamwirewheeled.jpg (35.65 KiB) Viewed 26046 times
-
- dsc4207seamrust.jpg (53.9 KiB) Viewed 26047 times
-
- dsc4205seamrust.jpg (34.43 KiB) Viewed 26047 times
-
- dsc4203seamincab.jpg (34.2 KiB) Viewed 26045 times
-
- dsc4170rusttray.jpg (32.45 KiB) Viewed 26045 times
-
RSR 555

- Elder Member
- Posts: 6951
- Joined: Sat Nov 10, 2007 10:42 am
- Location: ATM... stuck in Rockingham
Nice work Bennie.. going to be one very nice Brumby
You know you are getting old when the candles on your birthday cake start to cost more than the cake itself.
RSR Performance
Home of the 'MURTAYA' in Oz
Subaru Impreza WRX based Sportscar
[SIGPIC][/SIGPIC]
Disclaimer: Not my website but hyperlink here to Subaru workshop manuals
RSR Performance
Home of the 'MURTAYA' in Oz
Subaru Impreza WRX based Sportscar
[SIGPIC][/SIGPIC]
Disclaimer: Not my website but hyperlink here to Subaru workshop manuals