Re the wheel hub adapters - when I got my desert rats reburbed for the ute I asked the guy at the wheel shop about the need for hub adapters since the desert rats had a larger bore dia. than my hub spigots. He said no need, the wheels could be "hub-centric" or "lug-centric" it didn't matter either way. I think something along the lines of not being a 4.5 ton truck so no great danger of the studs being sheared or bent. Seems like it could be one of those things, different answer from everyone you ask
Sister's Gen3 Liberty "Basil"
Moderator: El_Freddo
-
Silverbullet

- Senior Member
- Posts: 2953
- Joined: Mon Aug 23, 2010 6:20 pm
- Location: Adelaide
Wiper washer jet? seriously??  Sounds like someone had a bone to pick or something...that must be so frustrating when you've put so much effort in, to be pulled up on stuff like that.
Re the wheel hub adapters - when I got my desert rats reburbed for the ute I asked the guy at the wheel shop about the need for hub adapters since the desert rats had a larger bore dia. than my hub spigots. He said no need, the wheels could be "hub-centric" or "lug-centric" it didn't matter either way. I think something along the lines of not being a 4.5 ton truck so no great danger of the studs being sheared or bent. Seems like it could be one of those things, different answer from everyone you ask")
Re the wheel hub adapters - when I got my desert rats reburbed for the ute I asked the guy at the wheel shop about the need for hub adapters since the desert rats had a larger bore dia. than my hub spigots. He said no need, the wheels could be "hub-centric" or "lug-centric" it didn't matter either way. I think something along the lines of not being a 4.5 ton truck so no great danger of the studs being sheared or bent. Seems like it could be one of those things, different answer from everyone you ask
Will it ever end!?
-EA81 TWIN CARB!!!!
-L series 5 speed
-Custom paint job
-2" lift
-Full custom re-wire
-L series front end

-EA81 TWIN CARB!!!!
-L series 5 speed
-Custom paint job
-2" lift
-Full custom re-wire
-L series front end
-
El_Freddo

- Master Member
- Posts: 12704
- Joined: Tue Oct 04, 2005 10:00 am
- Location: Bridgewater Vic
- Contact:
Patrick - got the spigot adaptors already. Wheel nuts are all the same taper but will have a set on the way with the bell end and a small nut "head". The nuts that came with it have a one inch hex head length and the centre caps don't fit as a result.
These spigots are one of those things that were told are completely necessary. With that said on the rear of my brumby there isn't anything to centre the rim on the hub other than the wheel nuts. Same for many older cars.
Anyway it is interesting the huge difference between a place that looks at the vehicle and assesses and a place that tries to drum up business. The latter mechanics make me mad!
Sis picks up the car tomorrow and I'll see them both on Australia Day eve I'm looking forward to hearing what she thinks etc. Hopefully I'll have the new wheel nuts to swap over as well.
Cheers
Bennie
PS: Silverbullet - yeah it gets picky depending on where you go. A washer jet is technically a RWC issue due to not being able to wash your windscreen properly while driving. That's more something that would annoy me but if my windscreen was really an issue and I couldn't wash it on the go I'd pull over to sort it out. Servo refuelling stops are also a windscreen wash stop for me
These spigots are one of those things that were told are completely necessary. With that said on the rear of my brumby there isn't anything to centre the rim on the hub other than the wheel nuts. Same for many older cars.
Anyway it is interesting the huge difference between a place that looks at the vehicle and assesses and a place that tries to drum up business. The latter mechanics make me mad!
Sis picks up the car tomorrow and I'll see them both on Australia Day eve
Cheers
Bennie
PS: Silverbullet - yeah it gets picky depending on where you go. A washer jet is technically a RWC issue due to not being able to wash your windscreen properly while driving. That's more something that would annoy me but if my windscreen was really an issue and I couldn't wash it on the go I'd pull over to sort it out. Servo refuelling stops are also a windscreen wash stop for me

-
El_Freddo
- Master Member
- Posts: 12704
- Joined: Tue Oct 04, 2005 10:00 am
- Location: Bridgewater Vic
- Contact:
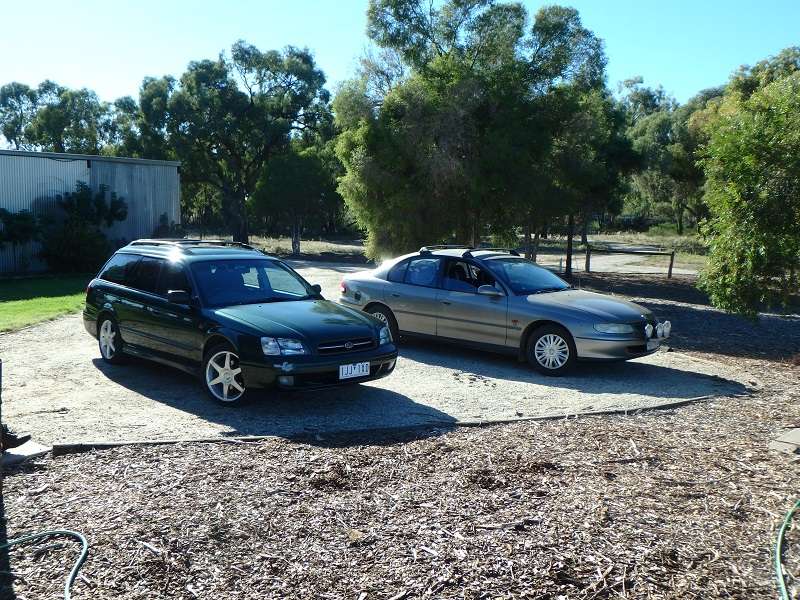
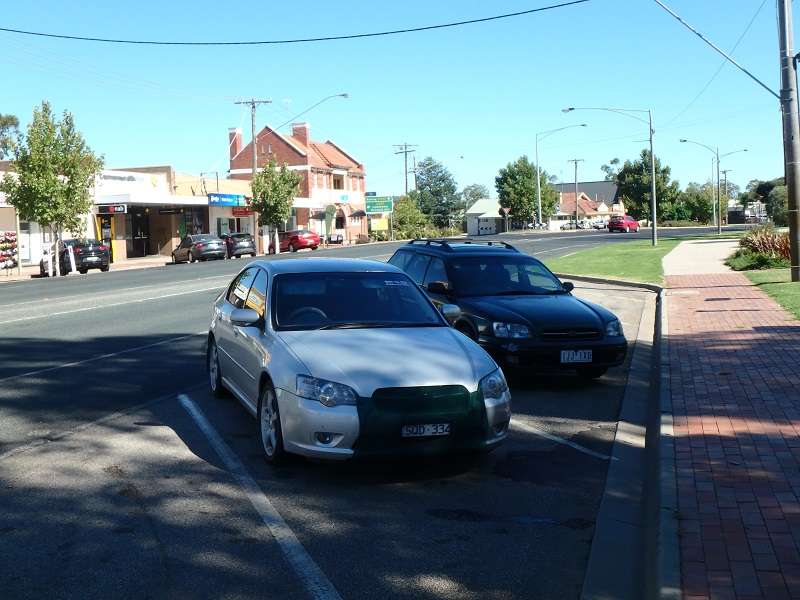
So lucky me has Basil for the next week
Long story short I didn't get Mrs El Freddo's car back together over the long weekend. So a "quick" road trip to Cohuna and back has us Basil
Only one bush rat pic at the moment - this is on a back road picking wild fig and pears that we came across on the way up there:

As you can see Basil is currently full bush spec!
I really enjoyed driving Basil home, but found some of the roads really boring in a vehicle that felt like it wanted to sit another 40km above the limit...
He's just arrived home again. Such a good note with those UELs!
Sis said she thought I'd done something to the exhaust and that she likes it. Her better half picked up on it the first night she drove from work - apparently he could hear her a mile away. And with how quiet it is out their way I can believe him too.
Some quick fuel usage figures. The best my sister has achieved is 8.6L/100km consistently. The worst is 9.1L/100km - which is what I managed to get
Having now moved house, there's a white Gen 3 wagon down the end of our street - it's now up for sale. But it's apparently got a STi Genome rear muffler without the UELs. It sounds pretty much like a Honda If only he knew the mod. A much straighter looking subi in comparison.
I still love Basil, and most importantly so does my sister. Next up is an oil change
Cheers
Bennie
Long story short I didn't get Mrs El Freddo's car back together over the long weekend. So a "quick" road trip to Cohuna and back has us Basil
Only one bush rat pic at the moment - this is on a back road picking wild fig and pears that we came across on the way up there:
As you can see Basil is currently full bush spec!
I really enjoyed driving Basil home, but found some of the roads really boring in a vehicle that felt like it wanted to sit another 40km above the limit...
Sis said she thought I'd done something to the exhaust and that she likes it. Her better half picked up on it the first night she drove from work - apparently he could hear her a mile away. And with how quiet it is out their way I can believe him too.
Some quick fuel usage figures. The best my sister has achieved is 8.6L/100km consistently. The worst is 9.1L/100km - which is what I managed to get
Having now moved house, there's a white Gen 3 wagon down the end of our street - it's now up for sale. But it's apparently got a STi Genome rear muffler without the UELs. It sounds pretty much like a Honda
I still love Basil, and most importantly so does my sister. Next up is an oil change
Cheers
Bennie
-
El_Freddo
- Master Member
- Posts: 12704
- Joined: Tue Oct 04, 2005 10:00 am
- Location: Bridgewater Vic
- Contact:
Ok, so it ended up that the last three weekends there's been a visit to Cohuna!
The week after the pic above in the last post, we had to return Basil to my sis as she was back at work. The trick was completing suspension work on the VT (all rear bushes replaced and the last lot on the front end done too). Basil got an oil change - I've moved to 10W-40 semi synthetic. The previous owner was running a Castrol full synthetic that I don't care to remember.
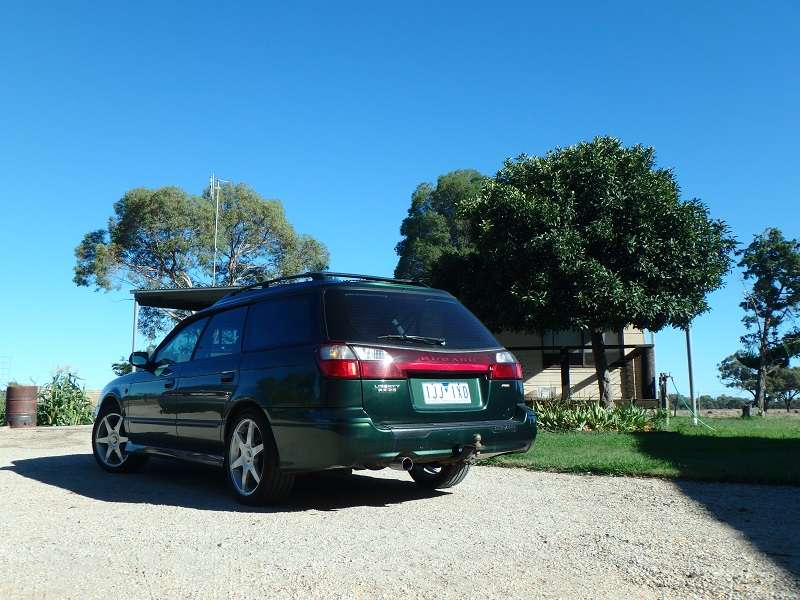
One late night trip and here they were the morning after on the Gunbower Island:
Probably one of my favourite pics of Basil to date:
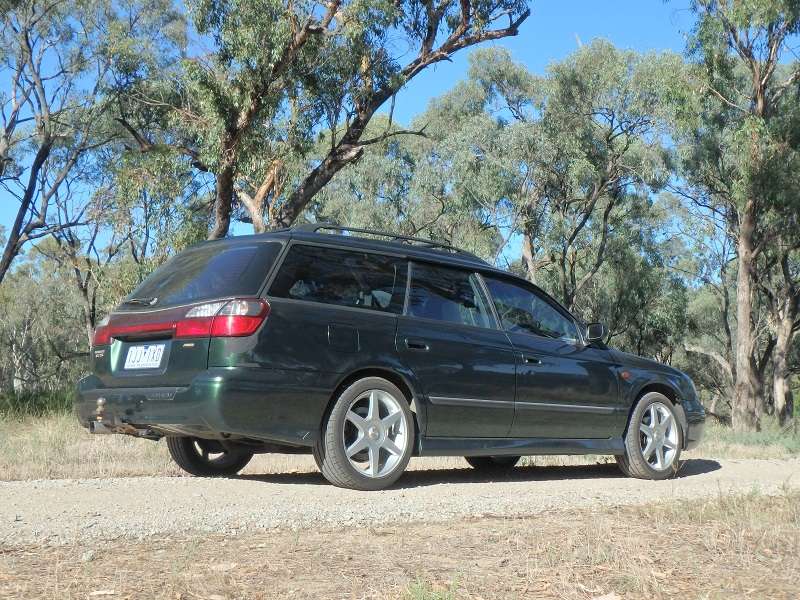
^ The rear patch on the body damage is really easy to see when he's clean and the paint shows its metallic as the sun brings it out. It's also very easy to see when the car is clean! But still much better than having left it.
We took a little trip into Cohuna itself. The town was quite sleepy on this Sunday morning:
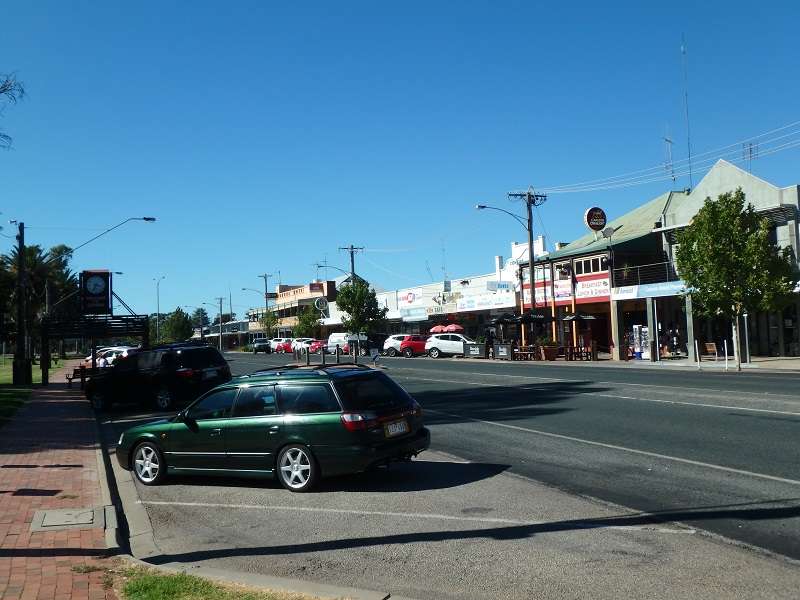
While we were off to the shop, Basil "made a friend" (just like my sister, leave them for a minute and they know someone new!):
We left Basil and a week later I was back again, in Basil (big car shuffle happened), to pick up my sister's better half and head off to my brother's wedding at Mt Hotham. On the drive up there I got the best fuel economy seen so far at 8.2L/100km with sis's drive down and my drive up to Cohuna, fill up was in Echuca (good fuel price).
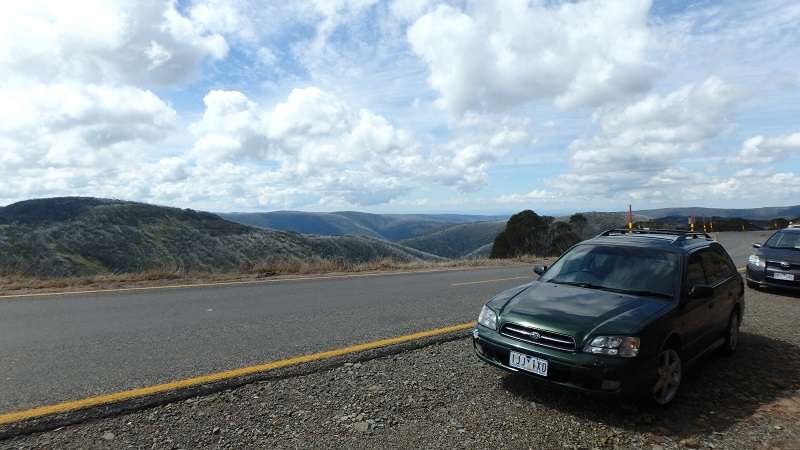
We did a bit of shared driving, then at Harrietville I got back in the driver's seat to have some fun heading up the Mt. We left Harrietville at a bit after 7:15pm and arrived at Dinner Plain (for dinner of course!) at 7:55pm. It was a nice run. At the point of Australia's highest sealed road (1850m) I snapped a few pics - it was later than I was hoping but anyway, it still looks pretty good I reckon:
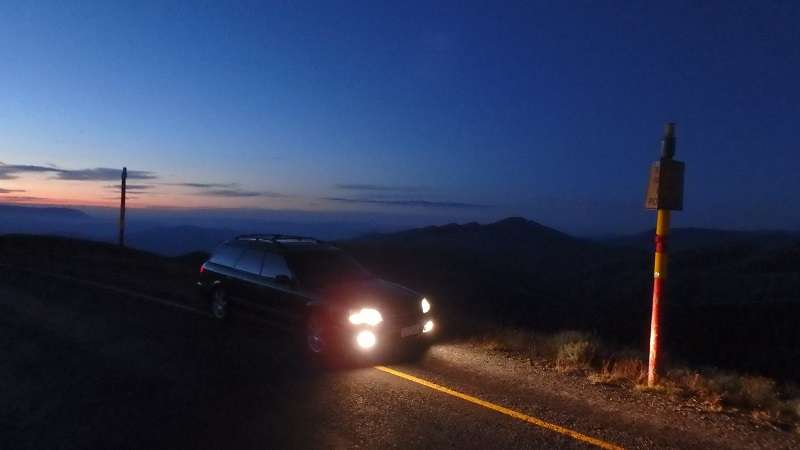
^ Mt Feathertop off to the right in the pic
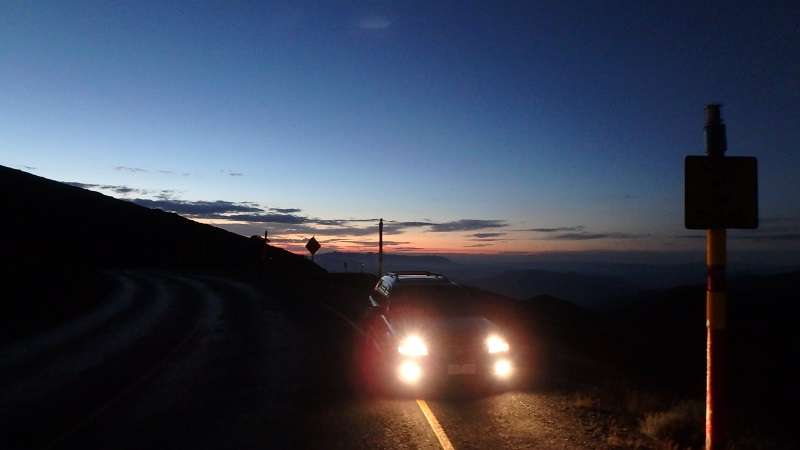
^ Mt Buffalo in the centre of pic with dusk above it.
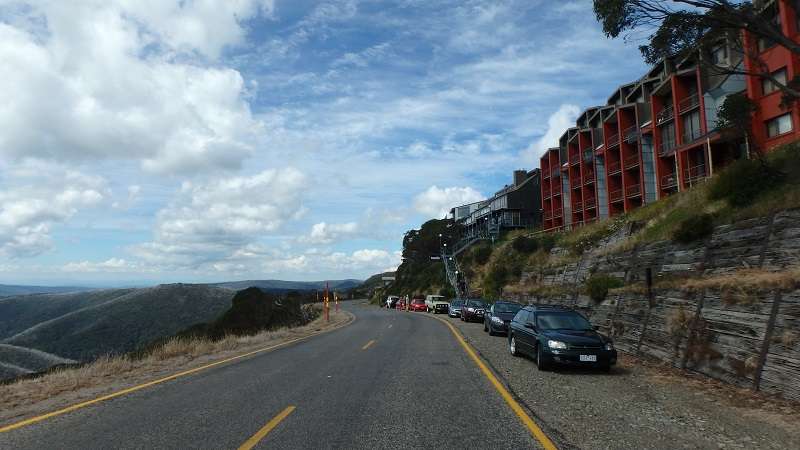
Chilling out in Hotham Heights near Fountains and the Arlberg:
.
The week after the pic above in the last post, we had to return Basil to my sis as she was back at work. The trick was completing suspension work on the VT (all rear bushes replaced and the last lot on the front end done too). Basil got an oil change - I've moved to 10W-40 semi synthetic. The previous owner was running a Castrol full synthetic that I don't care to remember.
One late night trip and here they were the morning after on the Gunbower Island:
Probably one of my favourite pics of Basil to date:
^ The rear patch on the body damage is really easy to see when he's clean and the paint shows its metallic as the sun brings it out. It's also very easy to see when the car is clean! But still much better than having left it.
We took a little trip into Cohuna itself. The town was quite sleepy on this Sunday morning:
While we were off to the shop, Basil "made a friend" (just like my sister, leave them for a minute and they know someone new!):
We left Basil and a week later I was back again, in Basil (big car shuffle happened), to pick up my sister's better half and head off to my brother's wedding at Mt Hotham. On the drive up there I got the best fuel economy seen so far at 8.2L/100km with sis's drive down and my drive up to Cohuna, fill up was in Echuca (good fuel price).
We did a bit of shared driving, then at Harrietville I got back in the driver's seat to have some fun heading up the Mt. We left Harrietville at a bit after 7:15pm and arrived at Dinner Plain (for dinner of course!) at 7:55pm. It was a nice run. At the point of Australia's highest sealed road (1850m) I snapped a few pics - it was later than I was hoping but anyway, it still looks pretty good I reckon:
^ Mt Feathertop off to the right in the pic
^ Mt Buffalo in the centre of pic with dusk above it.
Chilling out in Hotham Heights near Fountains and the Arlberg:
.
-
El_Freddo
- Master Member
- Posts: 12704
- Joined: Tue Oct 04, 2005 10:00 am
- Location: Bridgewater Vic
- Contact:
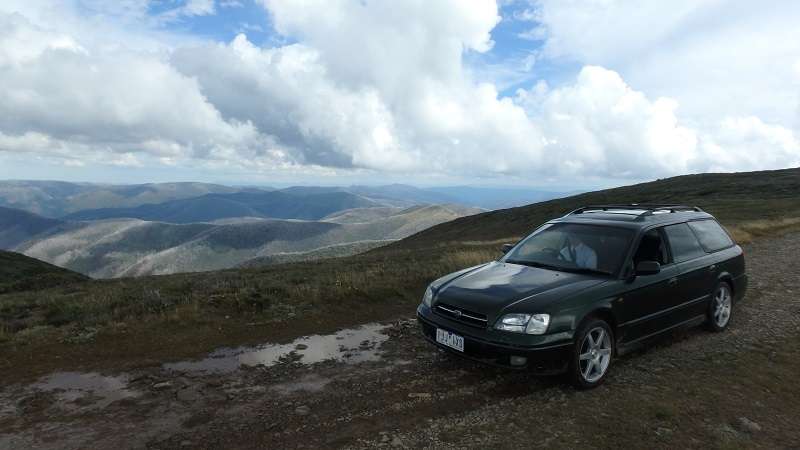
And quite a special event I guess - up on the Summit of Mt Hotham, not many vehicles get access up here, let alone a road going liberty. At this point he was playing chauffeur for guests at the wedding.
Once off the Mt and re-fuelled, we (read: I) got the worst economy we've seen so far - 9.2L/100km. Pretty stoked about that considering heading up the Mt was generally half to WOT with a driving style trying to keep revs above 3500rpm. I have wondered if my sister filled it to the brim like I do, as this can have an effect on the figures. Either way it'd still be near the 10L/100km.
With those fuel figures I'm pretty stoked. I was worried that the 2.5L would be thirstier than the L series and end up costing my sister more in fuel than she would've with retaining the L. So glad we moved up a number of pegs to the Liberty and I also love the Gen 3 shape, probably the best of the Libertys I reckon.
A few things will need to be done soon. The rear muffler will need replacing, it's rusted quite badly now, this happened quicker than I expected. The front struts are probably about due for replacement, with 340kkm on the clock they've done well. I found a hole in the exhaust that was cut by the dudes that welded the hole they found during the RWC. That's ironic.
I've not driven the EJ20 version of this vehicle, but if anyone is looking for a Gen 3 liberty I'd recommend going the EJ25 RX model for the get up and go and the other little extras that come in this spec.
From here I think this thread will move towards the random adventures I share with Basil and the conversations/questions that arise from these.
Cheers
Bennie
-
El_Freddo
- Master Member
- Posts: 12704
- Joined: Tue Oct 04, 2005 10:00 am
- Location: Bridgewater Vic
- Contact:
As any Gen3 owner can tell you, their high beam lights are absolute poo!
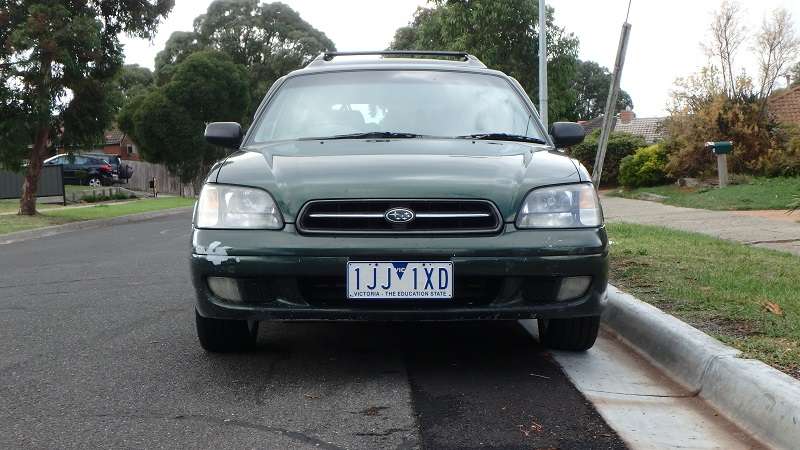
After many frustrations I finally managed to complete this work - stock first:
work completed - second setup that clears the bonnet when trying to open it:
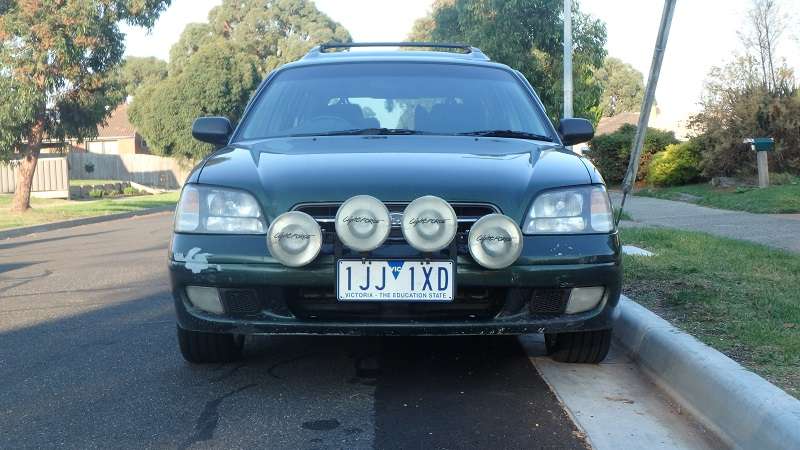
Overall look:

I'm very happy with the look. Neat and sort of aggressive with that Rally reference at the same time.
The wiring was another issue - for anyone doing this work: Use the negative switching model and reference the pin closest to the engine for the right hand high beam relay. This was THE wire we had to find for the "12v on with ignition". Every other wire we tried had the lights operate on low beam or when the stock lights were off. Very frustrating. Here's the diagram for negative switching:

Standard high beam for reference:
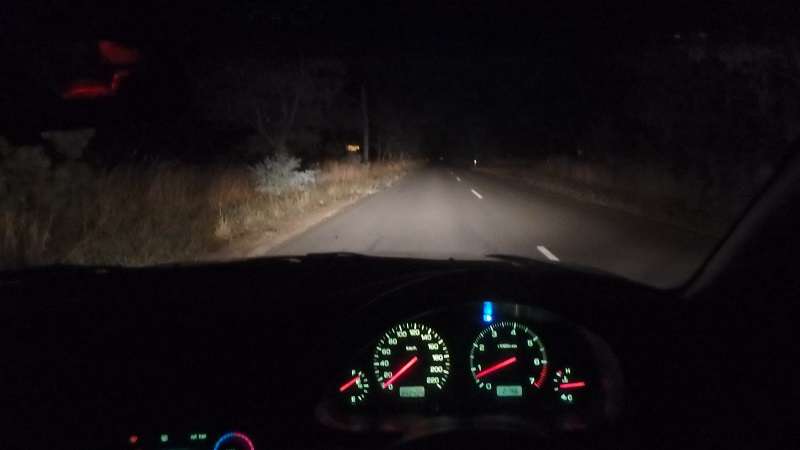
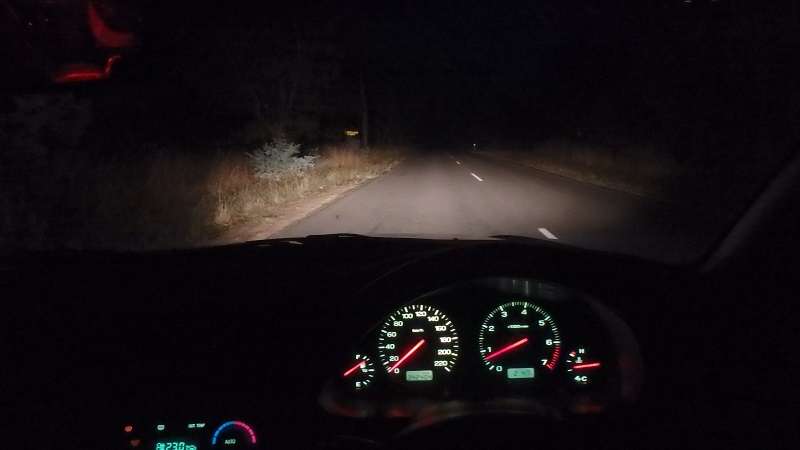
This is the end result with all lights ablaze:
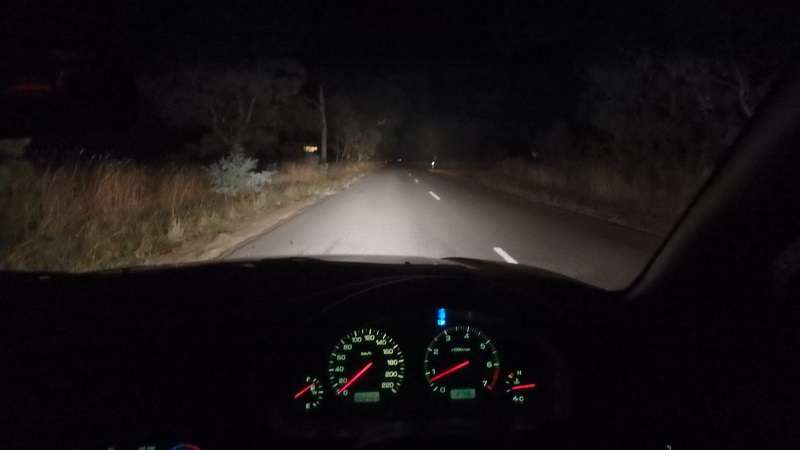
Standard low beam:
.
After many frustrations I finally managed to complete this work - stock first:
work completed - second setup that clears the bonnet when trying to open it:
Overall look:
I'm very happy with the look. Neat and sort of aggressive with that Rally reference at the same time.
The wiring was another issue - for anyone doing this work: Use the negative switching model and reference the pin closest to the engine for the right hand high beam relay. This was THE wire we had to find for the "12v on with ignition". Every other wire we tried had the lights operate on low beam or when the stock lights were off. Very frustrating. Here's the diagram for negative switching:
Standard high beam for reference:
This is the end result with all lights ablaze:
Standard low beam:
.
-
El_Freddo
- Master Member
- Posts: 12704
- Joined: Tue Oct 04, 2005 10:00 am
- Location: Bridgewater Vic
- Contact:
High beam:
Low beam:
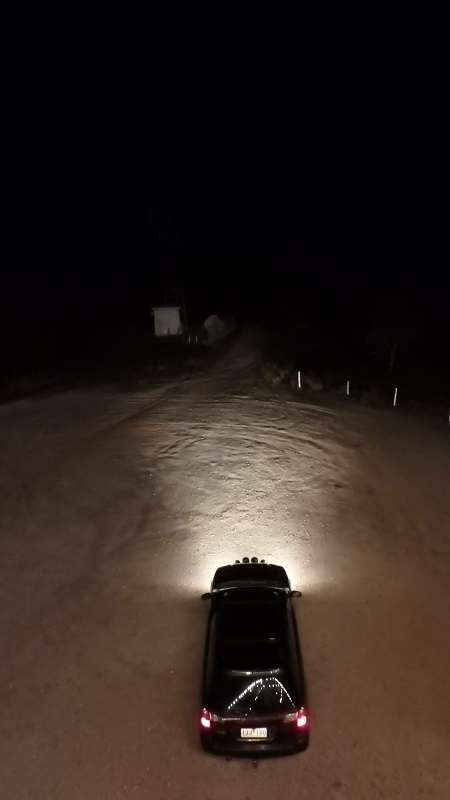
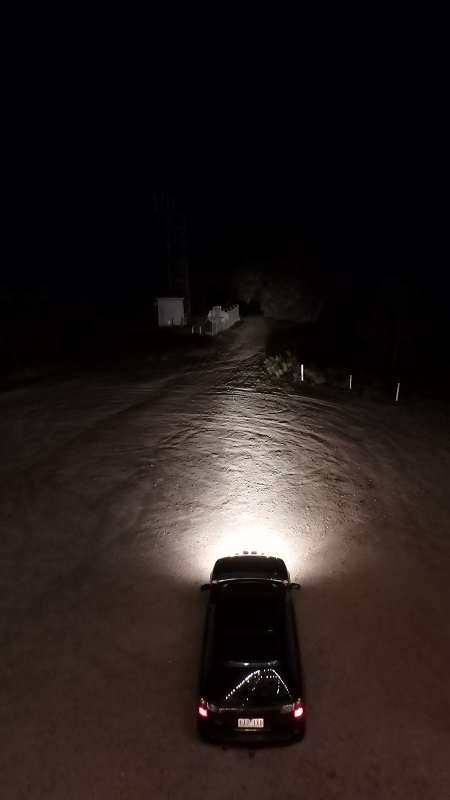
Photo because I can:

I've really enjoyed driving this subi. There's still some work to do but generally he's all sweet. I love how well the EJ25 pulls so easily, and if you need it a little quicker from low revs, rev matching a lower gear works an absolute treat
Next mod will be changing the switching of the lights to two factory switches rather than one aftermarket switch dug into one of the blanking switch panels...
Cheers
Bennie
Low beam:
Photo because I can:
I've really enjoyed driving this subi. There's still some work to do but generally he's all sweet. I love how well the EJ25 pulls so easily, and if you need it a little quicker from low revs, rev matching a lower gear works an absolute treat
Next mod will be changing the switching of the lights to two factory switches rather than one aftermarket switch dug into one of the blanking switch panels...
Cheers
Bennie
-
El_Freddo
- Master Member
- Posts: 12704
- Joined: Tue Oct 04, 2005 10:00 am
- Location: Bridgewater Vic
- Contact:
June, I think it was, we replaced all the suspension bushes. The rear was a bit tricky but after two days it was done with the help of my dad. We also dropped a set of new front struts in for "good measure".
If you're doing one of these Gen3's it'll look like this at some point:
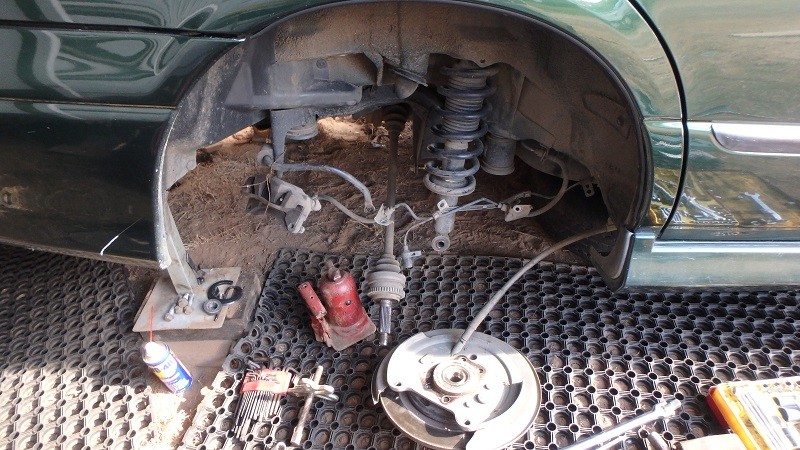
Subaru had the wisdom to build the rear end so that the suspension is separate to the brake and abs lines - they simply unbolt and everything easily swings away. Subaru usually has a habit of putting the brake line through parts so that the brake line needs to be cracked to remove parts.
Then pressing the bits out is the next tricky part after everything is removed in some of the limited spaces. It can be done without removing the rear subframe.
After an alignment it's all going well and is very stable over bumps in a straight line now
Cheers
Bennie
If you're doing one of these Gen3's it'll look like this at some point:
Subaru had the wisdom to build the rear end so that the suspension is separate to the brake and abs lines - they simply unbolt and everything easily swings away. Subaru usually has a habit of putting the brake line through parts so that the brake line needs to be cracked to remove parts.
Then pressing the bits out is the next tricky part after everything is removed in some of the limited spaces. It can be done without removing the rear subframe.
After an alignment it's all going well and is very stable over bumps in a straight line now
Cheers
Bennie
-
El_Freddo
- Master Member
- Posts: 12704
- Joined: Tue Oct 04, 2005 10:00 am
- Location: Bridgewater Vic
- Contact:
Well Basil has been running very well - has not missed a beat so far.
My sister told me of an unusual noise, sounded like dead front brake pads from her descriptions, but then she said it was like a grating noise like something was dragging on the road until you hit 40kmph.
So I paid her a visit earlier this week. Did an oil change, am currently sorting out some new brake pads for her (car not being driven as the LHS caliper is apart to sort out a caliper guide issue).
As for that noise, it turns out there's bearing on its way out in the gearbox So I'm on the hunt for a gearbox. Should be an easy swap - just need to find one, but I'm currently not in a rush. Also going to try putting more oil than what's required into the gearbox and see if that keeps it at bay a bit longer.
Cheers
Bennie
My sister told me of an unusual noise, sounded like dead front brake pads from her descriptions, but then she said it was like a grating noise like something was dragging on the road until you hit 40kmph.
So I paid her a visit earlier this week. Did an oil change, am currently sorting out some new brake pads for her (car not being driven as the LHS caliper is apart to sort out a caliper guide issue).
As for that noise, it turns out there's bearing on its way out in the gearbox
Cheers
Bennie
-
El_Freddo
- Master Member
- Posts: 12704
- Joined: Tue Oct 04, 2005 10:00 am
- Location: Bridgewater Vic
- Contact:
Update on the gearbox issue: Got a replacement gearbox ready to go.
We've tried the oil top up "trick" - and it didn't work - initially. It seems with more driving the noise has gone quiet. So it could be a waiting game to see what happens there.
Next time I visit the car (in saying this, I just had it for two weeks and managed a measly 20km at best) I reckon we'll drop the oil and replace it with fresh stuff - and see what the old oil tells us, if there's anything to tell.
I still love driving this car, loads of fun for a stock setup. I can see why people go all out on suspension mods etc to improve handling.
Cheers
Bennie
-
El_Freddo
- Master Member
- Posts: 12704
- Joined: Tue Oct 04, 2005 10:00 am
- Location: Bridgewater Vic
- Contact:
Re: Sister's Gen3 Liberty "Basil"
Well it’s almost August 2019, and I’ve got Basil in for HGs due to the pesky coolant and oil leaking externally. Head were shaved this time for piece of mind.
I ended up getting new head bolts - at about $4 a piece it made sense to go this way. I also found out there’s two different types of head bolts - the middle two are different to the outer two and are marked by paint on the head of the bolt. Last time I shoved them in any which way!
Anyway, I’m trying to find info on gearboxes. The replacement has a different code - only in the rear letters (when excluding the first two digits before the hyphen.
So I’ve got:
2000 RX model: H9 - TY75XFADA
2003 RX model: 54 - TY75XFCAB
What I want to know is whether the diff ratios are the same. I know they both came from the RX but I want to make sure I don’t have to chase a rear diff for this gearbox. I just want to throw it in and drive (once the engine is back in) without the centre diff exploding.
That’s about it for now, just trying to find that info!
Cheers
Bennie
-
El_Freddo
- Master Member
- Posts: 12704
- Joined: Tue Oct 04, 2005 10:00 am
- Location: Bridgewater Vic
- Contact:
Re: Sister's Gen3 Liberty "Basil"
I’ve finally got the engine back together and in two weeks ago now (I think). Everything was good with the engine. HGs done, cam belt replaced including all pulleys and tensioner, waterpump stayed, all new oil seals.
Cam retainer plate removed for valve stem seals to be replaced. Valves were lapped while this was done - missed opportunity otherwise. I reckon many ppl fail to reseal the cam retainer plate when the HGs are done, this allows them to weep oil again in a short amount of time.
Sump was resealed with fresh silicone. New rear main seal and the two plates on the back of the engine were resealed too. So oil loss should be nil from leaks now!
The issue now is with the replacement gearbox. I’ve got a wobble on the front left that Toonga thinks could be a drive shaft - issue wasn’t there before but I’ll swap shafts left to right while the box is out.
I’ve split both gearboxes beyond just the centre diff. I have new bearings for the front diff to help eliminate that wobble - if it was bearing related, doubtful but new bearings in there will be nice anyway.
The old box slipped out of gear in 3rd and 4th around town when cruising on light throttle. Turned out there was a bearing collapsing that allowed too much lateral movement in the top shaft. So that box would’ve detonated at some point due to this bearing.
New box in the initial test drives is tight. So new diff bearings and the good centre diff will have us a sweet box that will hopefully see Basil out to the end of his days.
As for gearbox codes: info from Subyclub.com said the different bits in the later part of the code “A” and “C” referred to the revision of the vehicle - basically the cosmetic looks of the vehicle. The other ones I think refer to the centre diff in the gearbox. Cases are very similar but there are different bearings used for the rear drive from the centre diff.
Our original (good) centre diff uses ball and cage bearings. The replacement gearbox uses tapered roller bearings. There are slight housing changes to accommodate this but the centre diff looks like it’s interchangable between the two housings.
Once the box is back together it’ll go back in Basil. Then we’ll sort out a new rear muffler (there’s a genome STi muffler on gumtree that’s very tempting - but it’s more than what I want to spend) before he’s delivered back to my sister. It’s been a long time coming!
Cheers
Bennie

Re: Sister's Gen3 Liberty "Basil"
It sounds like you sort of know what you’re doing 
-
El_Freddo
- Master Member
- Posts: 12704
- Joined: Tue Oct 04, 2005 10:00 am
- Location: Bridgewater Vic
- Contact:
Re: Sister's Gen3 Liberty "Basil"
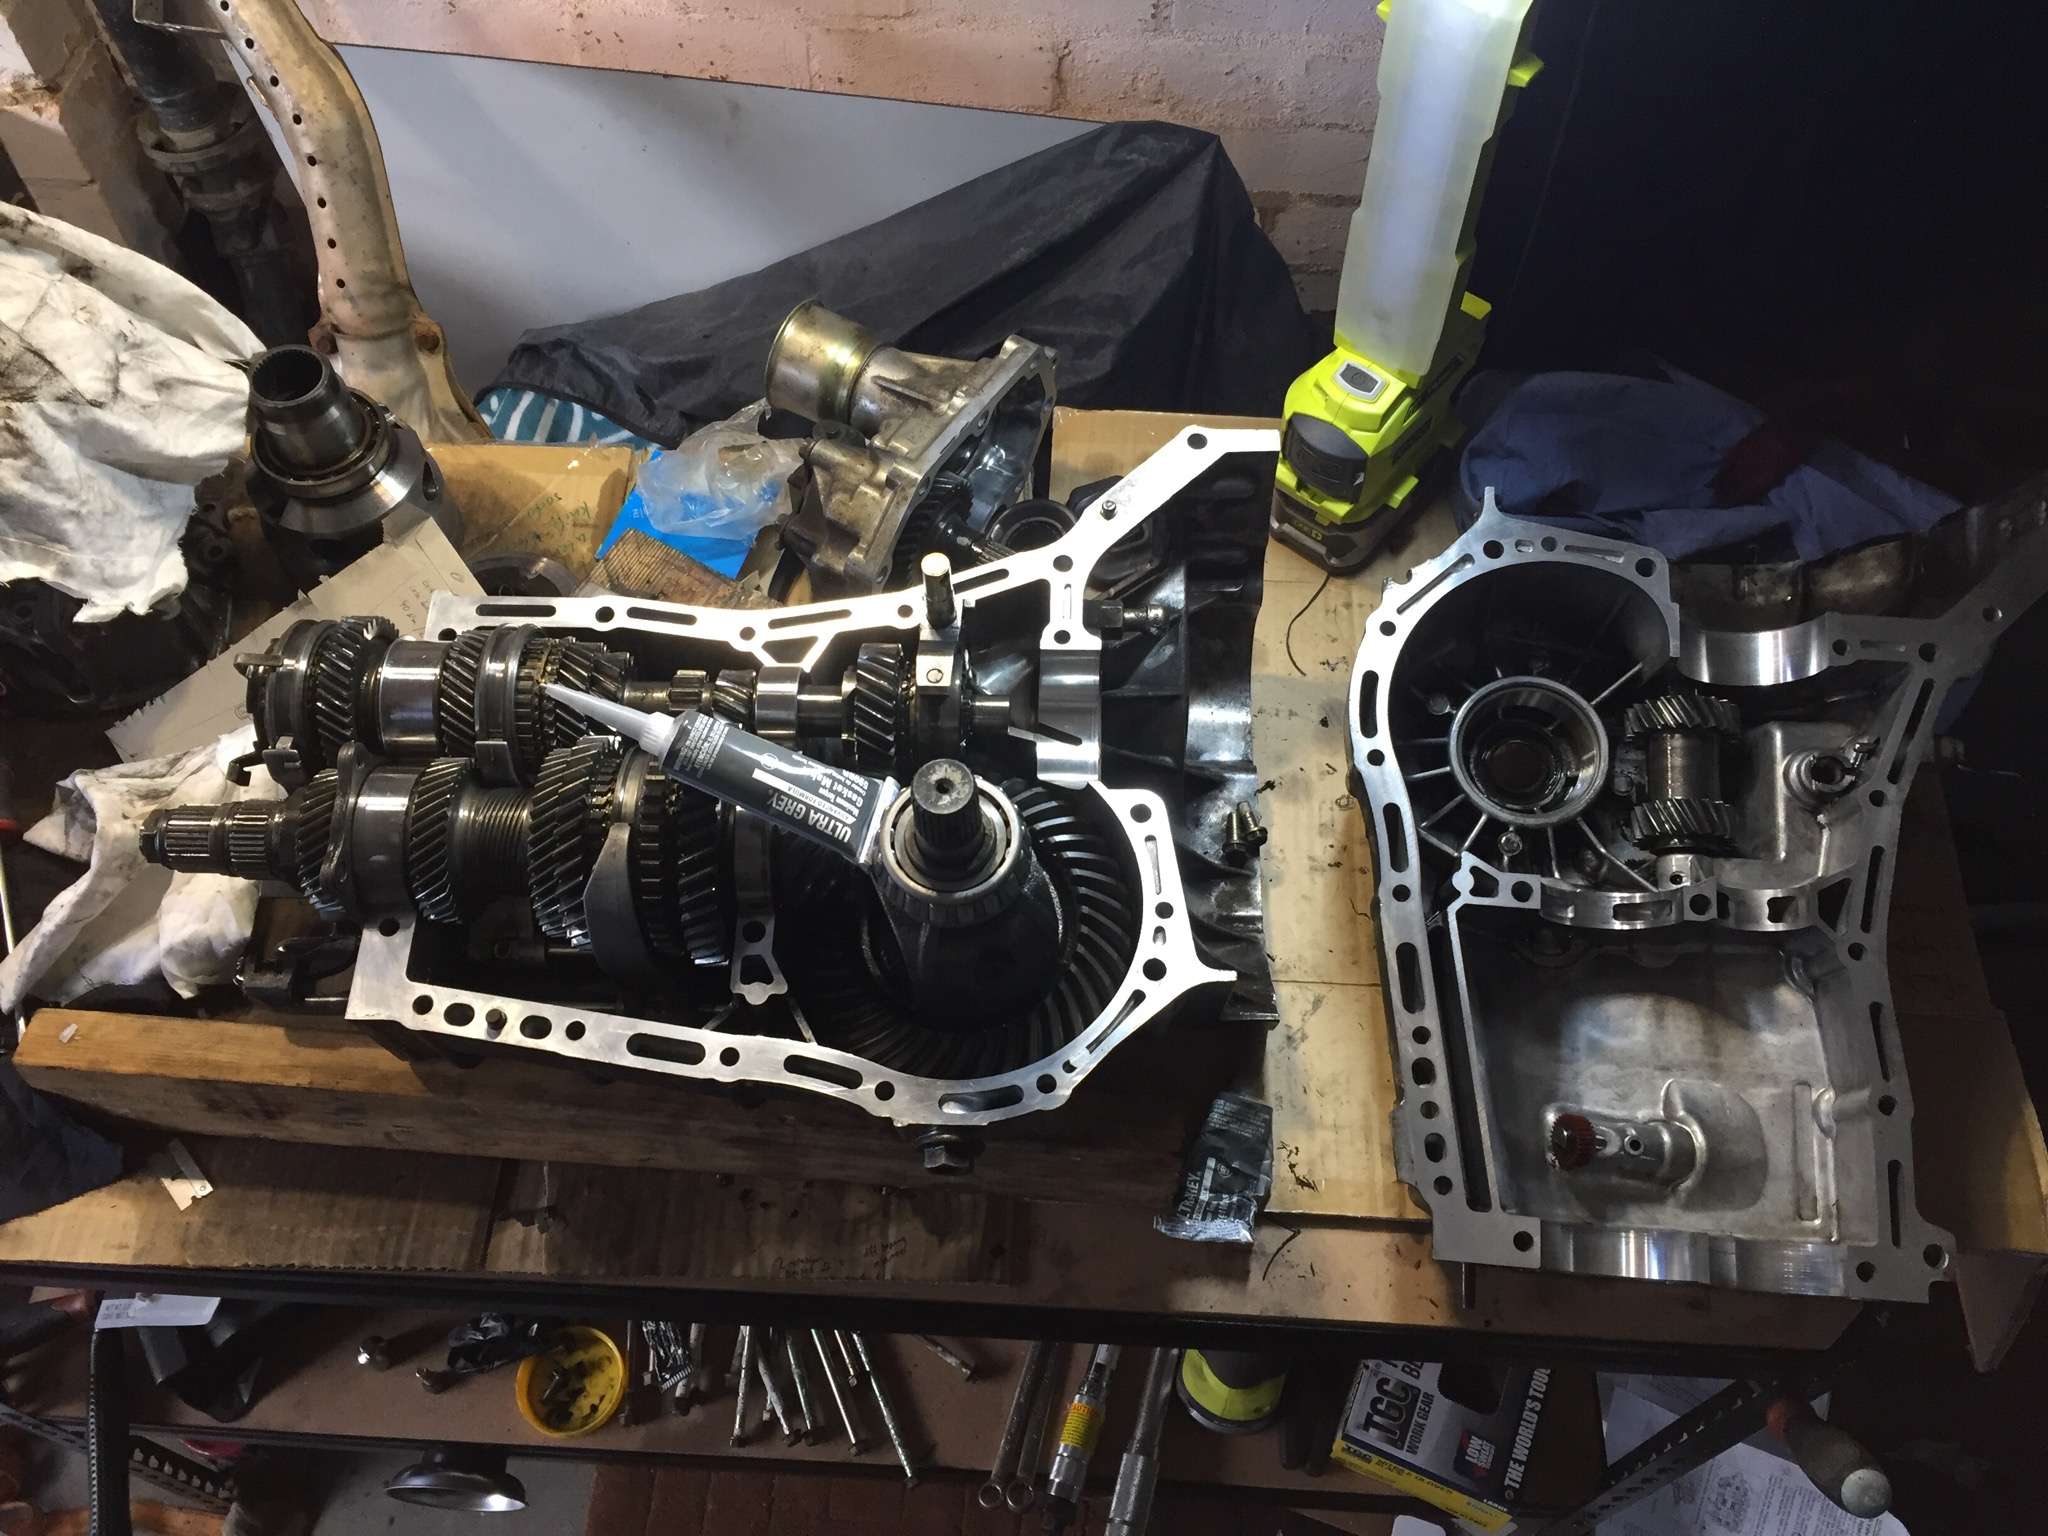
We'll see mate!
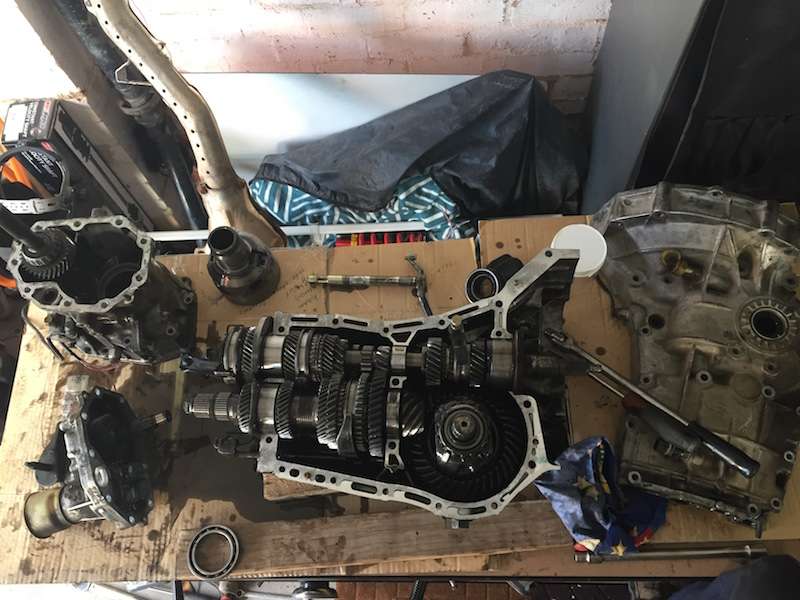
^ the replacement gearbox. The old one is on the floor behind me in the pic, in the same amount of pieces!
Some of the work done on Basil's engine while I had it out:

^ Valve lapping. Not much fun, but with a cheat's way with a DC electric drill and a piece of vacuum hose it was much easier!
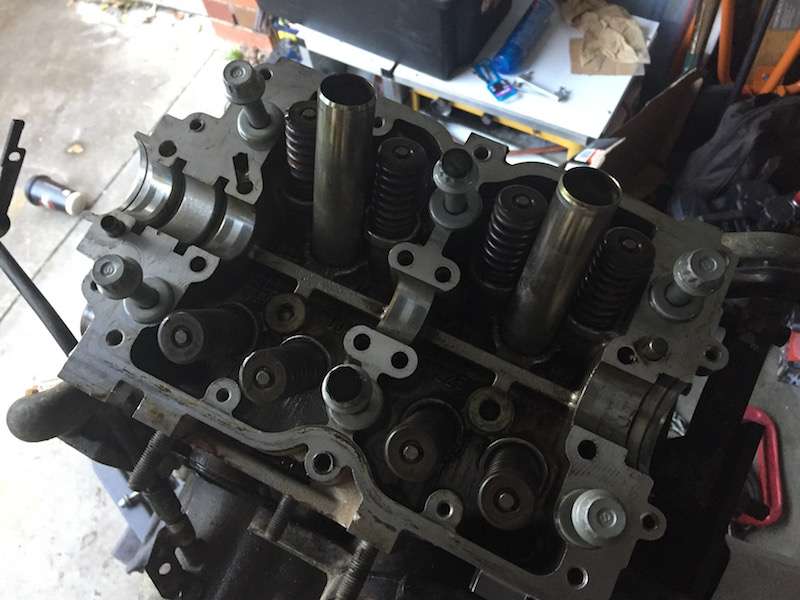
^ "Look Dad, I got the head bolts in the right order this time!" - seriously though, I didn't realise there were two different head bolt types on the EJ251s. I only noticed the painted ones when I was removing them - and they weren't where they were meant to be - in the centre two holes! Got it sorted this time.
For those that know, I removed the cam retainer plate to do the valve lapping and valve stem seal replacement. I wasn't going to lap the valves, but since I was already there it was worth the extra time to do the job. Once the head bolts were torqued down the cam retainer plate (and cam etc) was replaced with fresh silicone - something many don't do on these HG jobs. Hopefully no weeping oil leak from under the retainer plate for us!
Diff bearings are now removed. I'll put the new ones on tomorrow night (all going well), then begin prepping, aka cleaning, the gearbox cases for resealing. I'll also have to mess around with the diff bearing retainers due to the new bearings going in, things may have changed a tiny bit. New seals will go in too - these were meant for a gearbox I've got planned for Redback.
All going well I'll have Basil running again Sunday at the latest. Then to fix a few little, annoying issues, get a new rear muffler and send him off to his rightful owner (finally!).
Cheers
Bennie
-
El_Freddo
- Master Member
- Posts: 12704
- Joined: Tue Oct 04, 2005 10:00 am
- Location: Bridgewater Vic
- Contact:
Re: Sister's Gen3 Liberty "Basil"
Today was a big day that started off early, before 7am starts in the shed are very rare events but it happened today.
After a wasted afternoon yesterday I didn’t have the gearbox sealed as I’d planned - I got sidelined from my plans is probably the best way to put it. Anyway...
Up early this morning, prepped all surfaces for sealing. Sealed the front cases, sorted out the transfer case and rear bearing plate assembly too. Bolted it all together, only to find that when I went to sort out the diff preload/backlash (I cant remember which is which), I couldn’t for the life of me rosette the input shaft unless I used some vice grips, even then it was super difficult. Round one before the centre diff assembly went on (and the point you should mess around with the diff settings if you’ve changed anything such as front diff bearings):
Box stripped down again. At least the centre diff section didn’t need full disassembly. I thought it was the upper shaft front bearing not seating on the dowel pin properly. Turned out it was a jammed synchro on the input shaft, the one that deals with the low range. I put it in with the input shaft. It has three slots for the retainer tabs in the low range selector hub to live in and stop the synchro ring from rotating freely.
With that sorted and the sealing surfaces cleaned and prepped again, the gearbox came together without issue. While still on the bench, engine side down, I sorted the diff settings (I had previously replaced the seals and put the O rings in once I was done messing around). Centre diff housing assembly went on and the box was sorted for install. Round two - done and ready for install:
Dad came up and before the box went in we looked at the front left driveshaft. Outer joint was dry, we opened it up, cleaned out as much of the dried out grease as possible and packed in some fresh moly grease. It felt much better rotating the joint after this, nice and smooth! Hopefully that effort will pay off with the wobble disappearing.
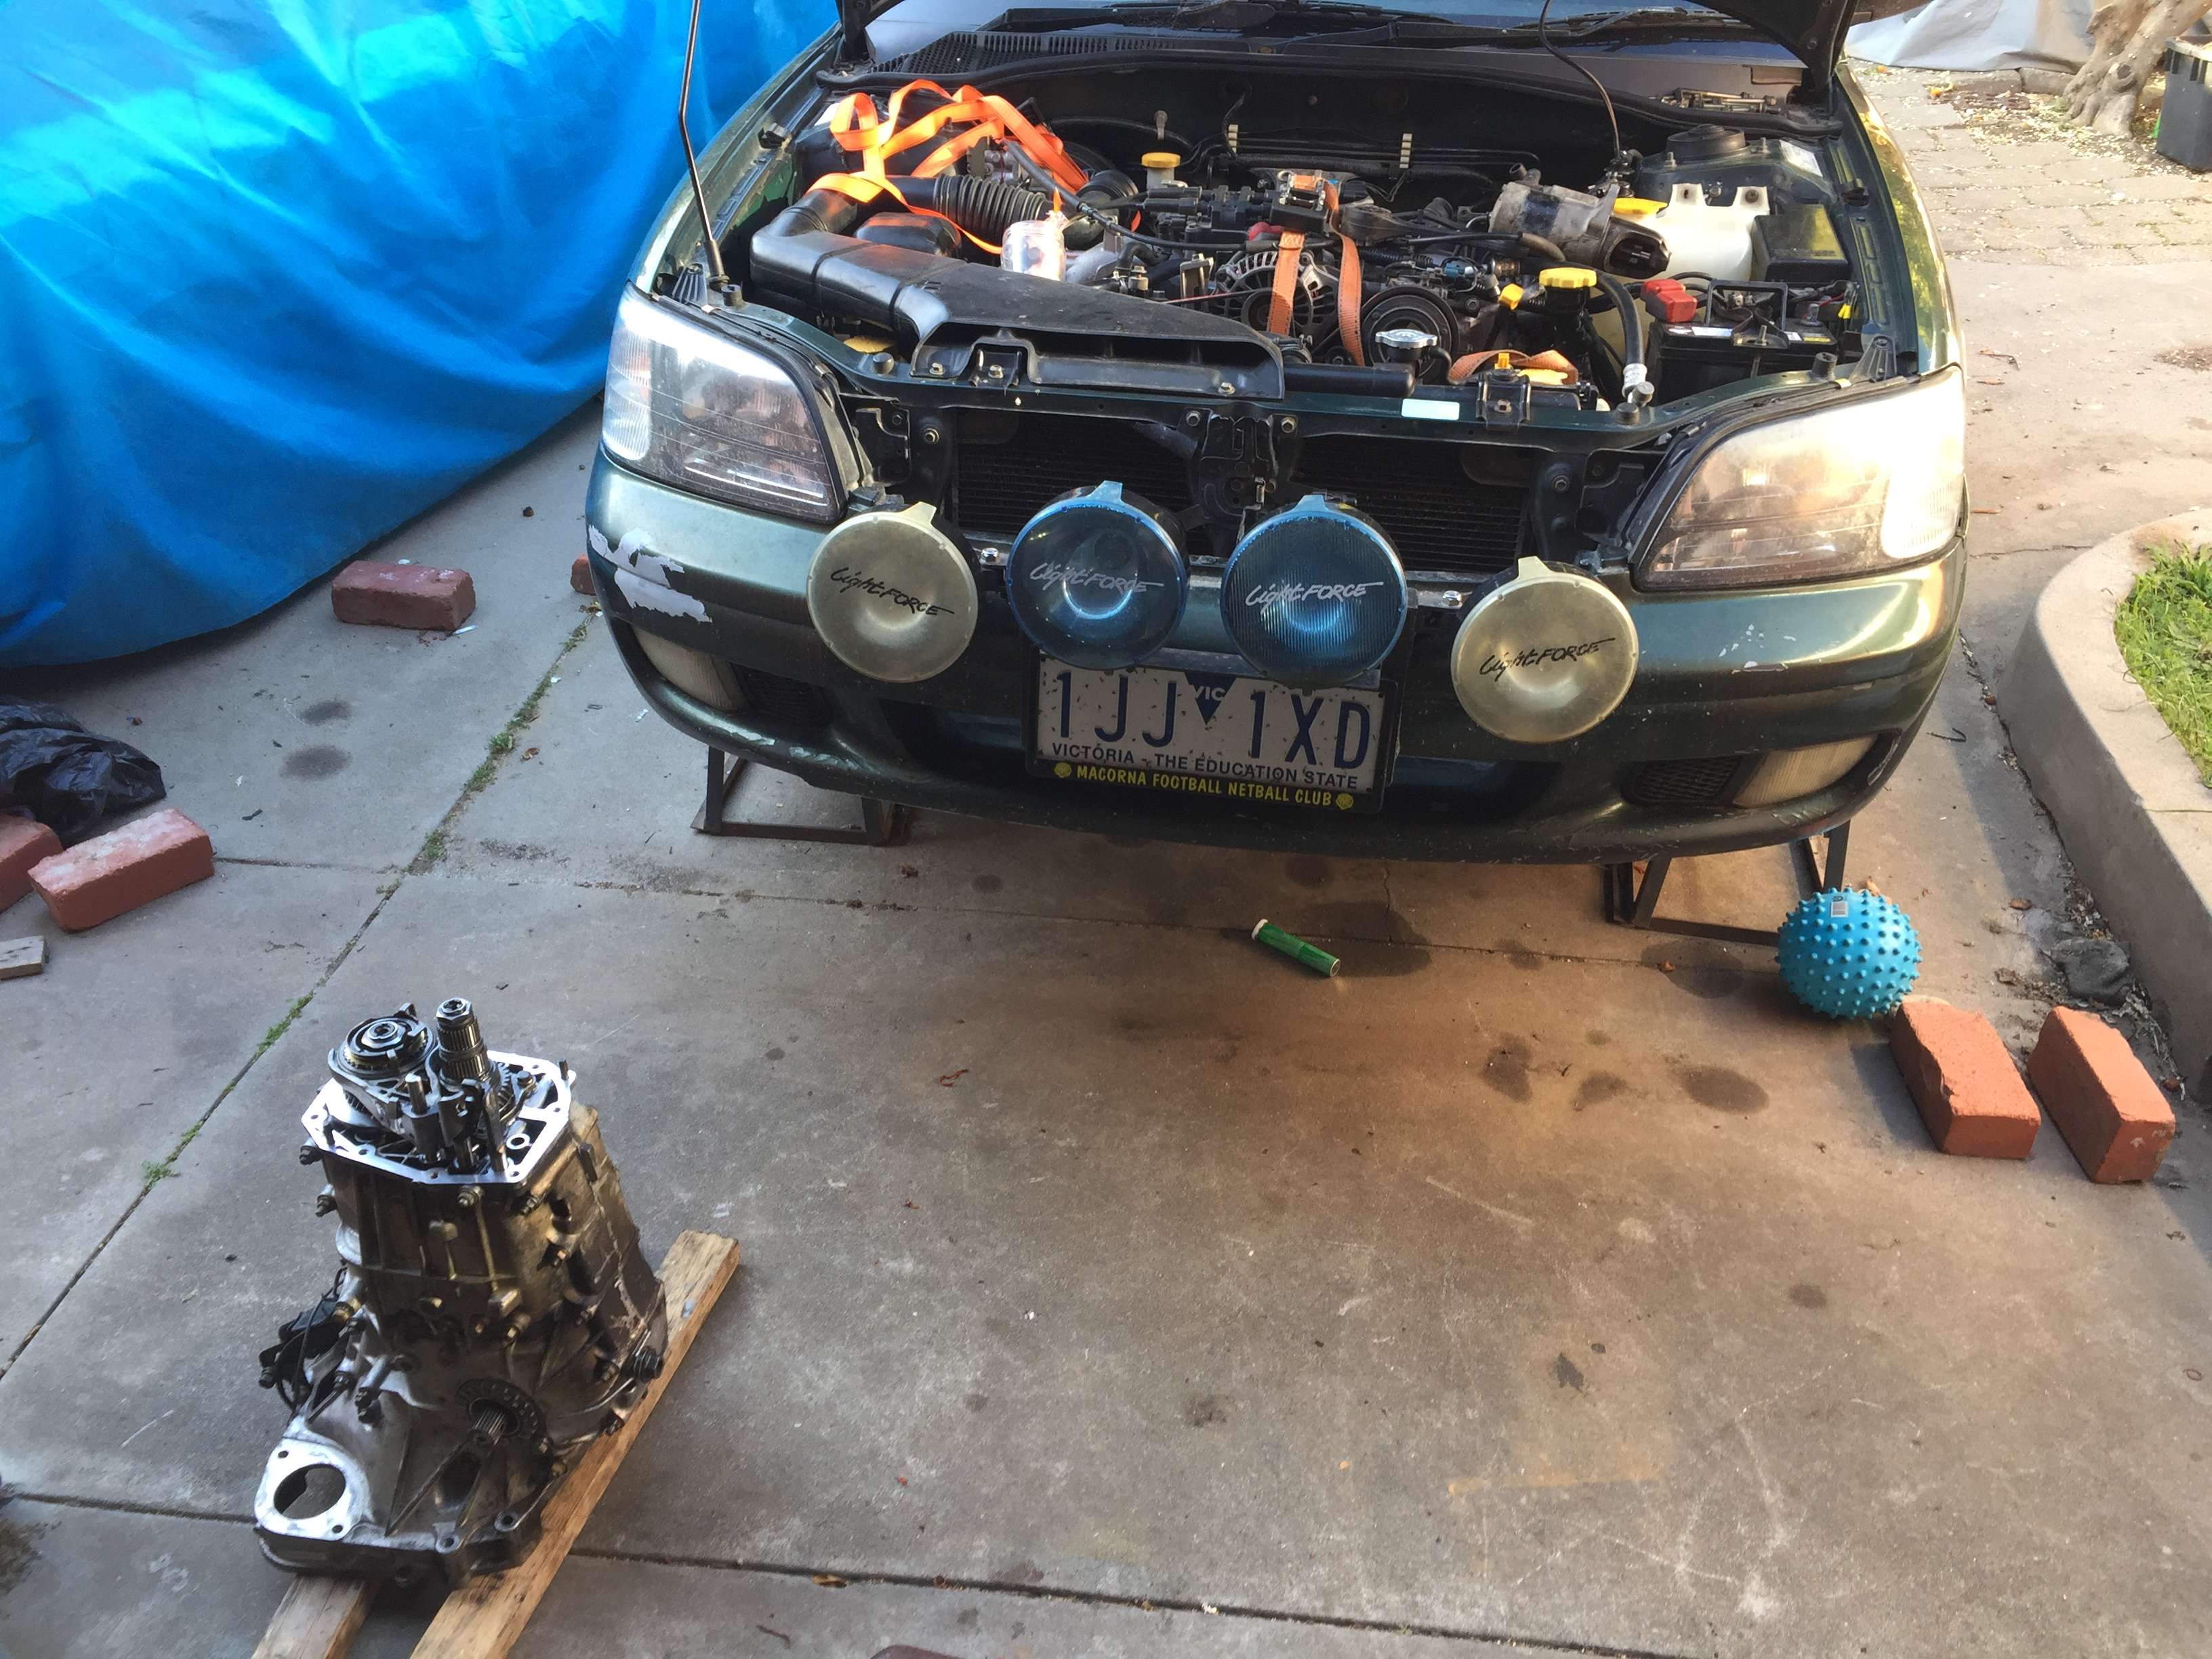
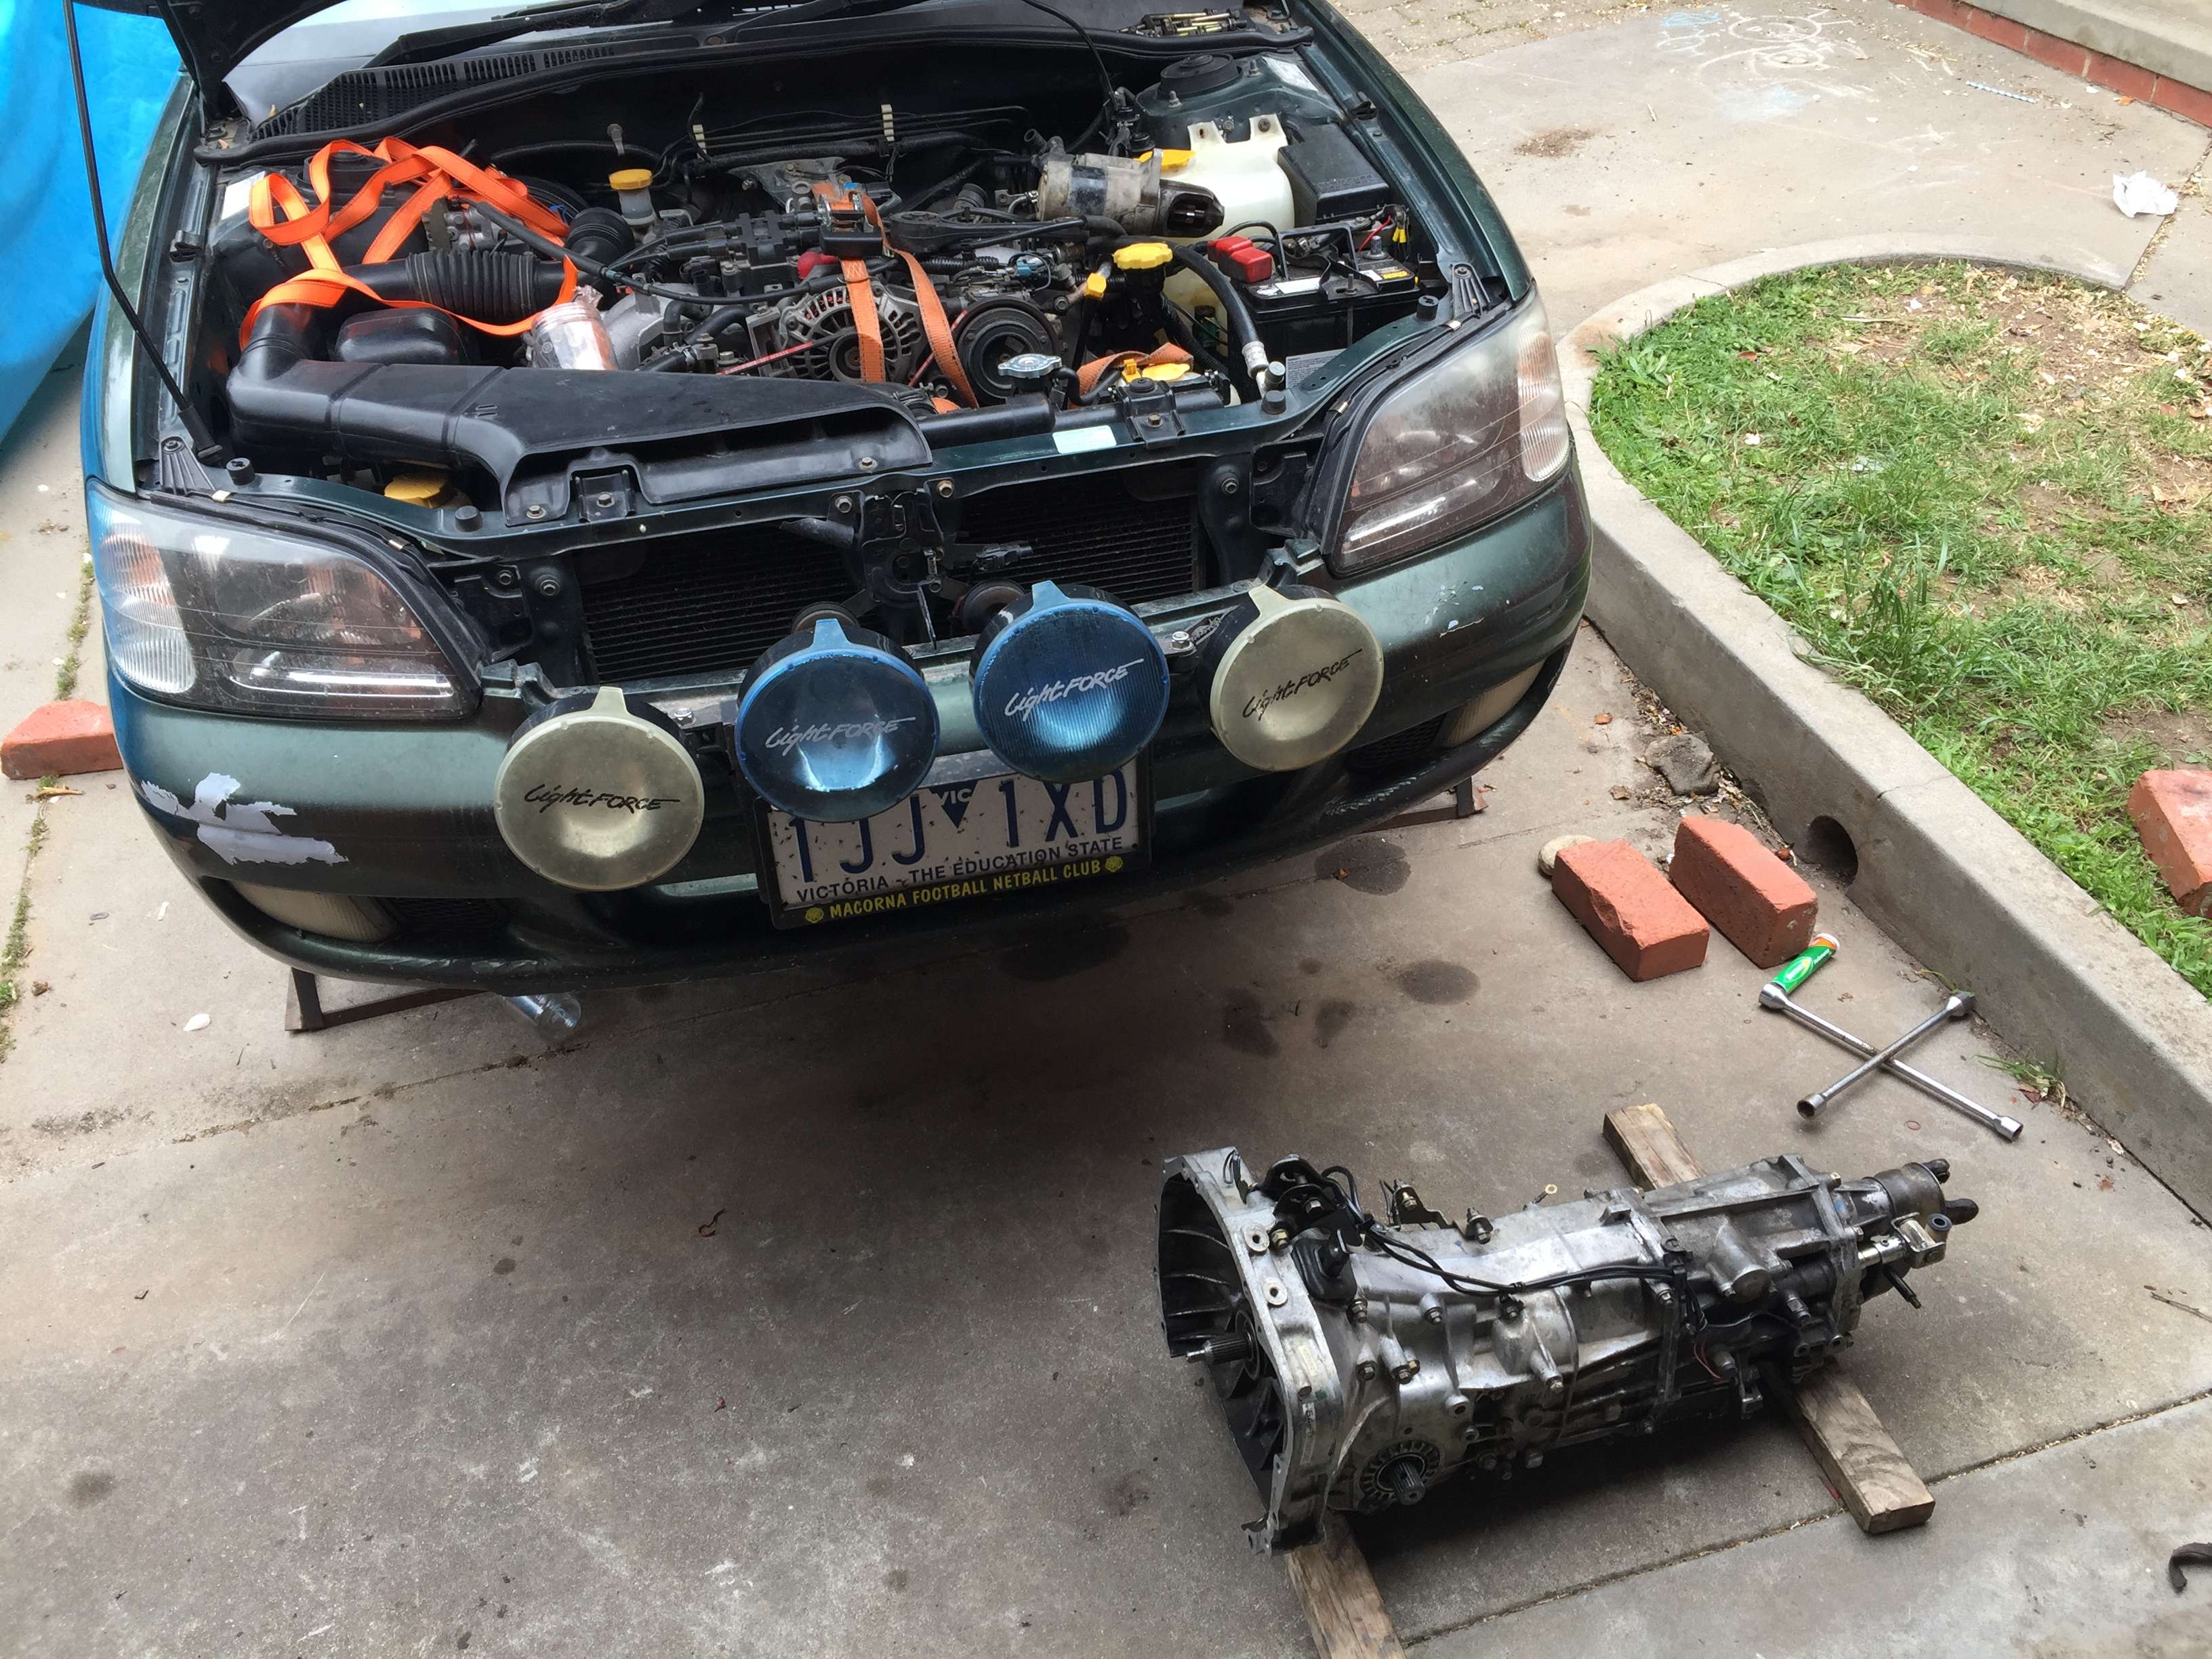
Once the CV shaft was sorted we got the gearbox slotted in easily from under the subi; subi on ramps, gearbox on wooden blocks strapped down on a motorcycle jack. Best way to do it!
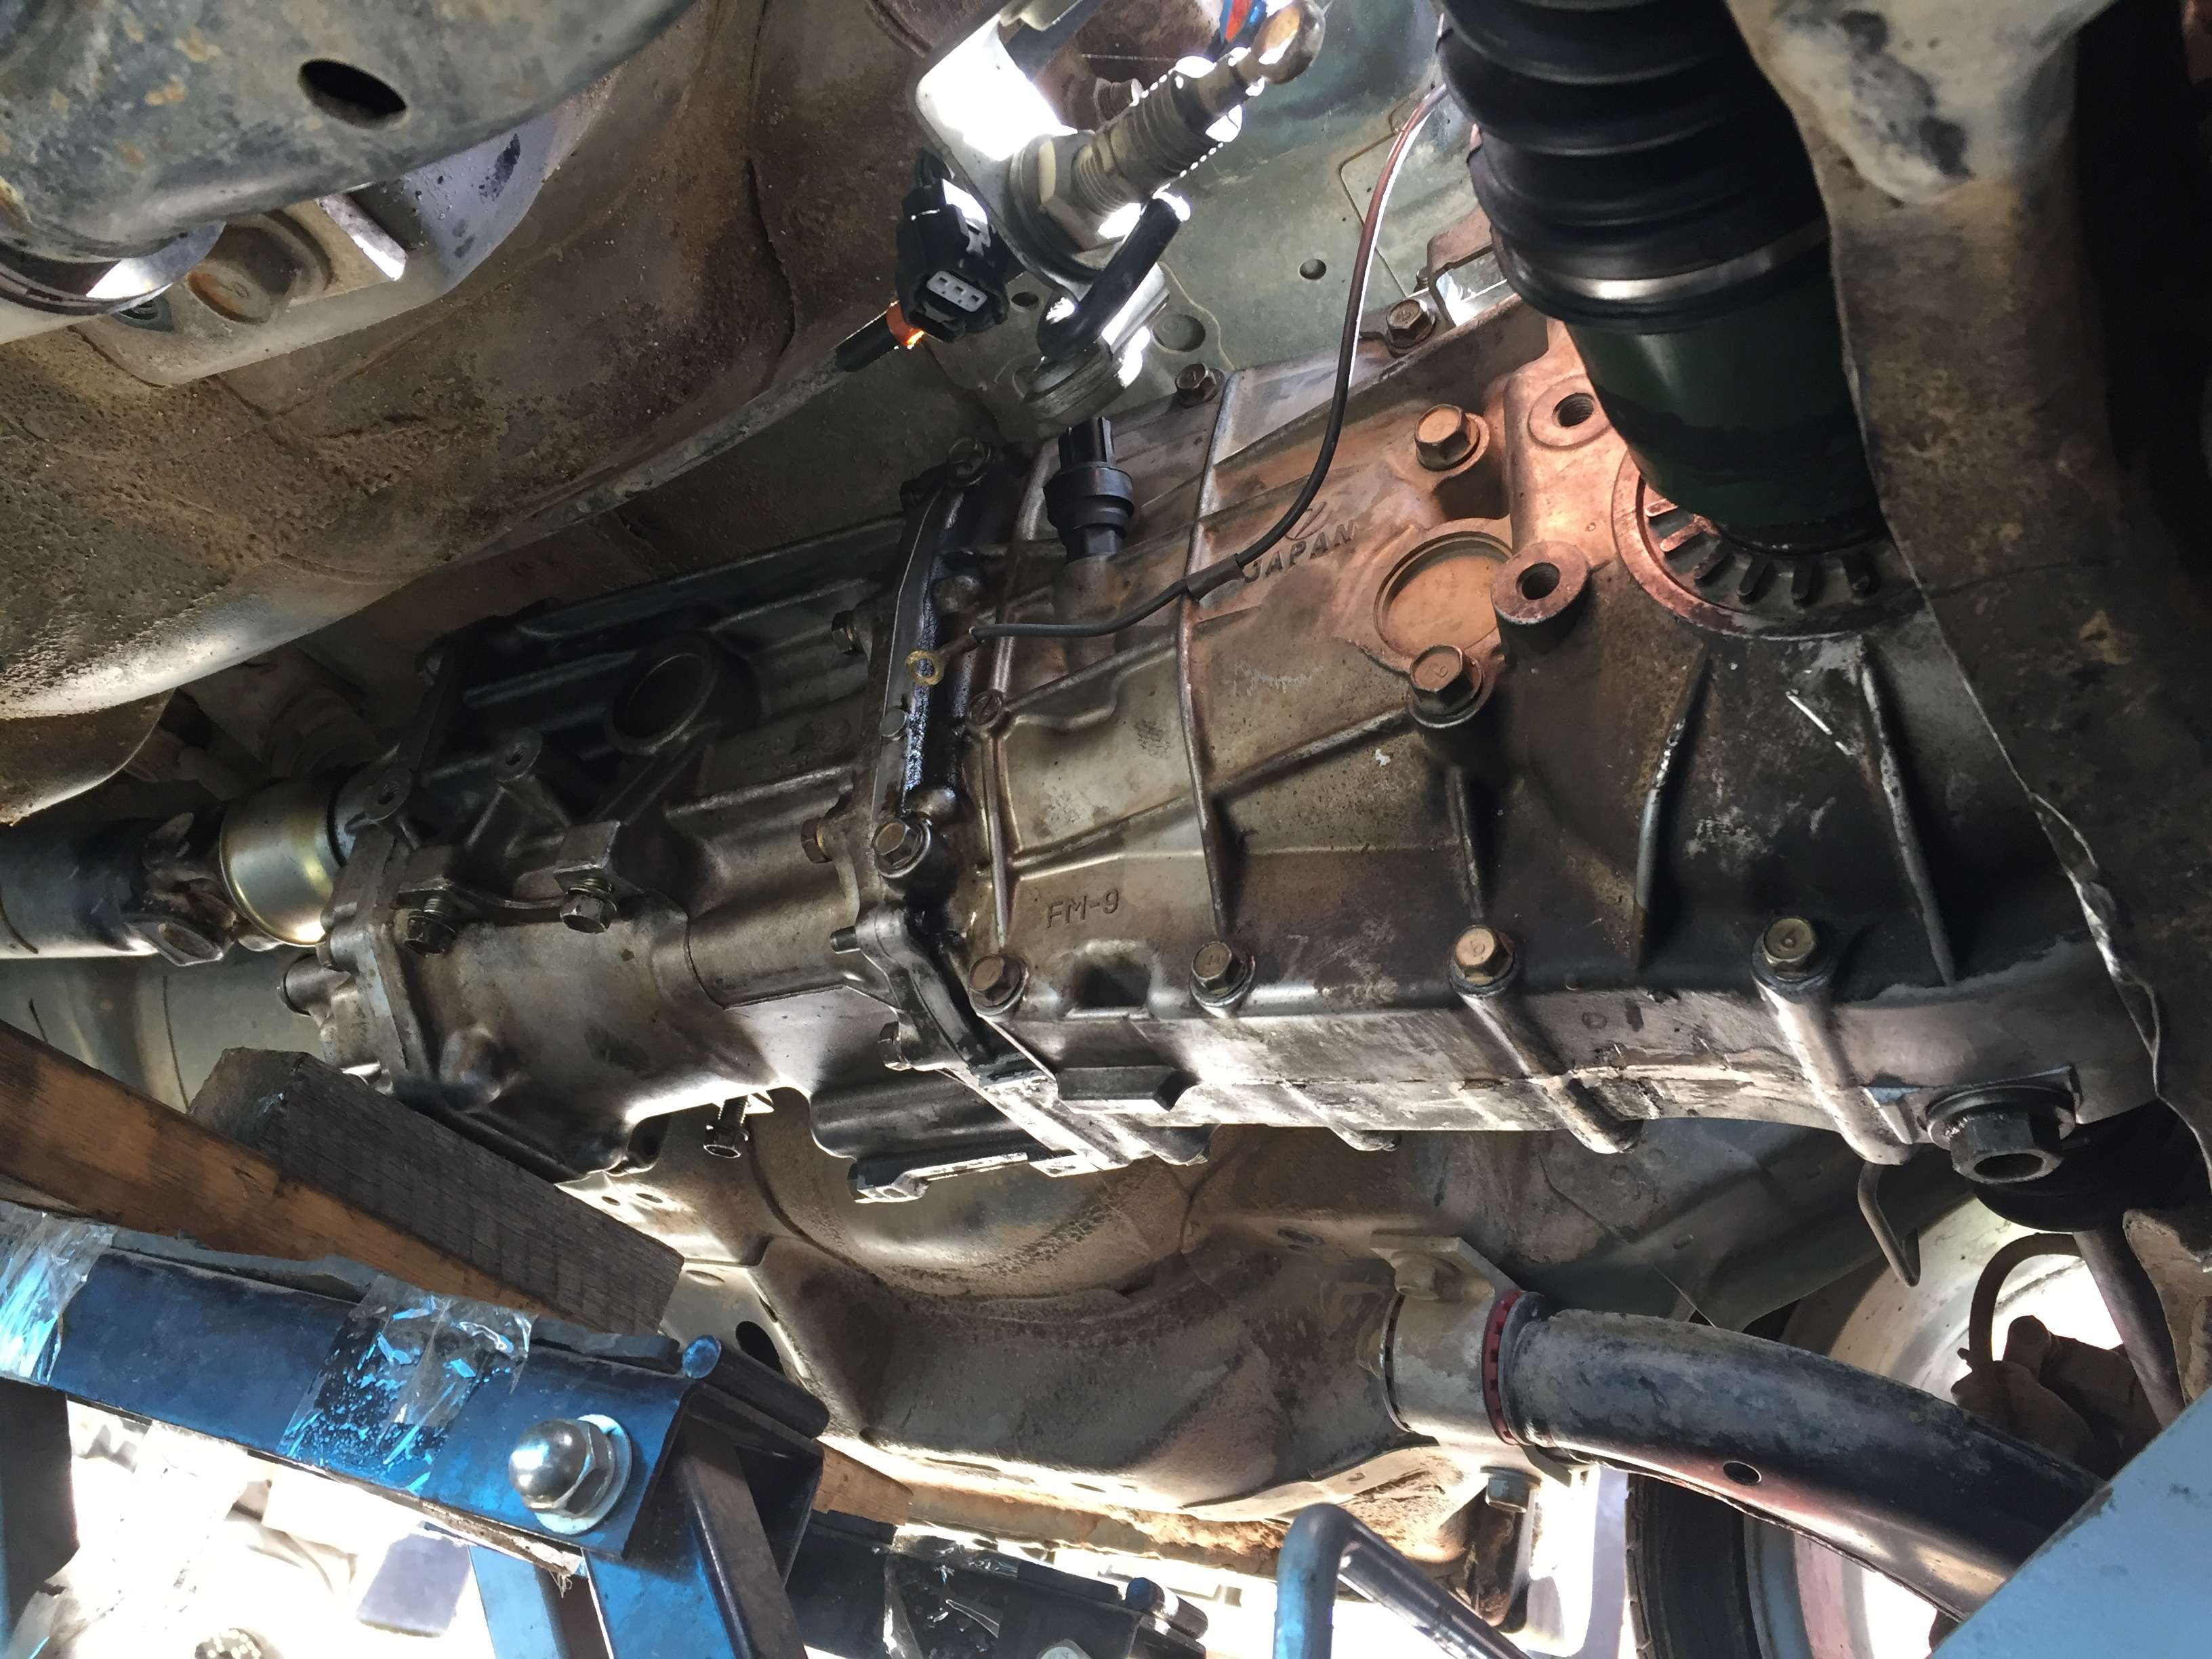
The drive shafts slip on as the gearbox approaches the engine while being raised up. I think this is the fourth or fifth time I’ve done a gearbox this way now. No need to jack up the front end and pop ball joints out.
After the gearbox was in, all the other bits came together relatively quickly. After all that was done and before the exhaust went on, we replaced the steering rack boots. The repco units weren’t a great fit and the cable ties supplied were rubbish. A set of quality cable ties now hold the boots on the rack snugly.
Some brake maintenance up front was done too - replacement caliper brackets with freshly greased caliper slide pins were installed. These were sourced with factory caliper retainer bolts. Someone used non OEM or automotive spec bolts to hold the caliper on. They were a 13mm bolt head as opposed to 14mm. I didn’t like that plus the slide pins weren’t great, so I finally got that sorted.
Now I’ll be eagerly waiting for work to finish so I can get home and fill the gearbox and rear diff with oil (the silicone used on the gearbox needs this time to cure before meeting oil), replace the airbox and go for a drive!! Hopefully there won’t be any wobbles, vibrations or noises other than that of the sweet sweet subi burble this thing has, even with the clapped out rear muffler - that’ll be sorted this week all going well.
Cheers
Bennie
PS - my new Ryobi 18v kit has a “wizzer” tool in it for tightening/loosening bolts an nuts. This tool copped a flogging with this gearbox build and install. It makes things so much quicker and less physical
After a wasted afternoon yesterday I didn’t have the gearbox sealed as I’d planned - I got sidelined from my plans is probably the best way to put it. Anyway...
Up early this morning, prepped all surfaces for sealing. Sealed the front cases, sorted out the transfer case and rear bearing plate assembly too. Bolted it all together, only to find that when I went to sort out the diff preload/backlash (I cant remember which is which), I couldn’t for the life of me rosette the input shaft unless I used some vice grips, even then it was super difficult. Round one before the centre diff assembly went on (and the point you should mess around with the diff settings if you’ve changed anything such as front diff bearings):
Box stripped down again. At least the centre diff section didn’t need full disassembly. I thought it was the upper shaft front bearing not seating on the dowel pin properly. Turned out it was a jammed synchro on the input shaft, the one that deals with the low range. I put it in with the input shaft. It has three slots for the retainer tabs in the low range selector hub to live in and stop the synchro ring from rotating freely.
With that sorted and the sealing surfaces cleaned and prepped again, the gearbox came together without issue. While still on the bench, engine side down, I sorted the diff settings (I had previously replaced the seals and put the O rings in once I was done messing around). Centre diff housing assembly went on and the box was sorted for install. Round two - done and ready for install:
Dad came up and before the box went in we looked at the front left driveshaft. Outer joint was dry, we opened it up, cleaned out as much of the dried out grease as possible and packed in some fresh moly grease. It felt much better rotating the joint after this, nice and smooth! Hopefully that effort will pay off with the wobble disappearing.
Once the CV shaft was sorted we got the gearbox slotted in easily from under the subi; subi on ramps, gearbox on wooden blocks strapped down on a motorcycle jack. Best way to do it!
The drive shafts slip on as the gearbox approaches the engine while being raised up. I think this is the fourth or fifth time I’ve done a gearbox this way now. No need to jack up the front end and pop ball joints out.
After the gearbox was in, all the other bits came together relatively quickly. After all that was done and before the exhaust went on, we replaced the steering rack boots. The repco units weren’t a great fit and the cable ties supplied were rubbish. A set of quality cable ties now hold the boots on the rack snugly.
Some brake maintenance up front was done too - replacement caliper brackets with freshly greased caliper slide pins were installed. These were sourced with factory caliper retainer bolts. Someone used non OEM or automotive spec bolts to hold the caliper on. They were a 13mm bolt head as opposed to 14mm. I didn’t like that plus the slide pins weren’t great, so I finally got that sorted.
Now I’ll be eagerly waiting for work to finish so I can get home and fill the gearbox and rear diff with oil (the silicone used on the gearbox needs this time to cure before meeting oil), replace the airbox and go for a drive!! Hopefully there won’t be any wobbles, vibrations or noises other than that of the sweet sweet subi burble this thing has, even with the clapped out rear muffler - that’ll be sorted this week all going well.
Cheers
Bennie
PS - my new Ryobi 18v kit has a “wizzer” tool in it for tightening/loosening bolts an nuts. This tool copped a flogging with this gearbox build and install. It makes things so much quicker and less physical
-
El_Freddo
- Master Member
- Posts: 12704
- Joined: Tue Oct 04, 2005 10:00 am
- Location: Bridgewater Vic
- Contact:
Re: Sister's Gen3 Liberty "Basil"
Gearbox and rear diff copped some oil this afternoon, then a test drive. He went well and there’s no gearbox noises or odd behaviour when doing U turns.
The wobble is still there though and I’ve since swapped the drive shafts left to right and vice versa. Wobble is still there under throttle application.
More driving made it worse over time and when cruising at different speeds you could feel it throughout the car sometimes, worse others and there were speeds where you couldn’t really feel it.
The thing that sold me on it being a wheel bearing was when doing a gentle swerve with clutch in you can hear a whining/whirring sound when the car has its weight on the left and it’s quiet when the weight is on the right. It’s a very subtle sound when travelling in a straight line.
I’ve also got a code 22 - knock sensor. It comes and goes so I’ll have to investigate the connectors in the system and see if that resolves anything. It’s still running well anyway!
Now to sort out this wheel bearing issue... then tidy up the exhaust and go from there.
Cheers
Bennie
-
RSR 555

- Elder Member
- Posts: 6951
- Joined: Sat Nov 10, 2007 10:42 am
- Location: ATM... stuck in Rockingham
Re: Sister's Gen3 Liberty "Basil"
How does the engine mounts look? Have they had any oil on them or come out of them?
-
El_Freddo
- Master Member
- Posts: 12704
- Joined: Tue Oct 04, 2005 10:00 am
- Location: Bridgewater Vic
- Contact:
Re: Sister's Gen3 Liberty "Basil"
Long story short - proper update to come - it was a self inflicted driveshaft issue!
Basil is running very well, sounds awesome and is now back to scaring birds and roos up on the Murray;)
Cheers
Bennie
-
El_Freddo
- Master Member
- Posts: 12704
- Joined: Tue Oct 04, 2005 10:00 am
- Location: Bridgewater Vic
- Contact:
Re: Sister's Gen3 Liberty "Basil"
Basil's rims are now changed over to a set of stock 17 inch factory subaru rims. I think they're Gen4 liberty rims, but I'm not 100% sure - they came from a Gen1 that 1WD-Foz was wrecking.
Reason for the swap was that the ones in previous pics have cracked - big time! My sister sent me a video of a crack about 8cm long, parallel to the rim's edge and about 1 to 1.5cm inwards. I don't know how that tyre wasn't leaking! So now the tyres are swapped over and Basil looks more stock than ever
I'll grab some pics when I see him his weekend.
Cheers
Bennie
-
El_Freddo
- Master Member
- Posts: 12704
- Joined: Tue Oct 04, 2005 10:00 am
- Location: Bridgewater Vic
- Contact:
Re: Sister's Gen3 Liberty "Basil"
Not much happened for Basil over the last few years other than smashing out kms, giving good fuel economy and smashing that set of factory 17 inch Liberty rims while up in Qld. According to Sis the edge of the road came into the lane where there was a pot hole, she couldn’t go around it due to oncoming traffic and when she saw it she couldn’t wipe off any speed so she basically hit it a full cruise speed. The front left rim was in two pieces - it shattered parallel to the rim’s edge for about half of the circumference of the rim, this piece came loose and rattled around in the wheel well where Sis was lucky it didn’t take out her brake line. The tyre was instantly flat.
The rear rim had a flat spot too. Spare tyre went on the front and Sis sourced a second spare to replace the rear with the flat spot. I’ve never seen anything like it. That was some time ago now. He’s now sporting a set of 16 inch six spoke GC8 WRX rims - ironically the same type he came to us with… With new tyres and their “chunky” tread when new they look really good on the Liberty.
Basil sat around for a while recently as Sis got a company car. I’ve since taken him on and he gives me a big smile with his thumping Subi beat!! Last week before coming home I couldn’t get second gear properly. Before long I had to rev match all gears. I couldn’t pick what the issue was, thought maybe a dead/jammed up spigot bearing holding the input shaft so it couldn’t be stationary - but when in gear and stationary there weren’t any noises and the car wanted to creep forward if you didn’t have your foot on the brakes. Forget about selecting a gear while stationary too - I had to turn the engine off to select first or reverse.
Today I found the issue - broken fingers on the clutch pressure plate. I wasn’t expecting that!

Beaut day for it, but by the time I was sorting out the exhaust fitment the weather was trying to drop some moisture, very lightly spitting on and off, nothing to stress about or stop work over.
Basil is all sorted now and ready for the runs into work this week. Very happy it was an easy fix and that I had a pressure plate laying around!
Cheers
Bennie
The rear rim had a flat spot too. Spare tyre went on the front and Sis sourced a second spare to replace the rear with the flat spot. I’ve never seen anything like it. That was some time ago now. He’s now sporting a set of 16 inch six spoke GC8 WRX rims - ironically the same type he came to us with… With new tyres and their “chunky” tread when new they look really good on the Liberty.
Basil sat around for a while recently as Sis got a company car. I’ve since taken him on and he gives me a big smile with his thumping Subi beat!! Last week before coming home I couldn’t get second gear properly. Before long I had to rev match all gears. I couldn’t pick what the issue was, thought maybe a dead/jammed up spigot bearing holding the input shaft so it couldn’t be stationary - but when in gear and stationary there weren’t any noises and the car wanted to creep forward if you didn’t have your foot on the brakes. Forget about selecting a gear while stationary too - I had to turn the engine off to select first or reverse.
Today I found the issue - broken fingers on the clutch pressure plate. I wasn’t expecting that!
Beaut day for it, but by the time I was sorting out the exhaust fitment the weather was trying to drop some moisture, very lightly spitting on and off, nothing to stress about or stop work over.
Basil is all sorted now and ready for the runs into work this week. Very happy it was an easy fix and that I had a pressure plate laying around!
Cheers
Bennie